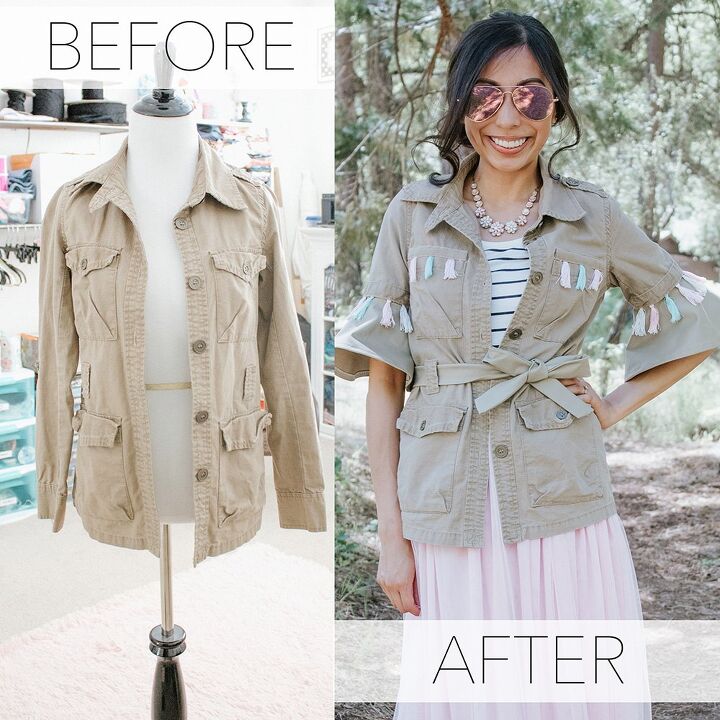
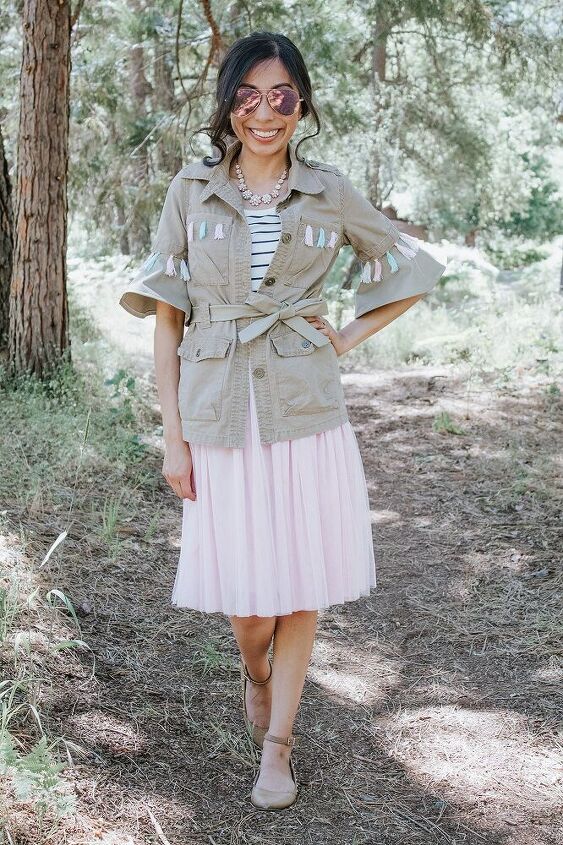
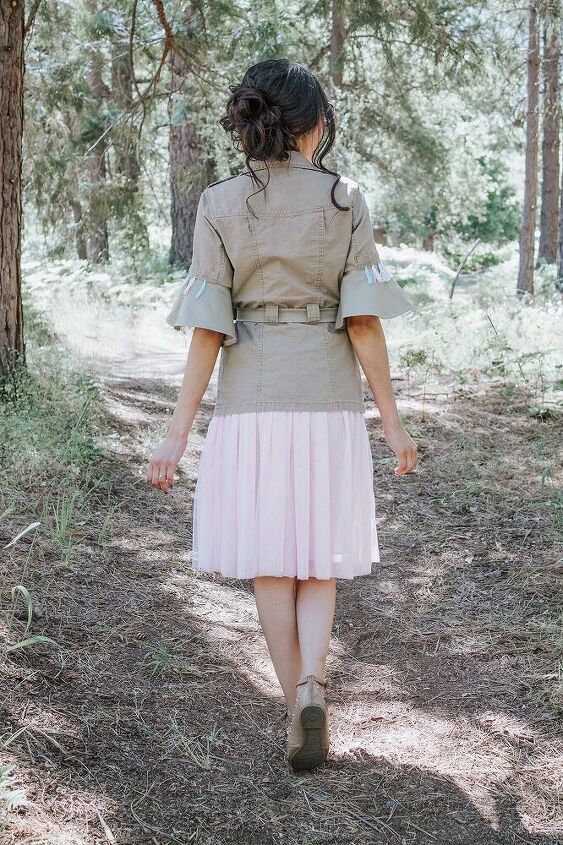
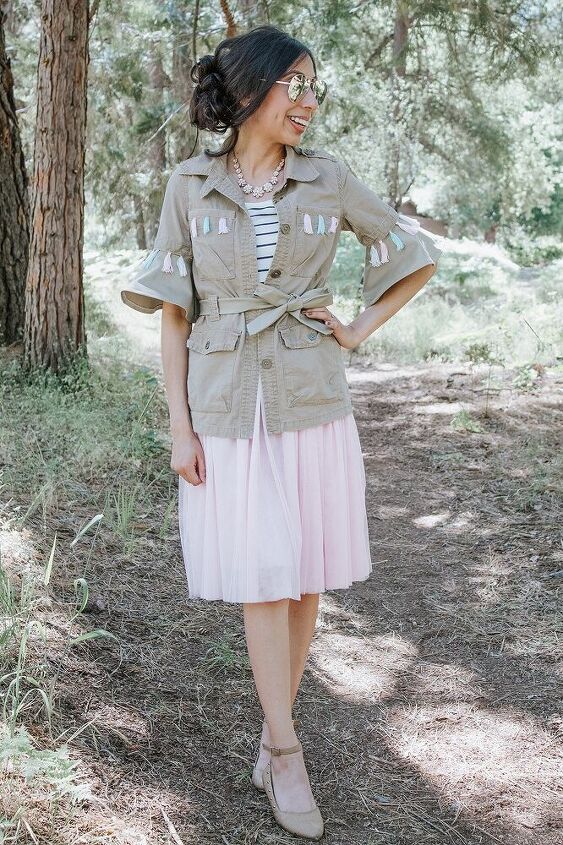
Tasseled Khaki Jacket DIY Refashion
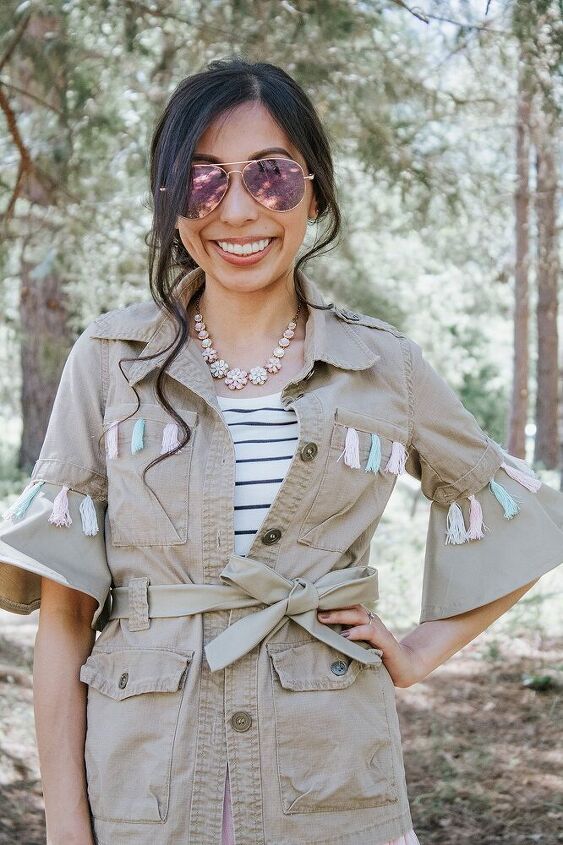
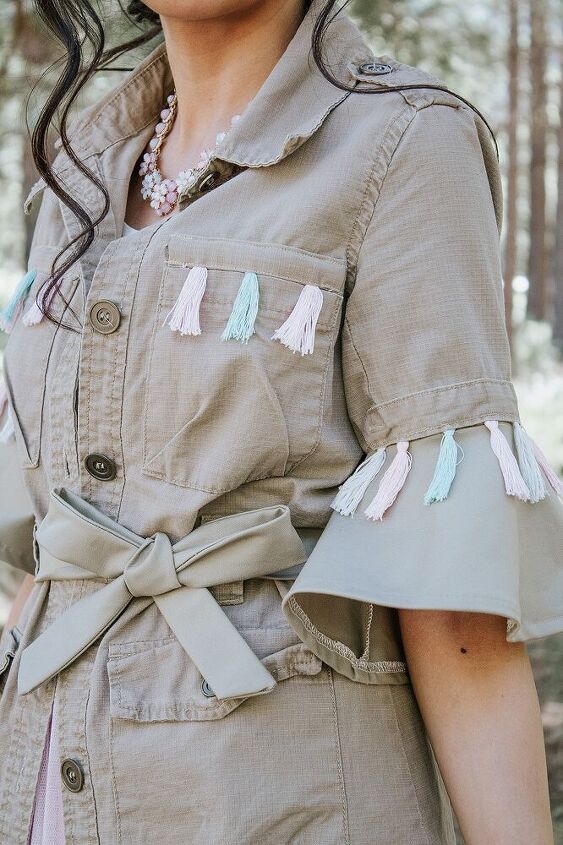
I thrifted this jacket back in 2014, and I loved it for chilly summer afternoons in San Francisco. Fast forward to 2020, and I see my poor little jacket all alone in the back of my closet. I've worn it maybe once or twice these past couple of years, so I decided to give it a makeover. I'm currently loving the tassel trend. (Dear fashion, please keep it alive a while longer!) If you've know me for a while, you've probably realized that I love pastel colors, so I was so excited to make pastel colored tassels when I found these threads hiding in my stash.

WHAT CHANGED:
1. New half circle bell sleeves were added
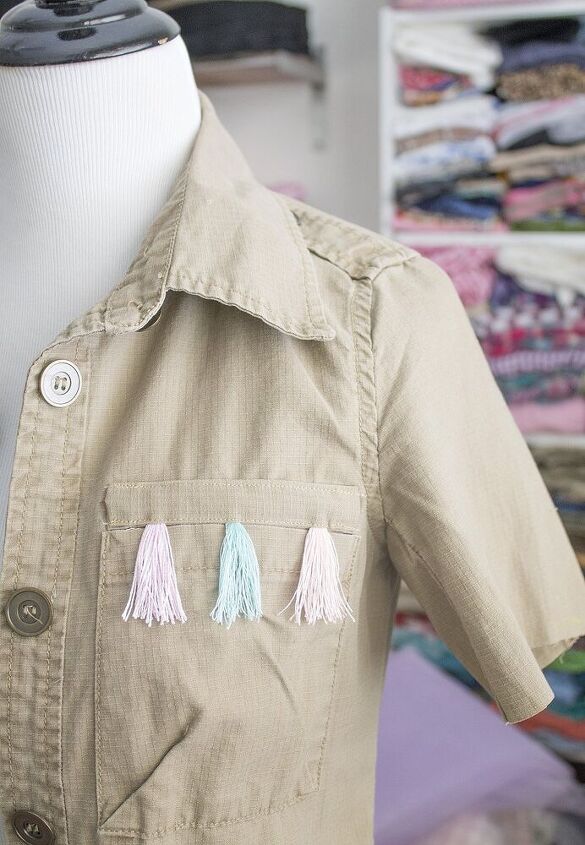
2. Tassel detail added on front and around new sleeves
3. This jacket was sash-less, so I made a new one that matched the sleeves. (I tied it in a bow, for an ultra feminine look!)
I also loved how well it paired with a skirt (for a more dressed up look) and my favorite jeans (for a more casual look). I'm all about versatile pieces in my closet!
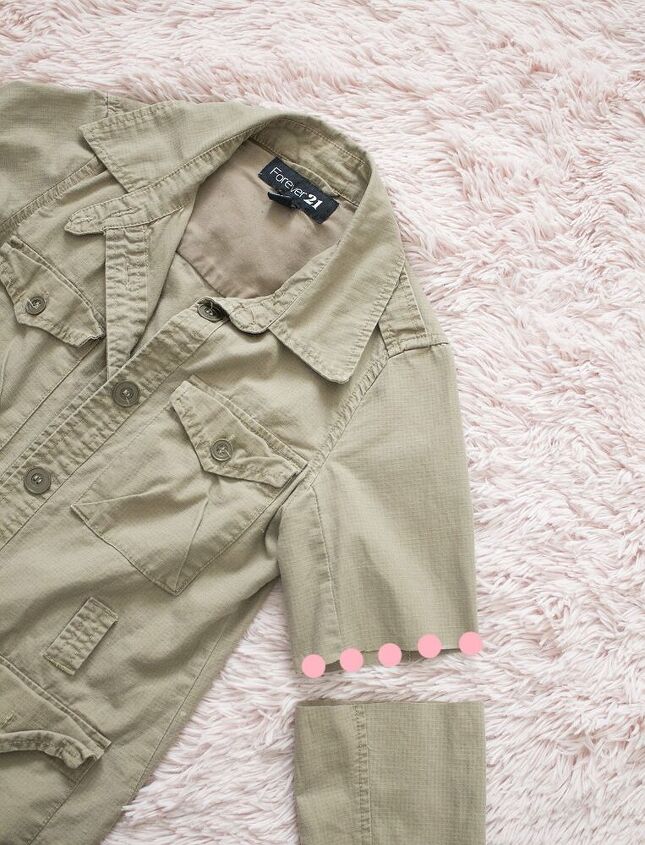
1. I chopped off a big part of the sleeves and measured my sleeve opening (the pink dots).Double this measurement and save it for the next step.
2. I made new half circle bell sleeves, and this is a quick guide on how I made them.Here's a detailed tutorial on DIY Flounce Bell Sleeves.
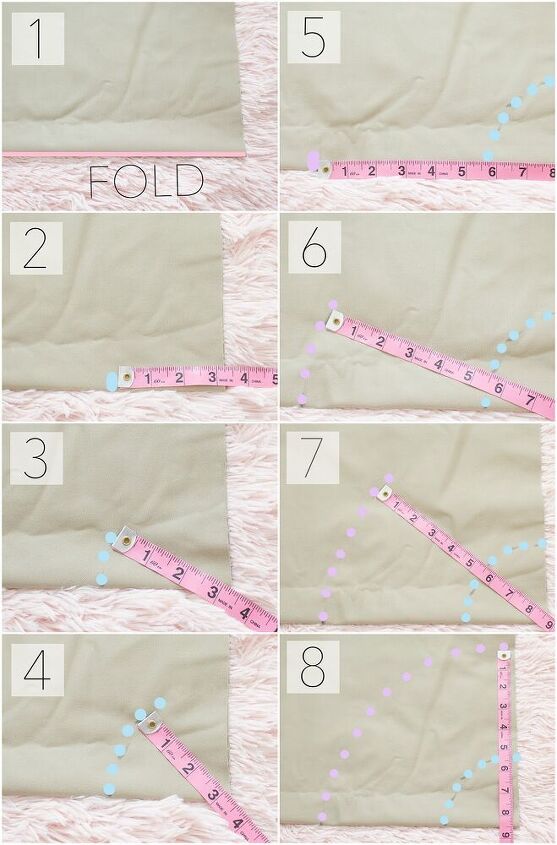
Quick Guide:
1. Fold your fabric once. (I only folded it once, because I wanted half circle sleeves, not full circle)
2. Visit this Circle Skirt Calculator and enter in the following:- working in inches- half circle skirt- mini (this one doesn't really matter, since you're choosing your own length)- waist: select the measurement from step 1.
From the edge of the fabric, measure out the "waist radius" number and mark it.
3. Keep on measuring from the edge of the fabric...
4. ...until you reach the other edge.
5. Determine how long you want your sleeves to be, plus seam allowance.Measure from the waist radius line.
6. Keep on doing this...
7. ...until you reach...
8. The other edge. :)
Now the bell sleeves are ready to be cut out!

3. I cut out my half circle bell sleeves, and sewed them closed on the open side.
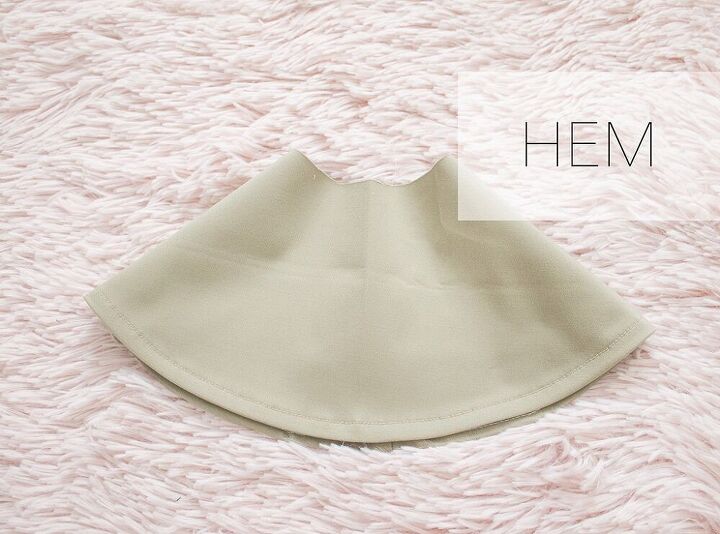
4. Lastly, I hemmed them. Here's a detailed tutorial on How to Hem a Circle Skirt Using a Serger.
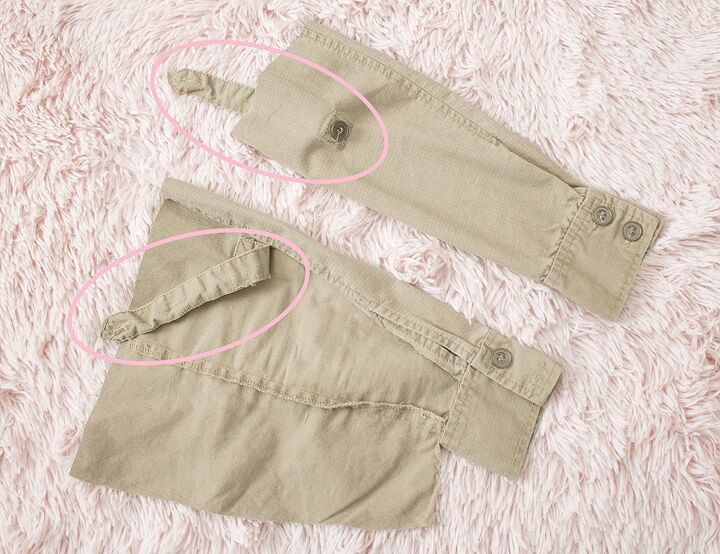
5. The sleeves I cut off in Step 1 had some pieces I wanted to repurpose.
6. I used a seam ripper to get these little tab pieces off the old sleeves.

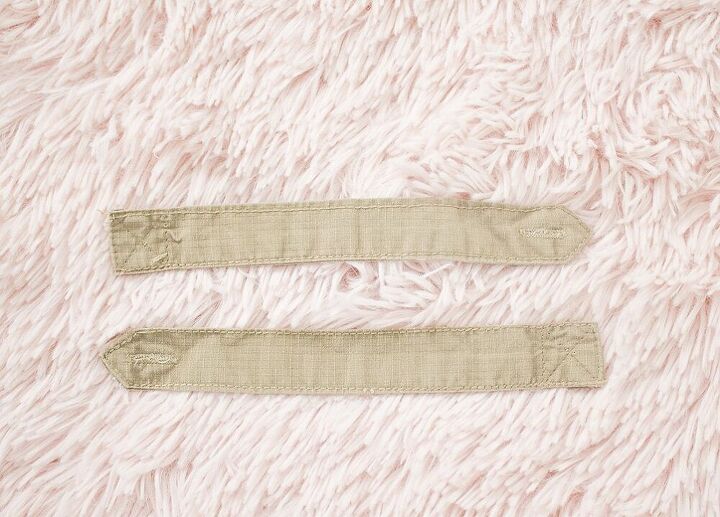
7. I used the remaining part of the sleeve to create two other pieces for my new jacket.
8. I cut out two pieces on the fold, 5" x 1 1/2", so unfolded would be 10" x 3".
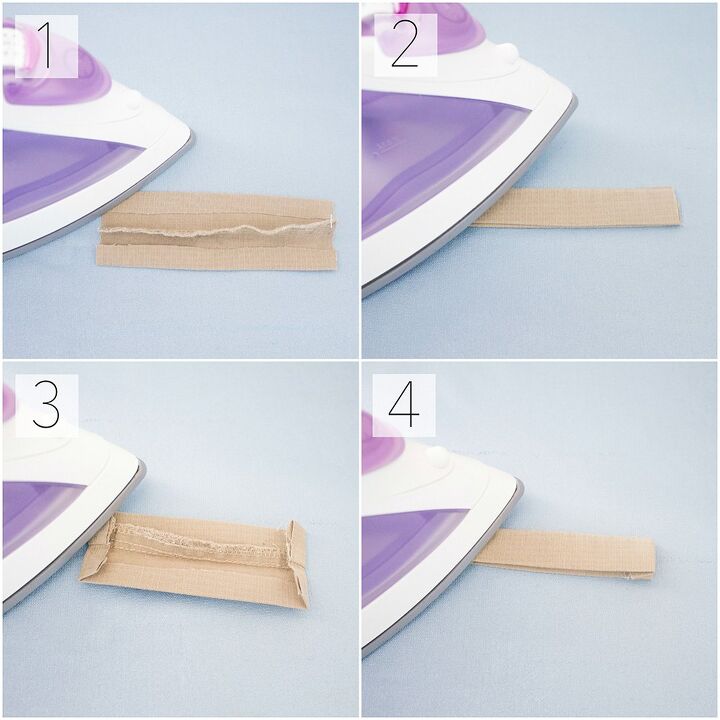
Then...
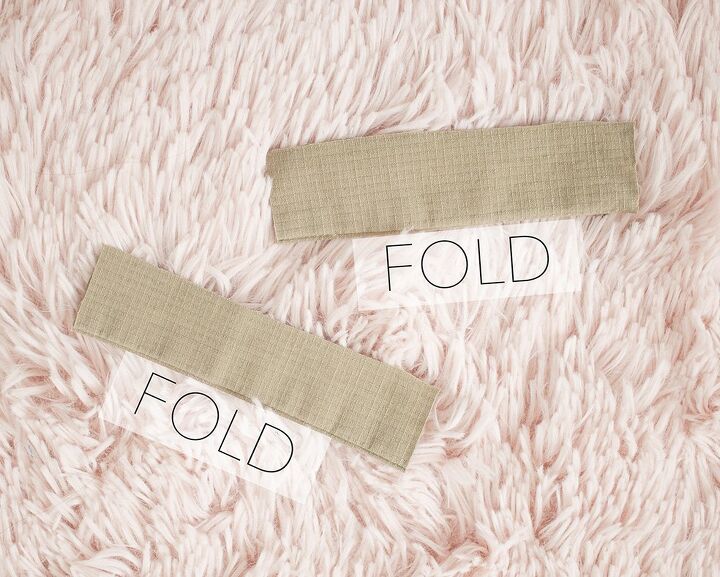
1. I ironed in the sides, lengthwise.2. I folded the piece in half.3. I ironed in the sides, widthwise.4. Lastly, I folded the piece in half.
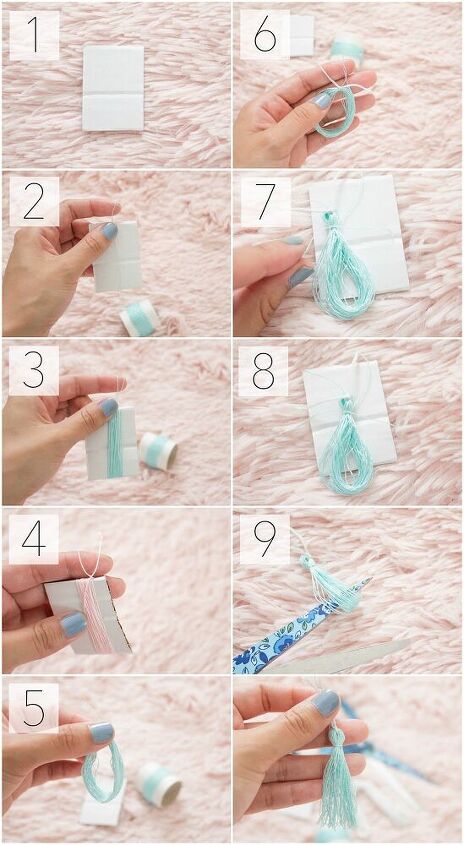
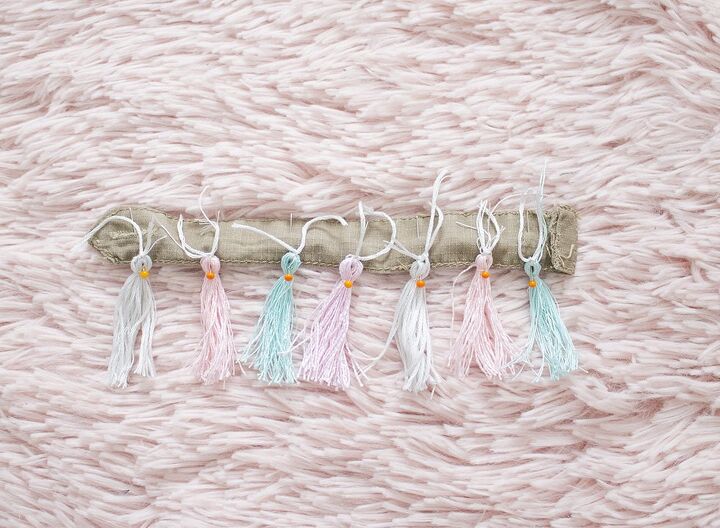
9. Now it's finally time to make the tassels!
1. Start with a little piece of cardboard, 2" long.(This depends on how long you want your tassels.2. Wrap the thread around the cardboard piece.3. Keep wrapping until you reached the desired thickness of your tassels.4. When you're finished, tie a knot at the top of the soon-to-be tassel.5. Gently slip your soon-to-be tassel out of the cardboard piece.6. For extra secure-ness (I like to make up words, LOL), tie a piece of thread on top of the soon-to-be tassel.7. Lay it flat and tie a piece of thread across the top.8. It's starting to look like a tassel now, right? :)9. The last step is to cut through the thread, as shown.
TA DA! Tassels! :)
10. For the tassels that would go on the front of the jacket, I hand stitched them in the middle of the piece I made in Step 8. (I just used a quick basting stitch)
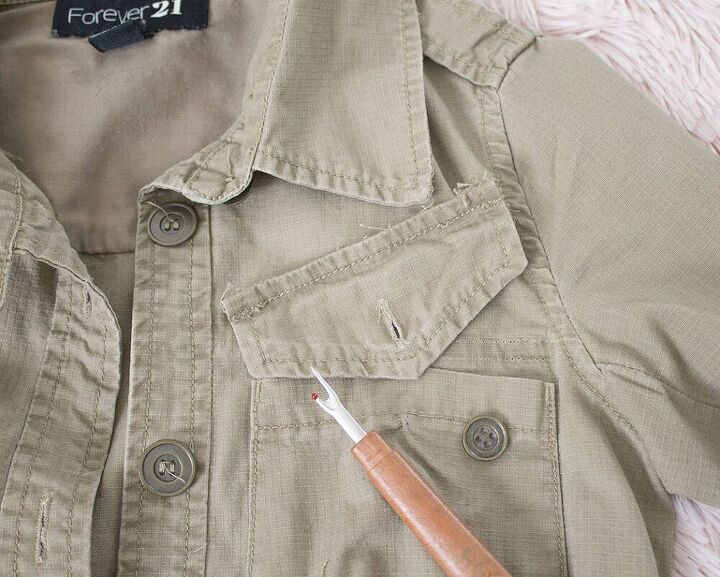
11. I used a seam ripper and took off the pocket piece.
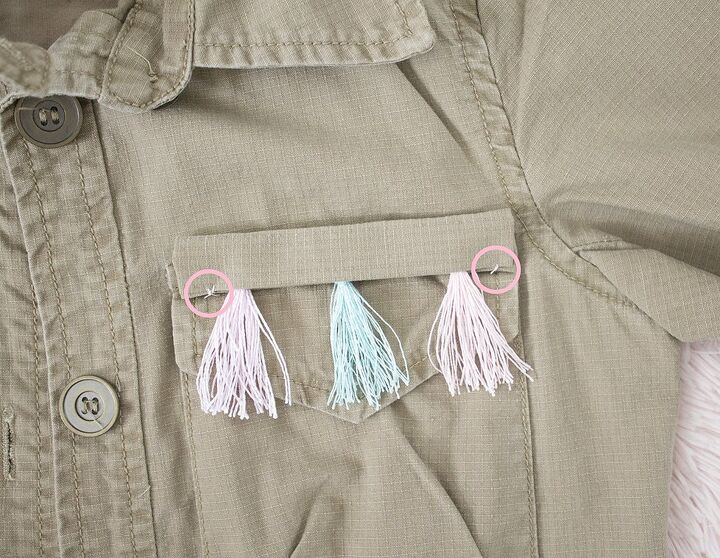
12. Next, I hand sewed the piece closed, with two little stitches (circled in pink).I just did this to make it easier to sew the piece down in the next step.You can take these stitches out when you sew it on with a sewing machine.
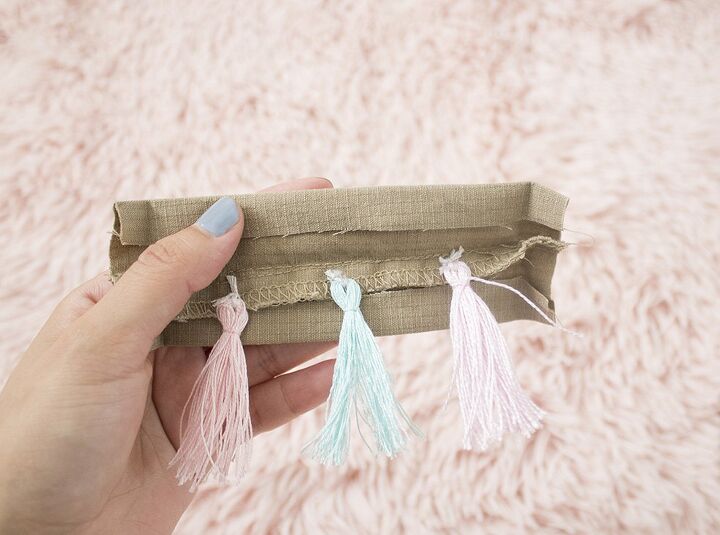
13. I sewed two stitches in matching thread and attached the piece on the other side as well.
14. Next, I used the pieces from Steps 5 & 6 and pinned the rest of my tassels on them.

15. I sewed them on with a quick basting stitch, as shown above.
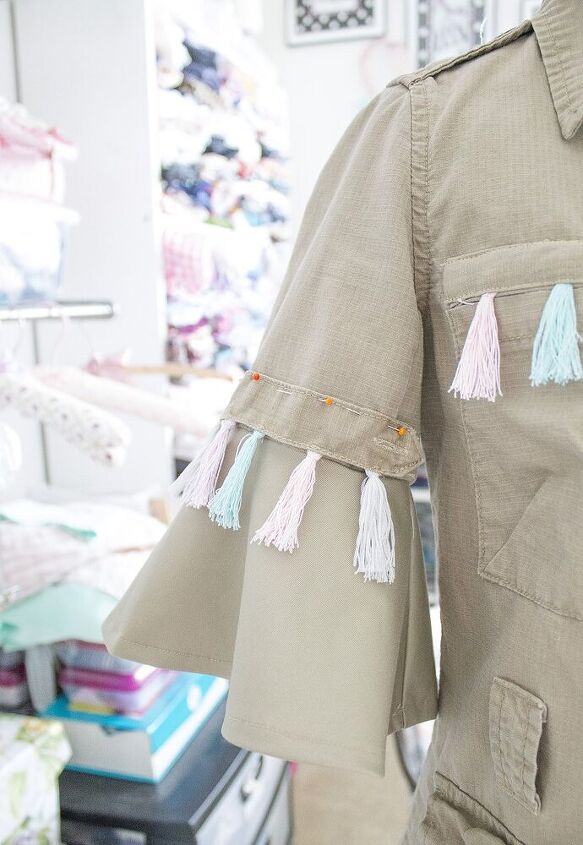
16. I pinned the piece to my jacket, as shown.
17. Sorry, if this feels like the longest tutorial ever! I really wanted to go into detail and give you plenty of ideas for when you make your own tassel trim jacket! :)
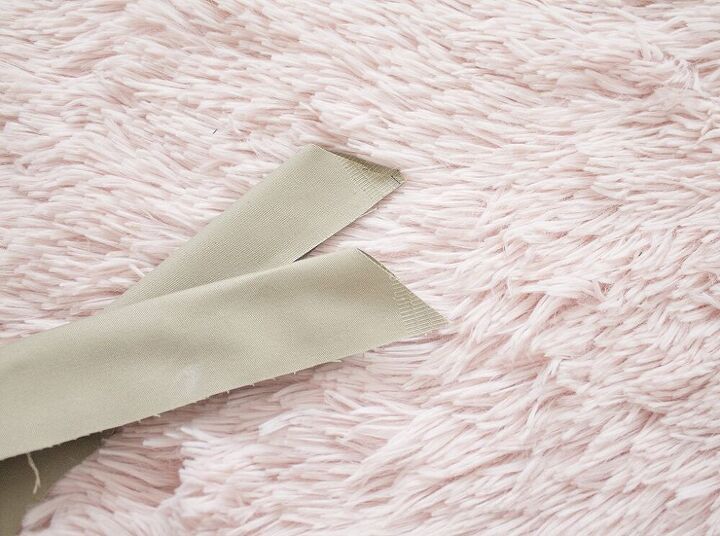
The last step was making the sash. I cut out a long piece, 56" x 2 1/2".I cut off the corners, as shown below.
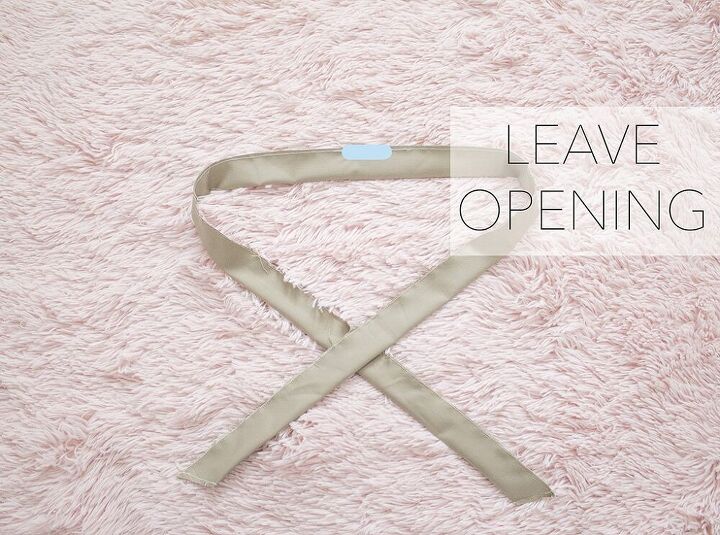
18. I sewed all around it, but left a little opening (the blue line).Then, very patiently, I flipped it inside out, and hand sewed the rest closed.
All done!This tutorial can be used to add your own little tassel trim to anything.Make 2-3 tassels and add them to a simple little pocket tee, or run free with a beach tote full of tassels.
The author may collect a small share of sales from the links on this page.


Comments
Join the conversation
Love this look but where did you get the extra fabric for the bell sleeve AND the sash.
Very fetching! You have lots of flair.