Easy No-sew Tutorial: How to DIY a Crystal Fringe Dress and Blazer

Wouldn't it be great to have a fabulous new outfit for the holidays? Especially if it's quick to make and doesn't require any sewing!
Here's how I made a no-sew glamorous, glitzy crystal fringe dress and black fringe blazer from a thrift store jacket, a plain black slip dress I already owned and some store-bought trims.
Tools and materials:
- Plain black blazer
- Black slip dress
- Crystal fringe trim
- Rhinestone trim
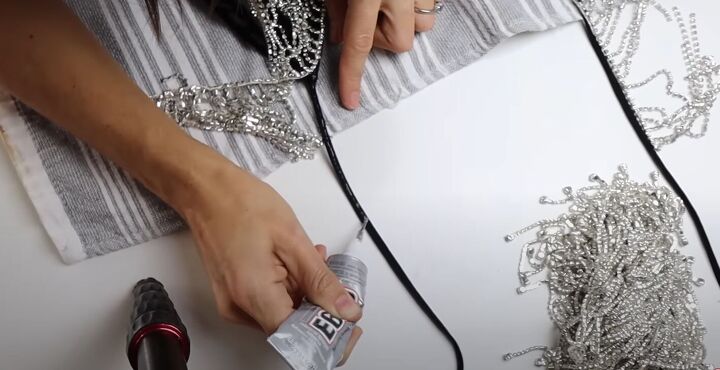
- Bottle of E6000 jewelry glue with a fine tip
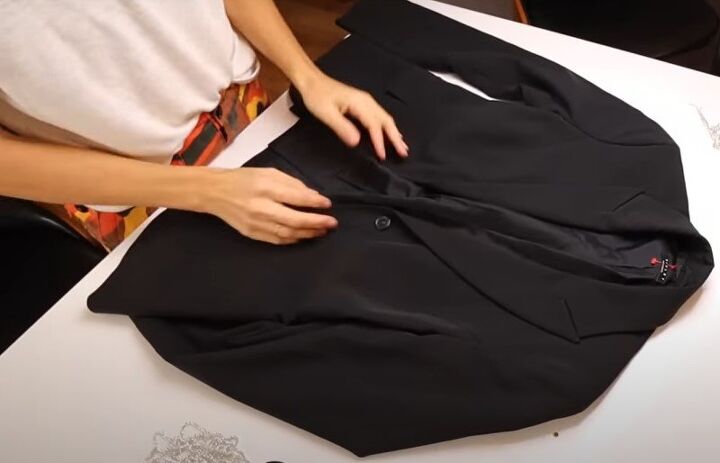

1. Plan your design
Decide where you want to put the trim.
I tried the blazer on and draped the trim over it in a few different ways until I decided on the design I chose.
You could also lay the blazer flat and plan your design that way.
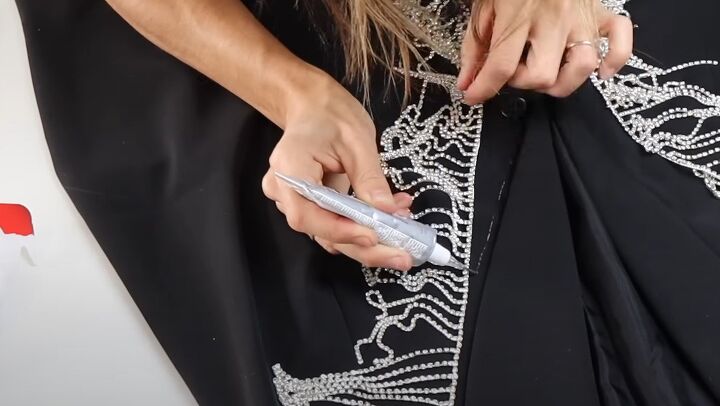
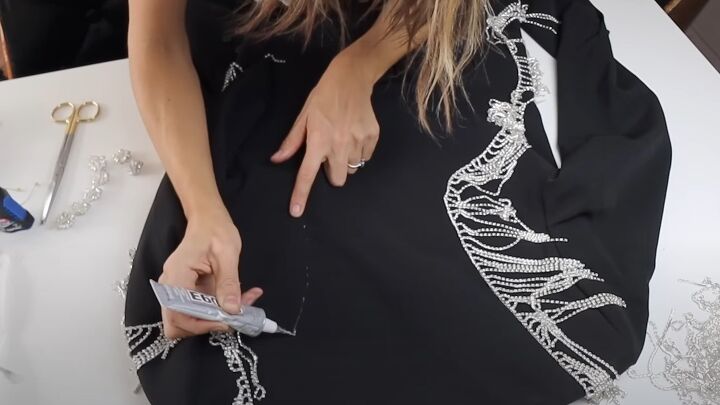
2. Draw a line of glue
Working in short sections of 4 or 5 inches at a time, draw a very fine and precise line of glue where you want the edge of the fringe to be. I did mine about a 1/4 inch outside the line of the lapel, so the fringe will lie against the edge of the lapel but not under it.
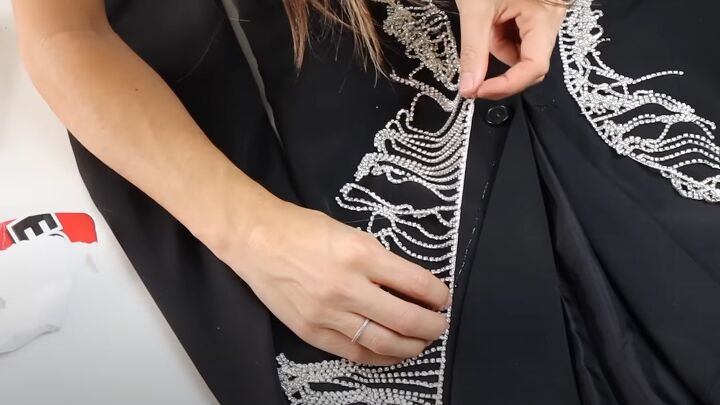
3. Lay the trim in place
Hold the straight edge of the fringe over the glue line and gently drop and press it into place, without sliding it.

4. Let the front dry
Complete the front trim and let it dry before moving on to the back.
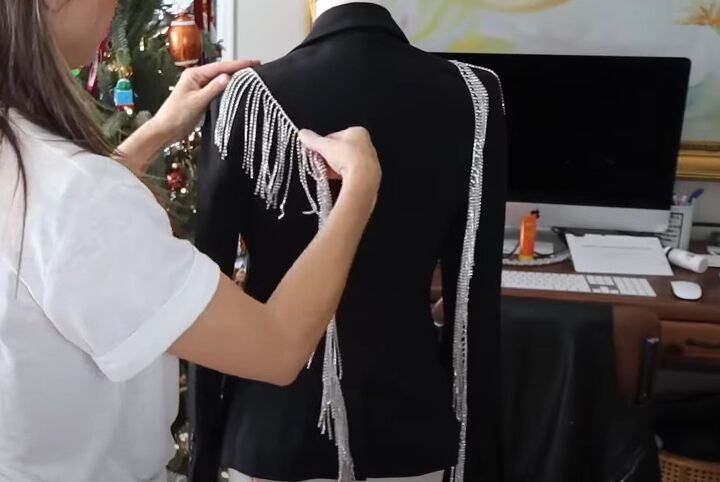
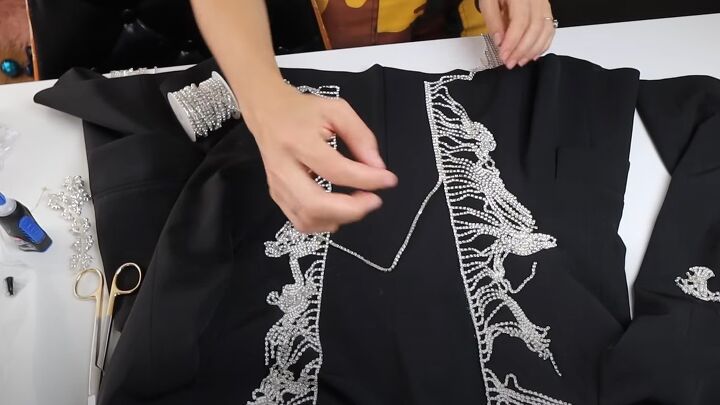
5. Plan the design for the back
I put my DIY blazer on a dress form so I could see how the fringe would drape while I tried out some ideas.
If you don't have a form, you could hook a strong hanger over a door and pin the trim into different designs on that.
6. Draw the glue line
I decided on a simple freehand design.
Here's a tip - to draw the glue line freehand, place the tip of the bottle on the fabric at the starting point and look at where you want the line to end as you glue.
If you prefer, you can measure and mark the line with chalk before adding the glue.
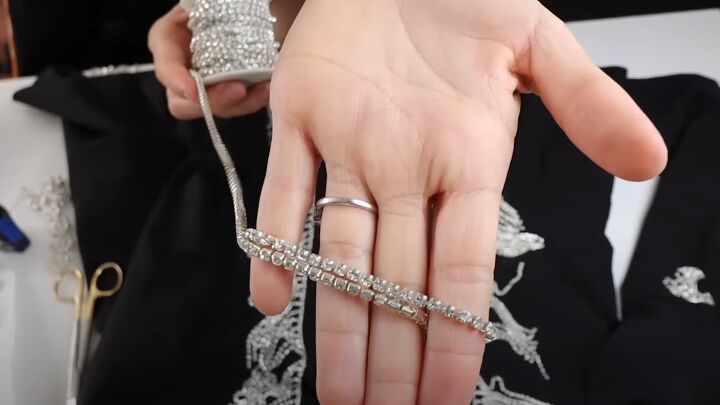
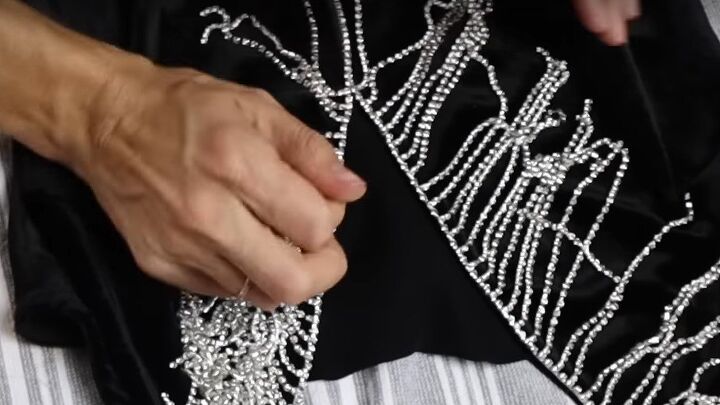
7. Add a rhinestone trim
After completing the fringe on the front and back, I added a rhinestone trim along the inside edge of the fringe, gluing in sections as before and dropping the trim into place.

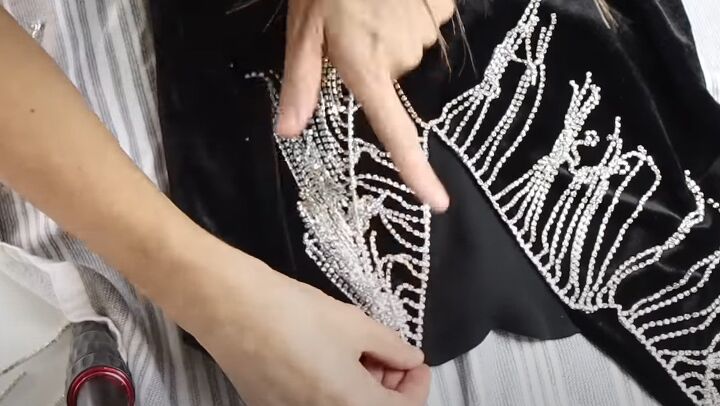
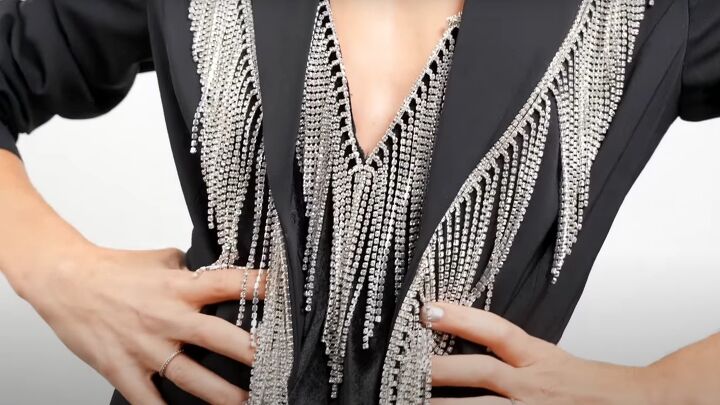
8. Plan the dress design
Try on your plain dress and drape the crystal fringe over it until you're happy with the look.
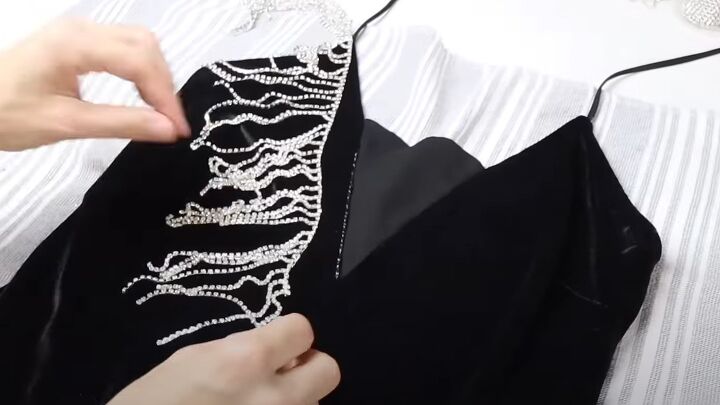
9. Glue the trim into place on the dress
Trim the dress using the same process as for the jacket.
I decided to add the crystal fringe along the very edge of the neckline on both sides, and on the straps up to my shoulders.
With a V-neck, start from the center of the neckline and work in sections towards the shoulders.
10. Trim the shoulder straps
My dress is a halter with ties, so I stopped the trim at the point where I would tie the straps.
11. Add extra trim in the center
If the fringe at the base of the V doesn't lie flat, glue individual pieces of fringe into place on either side of the center point.
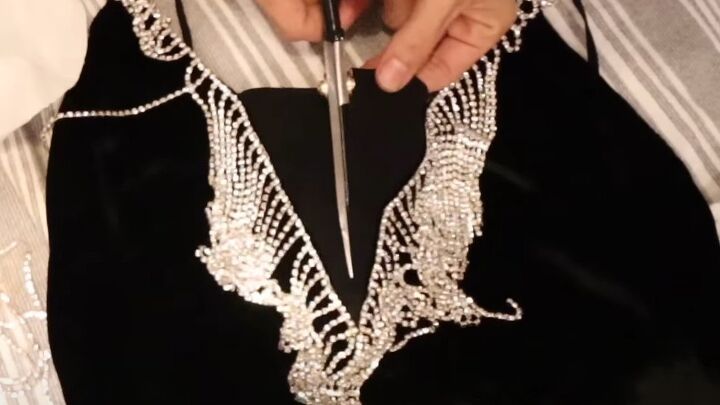
12. Modify the dress if needed (optional)
I didn't like the center triangle on my dress, so I cut it down the center and pinned and hand-sewed each side to the inside of the dress to give a clean finished edge.
This is the only piece of sewing on this project and is completely optional.


Crystal fringe dress + blazer
The finished dress and blazer outfit. They look stunning separately but when I put them together - wow!
Over the top for sure but I think they look fabulous. And to think I had that dress in my closet for years and never wore it! Now I have a glamorous outfit to wear for the holidays or any special occasion.
If you enjoyed this tutorial, check out my post on How to DIY Gucci Dupe Bow Shoes for the Holidays.
The author may collect a small share of sales from the links on this page.


Comments
Join the conversation