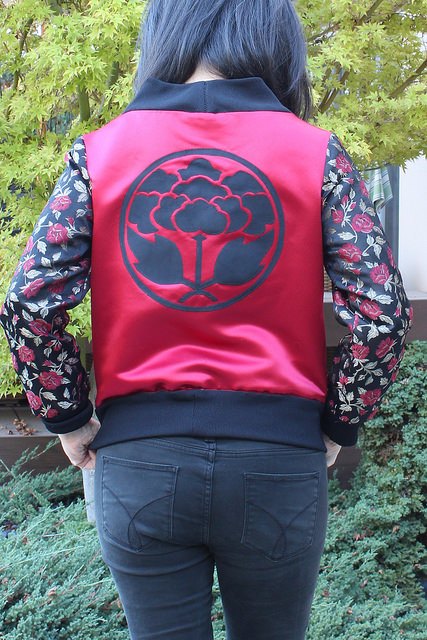
How to Refashion a Prom Dress to Bomber Jacket
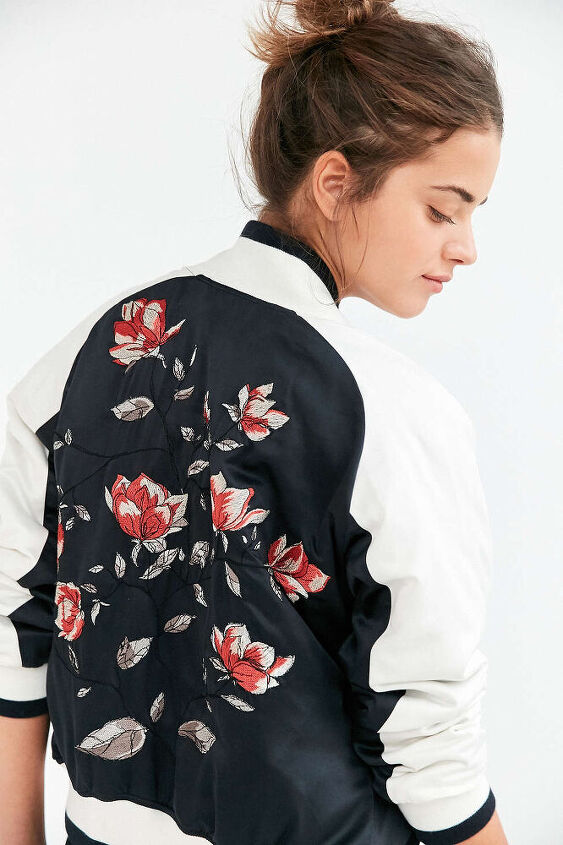
I’m seeing bomber jackets everywhere – in blogs, in magazines and on the streets. It’s a fun, fall trend I wanted to add my own spin to. When I saw this Asian inspired bomber jacket from Urban Outfitters on a co-worker, I became obsessed with making my own.
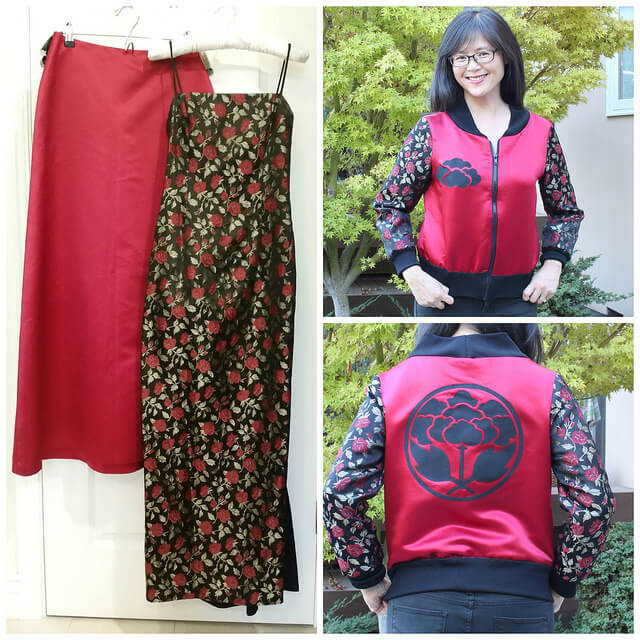
I had the perfect Jessica McClintock prom dress with a satiny floral brocade that would add a pretty chinoise touch to the bomber jacket. Before I dive into the tutorial portion of this refashion, I have to share with you a weird, funky embellishment that severely limited what I could do with this dress.
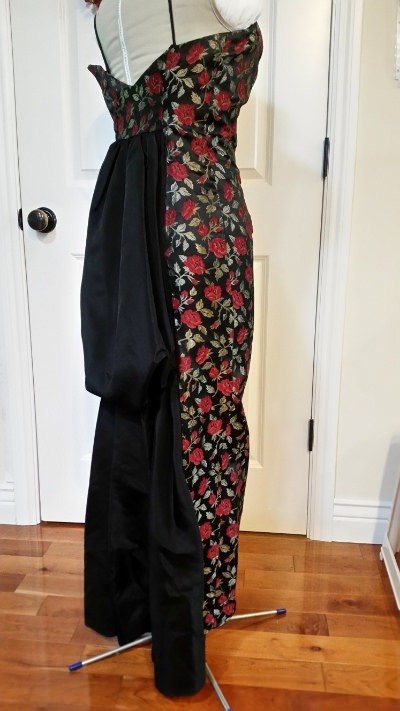
WTF? That is one butt ugly bustle. What were they thinking? Most women I know want to minimize their backside, not call attention to it! I bought this impulsively at the thrift store and didn’t bother to look at the back as I was in a rush. Note to self – carefully inspect everything you buy at the thrift store! If I had enough of the brocade fabric, I would have used it for the bodice of the bomber jacket. Instead, I had just enough fabric to make the sleeves. Luckily, I found a red skirt at the thrift store in a perfectly matching shade of red to use for the rest of the jacket.
Here’s a quick and dirty overview of this refashion:
- Cut sleeves and bodice from the outer fabric and lining
- Add floral applique
- Add pockets and sew sleeves to bodice
- Attach ribbed collar, cuffs and waist
- Attach the zipper
- Sew lining to jacket
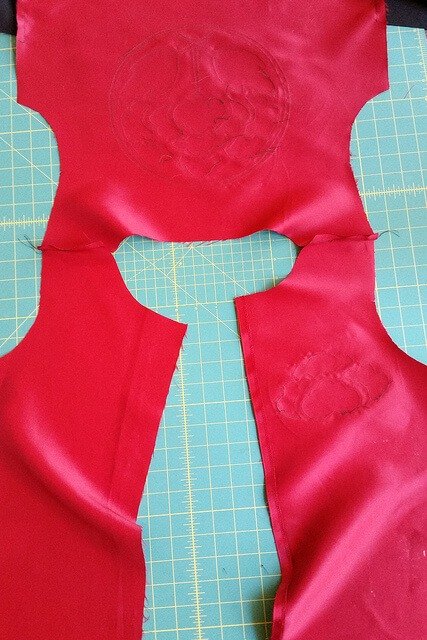
Step 1: Cut sleeves and bodies from outer fabric and lining
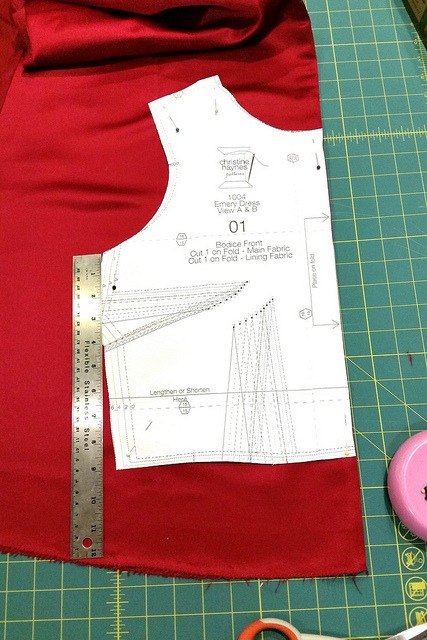
I repurposed the bodice and sleeves from my Christine Haynes Emery Dress pattern piece for the jacket. To make this a loose fitting jacket, I omitted the bust dart and extended the sides straight down from the arm hole. I used the lining of the skirt and dress for the lining of my jacket.
Step 2: Add floral applique
I was concerned the solid red bodice would be too blah, and I was determined to do something creative with that stupid bustle, so I made a floral applique that mimicked the floral pattern in the black brocade. After a day surfing the internet for the perfect pattern, I found this Japanese crest on Dreamstine.

My favorite fusible web for this kind of applique is a double sided fusible by Heat and Bond. It’s easy to apply, holds up well in washing and adheres securely to any kind of fabric. I don’t have any affiliation with Heat and Bond – I’m just a big fan.
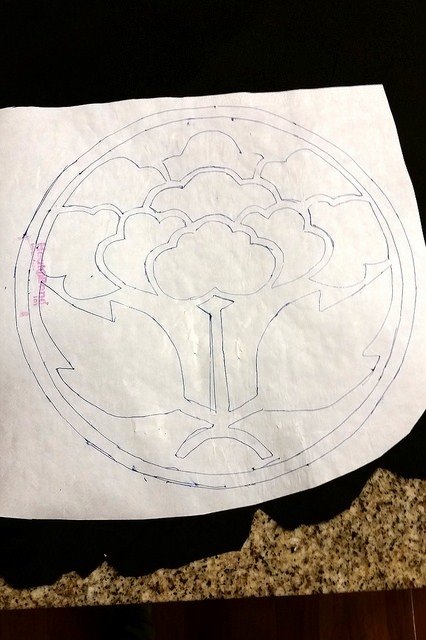
After fusing Heat and Bond to the wrong side of the fabric, I traced the floral pattern on the paper side of the fusible and cut out all the pieces.
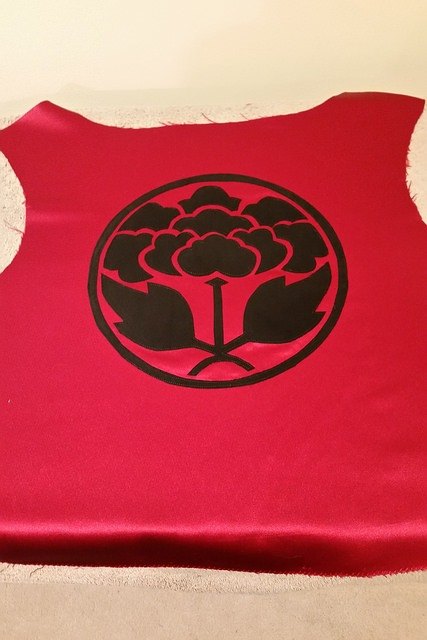
Apply floral pieces to the back of the bodice and iron in place.
Peel off the paper backing, place all the pieces on the back of the jacket with the fusible side down and iron in place. To fake an embroidered look, I top stitched all the edges. Just for kicks, I made a smaller version for the front of the jacket.
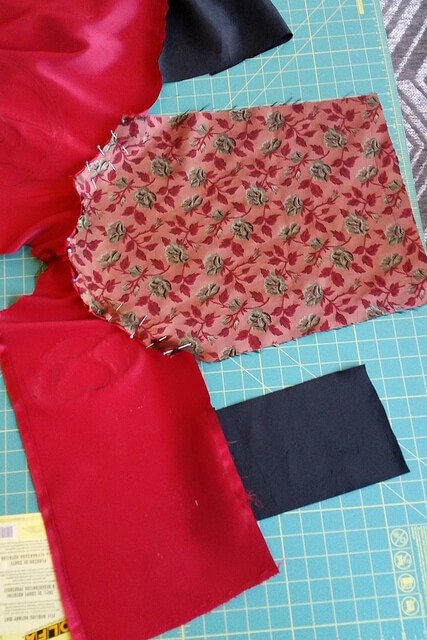
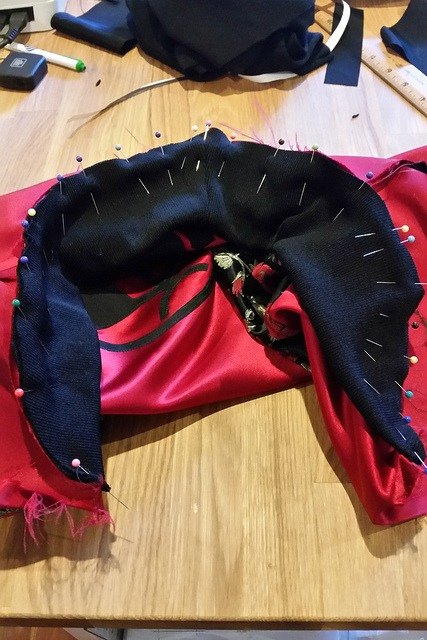
Step 3: Add pockets and sew sleeves to bodice
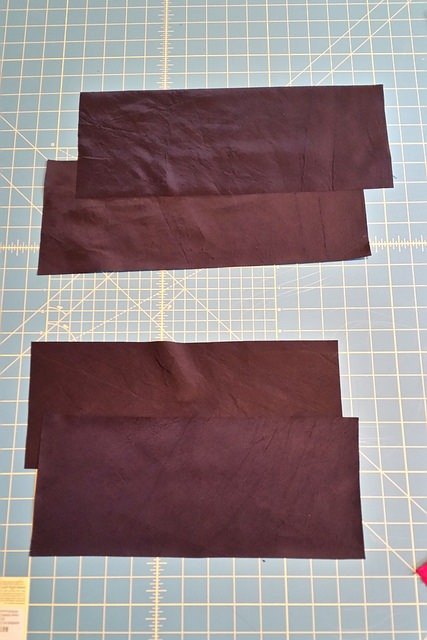
Cut out 4 rectangles for the pockets.
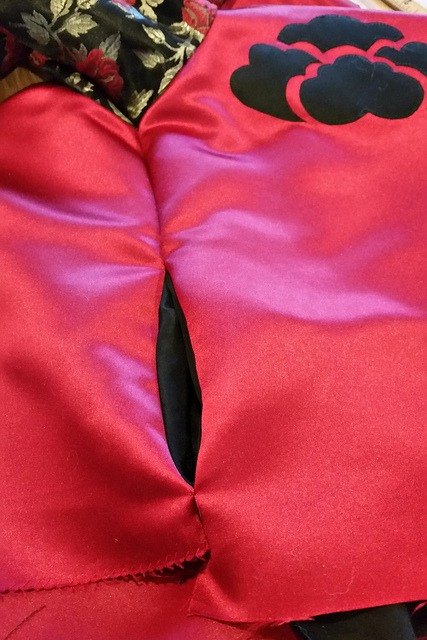
To make the pockets, I cut out 4 rectangles from the bustle. Yeah, I know they don’t look like your typical pockets, but I thought it would be fun to make extra deep pockets that extended all the way to the the zipper. I stole this idea from a jacket I found surfing the net for ideas to knock off.
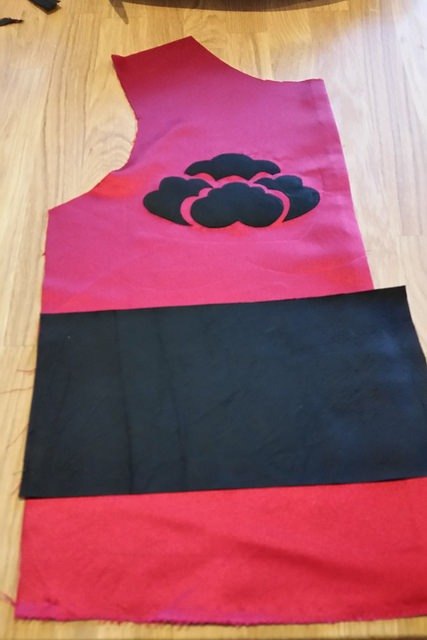
With right sides together, sew each pocket to the sides of the bodice.
With right sides together, sew the bodice at the shoulder seam
Attach sleeves using the flat technique.

Pin the sides of sleeves and bodice together. Extend the pockets from the bodice and pin around the edges. Sew all side seams and sew around the pockets. This is what the pocket opening looks like from the side seam.
For the lining, repeat the above steps but skip the pockets.
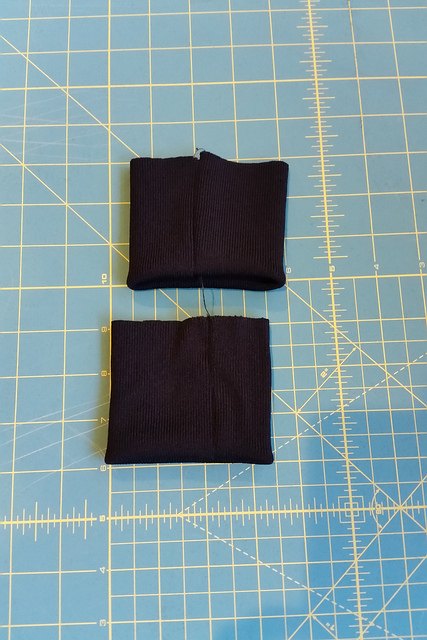
Step 4: Attach ribbed collar, cuffs and waist
For the ribbed collar, cuffs and waist, I used a black turtleneck sweater.

For the collar, chop off about 6″ from the bottom of the turtleneck. Cut out the side seam on one end, and on the other, cut out a slight curve. Sew the collar at the curve. This curve is critical to getting the collar to lie flat against the neck, otherwise the collar will stand straight up, leaving a weird gap at the neck. Fold the collar in half and taper the ends. Your collar should look something like this.
Pin the collar to the neck and sew in place.
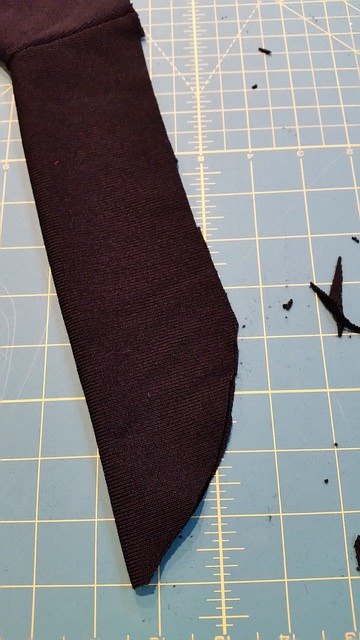
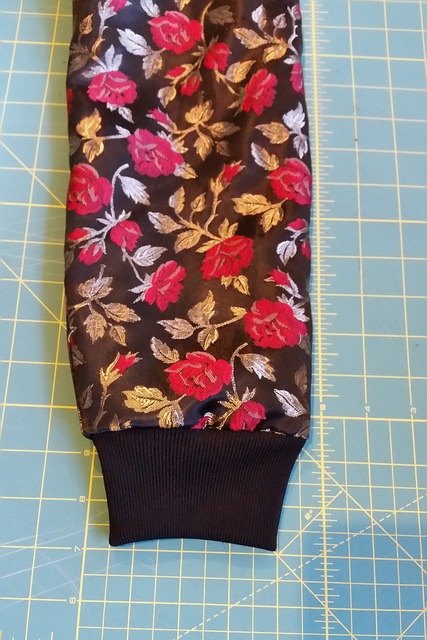
Cut 2 cuffs and waist from the rest of the black sweater. I cut 2 rectangles about 6″ wide and 7″ long. Sew the ends together and fold in half.
Pin and sew cuffs to the bomber jacket sleeves.

Your cuff should look like this.
Making and attaching the waist is the same process, except don’t sew the ends together.
Step 5 – Attach the zipper
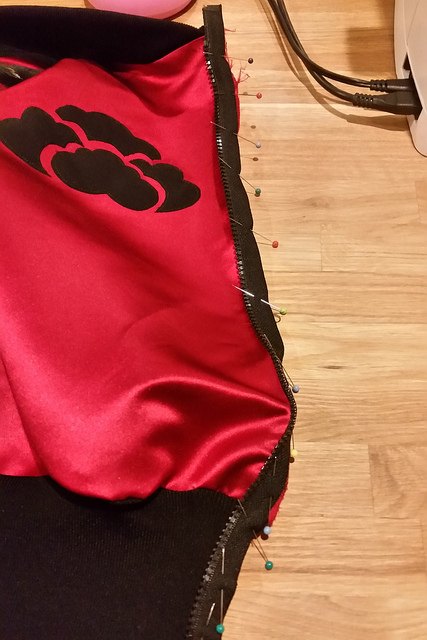
Pin and sew the zipper to the front of the jacket.
Step 6: Sew lining to jacket
This step is a tutorial in itself. Rather than bore you with a step by step overview, I’m going to direct you to this great tutorial by Grainline Studios. This was my first time lining a jacket, and this tutorial was super helpful.
Here’s a view of the finished bomber jacket from the front . . .

and here’s a view of the back.
This was my most ambitious refashion to date and took me 2 solid weekends to make. It was also one of my most expensive projects, about $18 all in with the zipper. Lining the jacket wasn’t hard but it took longer than I expected. I think the end result was worth the time and money. What do you think?
The author may collect a small share of sales from the links on this page.


Comments
Join the conversation
Very well done!!! I am an "older" sewer with a lot of experience & am always impressed with well-done examples. Yours is a great design combination along with the construction techniques. Also, your tutorial is very complete! Great job & great jacket!!!
You are so cute and I love your style. The bomber jacket is very well-made and your instructions are right on.