Summer Voile Caftan - Kaftan Tutorial
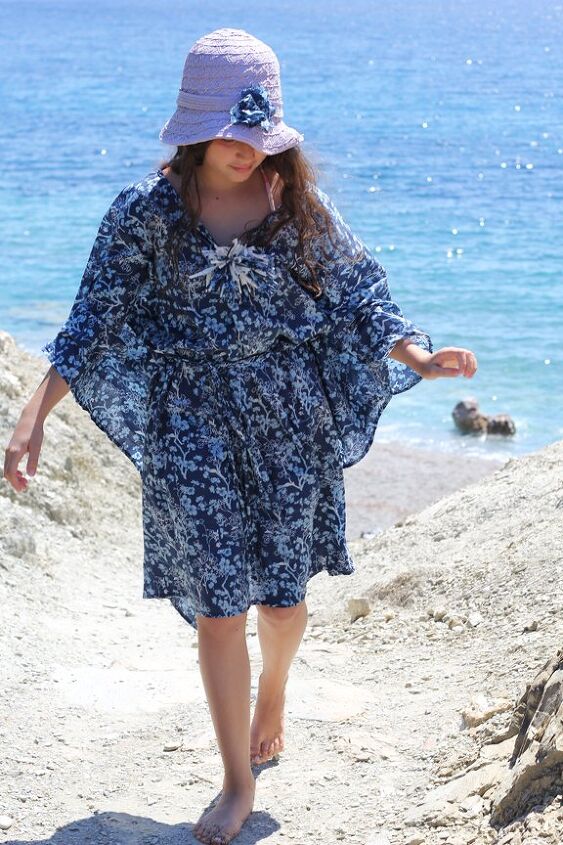
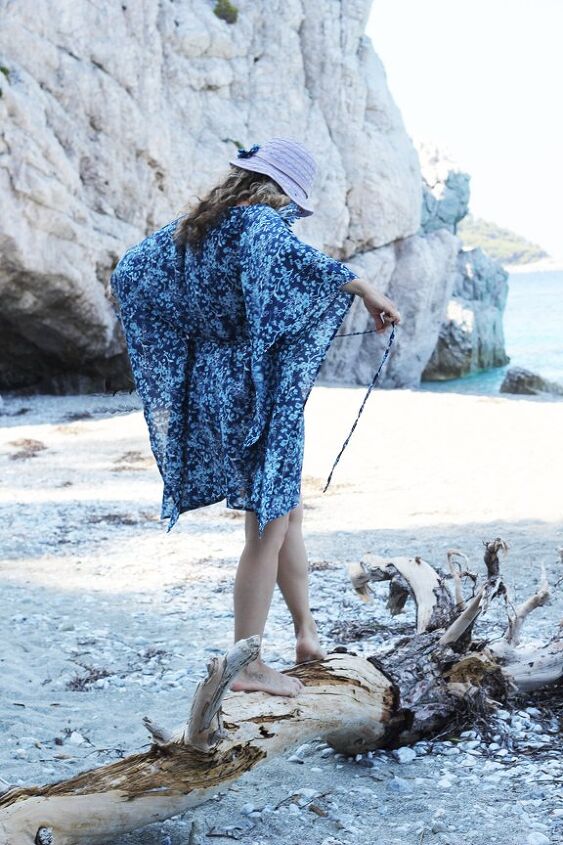
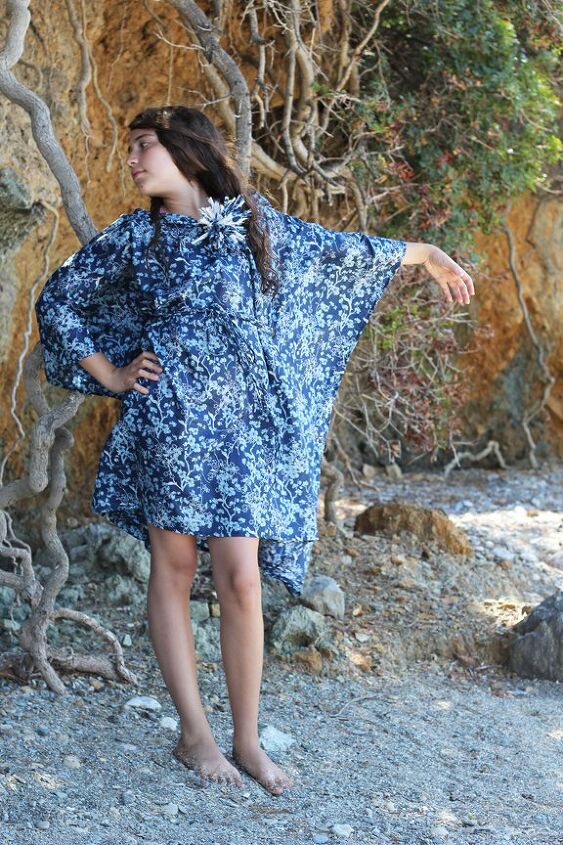
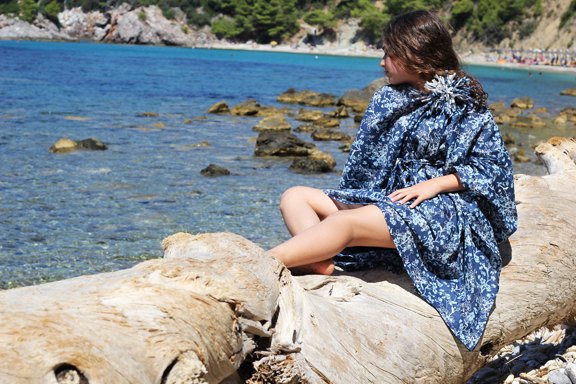
As you may noticed on some of the vacation pictures, there is a nice, blue kaftan that I managed to sew just the day before our departure to Skopelos.
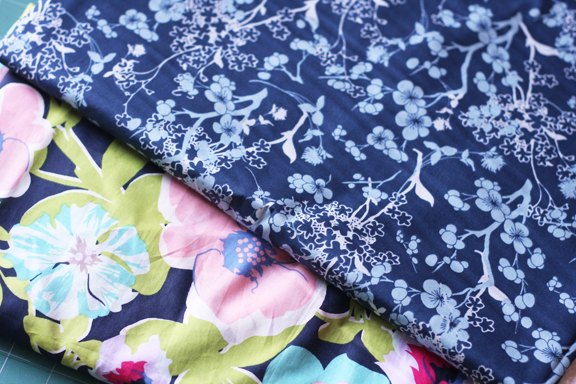
In the fabric goodie box that I received from the Art gallery fabrics there were two 2yds pieces of theirs gorgeous voile fabrics.

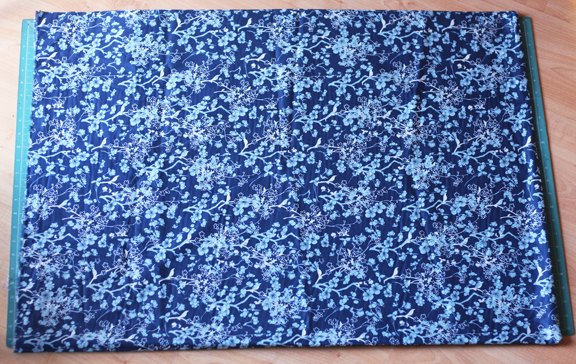
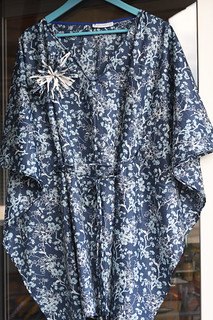
The first one is: V-114 Fashionable Azure (used for the tiered dress) and the other one is V-118 Branch Silhouette Blue (used for this kaftan).
AGF voile is 100% PIMA Cotton, 52/53" (133 cm) wide with a soft, sheer touch and an elegant, lightweight drape that will have you melting away with its exceptional hand. It's just perfect for the garment sewing, especially for the summer projects!!
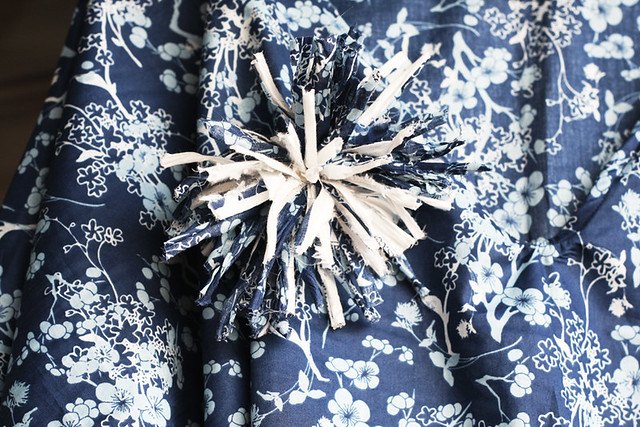
The first little tutorial from this summer voile sewing series is for the shabby flower pin that you may noticed as a great little accessory on the kaftan. I separated them in 2 tutorials, as the flower pin don't need any sewing machine or sewing skills at all, it's an easy crafty project that can be done even with the voile scraps, while the kaftan requires sewing machine.
Kaftan tutorial
Kaftans or caftans are perfect as beach coverup, poolside or cruise wear, but can be also nice as everyday wardrobe.
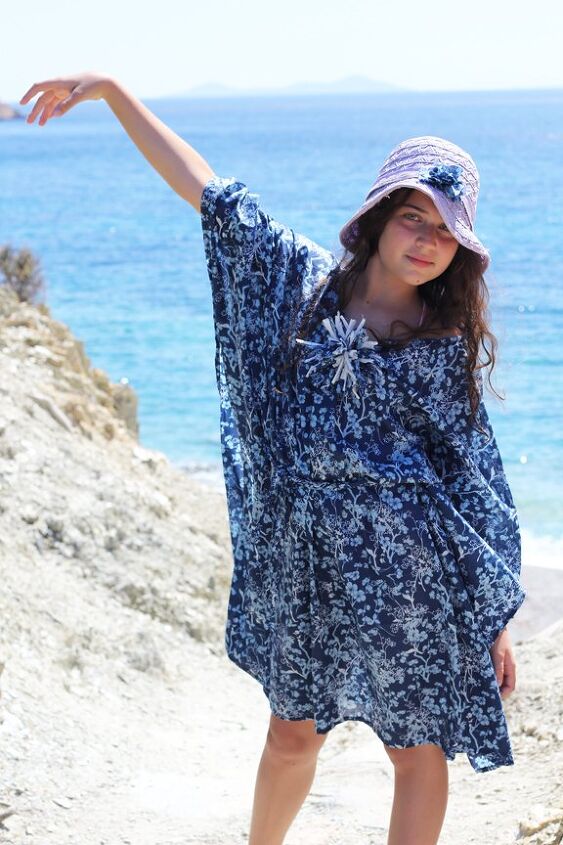

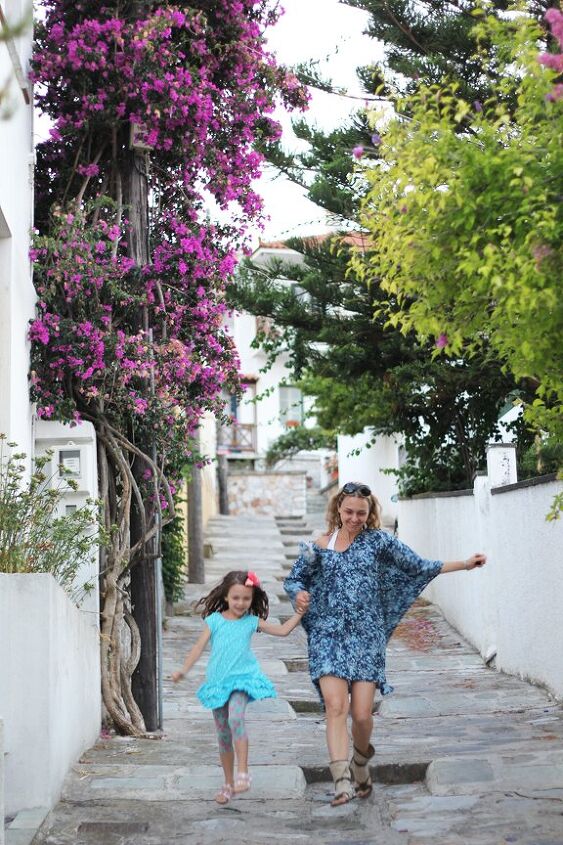
This project (thanks to the voile's width) allows flattering generous fit and suits all adult (and almost adult) sizes. The pics I took of the same kaftan are shown on a teenager (my older daughter) and adult (me) .
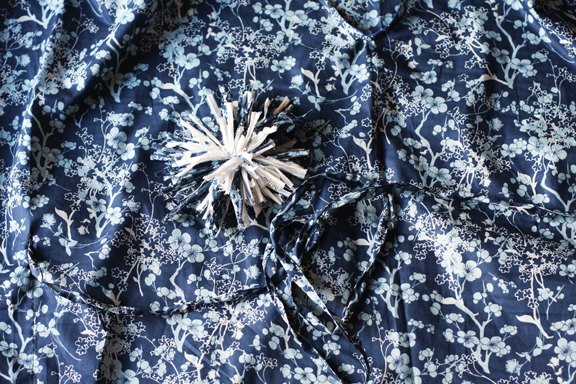
It uses fabric completely, and the only "scrap" or remnant is the head hole (and I used that fabric triangle to make a small matching scrappy flower for my sun heat;) .
The scrappy flower is made just by folding random cut pieces in fourths and layering them one over another, gathering and embellishing them with some beads.

TIP: You can eventually change the length of the kaftan by adding more yardage (mine is made with 2yds of fabric, so by adding additional 1/2 yds to 1 yds you can have it in longer style, like a maxi dress, which would be perfect for maybe older women.
You can also easily adjust this project for toddlers, by cutting the voile's width (just cut it after measuring your girl from wrist to wrist, standing with open arms). Or even for yourself, if you want it to have shorter "sleeves". Larger the width is, longer the length of the sleeves will be. You will need twice your desired length (calculating front and back sides) + calculate an inch or two more for the seams.
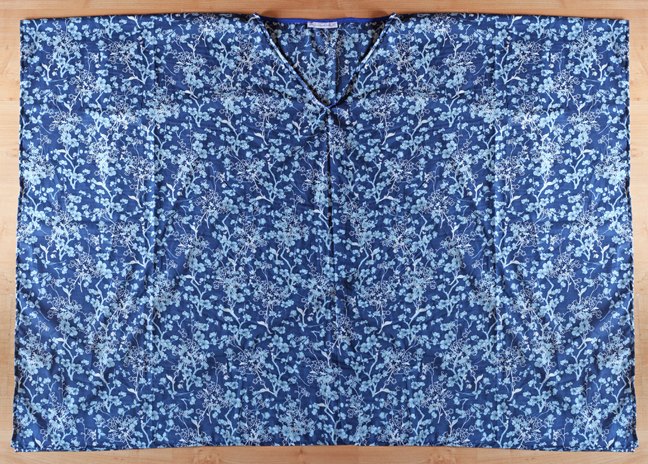
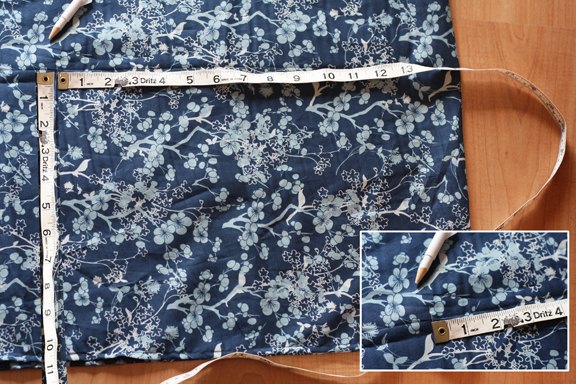
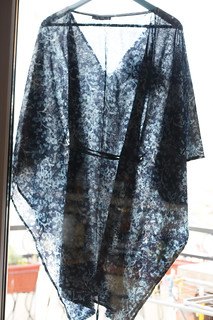
Determine your preferable width and length using the following picture:
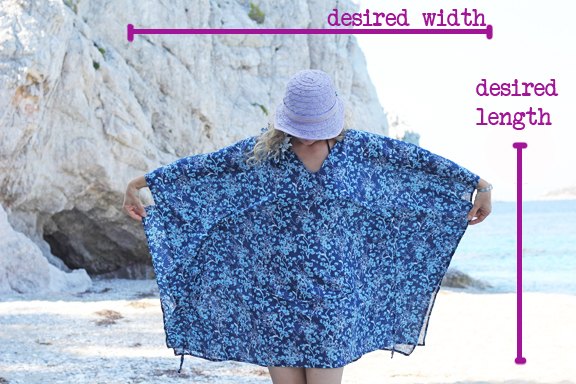
Looking at that picture above in comparison with the initial following picture of the fabric used for this project will maybe help you understand determination of the lengths/widths. As you may notice immediately, the finished kaftan gained only the head hole shape (V neckline in this case), finished hems and 2 button holes to insert the drawstring and the drawstring (to look more appealing).
It's an very easy project, so let's get started!
Needed supplies:
- 2 - 3 yds of cotton voile fabric
I used the gorgeous voile fabrics from Art Gallery fabrics that are great for this project (the quality and the weight are just perfect)
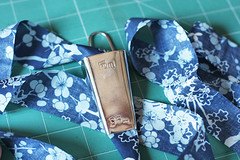
-small piece of the matching single fold bias cotton binding -approx. 30" (for the neckline)
if you have enough fabric, you can make the bias tape from the same fabric see : HERE how, and that will give you even the better results! The V angle will not tend to twist and fold, if made with lighter weight bias binding!
- sewing machine
- scissors and/or roller
- thread, needle (size 9 sharp needle is the best choice for voile sewing as well as Aurifil thread in 40 or 50W)
- iron and pins
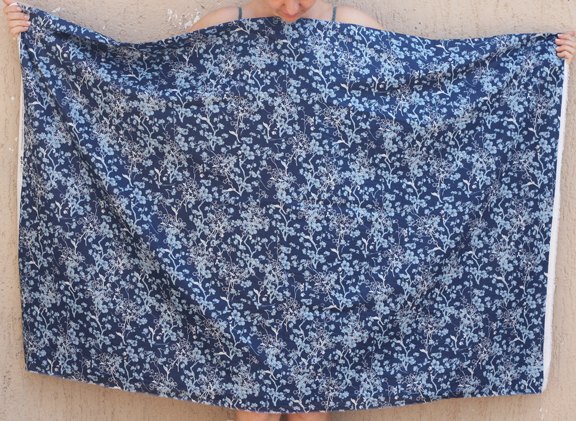
We saw that the voile generous width (distance from selvage to selvage) is 52/53".
So after determining your desired length and width, cut the fabric.
I used 2 yds of it's length -72" and it's full width - 53/54".
Finished size of my kaftan is 34"(length) x 48"(width) .
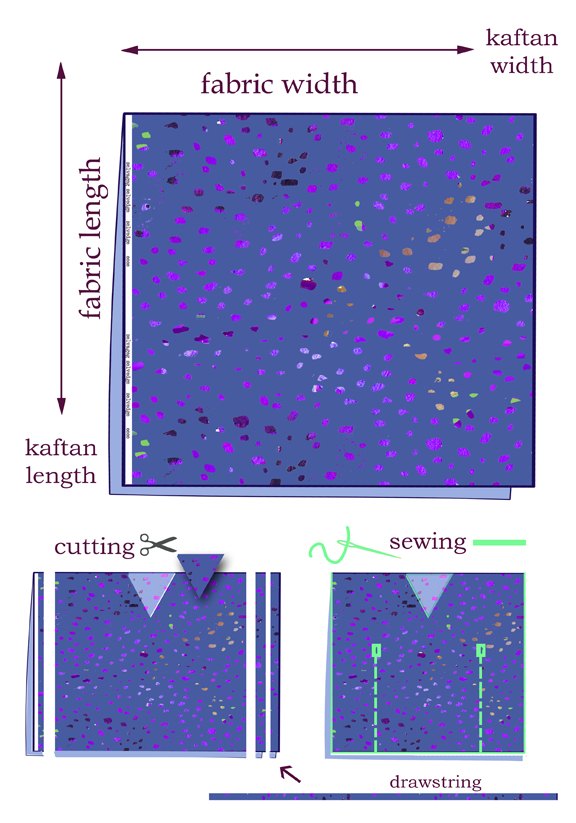
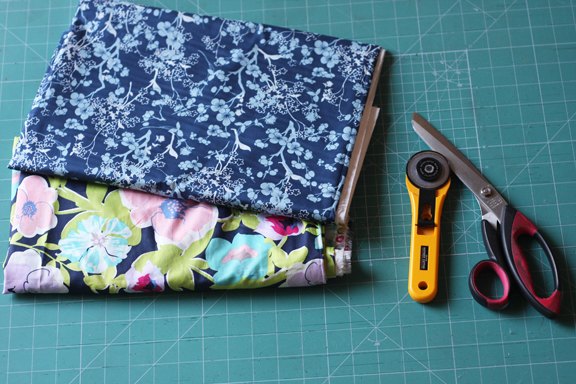
Place your piece of the voile fabric on the cutting surface, folded lengthwise.
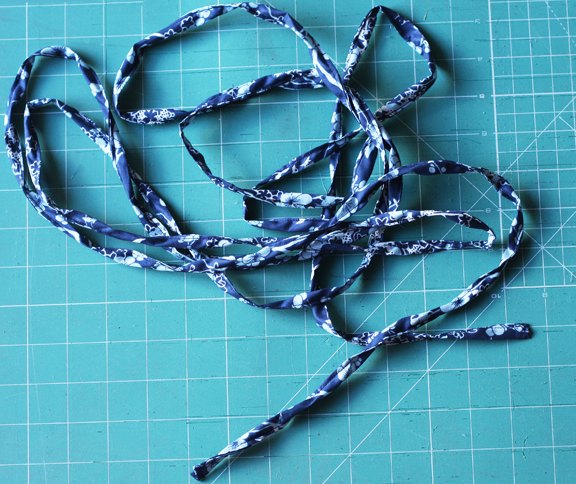
Cut off the selvedges and use these 2 tiny strips for the shabby flower pin.
You will need to cut additional one or two 1-1 1/2" strips, as you will need to sew the drawstring with them.
(Eventually you can even use some other ribbon for that drawstring, without making it from the same fabric).
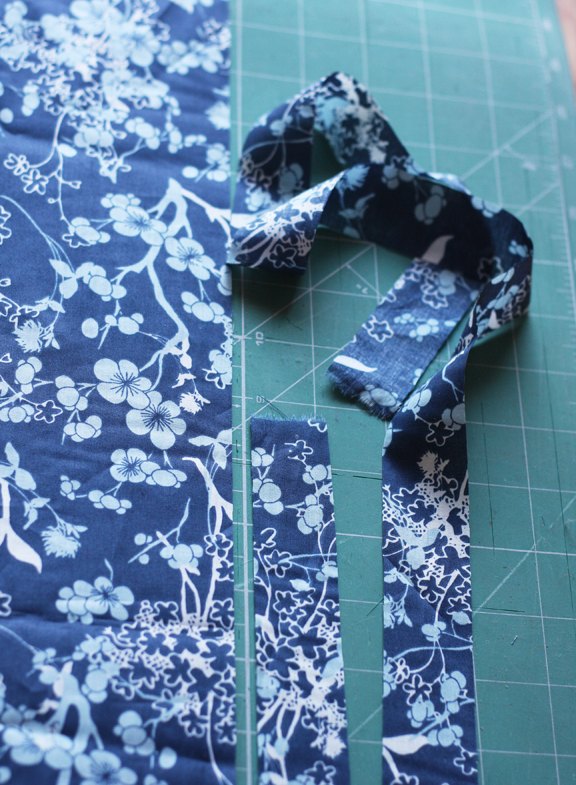
I have cut 2 of these strips and got a very very long drawstring, so cutting only one is more than enough.
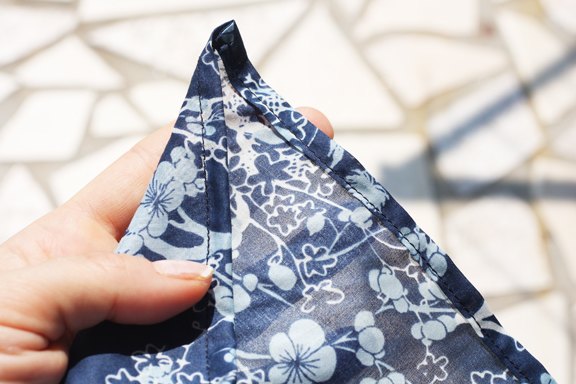
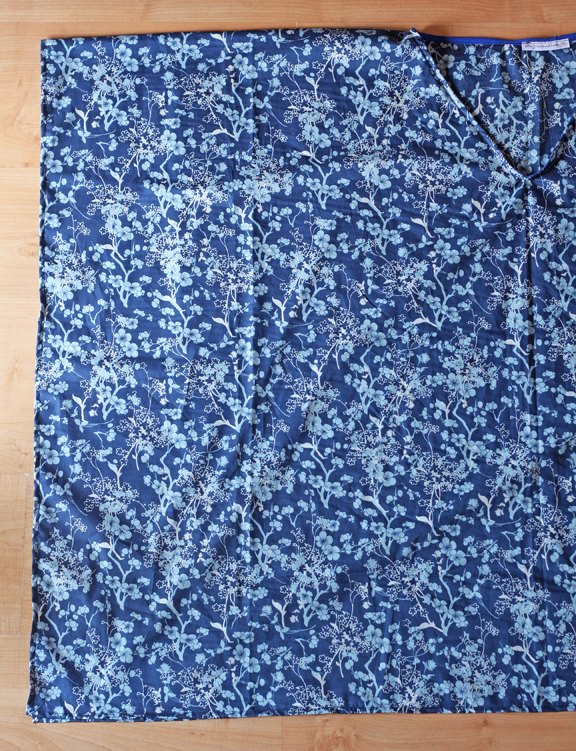
Now fold the fabric in half width wise (to find the center) and cut out the neck opening that is 5 x 1" like shown on the picture.
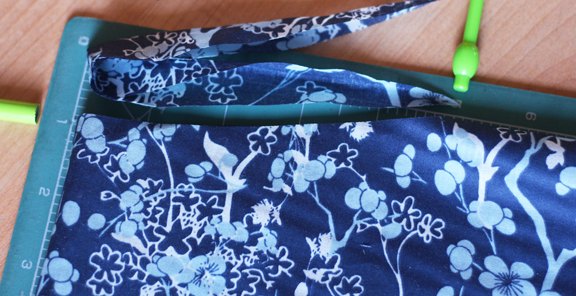
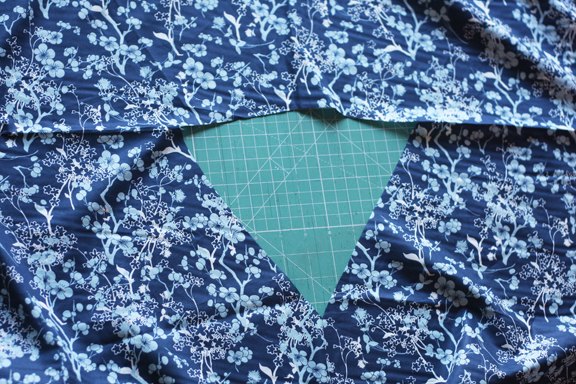
So this is what we have as far, but now we need to obtain the desired head hole. It can be round shape, boat shape etc., but I chose the V neck shape.
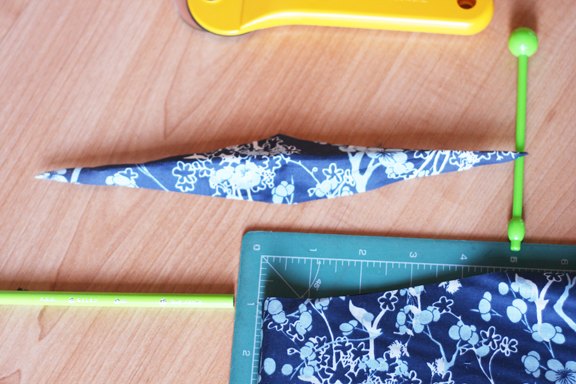

So draw on the piece of simple paper the triangle that is 10 x 8". That will be the head opening hole.
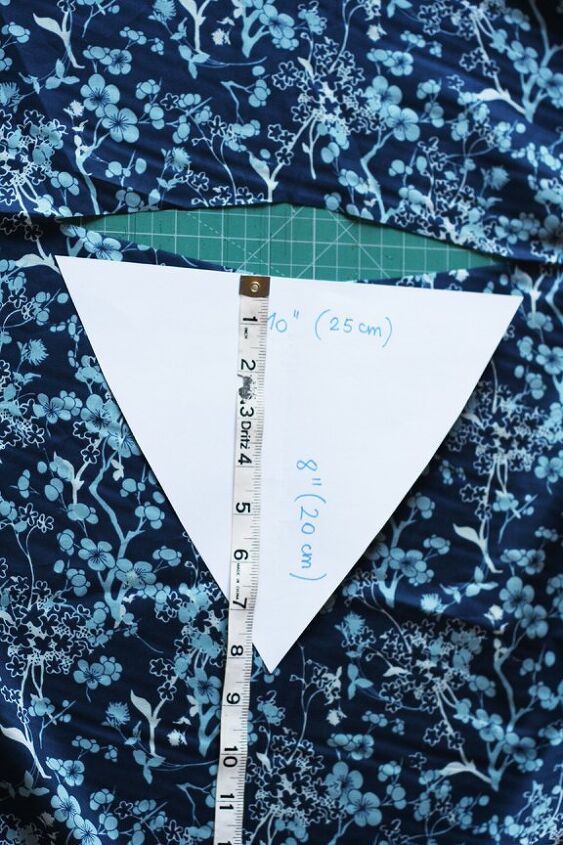
Carefully, cut it on the fabric.

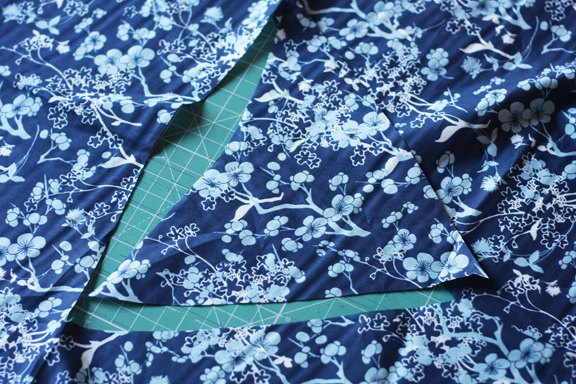
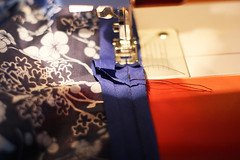
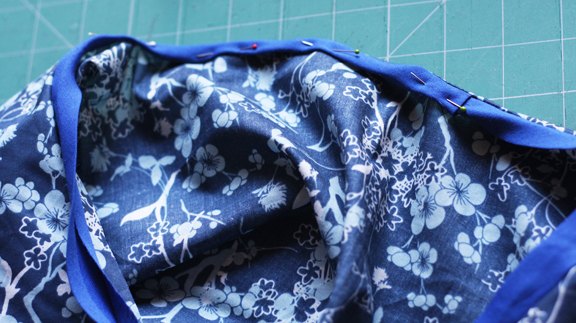
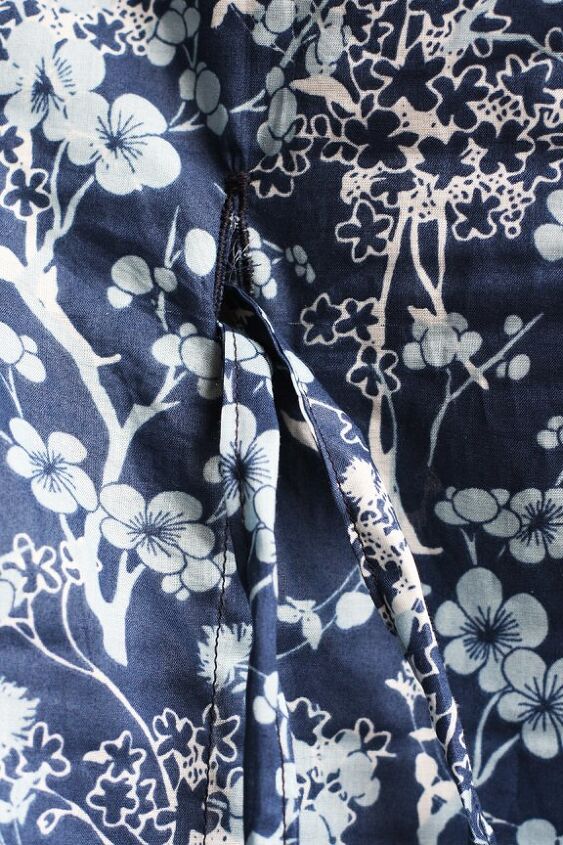
Now we need to bind it - finish the opening with the bias binding and that may be the only "tricky" part of this easy project.
If you round a bit your V angle, it may be easier to apply the bias binding nicely. You can eventually use THIS Burda's tutorial or apply it like I did.
Don't cut the bias binding until you finish pinning!
Starting from the center of the back, pin your bias binding tape to the opening hole, right sides together. You can place one pin to the center of the back, it will help you with orientation.
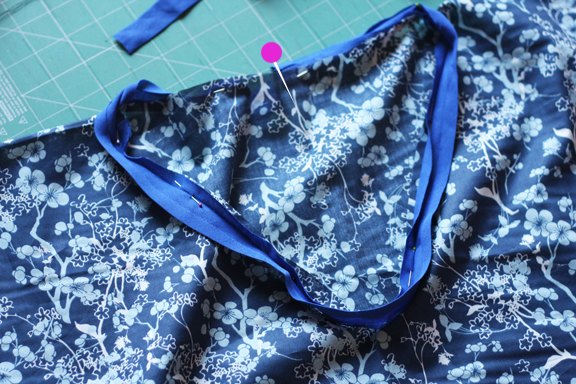
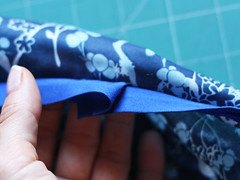
Fold the beginning of the binding inside. Pin all around carefully. Place the end of the binding tape over the beginning point (start of the binding).
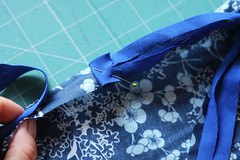
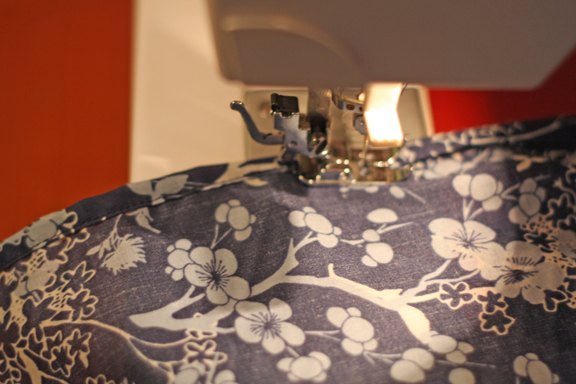
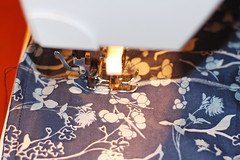
Once you are done with pinning, stitch around the neckline. Sew along the first fold of the tape.
Once you have the bias tape sewn to the neckline, you just need to fold it inside and finish sewing.

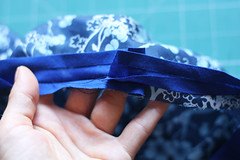
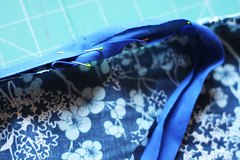
You can use the iron to press it nicely toward the inside of the kaftan.
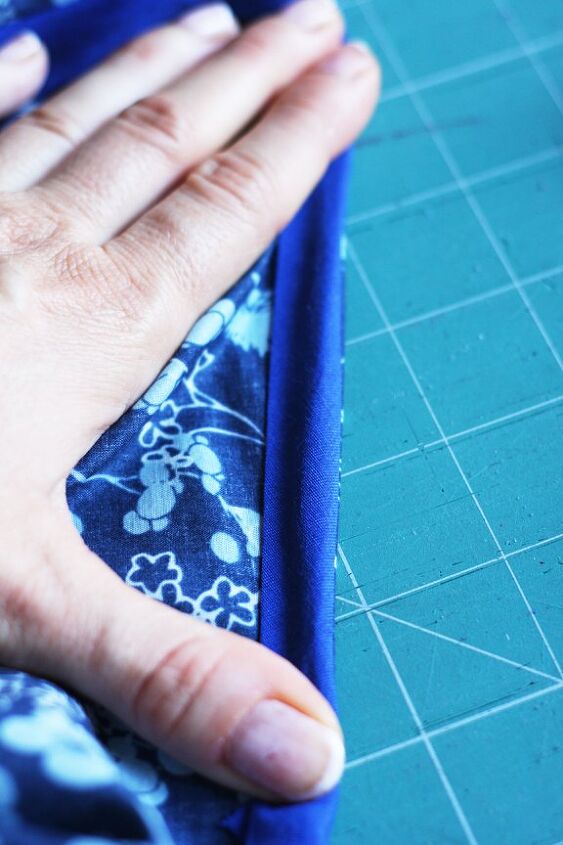
Make sure that the binding tape is not peeping on the other right side of the kaftan.
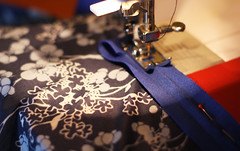
Pin and stitch it all over.
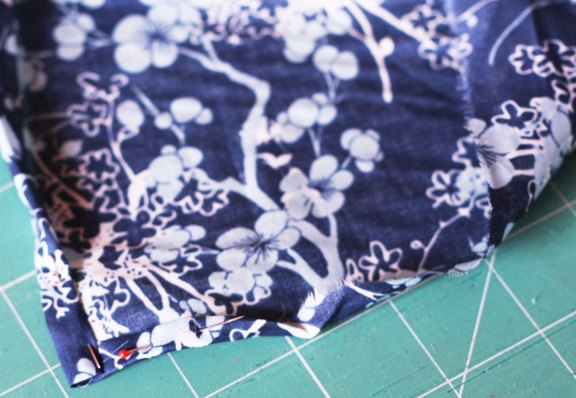
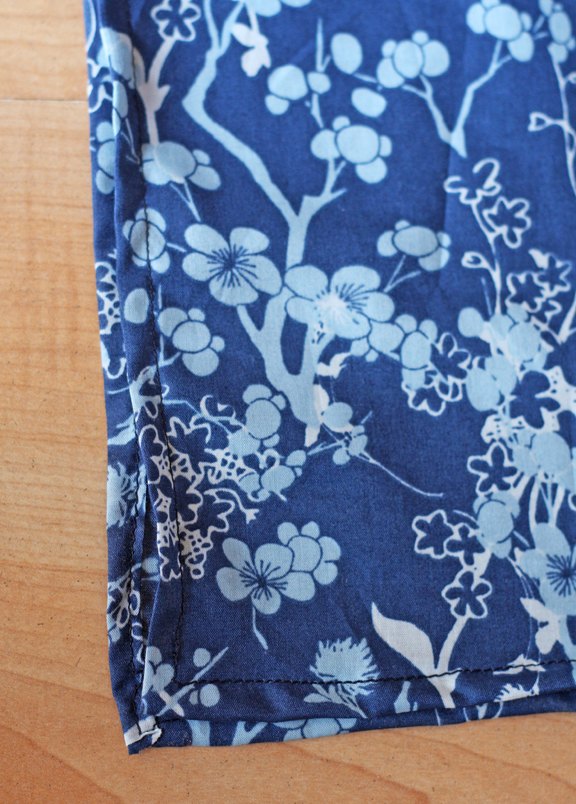
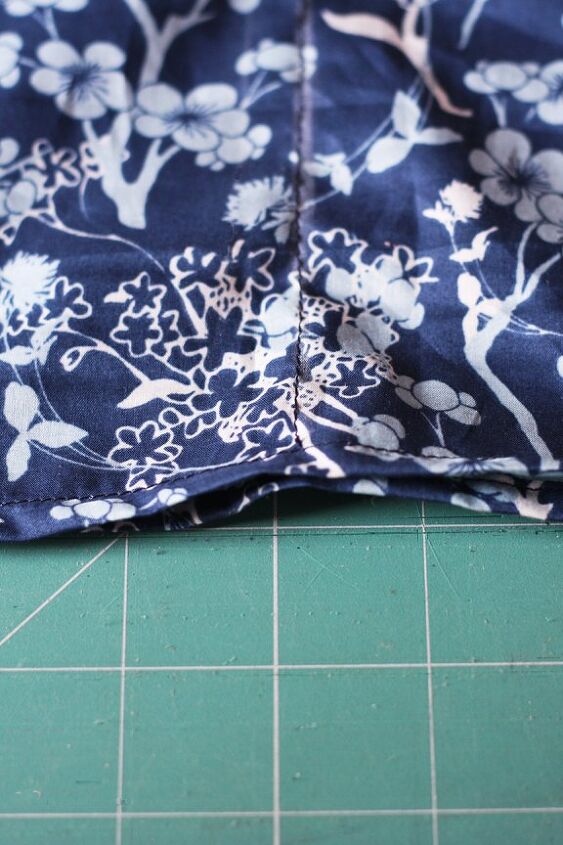
Now, finish the hems: double fold and stitch the edges, all around - all 4 fabric edges.
So, at this point, the neckline is done and the edges are finished.
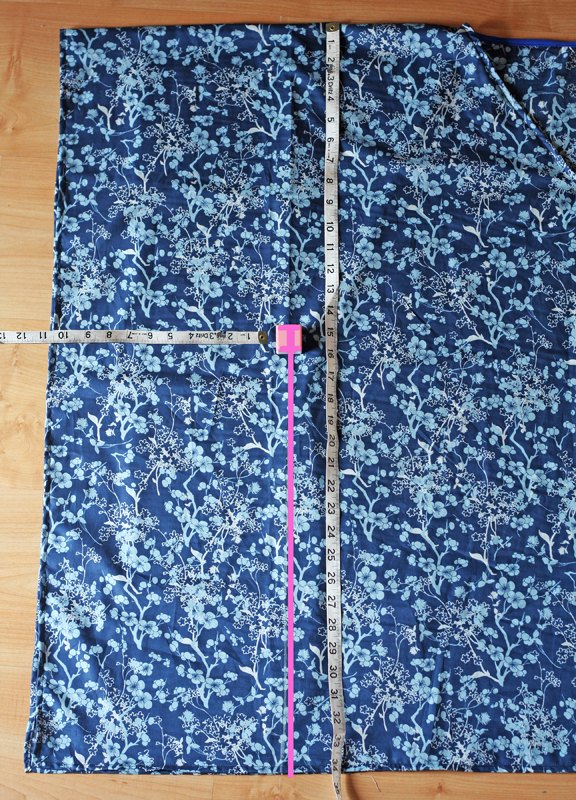
Now, we only need to sew 2 straight line - seams with the buttonholes.
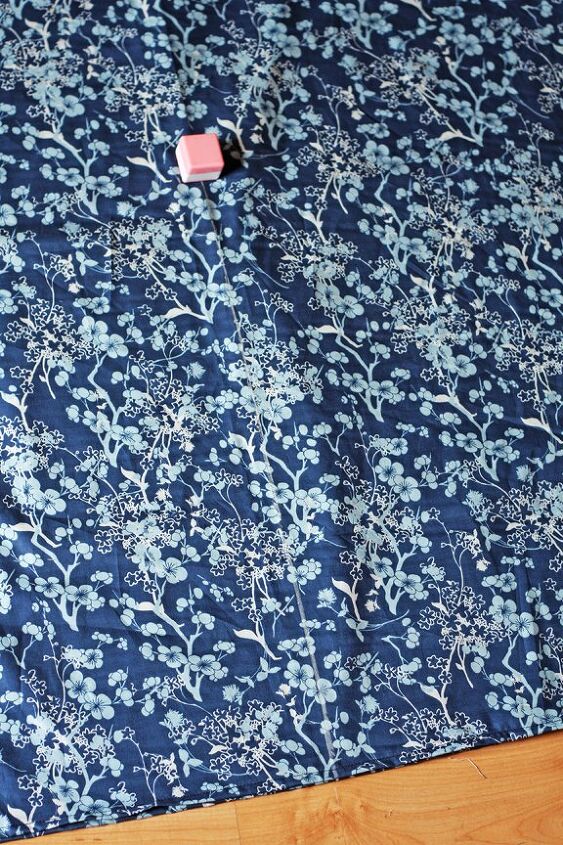
With the fabric marker or pencil or anything that you normally use to draw on the fabric, draw 2 straight lines on each side of the kaftan, starting 15" away from the upper (shoulder) edge of the kaftan. This 15" space will be the arms opening. You can eventually leave even more space, if you might need it.
The lines (and the seams) should be approx. 10" distant from both lateral edges.
For plus sizes, I suggest making them a bit closer to the edges, allowing more comfort.
Sew these 2 seams, starting from the bottom edge, finishing them with a buttonhole stitch.
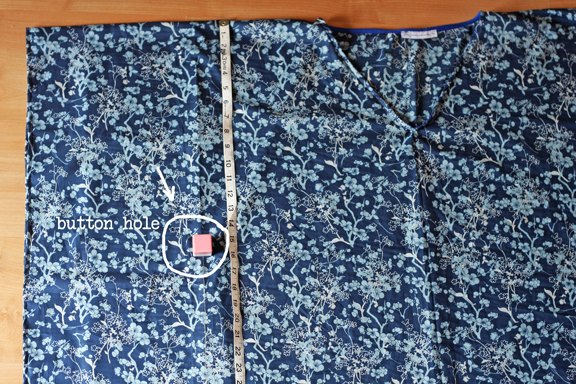

With the cutting knife, make the holes.
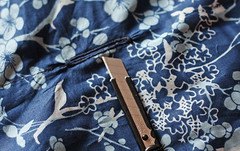
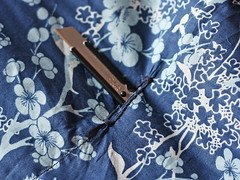
Now we only need to make the drawstring to go through these 2 button holes.
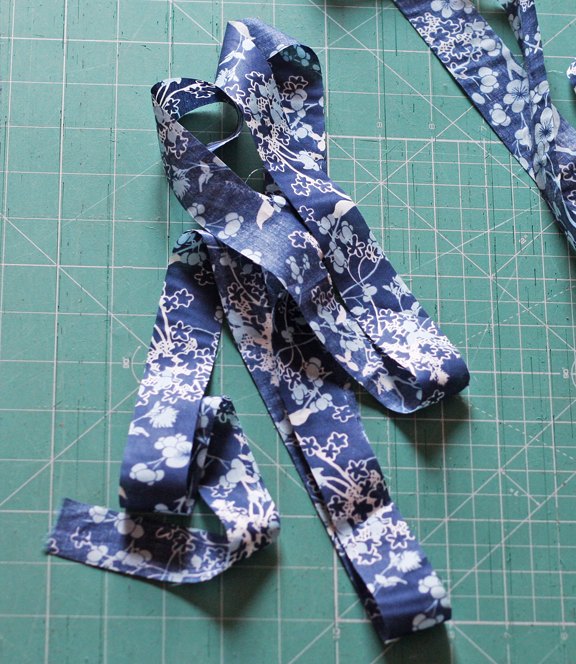
To make the drawstring, you can either use the bias binding tool(like I did) and than press it lengthwise and stitch or you can fold the strip in half lengthwise and iron it, then open and press both sides toward the center crease, press center crease close again and stitch

Just insert the drawstring through the holes and you are ready to go!


The author may collect a small share of sales from the links on this page.


Comments
Join the conversation