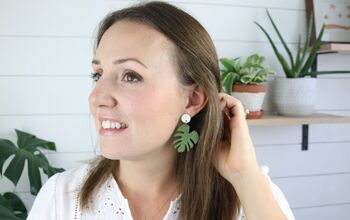
How to DIY Monstera Leaf Earrings From Polymer Clay

Today, I will show you how to make some monstera leaf and plumeria earrings with a gorgeous delicate design.
Follow along as I show you how to create intricate details to make your leaves and flowers look just like real things. Let’s get started with this tropical design!
Tools and materials:
- Polymer clay
- Pasta machine
- Clay knife
- Dotting tool
- Cornstarch
- Heart-shape cutter
- Needle tool
- Exacto knife
- Pastels
- Paintbrush
- Cutters
- Alcohol
- Cotton bud
- Sanding paper
- Nail sander
- Ring posts
- Clay adhesive
- Jump rings
- Gloss varnish
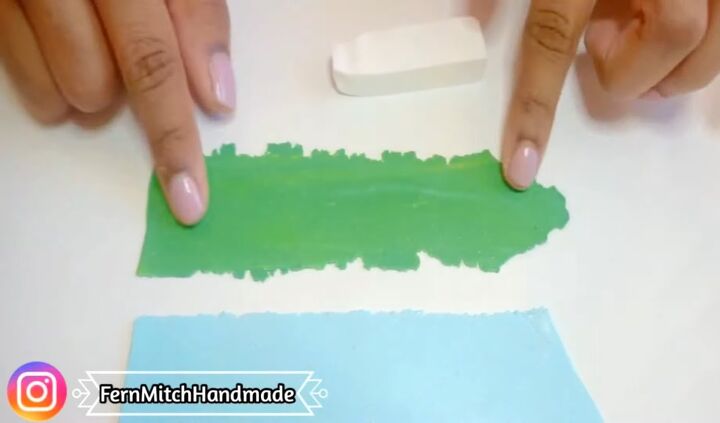
1. Flatten the clay
Run the background clay through the pasta machine at about 3mm thickness and green clay on the thinnest setting.
2. Make the petals
To create the flowers, roll the white clay into a snake. Then cut tiny pieces from it, which will be the petals of the flowers.
Roll them into tiny balls and then mold them into teardrop shapes. You need five of these teardrop shapes for each flower.
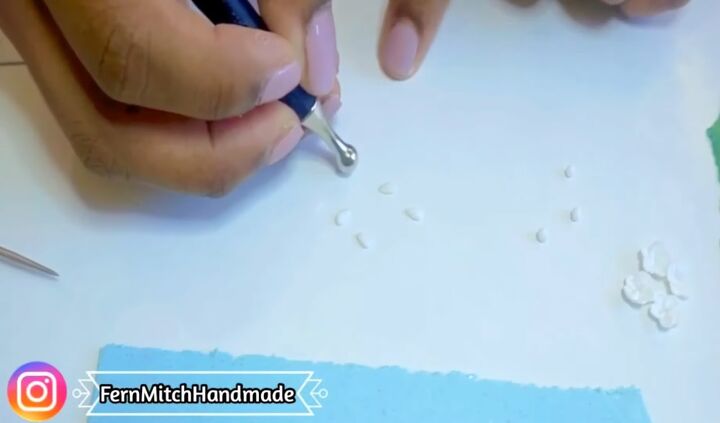
3. Shape the petals
Press the teardrop shapes onto your working surface.
To give dimension to the petals, use a dotting tool to roll and stretch the end of the teardrop.
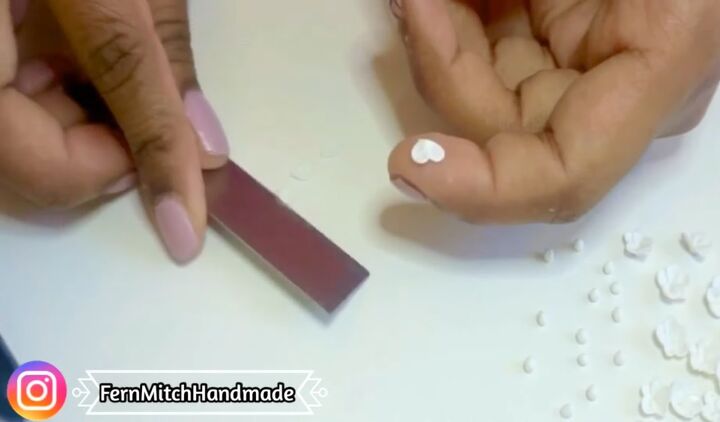
4. Overlap the petals
Rub some cornstarch or cornflour onto your fingers to prevent the clay from sticking to them.
Then carefully lift the petals and overlap them in a half circle.
To create the plumeria appearance, gently push the middle of the flower, and overlap the first and the last petals.
Then pinch the bottom of the flower and cut off the excess.
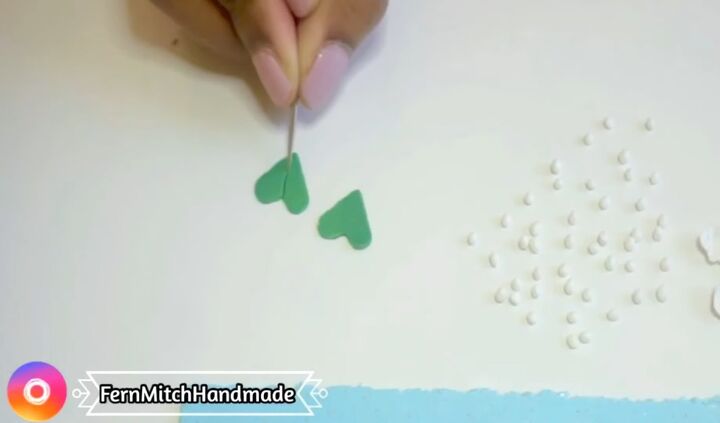
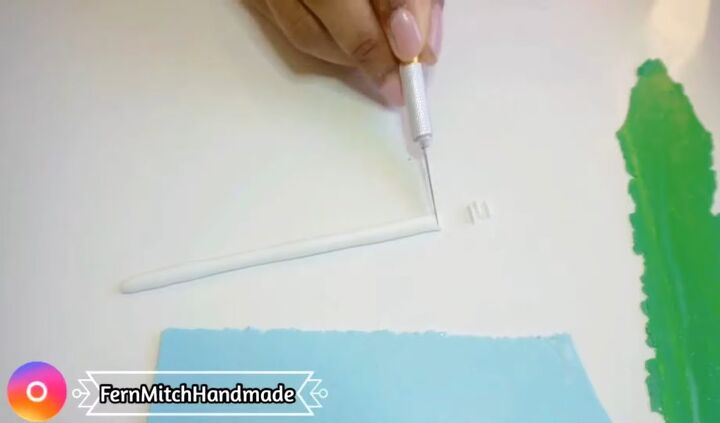
5. Cut and mark the leaves
To create the monstera leaves, use a small heart-shaped cutter to cut out the pieces. Then mark the middle of the leaves with a needle tool.
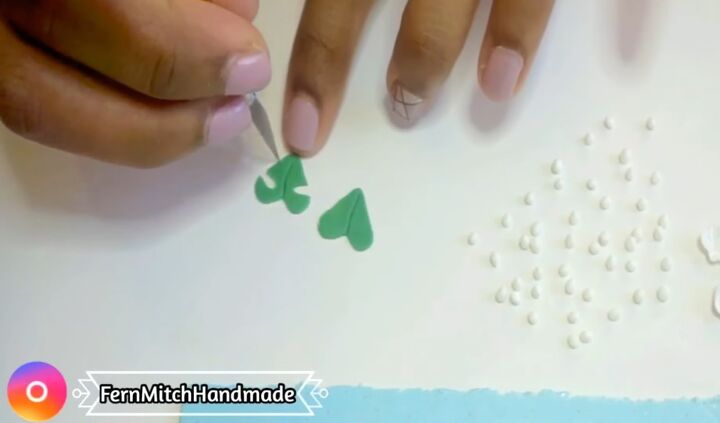
6. Cut notches
Then use a sharp Exacto knife to cut out the notches carefully. Try to be very random with these notches and keep them very curvy.
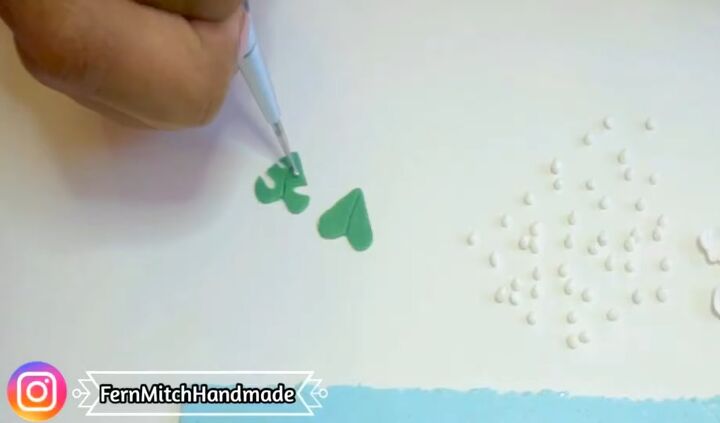
7. Add detail
Then use a dotting tool to add a couple of dots on each monstera leaf and smooth out the notches.
Proceed to make a bunch of these monstera leaves and a bunch of plumeria flowers.
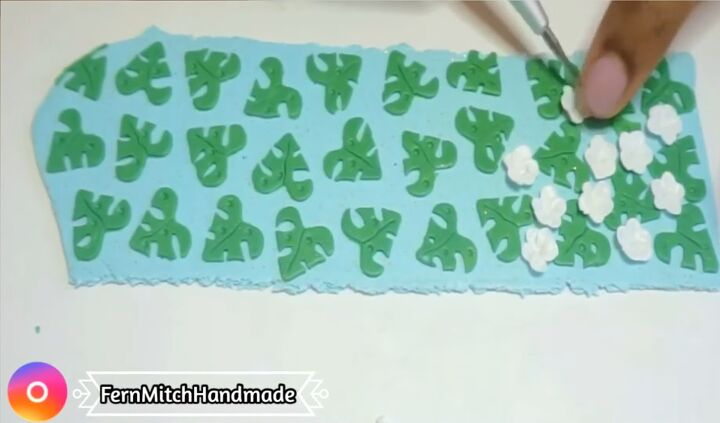
8. Place on background
Start placing your plumerias and monstera leaves onto the background clay.
Make sure they cover the whole piece of clay. These 3D pieces do stay on the background clay without falling off.
But, if in doubt, just press your 3D pieces carefully into the clay a little bit.
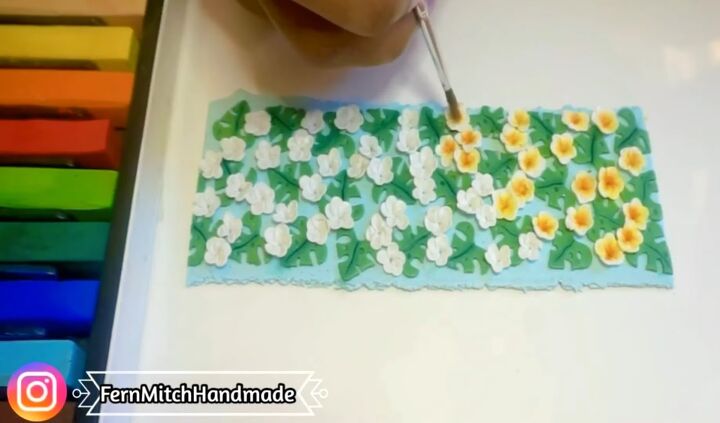
9. Color the flowers and leaves
To give plumerias their color, apply some soft pastels with a soft bristled brush. I used yellow, red, and orange.
Concentrate orange and red in the middle. Also, add some shading on the monstera leaves with dark green soft pastels.
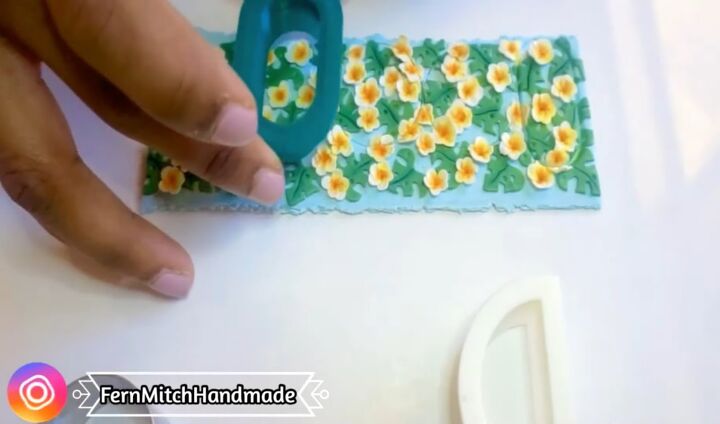
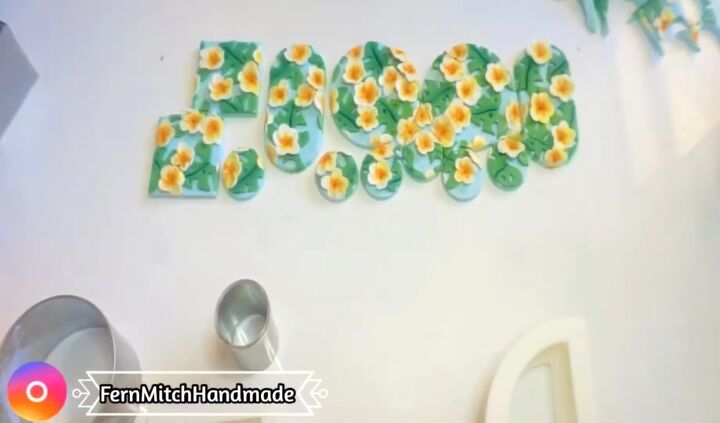
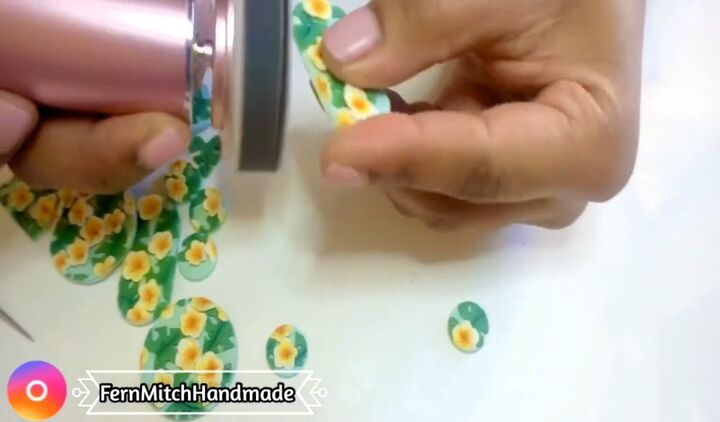
10. Cut out pieces
Once the whole slab is done, use your cutters to cut your earring components.
Then clean up the edges and use some alcohol and a cotton bud to clean up any dust.
11. Bake the earrings
Bake the pieces for about an hour at 225 Fahrenheit.
I recommend you make a couple of samples and figure out your ideal temperature and time.
I also created and based some small monstera leaves as component pieces.
12. Sand the earrings
After the pieces are cured and cooled down, move on to sanding.
When polymer clay is cured properly, it should be flexible. When you bend it, it should not break, and it should not be very hard.

13. Drill holes
Use a nail sander to add jump ring holes to the pieces.
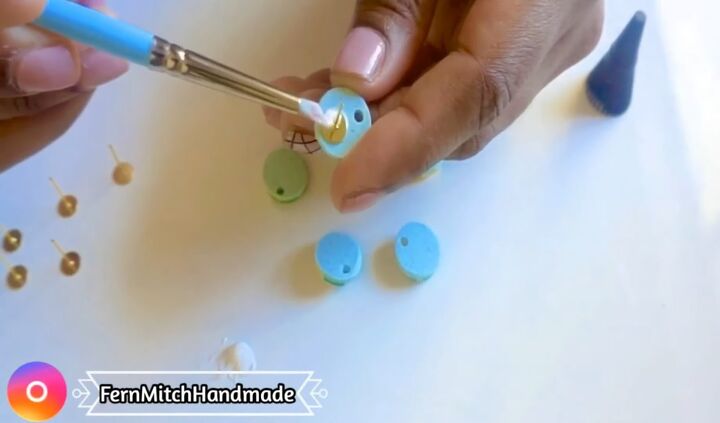
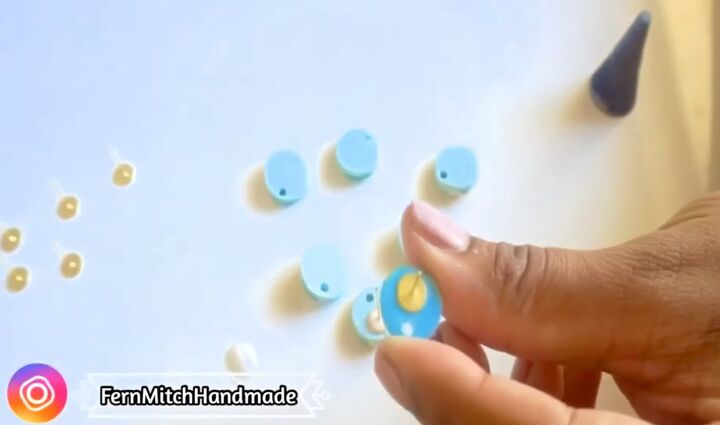
14. Attach earring posts
Attach the ring posts with a bake and bond clay adhesive. Dip an earring post into the liquid and attach it to the clay component.
Then use a small silicone brush to scoop some of the liquid on the top of the post and let the liquid drip onto the side, blending it with the clay.
It's important that the liquid drips onto the side covering the post because it's going to create a sort of pocket, so the post is enclosed in the bake and bond.
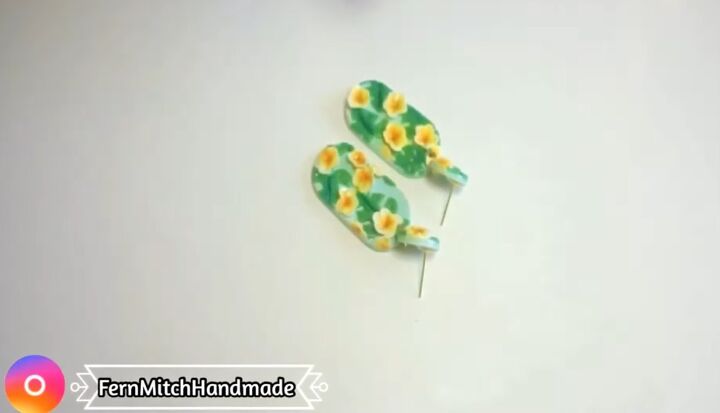
15. Bake the earrings
Then bake these pieces for about 15 minutes at 225 to 275 Fahrenheit. It bakes translucent, and afterward, the post won't move around at all.
16. Attach jump rings and apply varnish
Finally, add the jump rings and finish the pieces with gloss varnish to seal the pastels.
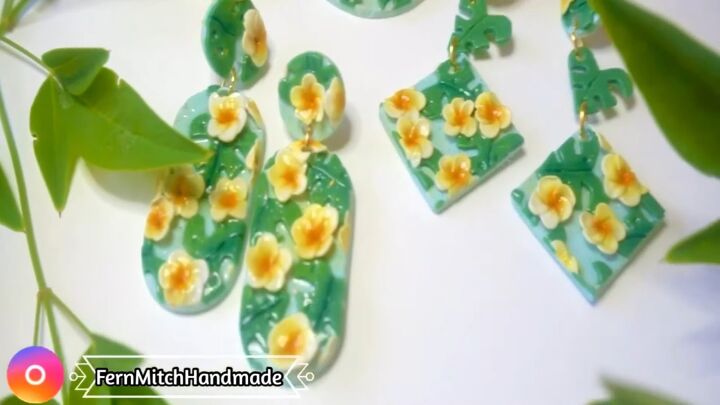
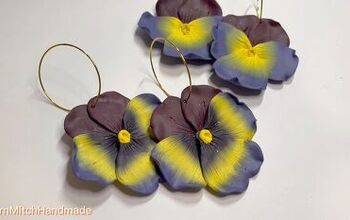
DIY monstera leaf earrings
Here are the finished earrings. You can make earrings in different shapes depending on which cut-outs you use. you can also use leaves as component pieces, as I’ve done here.
The flowers and leaves look so bright and vibrant, and I adore this design!
For more polymer clay content, check out my post on How to Make Rose Quartz Polymer Clay Earrings.
The author may collect a small share of sales from the links on this page.


Comments
Join the conversation