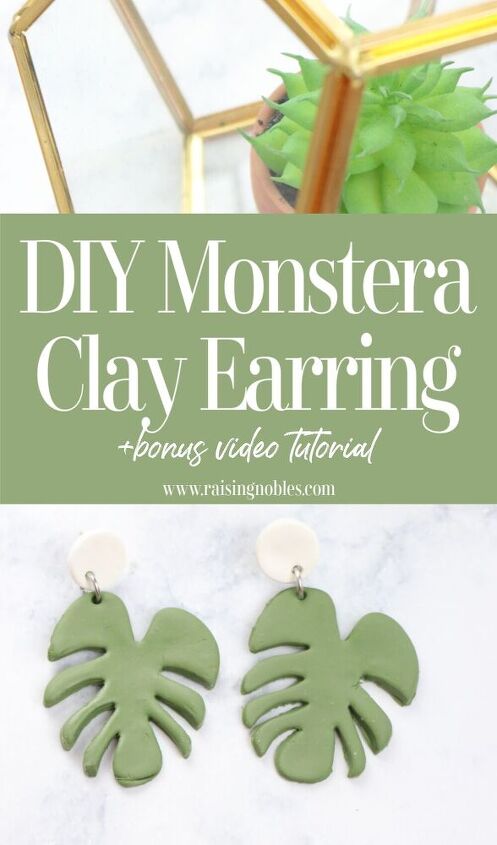
How to Make Clay Earrings – Monstera Leaf Earrings
Today I am sharing with you how to make clay earrings. These Monstera leaf earrings are so easy to make. All you need are a few simple supplies to make these clay earrings.

Clay Earrings
DIY Polymer clay earrings are so popular right now. And you can probably see why – the colors and design options are endless. They are super lightweight and the materials are available for just a few dollars at your local craft store. As soon as I saw these I knew I needed to make some of my own.
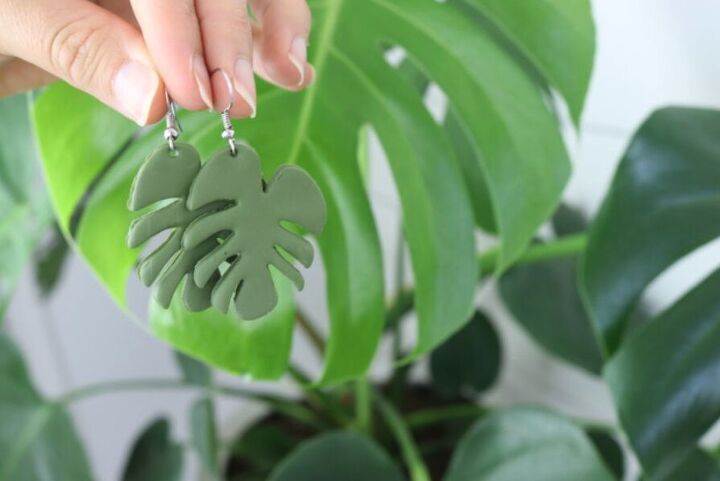
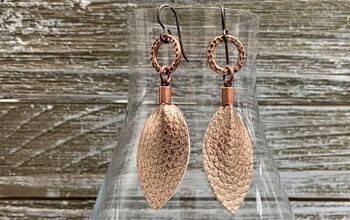
Being the plant lover that I am and specifically a monstera plant lover, I had to make some of these earrings for myself. I just love how they turned out and I can’t wait to share the tutorial with you!

The supplies you need are simple; polymer clay, something to roll out the clay with, some earring posts, jump rings and something to cut the clay – I’ll link my favorite clay cutter set, but I also just use lotion lids or a medicine measuring cup I found in my kitchen. Use what you have if you can! You will also need a pair of pliers(two is best) to assemble the earrings as well as some super glue – don’t worry, I’ll have links to everything for you!
Clay Earring Supplies
Not all clay is created equal. I have found that the sculpey brand gives me the best and most consistent results. I tried the off brand clay and it was really hard and difficult to mold and roll out. You can buy a really big multi-pack of sculpey clay on amazon for super cheap, like this, but if you want certain colors you can grab those at your local craft store.
Jump rings and earring posts are very inexpensive and I like to buy mine on amazon. These 7mm jump rings are my favorite and t hese earring posts have worked well for me.
An x-acto knife is really helpful, as well as some pliers. You will also need super glue, this is my favorite. A rolling pin or tool like this is helpful as well.
Lastly, for cutting your shapes, I have found this kit from amazon to be really helpful. I also use random lotion lids and a tylenol measuring cup – sometimes you gotta use what you have. For the monstera earrings, I used a 1.5″ clay cutter from etsy, but the shop is currently sold out. Here is a similar one on amazon.
How To Make Clay Earrings
- Clay, Sculpey is my favorite
- Rollers
- Clay Cutters – this is my favorite set from amazon, and I love this Etsy shop for more shapes(use code POLYMER15 for 15% off your $20 order!) I’ve got my eye on these cutters, but I haven’t ordered them yet
- J ump Rings
- Earring Posts
- Super Glue
- Jewelry Pliers
- X Acto Knife
- Parchment Paper
- Clay Softener
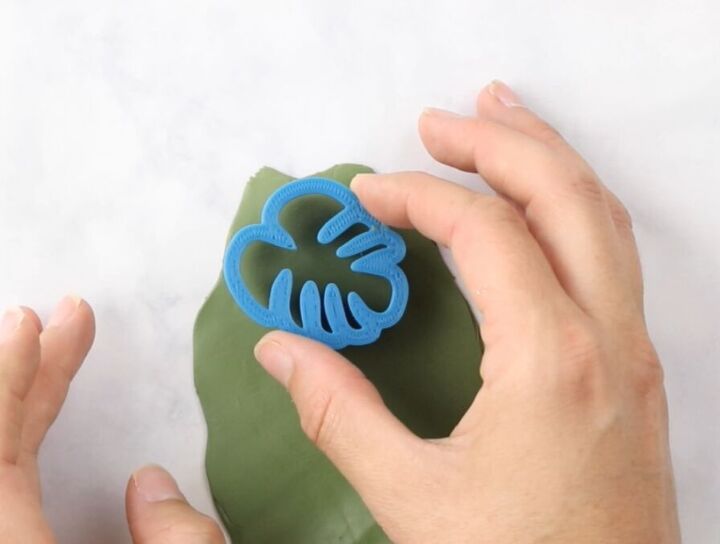
Start by rolling out your clay flat with a rolling tool. Once it’s nice and flat without any bubbles, go ahead and press your shapes.
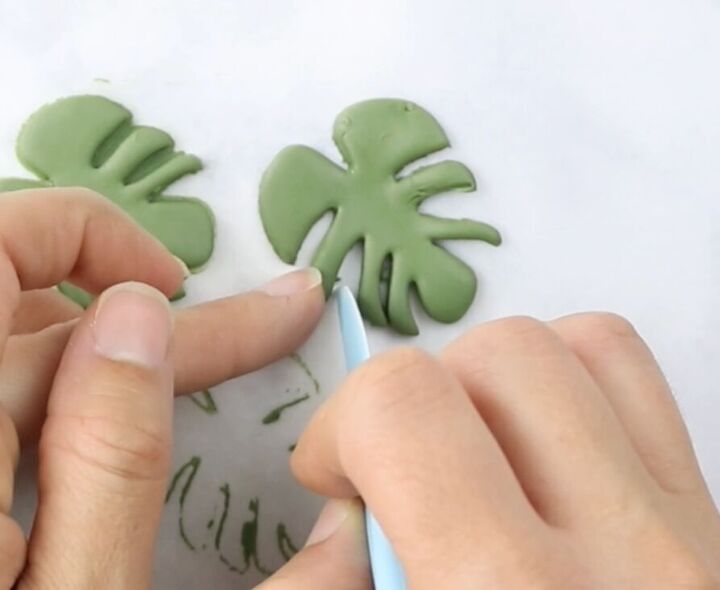
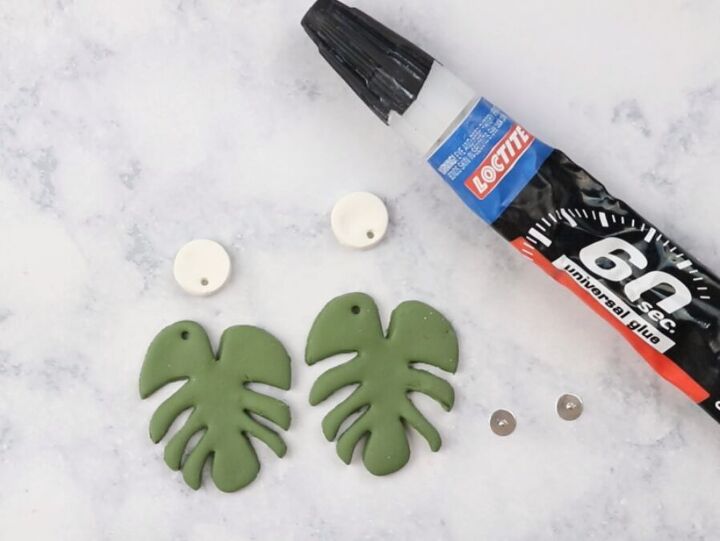
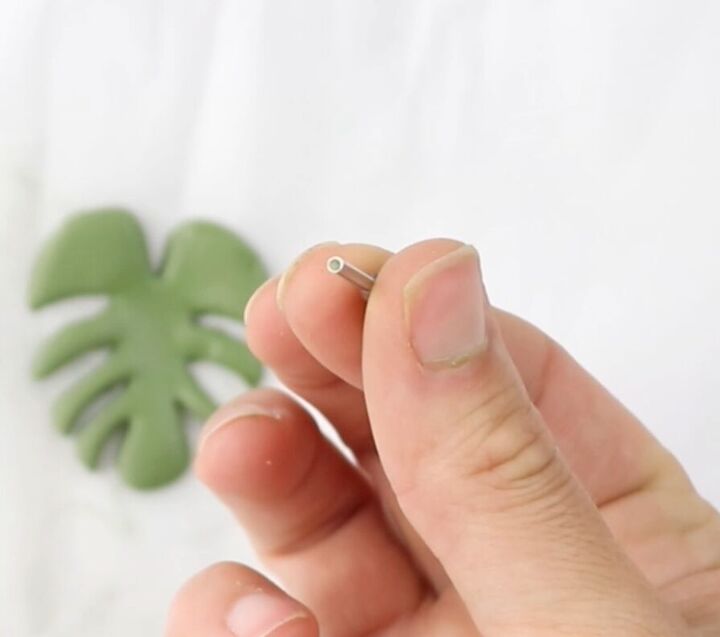
The next step is to clean up any mess ups with your x-acto knife and go ahead and cut the holes for the jump rings. This part is very important, make sure the holes you are making for your jump rings are big enough! If they are too small, you won’t be able to finish your earrings and it’s such a bummer once they are baked. So I recommend buying this cutter kit from amazon and these jump rings so you can be 100% sure the jump rings will fit. I use the SILVER end of the brown cutters in that set.
Once you have your pieces cut, preheat your oven and follow the package directions to bake your clay. Allow the clay to cool completely before assembling the earrings.
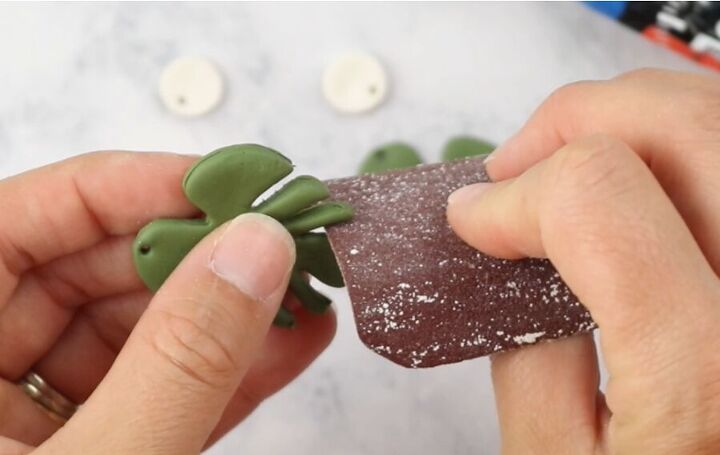
For these monstera clay earrings, I did find it helpful to use a small piece of sand paper to clean up the edges after they had baked and cooled.
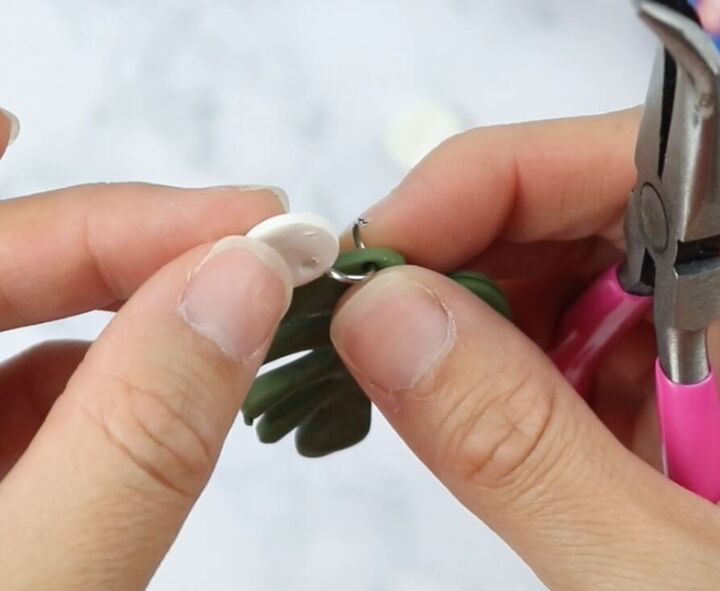
Using your 2 pliers, open up your jump rings and assemble the earrings. Lastly, dip the earring posts in the super glue and adhere them to the back of the earrings. Make sure the glue dries completely before trying them on…I totally didn’t wait long enough when I first made my clay earrings and I kinda glued them to my ears 0_0
Variations
A couple of variations that I would recommend for these monstera clay earrings is doing a different color on the white button part. I think a black and white flecked color would be lovely, also I think painting the white clay a nice gold color would also make it really pop.
Another option is adding a fishhook style earring hardware, like this.
You can find this type of fishhook hardware here.
Thanks for joining me as I shared how to make clay earrings. If you make some for yourself, I would love for you to tag me on instagram, I am @raisingnobles
The author may collect a small share of sales from the links on this page.


Comments
Join the conversation
Very nice earrings :). I made some a few years ago that were of the giant multicolored philodendron that you can see in Florida. I have been using polyclay for ages and all brands and I find that even the off brands are great to work with but you may have to knead them more for more pliability to work with it. That is the secret, kneading. It may be due to packaging or they have gotten old but drying out can happen with the Sculpey and other well known brands. If you should have this problem, Add a little mineral oil to your hands to work into the clay and keep manipulating it. If you should make it too sticky just wrap in some plain white paper and let some of the oil leach out. I had 2 bricks of the white Sculpey that basically turned into rocks because they were old and the clay leached out what keeps it pliable. All I did was put some of the mineral oil / baby oil in a plastic bag, break up the clay and let it absorb the oil. Then I kneaded it to see if it needed more oil. You may have to really work it and sometimes I pounded it with a rolling pin but it worked out well. I strongly suggest to anyone interested in polyclay that you google info on it you would be surprised at its versatility and what people make with it, from museum pieces to kids play stuff. Also it is non toxic. Good luck.
I love these earrings, but have a suggestion: make them so they're not both facing the same way- they're more interesting that way. 😁