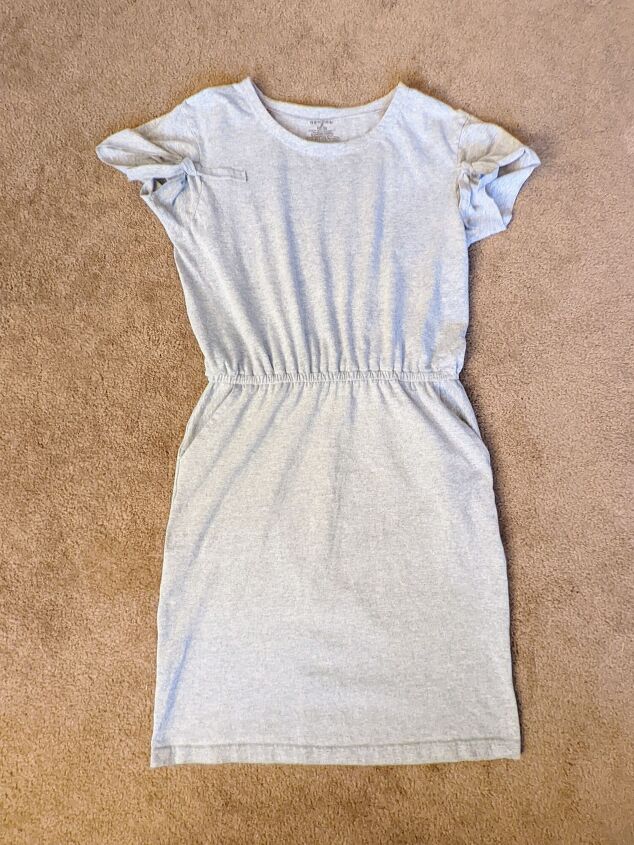
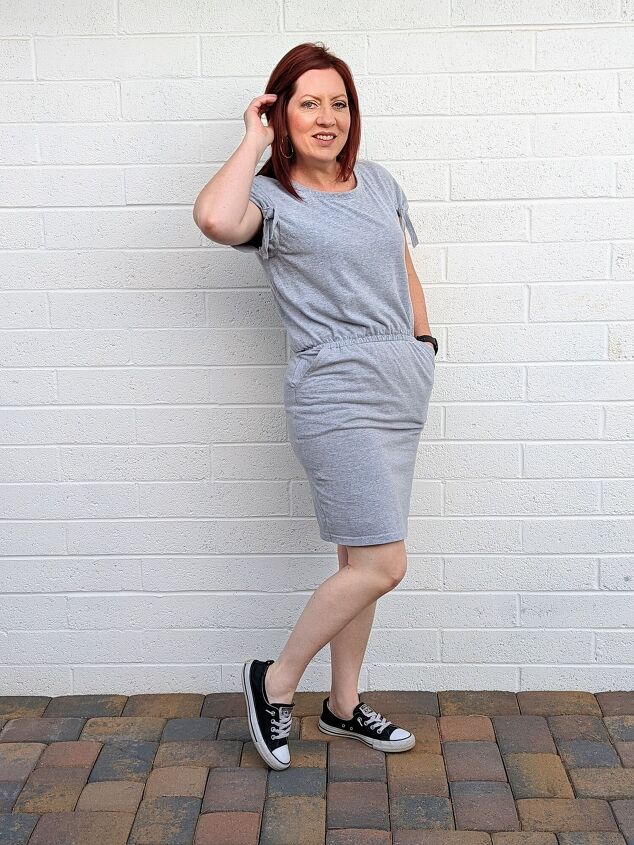
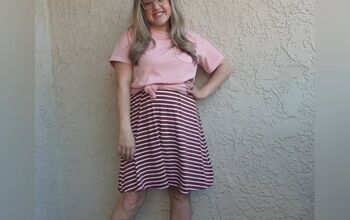
Not You Average T-shirt Dress!

I recently inherited several gray shirts from my oldest son when he moved out. Two of them matched perfectly except one was thicker than the other. What do you do when you have two almost identical t-shirts in your size? How about combine them to make a t-shirt dress? T-shirt dresses can be kind of plain and frumpy, but not this one. It was definitely NOT going to be your average t-shirt dress. This one was going to have some upgrades.
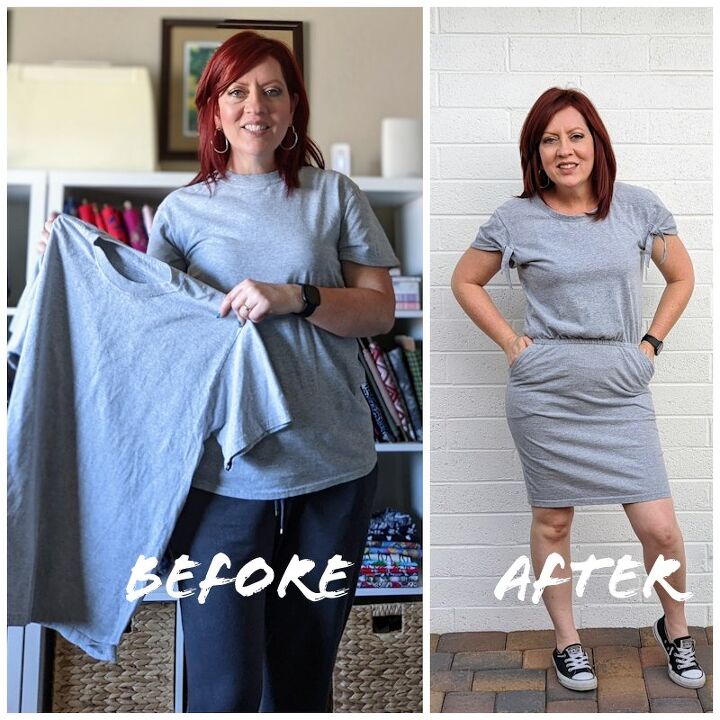
The Upgrades
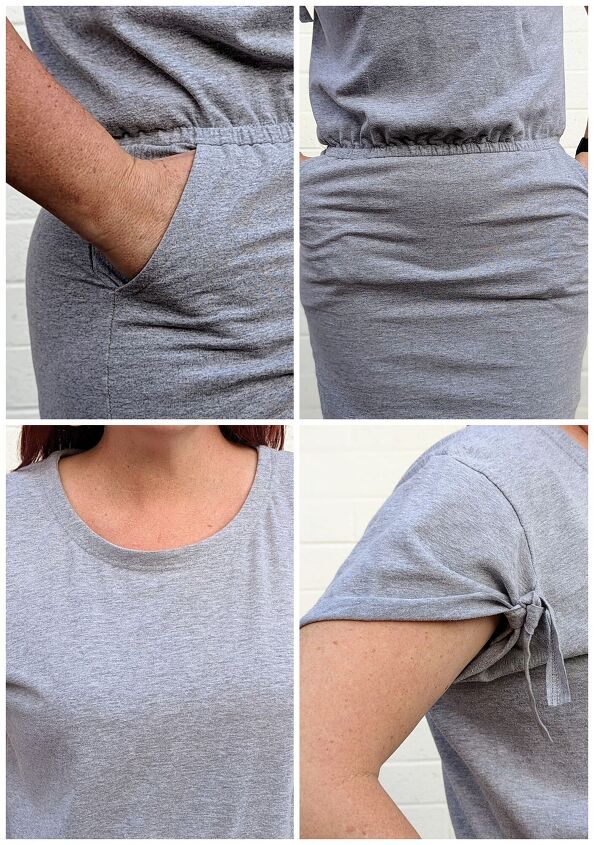
- Pockets
- Elastic casing around the waist.
- Get rid of the ribbed neck band and add a neck facing.
- Shorter sleeve with a tie detail.
The Bottom
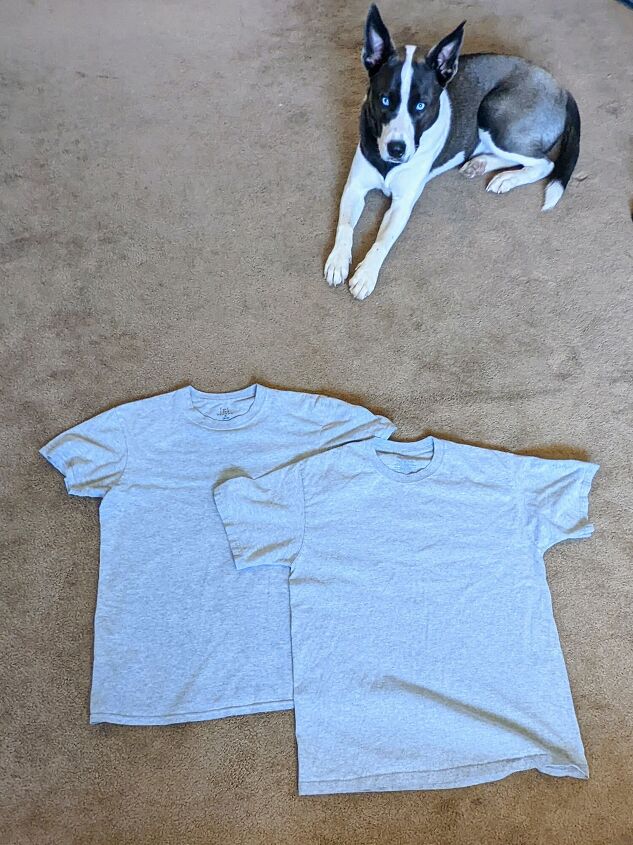
Both of these t-shirts are a size men’s medium. As I mentioned, one of them was thicker than the other. The thicker one was going to be the bottom of the dress and the thinner one was going to be the top.
Here’s what you do:
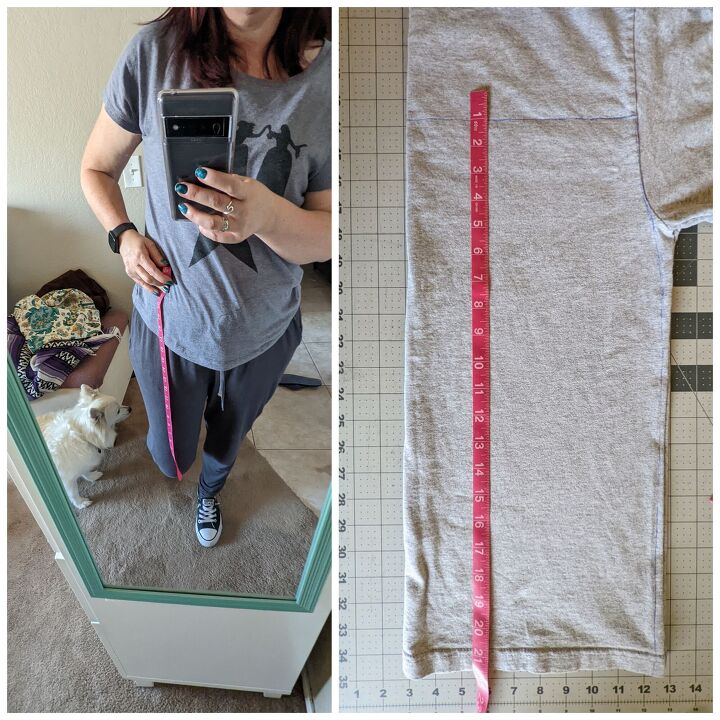
Measure from your waist down to the length you want the skirt to be and add 1 inch for the elastic casing. You won’t need to add any for the hem because you will use the existing hem.
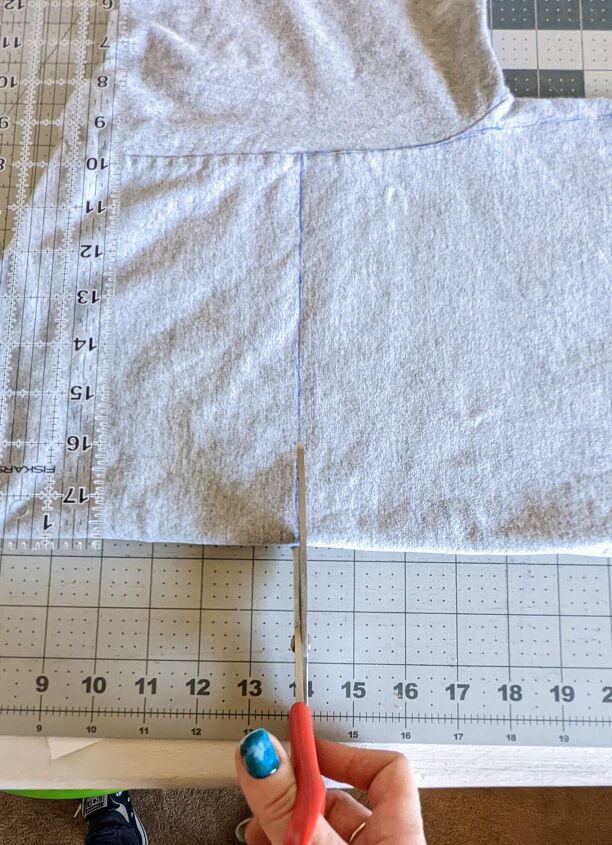
Then on the shirt, measure from the hem up the length that it needs to be. I used a disappearing fabric pen to draw a line across the top and down the sides, mimicking a pencil skirt shape. Then, cut it out. Both the front and the back will have the same shape.
The Top
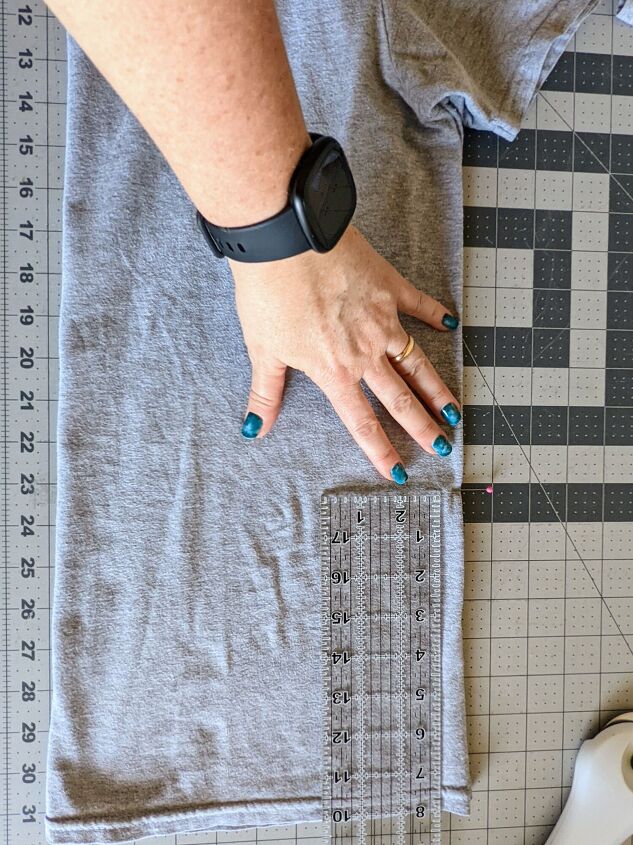
First, shorten the top to 3 inches below your natural waistline. You will use the fabric you cut off for the pockets. If you cut off less the shirt part will blouson more at the waist.
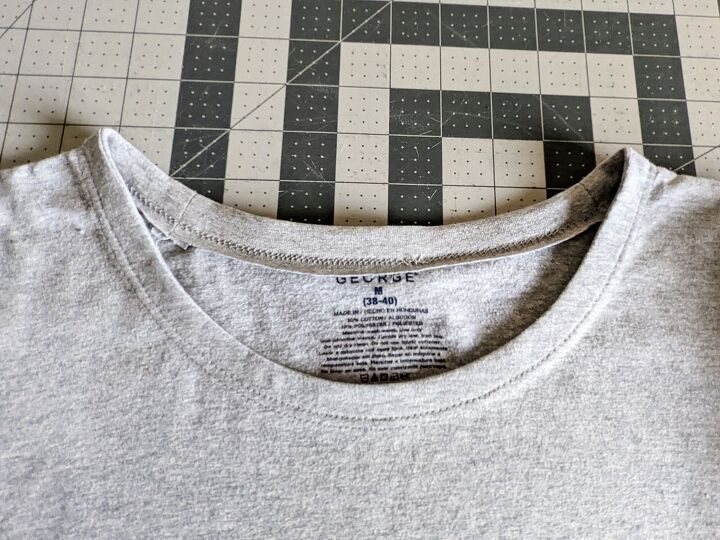
The Neck Facing
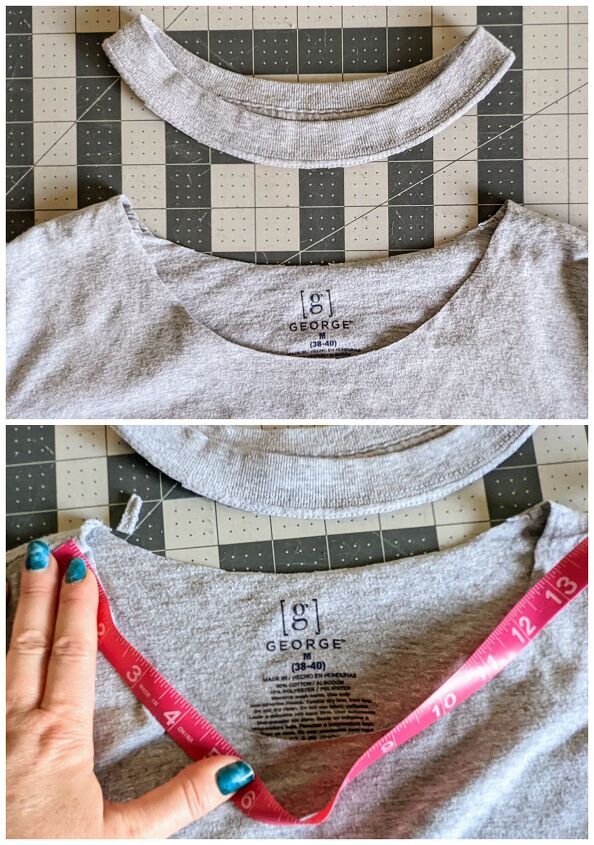
This next part is optional. I didn’t want the top to be a crew neck so I cut the ribbing off. I was going to do a facing instead. To do this, once you cut the ribbing off, measure around the neck opening and subtract 2 inches. My opening was 26 inches so I cut out a facing piece that was 1.5 x 24 inches. It needs to stretch a little for the facing.
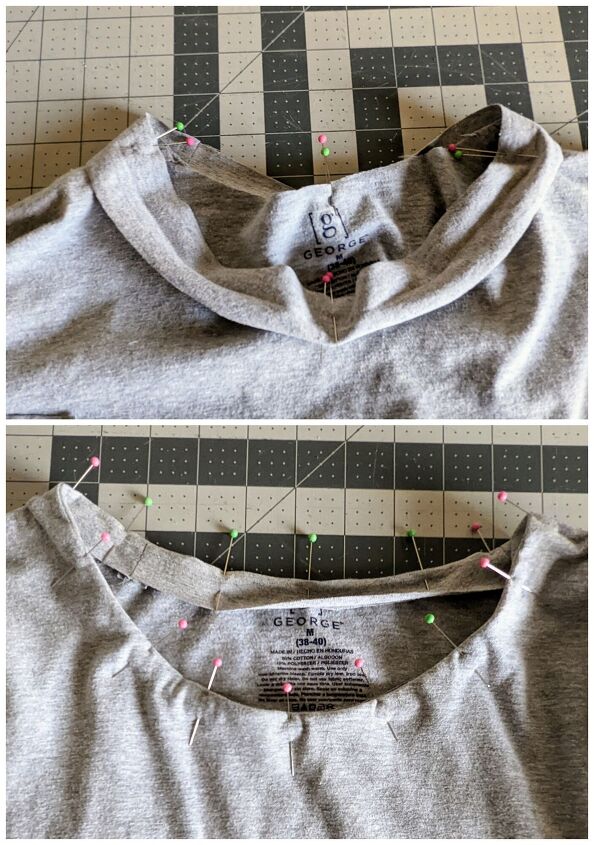
Make sure the stretch of the fabric is going the long way so it will stretch around the neck. Sew the short ends of the facing together to form a circle, mark the quarter points on both the shirt and the facing and pin them together.
I used a narrow zig zag stitch to attach it to the neck, right sides together. Then I turned the facing to the inside and stitched it again, but this time I used a twin needle so It would have a professional look. If you need help figuring out how to use a Twin Needle Blue Print DIY has a video.
I have another post here that shows you another shirt I did this type of neck facing on. It helps to iron the facing in place before you do the twin needle stitching.
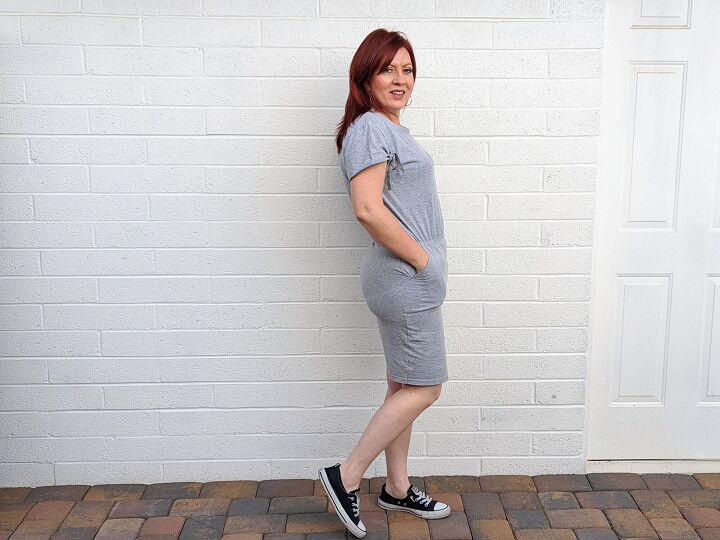
The Pockets
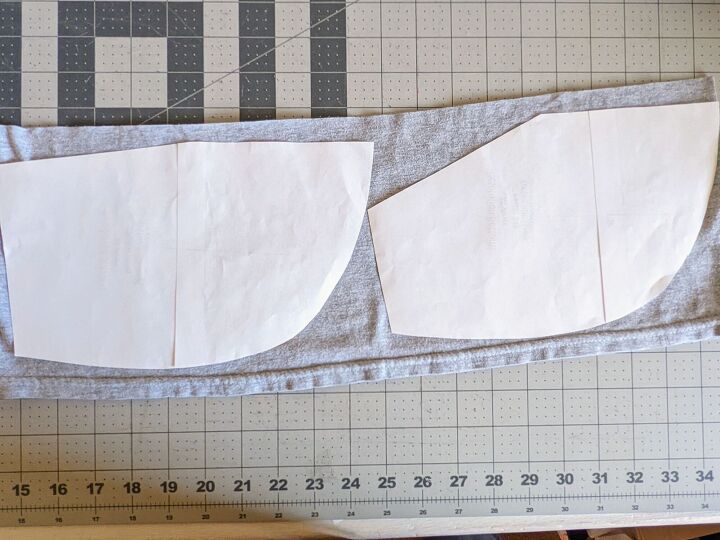
Cut the pockets out using the portion that was cut off the bottom of the shirt. Then, shape only the front of the skirt to fit the pocket. If you need to see how I made the pockets check this post here for two different options. Both would work for this project.
Assemble the pockets and attach to the front of the skirt. Once the pockets are complete place the front and the back together and sew down the sides of the skirt.
Now it’s time to do the sleeves.
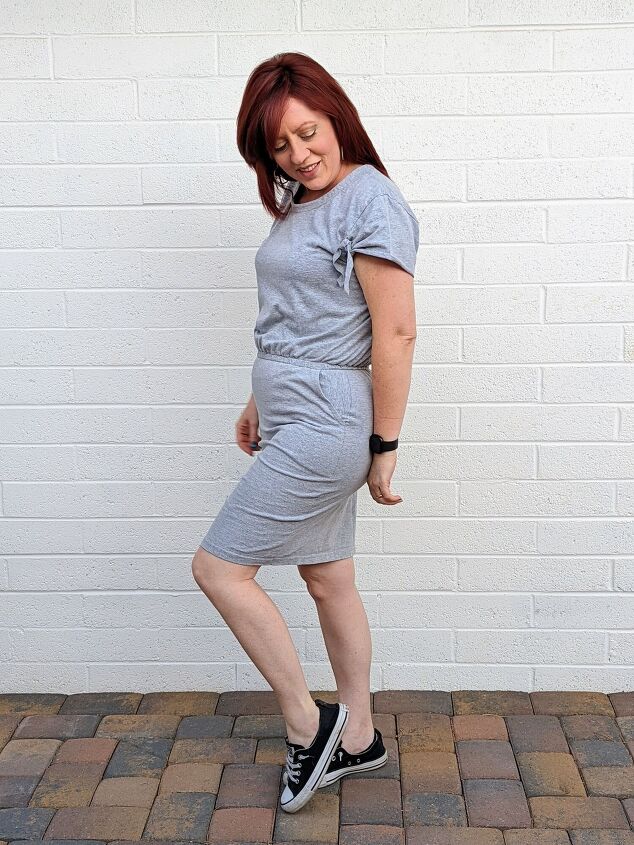
The Sleeves
This next part is my favorite thing to do with plain t-shirts! It gives it that little extra detail that makes it not your average t-shirt dress.
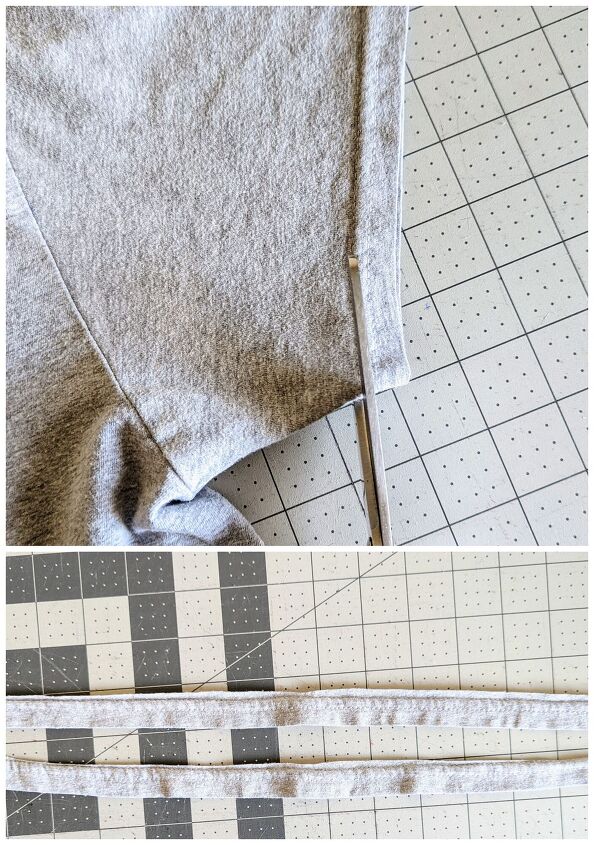
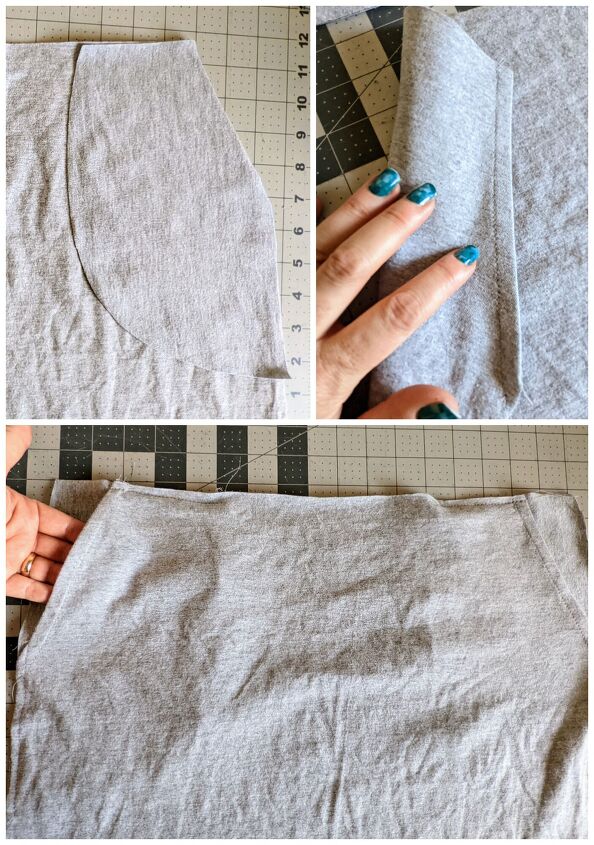
First, cut the hems off the sleeves of the shirt, but don’t get rid of them. Cut the seams on them so you have two strips of fabric.
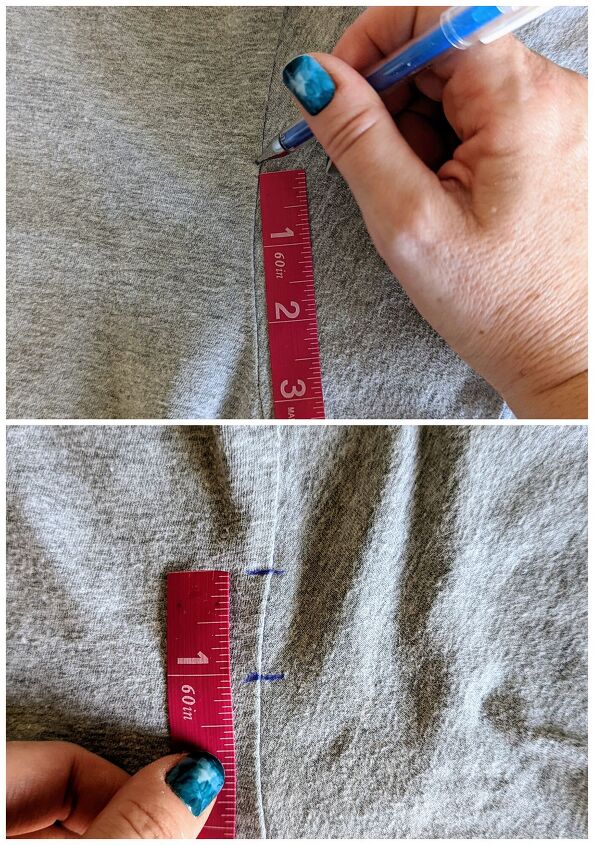
Then try the shirt on and mark just above the armpit crease. For me that was 4.5 inches from the seam of the sleeve. Make a mark there, then measure one inch up from that marking and make another mark.
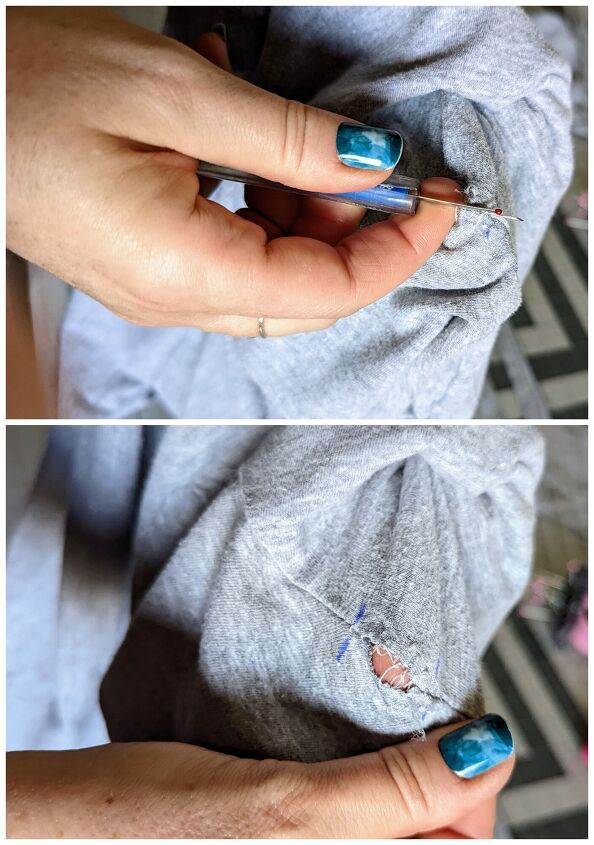
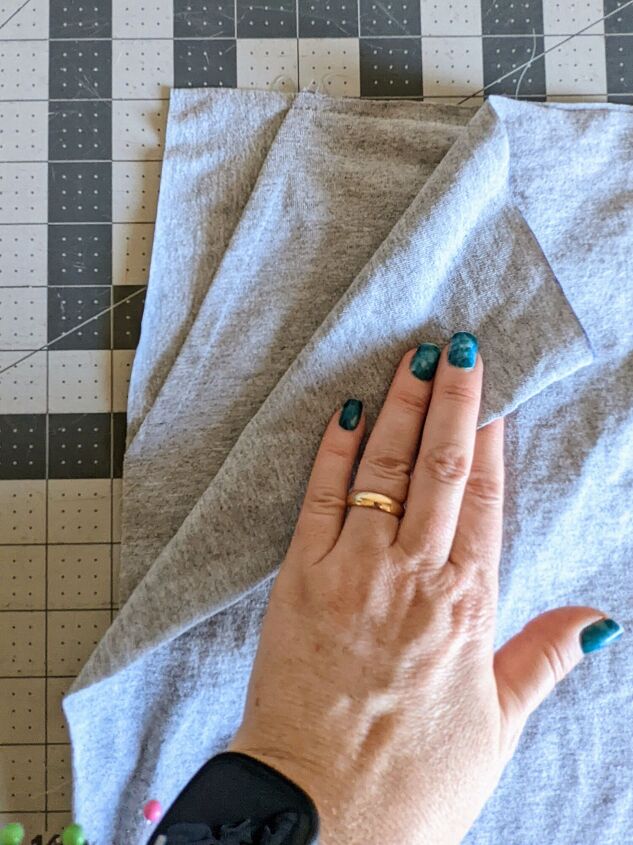
Seam rip that 1 inch section between the marks only. That makes a little 1 inch opening. Ok here's the cute part.
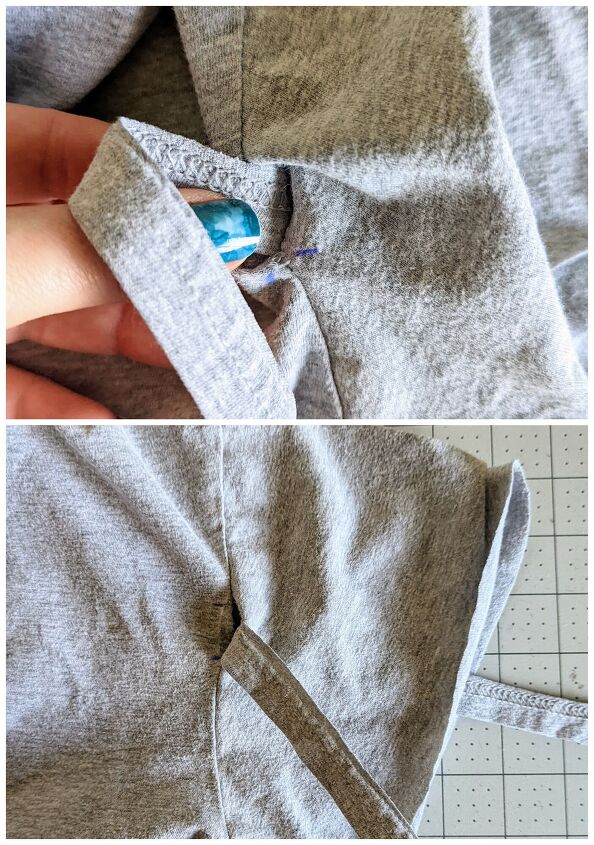
Take those hem strips that were cut off from the bottom of the sleeves and lace it through the one inch opening. Pin it in place and sew the hole closed.
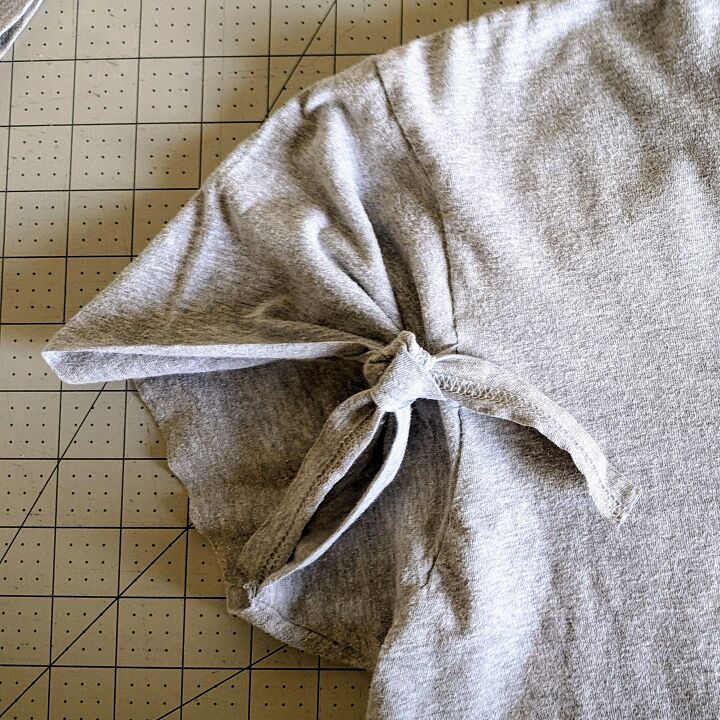
Then tie the little strips in a knot and it makes the sleeves look super cute! The edges of the sleeve roll up and you don't even need to hem them because it’s knit fabric that won't fray or unravel.
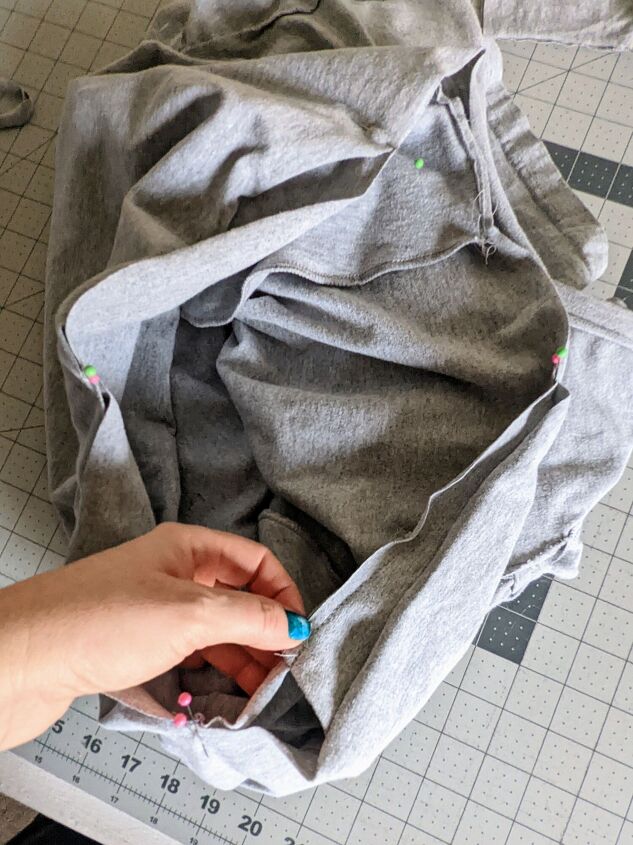
Connect the Top and Bottom
Once the top is completed it’s time to connect it to the bottom. Mark the quart points on both the top and the skirt and pin it in place. The skirt will need to be stretched a bit to fit the top which will make it blouson. I love that look!
To make the elastic casing mark the quarter points where the shirt and skirt will join. Attach the skirt to the top using a serger of zigzag stitch just on the edge. Then do a 1 inch seam, I used a lightning stitch but you could use a narrow zig zag. It should look like the picture below.
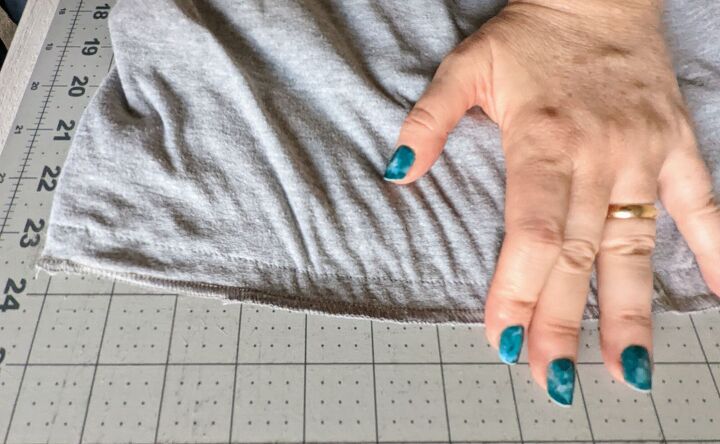
Then turn that seam allowance up toward the top and press and pin in place. Stitch that in place, close to the edge, all the way around the dress with a zigzag stitch. Leave a 1 inch opening in the back to get your elastic through.
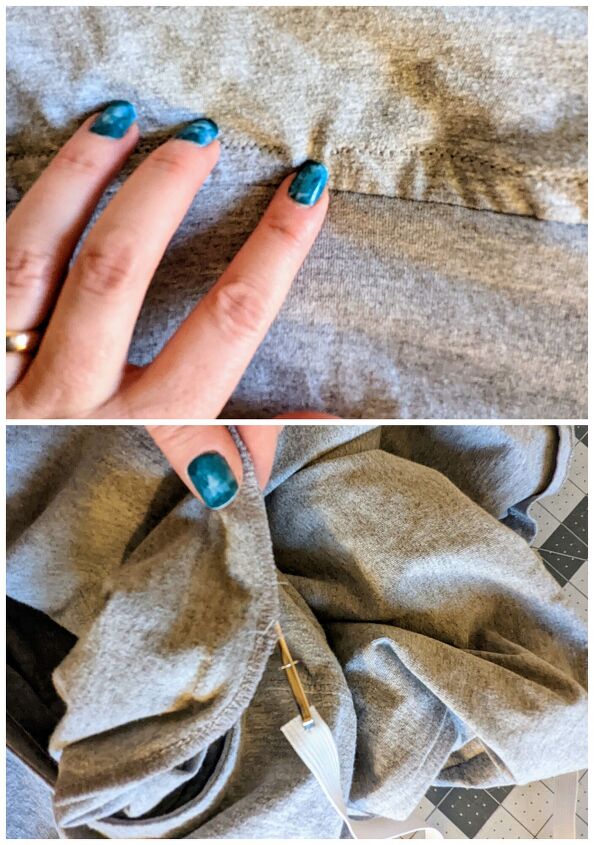
Measure your waist and subtract two inches. Then cut a ½ inch elastic to that length. Using either a safety pin or bodkin, run the elastic through the casing that was just created. Sew the ends of the elastic together and stitch the opening closed. You are finished with your Above Average T-shirt Dress!
I want to say this took me around 2 hours to complete. You could also skip the pocket part and just do the sleeve ties and that would be super cute too. Also much faster.
Now you have a cute dress ready to go for spring, which is right around the corner for me. I would love to do this with darker color t-shirts so I could spray bleach it like my son did with his shorts here.
Let's keep in touch! Check out my fashion inspiration on pinterest or see what else I’ve been up to over Instagram or my blog.
Thank you for reading! Have you started sewing for sping yet? Let me know in the comments what your favorite season is! Mine is Spring.

The author may collect a small share of sales from the links on this page.


Comments
Join the conversation