This Glitzy DIY Christmas Party Dress is Perfect for the Holidays

Need a glitzy party dress for the holidays? In this tutorial, I'll show you how to make a DIY Christmas party dress! It’s shimmery, sparkly, festive, and very sexy, with a deep V in the front and an open back. Let's get sewing!
Tools and materials:
- Sparkly fabric - 2 yards
- Lining - 2 yards
- Sewing machine
- Serger
- Invisible zipper presser foot
- Zipper - 12 inch
- Slider and rings for adjustable straps
- Needle and thread
- Measuring tape/ruler
- Marking or tailor’s chalk
- Iron
- Safety pin
1. Make the top pattern
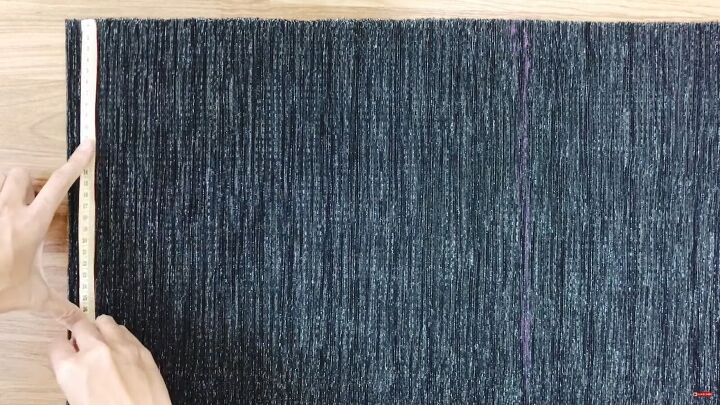
Fold the sparkly fabric in half. Measure a rectangle 16 inches (half your bust size) by 12 inches (from the shoulder to just under the bust). Cut it out.
From the left top side, go in 7 inches (¼ of the measurement under your bust).
Mark the top and bottom and connect in a straight line.
From that line, go down 6 inches (measurement from the shoulder to under the armpit).
On the right side, go in 4 inches and mark on the top.
From that mark, draw a line to connect to the bottom right corner.
Then, draw a curved line to connect those 3 marks together.
Mark the lining the same way.
Cut out the pieces.
Lay the lining and fabric right sides together, and pin.
2. Make the shoulder ties
Fold the fabric in half. Measure 2 rectangles 1½ inches wide by 24 inches long. Measure another 2 rectangles that are 1½ inches wide by 3¼ inches long.
Cut out the pieces. Fold the long ties lengthwise so the right sides are together.
Pin and sew with a straight stitch lengthwise.
Use a safety pin to flip the fabric inside out.
Insert the straps between the lining and the fabric at the top of the triangles. Pin in place.
Fold the short ties lengthwise. Pin and sew with a straight stitch down the length of the tie. On the outside of both of the bodice triangles, measure 6 inches from the bottom. Mark the spot.
Add a ring to the short tie and fold the tie in half. Sandwich the tie inside that 6-inch mark. Pin in place.
3. Sew the top pattern
Sew the sides of both triangles, sewing the ties in, leaving the bottom unsewn.
Iron the fabric.
Serge the bottom of the triangles. Sew a basting stitch about ¼ inch in to gather the fabric at the base of the bust. Only gather in the inner corner of the bust area.
Make sure the width of the triangles is half the measurement just under your bust.
4. Make the waistband
Measure 2½ inches wide by 29 inches long (measurement of your ribcage under your bust, plus 1 inch). Measure the same for the lining. Cut the fabric.
Fold the waistband in half widthwise and mark the center. Unfold the waistband and place the mark in the center of the 2 triangles. Do the same technique for the lining.
Place the lining behind the triangles, so both linings are together and the triangles are sandwiched in between. Join at the center first, working your way outward.
Sew about ¼ of an inch in from the edge.
After sewing the first stitch, sew another straight stitch right next to the previous stitch. Serge the ends of the waistband to connect the lining to the fabric.
5. Make the skirt
Fold the fabric and measure 36 inches across (hip size) by 20 inches long (preferred length). Cut. Do the same for the lining.
Baste stitch both fabrics to create a gathered effect at the top.
Make sure the gathered fabric matches your waistband exactly.
6. Sew the bodice to the skirt
Fold the bodice over the skirt, right sides together. Lay the lining underneath, so the bodice is sandwiched between the fabric and the lining.
Pin the edges first, working your way towards the center, while making sure the gathers are evenly distributed. Sew with a straight stitch. Then sew a second straight stitch.
Serge the two side seams and the hem.
7. Install the zipper
Bring the side seams to the back.
Place the closed zipper to the left side first and pin in place at the top. Then pin the zipper to the top on the right side. Open the zipper. Pin the zipper down on both sides.
Install an invisible zipper presser foot on the sewing machine. Sew the zipper in place.
8. Finish the dress
Pull the bottom of the zipper out. Sew up the back center seam with a straight stitch. In my case, I needed to hand-sew the top of the zipper down.
The last step is to connect the long ties in an X shape in the back. Install the slider on the long tie. Insert the tie into the already attached ring on the short tie (similar to a bra closure so you can adjust the strap length).
Once you’ve folded the fabric into the rings, sew the open end of the tie to close the loop.
DIY Christmas party dress tutorial
There you have a beautiful DIY Christmas party dress you can make today and wear tonight! Let me know in the comments if you made this dress and share your photos! Merry Christmas & Happy Holidays!
Enjoyed the project?
Suggested materials:
- Sparkly fabric - 2 yards
- Lining - 2 yards
- Sewing machine
- Serger
- Invisible zipper presser foot
- Zipper - 12 inch
- Slider and rings for adjustable straps
- Needle and thread
- Measuring tape/ruler
- Marking or tailor’s chalk
- Iron
- Safety pin
The author may collect a small share of sales from the links on this page.


Comments
Join the conversation