How to DIY a Cute Vintage Upcycled Bag

I found two handmade, probably vintage, crocheted placemats at the thrift store.
I was pretty sure I had the perfect item in my stash to upcycle them into an adorable DIY crochet bag for spring.
Upcycling vintage items to give them a new lease of life is one of my favorite things to do, because they’re usually so well made.
Upstyle Recommends!
Tools and materials:
- 2 crocheted placemats
- Toning or contrasting knitted belt
- Button
- Pins
- Sewing machine
- Hand sewing needle and thread
1. Prepare your materials
I’m not doing anything too fancy here. The tie belt from my stash is going to be the bag strap.
The first thing I’m going to do is overlap the ends and sew them together.
I’m going to put the join at the bottom of the bag, so it won’t be visible on my shoulder.
I sewed the ends together securely, going back and forth a few times until I felt confident they weren’t going to come apart.
2. Attach the strap to one placemat
The placemats weren’t perfectly round and I could see there was an obvious seam where the final section had been joined. I decided to put that part at the bottom of the bag.
Also the mats had a scalloped edge which I wanted to use in my design.
Placing the strap inside the scalloped edge meant that the strap would become the base and sides of the bag but would be concealed by the scallops.
I laid out one placemat with the wrong side uppermost.
I placed pins at approximately the “ten-to-two” position because that’s where I wanted the sides to end and the shoulder strap to start.
That way I would get a generous opening to the bag without it being so open that items could fall out.
I pinned one long edge of the strap at the point where the scallops joined the main section of the placemat.
I sewed it using a tight, wide zigzag stitch to stop it stretching too much, and went over it a few times for extra strength.
3. Join the second placemat
This took way more thought than I expected it to and I got it wrong twice before I figured it out.
I laid out the first placemat with the right side uppermost.
I put the second one on top with the right sides together and matched the scallops as best I could.
I had to fold the first scallops inwards so they didn’t get caught in the stitching.
I pinned the free side of the strap to the wrong side of the second placemat and sewed it in the same way as I did the first.
Luckily, this time it worked and came out just as I intended.
4. Add a closure
When I put the bag on my shoulder I realized it needed a closure of some kind, otherwise the top was going to flap open.
I found a cute flower button in my stash, that I hand stitched onto the lower flap.
That meant I could use one of the decorative holes in the upper flap as the buttonhole.
Vintage upcycled bag
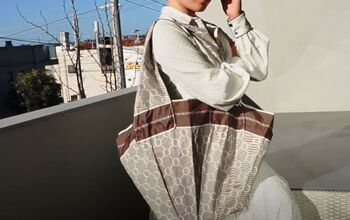
Isn’t this vintage upcycled bag so adorable? The strap is long enough for me to wear it crossbody, which helps support the bag as well.
You can line the placemats before you join them together and if yours are lacier than mine, I would certainly suggest you do that.
I always keep fabric and knitted belts that come with my thrifted items, because even though I rarely use them as intended, they’re often exactly what I need to create straps or trims when I’m thrift flipping.
If you want me to make a tutorial showing you how to add a lining to a bag afterwards, let me know in the comments below. And please, tell me what you think of my latest vintage upcycle project.
Next, learn How to Make a Waistband Smaller.
Enjoyed the project?
Suggested materials:
- 2 crocheted placemats
- Toning or contrasting knitted belt
- Button
- Pins
- Sewing machine
- Hand sewing needle and thread
The author may collect a small share of sales from the links on this page.


Comments
Join the conversation