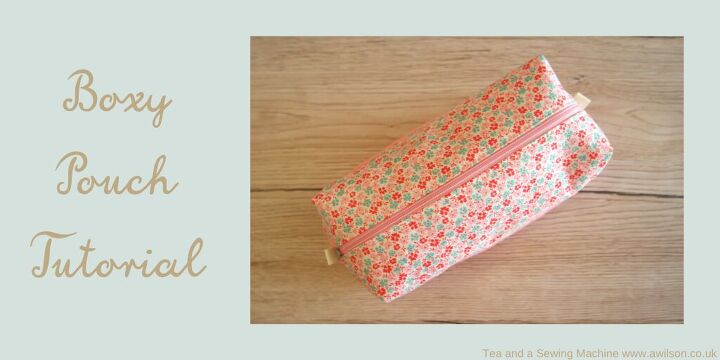
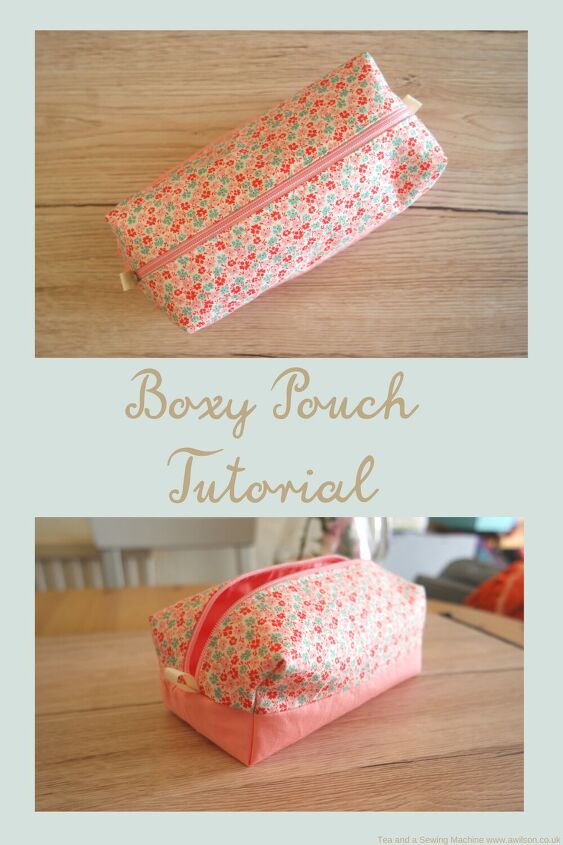
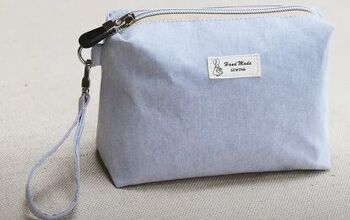
Boxy Pouch Tutorial
This post contains affiliate links.
Creativity is an odd thing sometimes. Usually I have lots of ideas, but this hasn’t been the case as much recently.
Alan Turing apparently had his best ideas in the bath, and I suspect there’s something in feeling relaxed that helps ideas to flow.
The current global situation is enough to make anybody feel the opposite of relaxed, so I suppose it’s not really a surprise that I haven’t felt as creative as I often do.
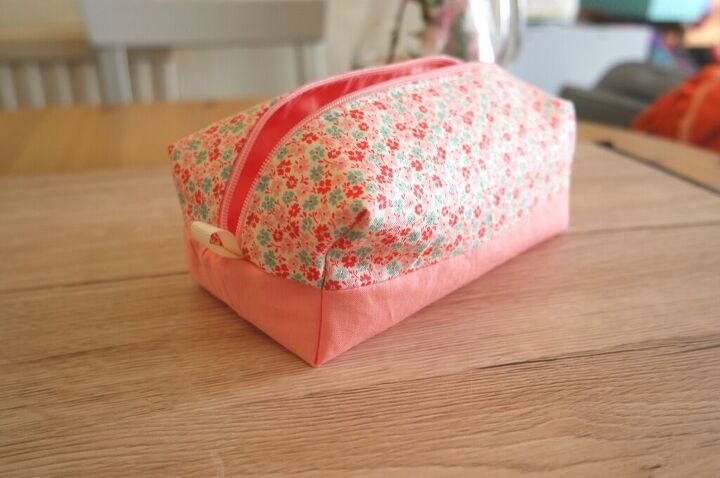
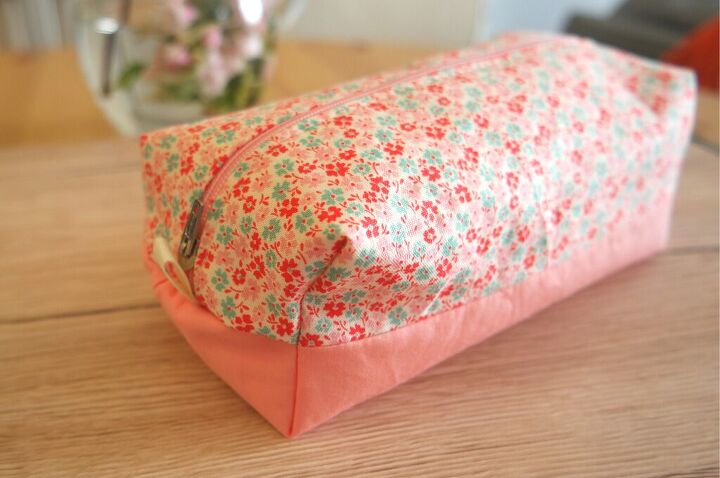
Anyway, last week I had an overwhelming urge to make something pretty. The fabric pile behind the bedroom door yielded a little piece of Tilda fabric, and some plain pink cotton. I also found an old bag that I’d kept, thinking that I could use the zips for something (the whole of the front panel is zips; it’s a weird bag). Last week that bag finally came into its own and I used one of the zips!
The size of the boxy pouch was decided by the length of the zip. And, as a word of warning, if you use a zip that doesn’t have things at the ends to stop the zipper thing coming off, pull it slowly! It’s tricky to get it back on once it’s come off.
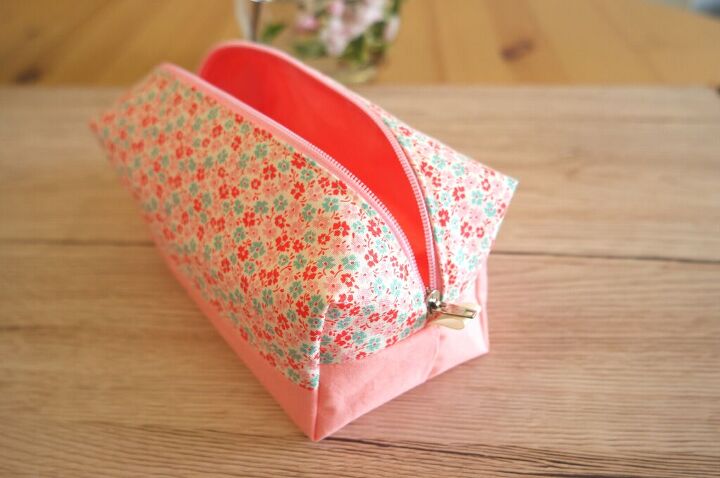
I used boxed corners on the ends to make the boxy shape, and I added ribbon tabs to make it easier when pulling the zip open and closed.
Instructions For Making a Boxy Pouch
You Will Need
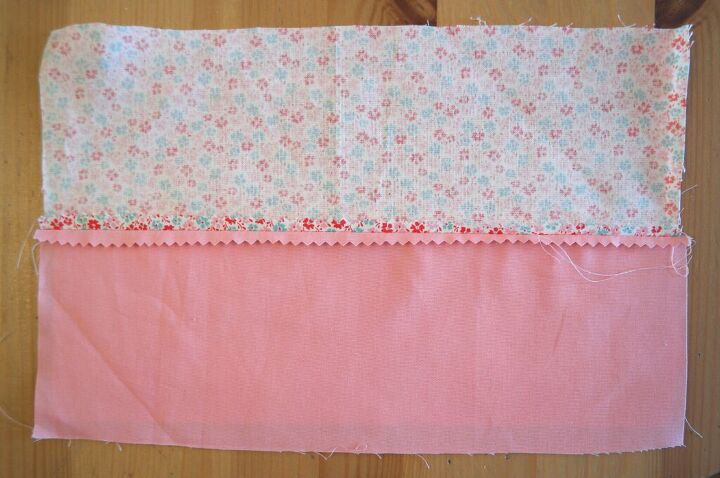
Cotton fabric for the outer and the lining. You could use the same fabric or a plain cotton with a contrasting print. I used a little bit of a print with some plain for the outer, and the same plain for the lining. If you are new to sewing you’ll find it easier to use one whole piece for the outer.
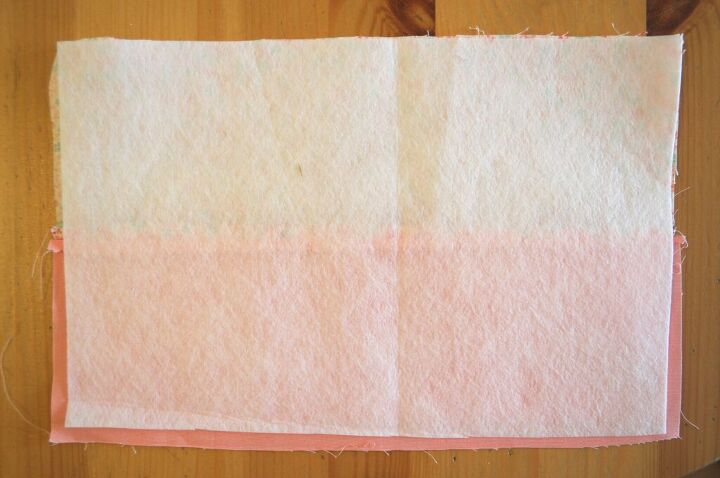
Interfacing. I like to use a medium weight sew in interfacing because it gives it some weight and just enough squodginess, but you can use what you have. Even lightweight interfacing will make a difference.
A zip. The zip I used was 26 cm long.
Ribbon or similar for the tabs (optional)
A zip foot (optional)
Cutting Out
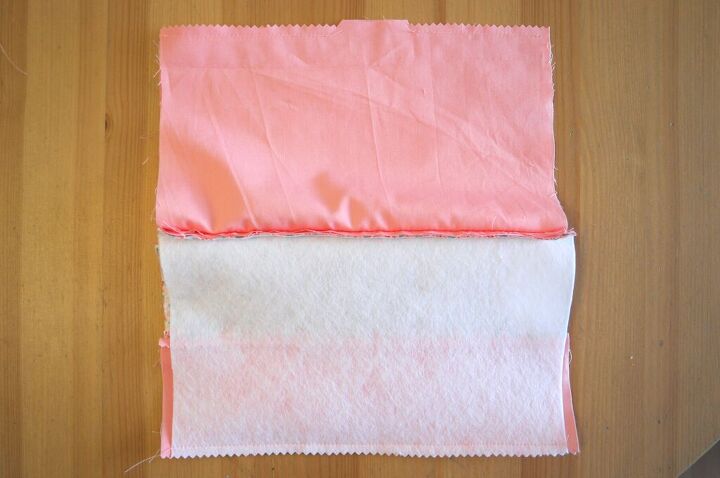
Cut 2 pieces of outer fabric 26 cm x 18 cm, 2 pieces of interfacing 26 cm x 18 cm and 2 pieces of lining fabric 26 cm x 18 cm.
To make the outer from 2 different fabrics, cut 2 pieces 26 cm x 10 cm and join them along the long edge.
The finished boxy pouch measures 27 cm x 8 cm x 7 cm.
If you want to make a pouch that’s a different size but has the same proportions, the long edge needs to be the same length as the zip, and the short edge needs to be 2/3 the length of the long edge.
Cut 2 pieces of ribbon 5 cm in length.
Sewing the Boxy Pouch
If you are joining pieces to make the outer, do that first.
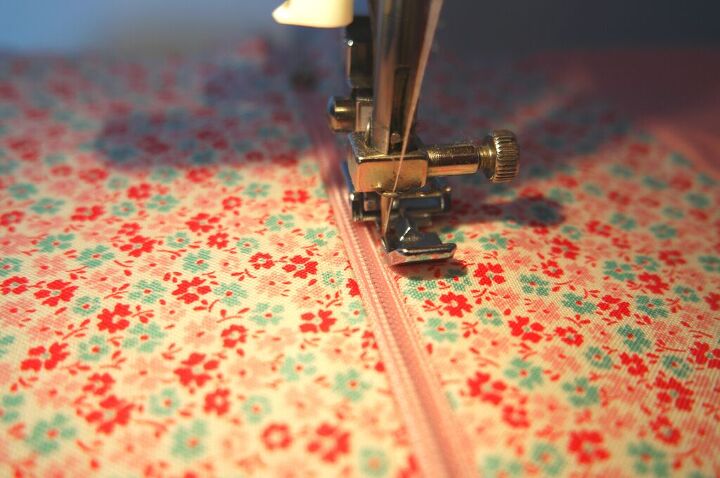
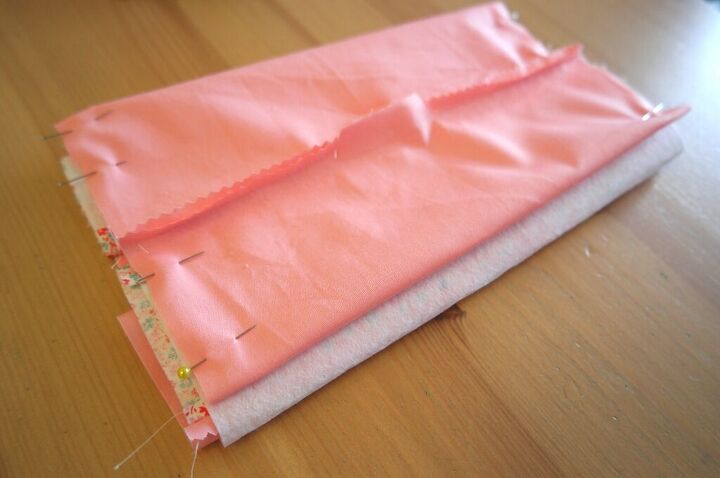
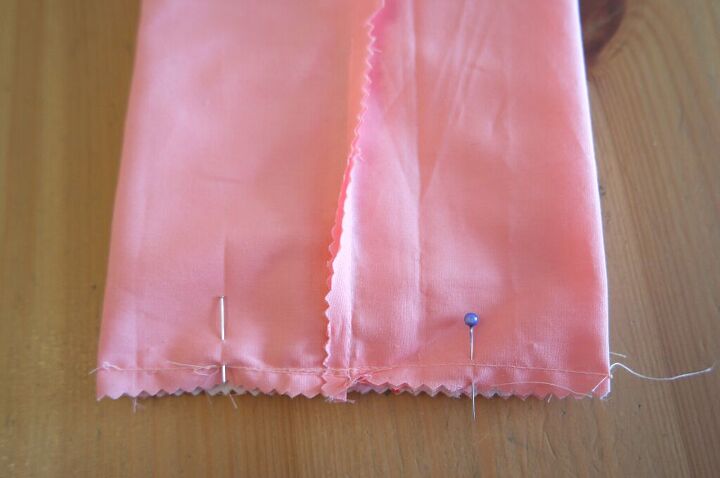
Take one one of the lining pieces and lay it down with the right side upwards. Position the zip on top of the lining, also face up, with the edge of the zip aligned with one of the long edges of the lining.
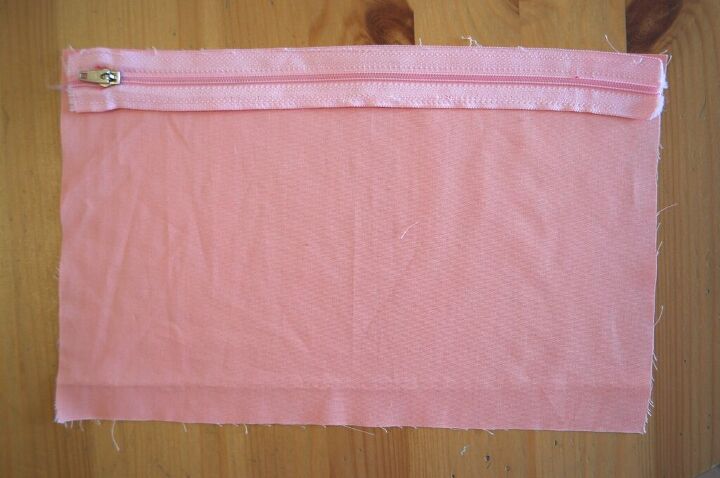
On top of this, place one of the outer pieces with right side down on top of the zip, and a piece of interfacing on top of the fabric. Make sure that the long edges are lined up and the zip is inside.
Pin it together, then sew along the long edge, leaving about a cm at either end. This is much easier to do if you have a zip foot, but it’s still possible if you don’t have one.
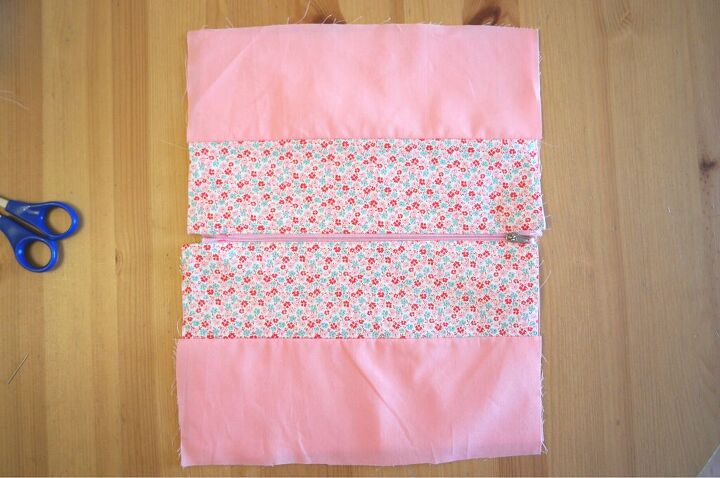
Fold the lining and the outer the right way out away from the zip. It’s a good idea to run the iron over it at this stage. As you are doing this, check that you have pulled the outer and the lining away from the zip. Otherwise you’ll end up catching things in the zip (guess how I know!).
Leaving a cm free at either end, top stitch the lining and the outer, keeping close to the folded edge.
Repeat these steps to attach the other lining piece, outer and interfacing to the other side of the zip.
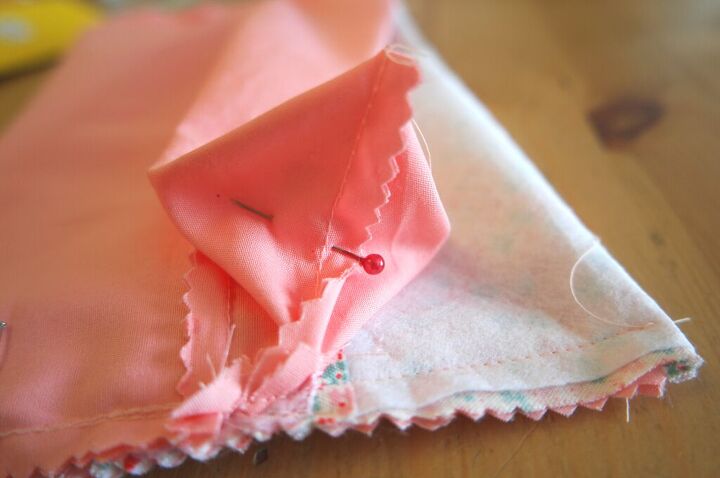
With the right sides together, sew the other long edge of the outer with the interfacing.
Repeat with the lining, but this time leave an opening.
Trim the seams.
Now open the zip a little way. This is very important! When you turn the box pouch out, it will need to go through the zip opening as well as through the gap in the lining, so make sure you open it enough!
Squash the lining and the outer so that the seams you have just sewn are aligned with the zip. Pin the short edges of the lining, then pin the outer and interfacing.
This is where it will make a difference if you remembered to leave a cm or so free at each end. If you didn’t do this, don’t panic! Just unpick a few stitches.
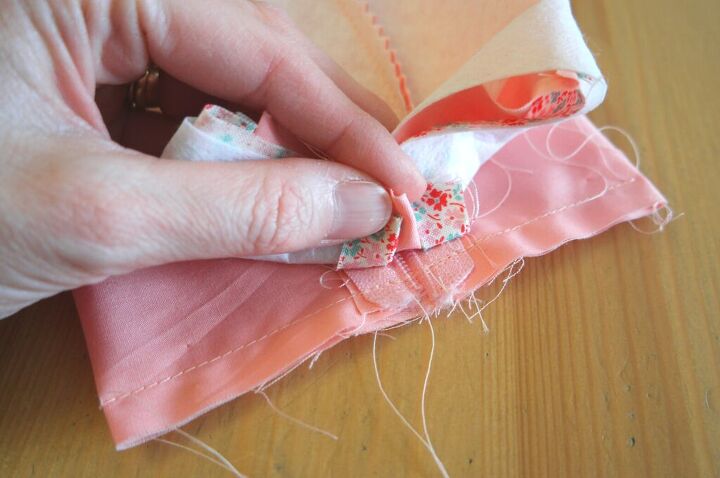
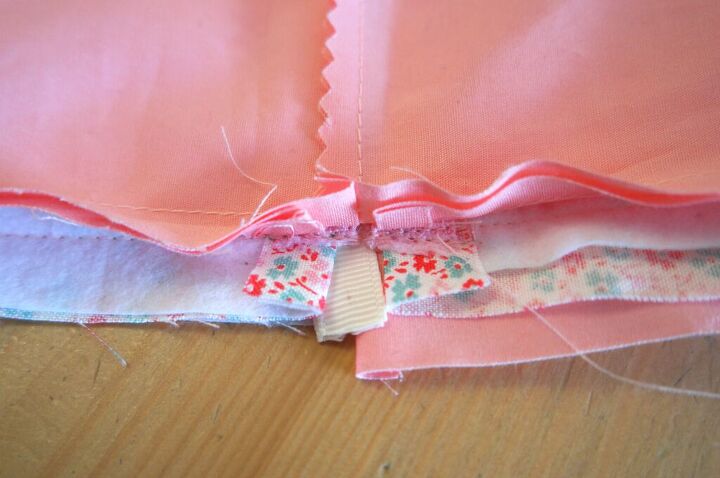
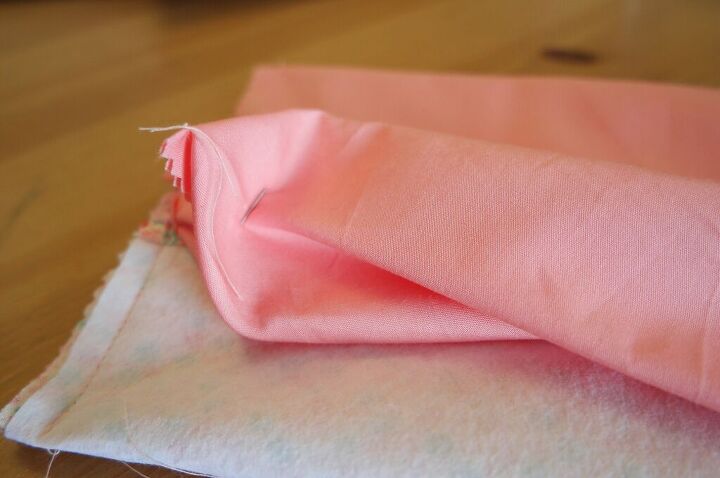
If you want your box pouch to have tabs, take a piece of ribbon, fold it in half and slip the folded edge inside the seam. Pin it in place, then do the same on the opposite side.
Sew the sides of the lining, catching the zip in the seam each time.
Repeat with the outer and the interfacing, again catching the zip in the seams. Trim the seams.
Making the Boxed Corners
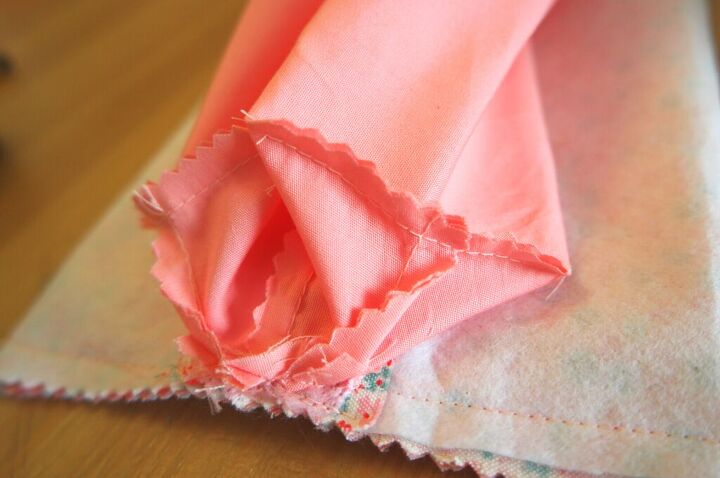
Find the half way point between one of the corners and the bottom seam. Mark it with a pin.
Press from the corner with your finger to crease the fabric. Now open out the corner and match the crease to the side seam. Pin the corner where you marked the half way point.
This is a bit fiddly and you might have to put your hand in through the gap in the lining to get the crease and the seam lined up.
Do the same with the rest of the corners of the lining, and with the outer.
If you would like a more detailed tutorial showing how to make boxed corners, there’s one here. Please note though that these were boxed corners for a bag and although the process is the same, it was less fiddly!
Sew across the corners at right angles to the seam. Cut the corners off. Trim away all the threads.
Finishing the Pouch
It’s time to turn it out! This is where I’m really hoping that you remembered to open the zip!
If you didn’t, unpick the side seam of the outer a little bit, open the zip a few cm, then resew the seam.
Push the corners of the pouch out. Handstitch the opening in the lining.
Now all you have to do is decide what to use your boxy pouch for! I think I might keep the pens I like to use for drawing in mine!

The author may collect a small share of sales from the links on this page.


Comments
Join the conversation