DIY Notions: How to Make a Drawstring
DIY notions: how to make a drawstring
1 Comment / Easy Sewing Projects, Learn to sew / By elizabethmadethis
Drawstrings are such versatile things, but do you know you can make them yourself?
I think we take them for granted. They hold up our pajama pants, top off a simple gift bag or cinch up inside a hoodie to protect us from the wind.
Yes you can use any stringy thing as a drawstring, but I want to make the case today that the best drawstrings are of the DIY variety.
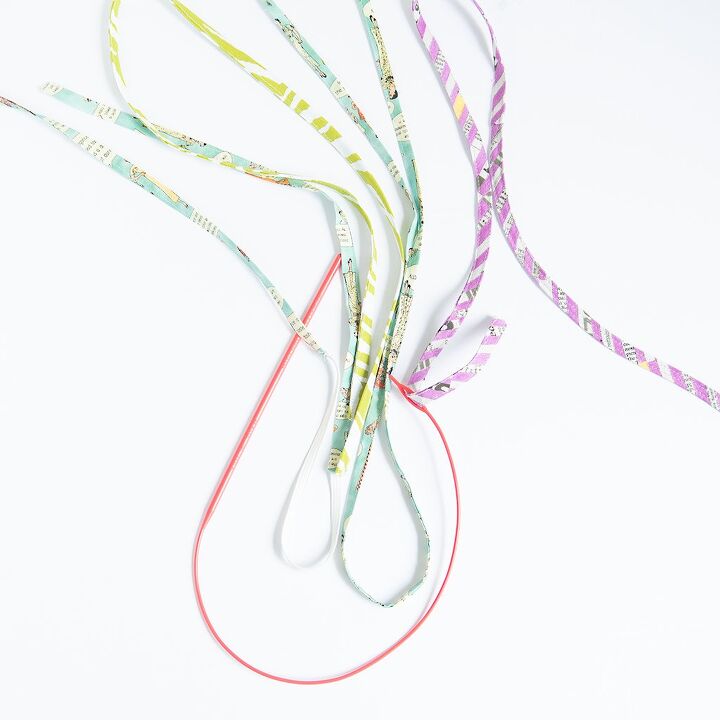
When you make drawstrings yourself, the colors and prints are up to you. A boring, afterthought, humdrum sewing can become a focal point. The best part: DIY drawstrings are super fast to make and you can make them from random scraps of just about any fabric.
I’ll show you how to make a drawstring from bias tape, straight cut fabrics, and also knits. By the end, I hope you’ll start to see the possibilities for this humble sewing notion!
Find your favorite tube turner and let’s drawstring!

Pin me on Pinterest!
Table of Contents
- What does a drawstring do?
- No sew drawstrings
- How to make a drawstring 4 ways
- The best fabrics for making fabric drawstrings
- How to make a drawstring: the tube method
- Pro-tip: use a stitch starter!
- Turn the tube
- How to make a drawstring: the fold and stitch method
- How to make a raw edged drawstring
- Drawstring + elastic: the specialty drawstring for pants that fall off you
- Add your drawstring to the casing
- Projects that use drawstrings you can try right now:
- Add a drawstring cowl to any t-shirt
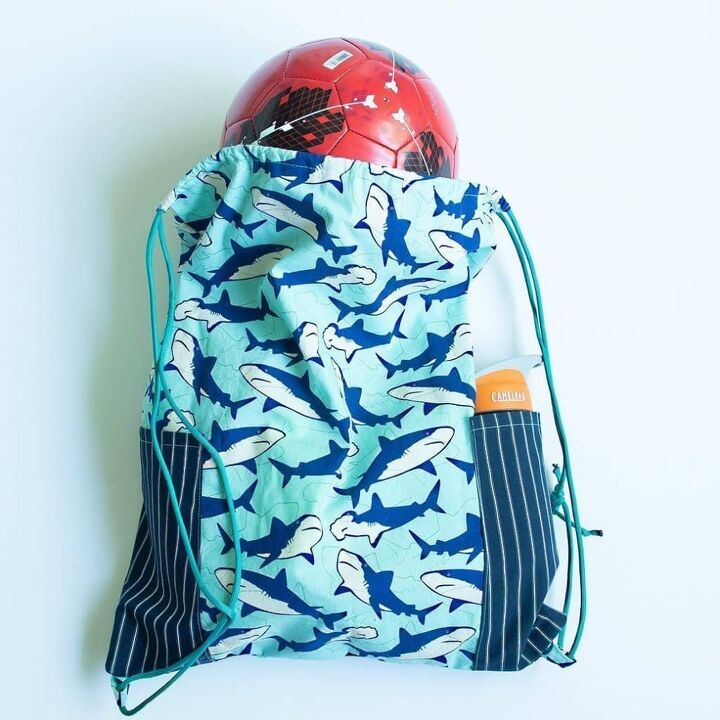
- How to sew a drawstring backpack
What does a drawstring do?
Drawstrings can be any ribbon, or string like thing that fits inside a casing. There’s either buttonholes, or grommets where the drawstring ends poke out. Tug on the ends, and the drawstring gathers up the fabric to fit our bodies better.
You’ll find them in casual pants, hoodies, dress waists and more. You can use them to ruche up fabric on sleeves or side seams or pretty much anywhere you want to add some gathering. And don’t forget about them inside of a classic drawstring bag.
No sew drawstrings
Yes this post is primarily about how to make a drawstring, but sometimes we need the easy button. Here a quick list for drawstrings you can use any time.
- Ribbon
- Leather lacing
- Shoelaces!
- Fold-over elastic: super soft and non-irritating inside a casing.
- Clothesline or other cotton cord: excellent for drawstring bags
- Paracord: nice for simple drawstring backpacks. Here’s how to sew an easy drawstring backpack.
- Twill tape: soft, lightweight and strong. Twill tape is a good all-around choice for just about all fabrics.
How to make a drawstring 4 ways
Now let’s break down how easy it is to make fabric drawstrings. There’s a few different ways:
- Sew a tube
- Fold and stitch
- Raw edged drawstring
- Drawstring + elastic: a specialty variation for waists
All these methods work well, though the tube method works the best with lighter weight fabrics and knits. The fold and stitch method will work for anything from light cottons to heavy denim. The raw edge is my favorite for bulk free knit drawstrings. Speaking of fabrics…
The best fabrics for making fabric drawstrings
Almost any fabric can make a great drawstring. The only caveat is to make sure that the fabric isn’t too heavy. If you’re not sure about a fabric, fold it in half 3 times.
Does it have a hard time folding together? Hard pass.
Think about how that fabric will feel once it’s inside a casing. If it’s soft, it’ll make a good drawstring.
Here’s some of my favorite fabric choices for diy drawstrings:
- Cotton quilting fabric: always fun!
- Bias tape: make your own bias tape or use packaged stuff.
- Cotton spandex knits: awesome in hoodies!
- Cotton jersey
- Double brushed poly jersey
- shirtings
- cotton voile
- linen
Once you’ve picked your fabric, here’s how to make a drawstring.
This page contains affiliate links. As an Amazon affiliate, I earn on qualifying purchases. If you purchase a product through one of them, I will receive a commission (at no additional cost to you). I only ever promote products that I use and love and I think you will love too. Thanks for supporting this blog!
How to make a drawstring: the tube method
Cut a strip of fabric 1″ wide. How long should you cut your drawstring? It depends, but I think that 36″ is a good all-purpose length. If you’re using bias tape, simply cut a piece of tape to the length you want.
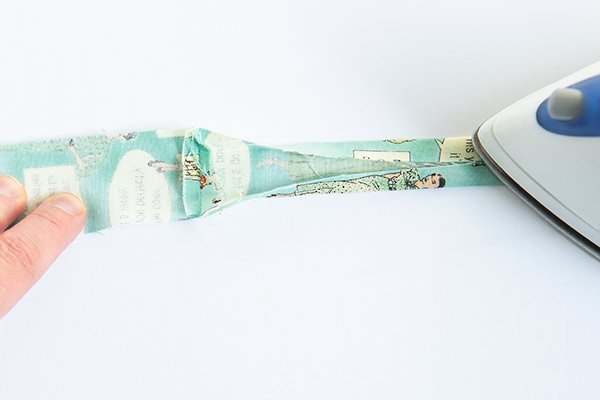
If you do use bias tape, open up the folds and press the tape flat.
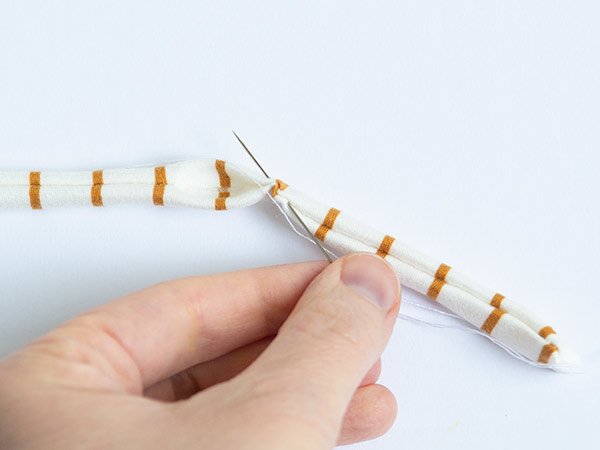
Pro-tip: use a stitch starter!
Next, fold the long edges right sides together. Grab a scrap piece of fabric. Start stitching on the scrap. This little stitch starter will help the drawstring from being sucked inside your machine.
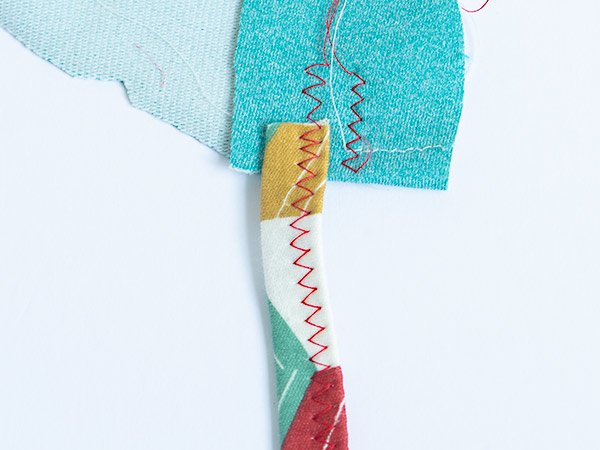
stitch starter!
Drawstrings are narrow creatures, and sometimes sewing machines will get grumpy with them! Believe me, I’ve had to rescue a lot of drawstrings out of the depths of my bobbin area before I figured this out.
After you’ve sewn a few stitches on your stitch starter, stitch down the short sides and the long side of your drawstring with a 1/4″ seam allowance. For woven fabrics, use a straight stitch. If you’re making a knit drawstring, stitch with a narrow zigzag (0.5mm width, 2.5mm length).
Turn the tube
Leave a small hole for turning along the long end.
I’m using these Turn-it-All Tubes for turning. There’s other tube turners out there that work fine, but these ones work the fastest and with the least effort.
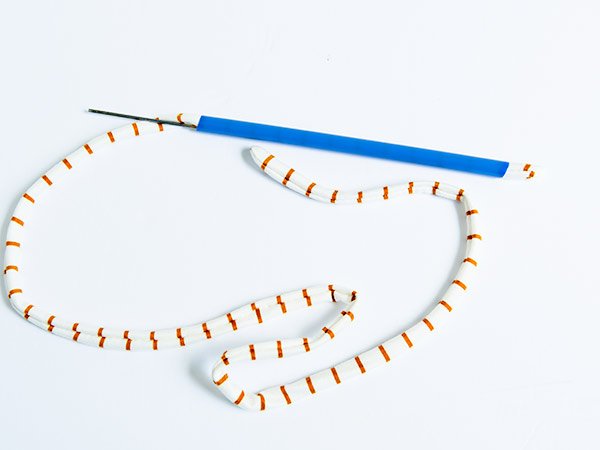
medium tube turner on double brushed poly
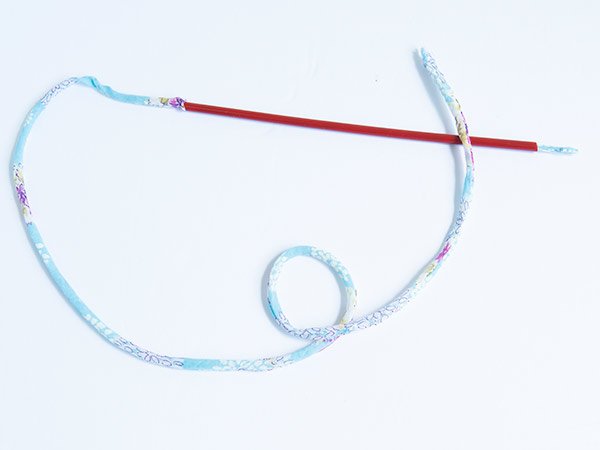
fine tube turner with cotton voile
Stick the appropriate width tube inside the hole down to one of the short ends. Use one of the sticks in the set to poke the fabric through the tube from the wrong side. The turned fabric will appear through the other side of the tube as you continue to poke the fabric through it.
Finish off your tube string by stitching up the tiny hole. You can do this by hand or machine. Yes the hand finish is nicer, but if the string is on the inside of your casing, your casing is the only one who knows!
Onto the fold and stitch.
How to make a drawstring: the fold and stitch method
This is crazy easy! Cut your piece of fabric 1 to 1 1/2″ wide.
Fold the raw edges of the long sides in toward the center and press with an iron and some good steam. If you’re using bias tape, it’s already pressed for you!
Don’t forget about the short sides. Press them in too. Also, be sure to clip the corners on the short ends. This will keep the ends of the drawstring from getting too bulky.
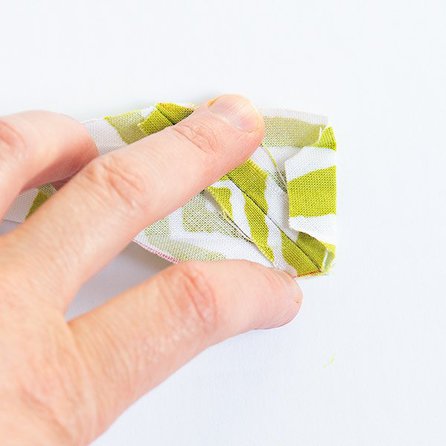

Fold the folded edges on top of each other and press down the middle.
From here, stitch down the sides close to the pressed edge, starting in the middle of the long side.
Why start in the middle? If you do this you can avoid having to use a stitch starter.
Keep the needle close to the edge as you stitch. For the best results, use a specialty topstitching foot like a ditch quilting foot to sew right on the edge.
It’s only necessary to sew down the pressed edges, but you can topstitch around the entire string if you like.
How to make a raw edged drawstring
I love this method for knit drawstrings. It’s a little more casual, but it makes for an ultra lightweight drawstring with zero bulk.
Cut your 1″x36″ strip of knit fabric on the cross-grain.
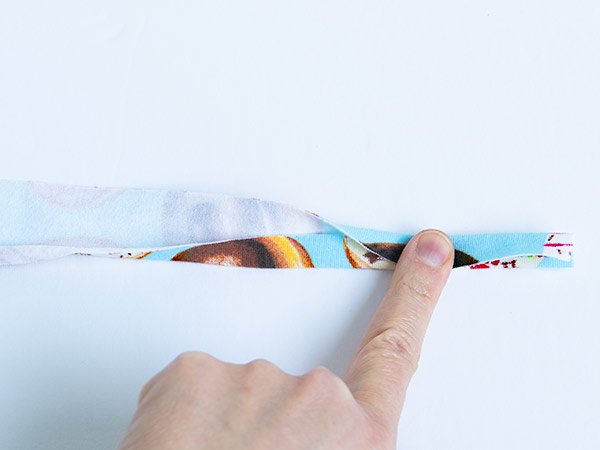
Fold one of the long edges to the middle and press. After that, fold the second raw edge over the first. The raw edge comes on this top layer. You don’t need to press in the ends.
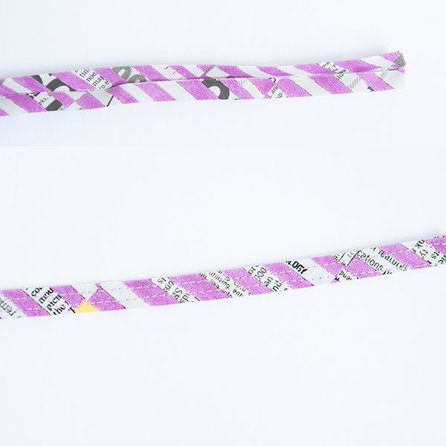
After this, using your stitch starter, sew straight down the middle of the drawstring with a zigzag stitch, a twin-needle or a coverstitch. A coverstitch is my favorite choice here, but I realize that not everyone has this option. A twin-needle is a good second option, and you might like the zigzag too.
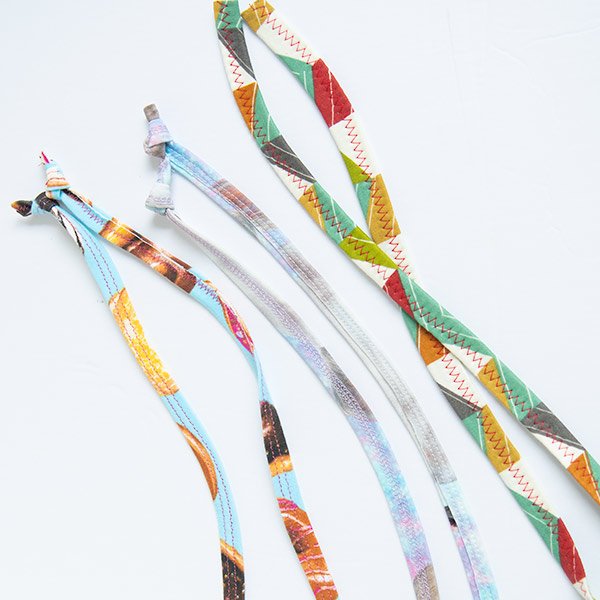
From left to right: twin needle, coverstitch, zigzagTo finish it off, knot the ends.
Drawstring + elastic: the specialty drawstring for pants that fall off you
If you have a problem where drawstring pants fall off you, this is the sneaky variant for you.
It’s also a good drawstring to add to the inside of dresses with drawstring. The elastic will give the drawstring some extra support on the back waist so that it stays in place.
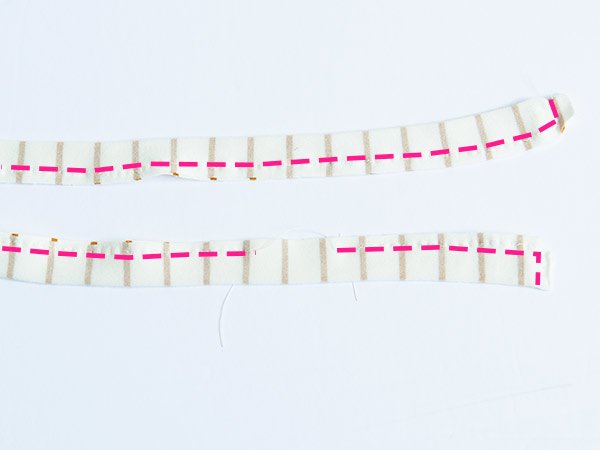
To make a drawstring like this, prep your fabric like you would for a fold and stitch drawstring. Cut a piece of 1/4″ wide elastic that’s 1/4 the length of the finished string.
Cut your piece of drawstring in half. The danger with this type of drawstring is that the ugly elastic can poke out the holes when you go to cinch up the fabric. Not so pretty!
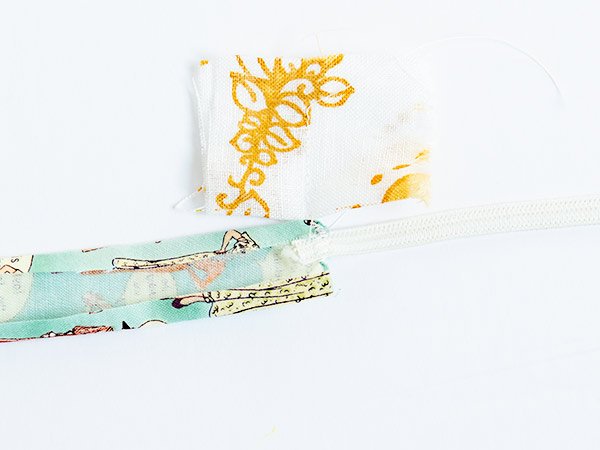
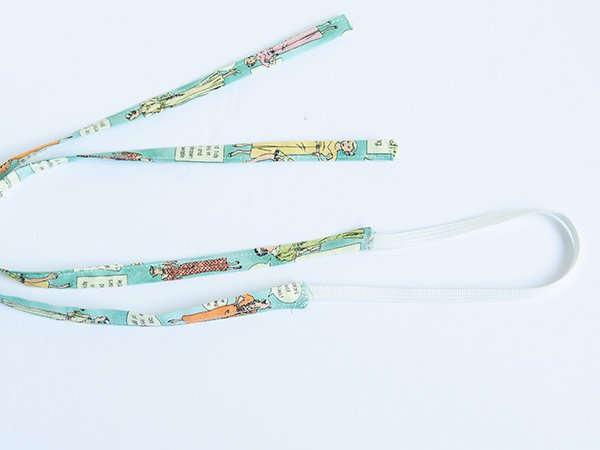
Start stitching on your stitch starter as before, then place one end of the elastic on top of one of the short ends. Stitch the elastic to the fabric with a small zigzag stitch. Repeat on the second side of the drawstring.
Fold the fabric together and stitch around the string as before.
Add your drawstring to the casing
To finish off your drawstring no matter what kind you’ve made, you have to thread it through the casing!
Before you do that, give your drawstring a good press with steam. For more on adding buttonholes to a casing, you can check out Add a Drawstring Cowl to a T-shirt.
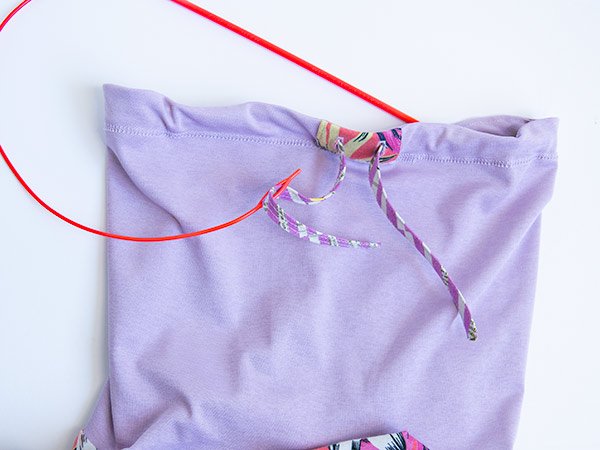
This elastic threader is my favorite cheap tool! Thread the end with the eye through the whole casing. After that, thread the eye of the threader with the drawstring. Tug on the opposite end to whip your string through the casing in 10 seconds or less.
To anchor your string inside the casing, stitch straight down through the casing close to a seam. If you’re adding a drawstring to a hoodie, center back is the place to do this!
That’s about everything I can think about with drawstrings. As you can see, they’re versatile critters! So the next time you want to make a some pj pants, a hoodie or a drawstring bag, think about which one of the 4 ways to make a drawstring you might want to try.
The author may collect a small share of sales from the links on this page.


Comments
Join the conversation