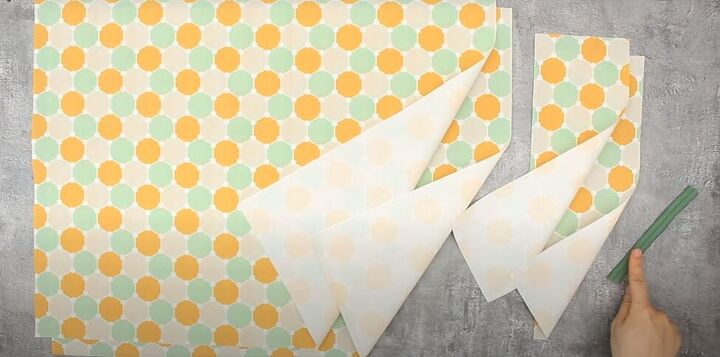
How to Sew Super-Easy DIY Reusable Grocery Bags

Plastic grocery bags are quickly becoming a thing of the past, and the environment is all the better for it. But the reusable bags you buy in the store can get pricey. So, here’s a tutorial for DIY reusable grocery bags that you’re going to love!
This is a super way of using extra fabric and making your grocery bags stylish at the same time. These reusable grocery bags are also easy to fold and store when they’re not in use.
Tools and materials:
- Scrap fabric
- Fabric elastic
- Fabric elastic
- Scissors
- Ruler
- Thread
- Sewing pins
- Sewing machine
- Iron
1. Cut your fabric
Cut two pieces of fabric measuring 49.5 x 44 centimeters (19.5 x 17⅝ inches) each.
Also, cut two pieces of the same fabric measuring 12 x 36 centimeters (4.75 x 14⅛ inches) each.
Finally, cut one 15-centimeter (6-inch) piece of fabric elastic.
2. Make the reusable bag handles
With right sides facing in, fold and pin each smaller rectangle piece of fabric in half lengthwise. Sew the long open edge of the rectangles closed, 1 centimeter (3/8”) from the edge.
Turn the handles right-side out and press flat.
Topstitch along both long edges of the handles.
On the larger pieces of fabric, mark 8.7 centimeters (3.5 inches) in from each side of the top of each piece. That is where the handles will be attached.
3. Attach the handles
With right sides facing each other, pin one end of each handle just inside the marked line and then mark 2.7 centimeters (1⅛ inches) down the handles from the top. That will be your sewing line.
Sew the handles to the bag at the top edge and at the 1⅛ inch line.
Repeat for the other end of the handles on the second piece of bag fabric.
4. Attach the elastic
Fold the two sides of the bag together, with right sides facing out, and then fold the bag in half lengthwise.
Snip a tiny corner at the folded bottom corner of the bag.
Now fold the elastic in half and pin it to the bottom center of the bag.
5. Sew the bag
Topstitch the two sides and bottom of the bag at ½ centimeter (0.2 inches) from the edge, catching the elastic in the seam.
Turn the bag inside out and sew the side seams again at 0.7 centimeters (¼ inch) from the edge.
Mark 8.2 centimeters (3½ inches) in from each side at the bottom of the bag.
6. Make the reusable bag pleats
Fold in the sides of the bag along the mark you just made. Pin in place and sew along the bottom edge of the bag at 0.7 centimeters (¼ inch).
7. Finish the top of the bag
Tuck the handles to the inside of the bag and turn down the top edge of the bag 1 centimeter (⅜ inch).
Fold over the edge once more, this time 2 centimeters (¾ inch.)
Pin the top edge in place and sew it at both the top edge of the bag and the bottom edge of the fold, on the inside of the bag.
Lay the bag flat and press it, including the inside of the pleat.
8. Fold and store your reusable grocery bag
Fold the bag over twice, lengthwise.
Fold the handles down and then fold the bag in half so the top meets the bottom.
Now fold it over twice so have a nice little packet.
Pull the elastic over the packet to hold it all in place.
DIY reusable grocery bag tutorial
That’s all there is to making these simple DIY reusable grocery bags. They’re strong, washable, and environmentally friendly. What a great use for all those extra pieces of fabric you have.
Make lots because you can certainly use the bags for more than groceries. Leave me a comment to let me know how you liked this DIY reusable grocery bag tutorial.
Enjoyed the project?
Suggested materials:
- Scrap fabric
- Fabric elastic
- Scissors
- Ruler
- Thread
- Sewing pins
- Sewing machine
The author may collect a small share of sales from the links on this page.


Comments
Join the conversation