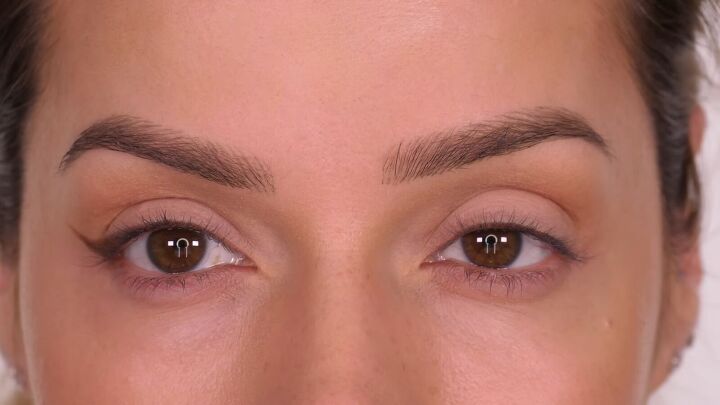
How to Do Winged Eyeliner in 3 Easy Steps for Beginners

Hey beauties! I’m sharing how to do winged eyeliner for beginners.
Follow along with my 3-step winged liner tutorial, suitable for most eye shapes, including those with hooded eyes that are not extremely heavy on the outer corner.
I have included an optional 4th step that you can rely on while practicing perfecting this eyeliner wing hack.
Best liquid eyeliner!
Tools and materials:
- Brown eyeshadow
- Angled liner brush
- Micellar water
- Cotton swab
- Liquid eyeliner
- Concealer or foundation and smaller, angled brush (optional)
- Mascara
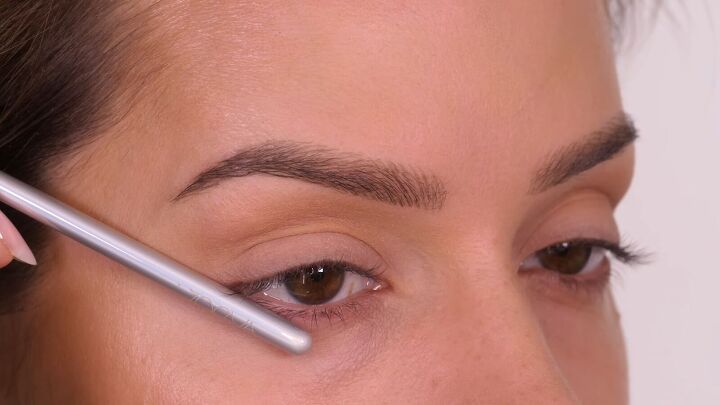
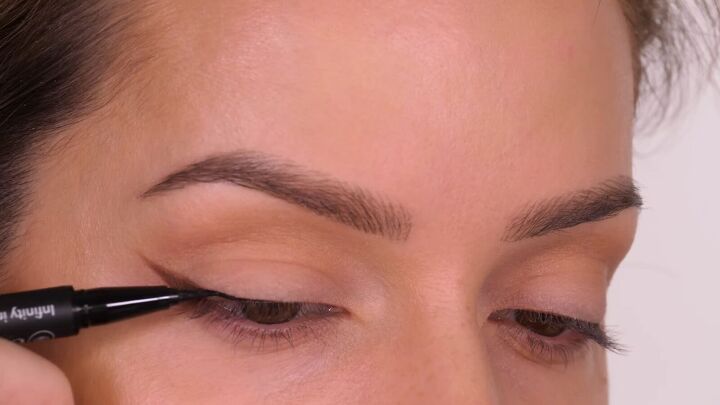
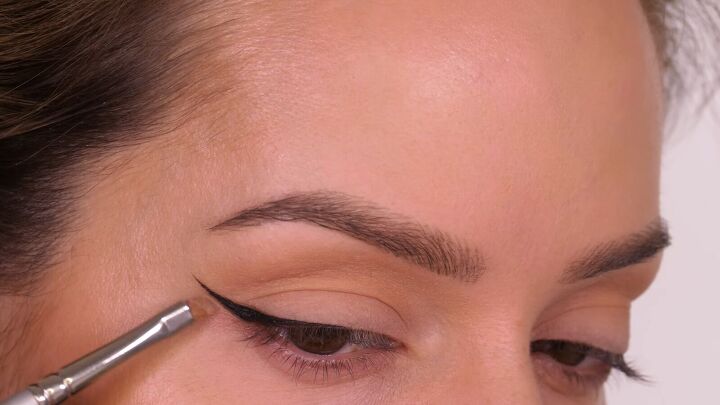
1. Map out the shape
This first step is great for those newbies who have yet to learn how to apply winged eyeliner.
The key for the trajectory is to follow your lower eyelash line. For hooded eyes, avoid the crease on the outer half of your eye.
If you don’t have hooded eyes, you can position your trajectory slightly higher for a more lifted look. But at all costs, we want to avoid drooping the eye lower than the trajectory of our lower lash line.
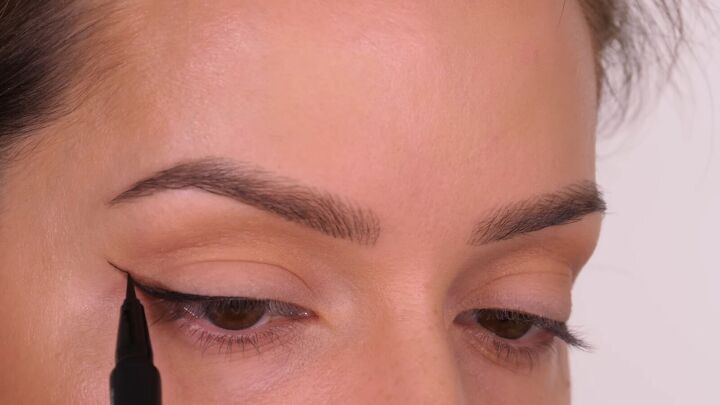
Pick up brown eyeshadow on your angled brush, note the trajectory of your lower lash line and begin marking from the furthest point, pulling the color back toward your eye.
Then turn the bristles around and pull the color outward.
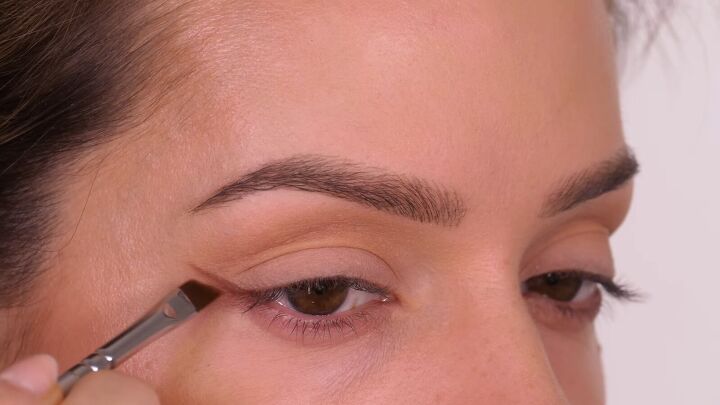
When filling in your eyeliner, avoid taking it higher than the highest point of your eyelid.
For hooded eyes, keep your wing minimal.
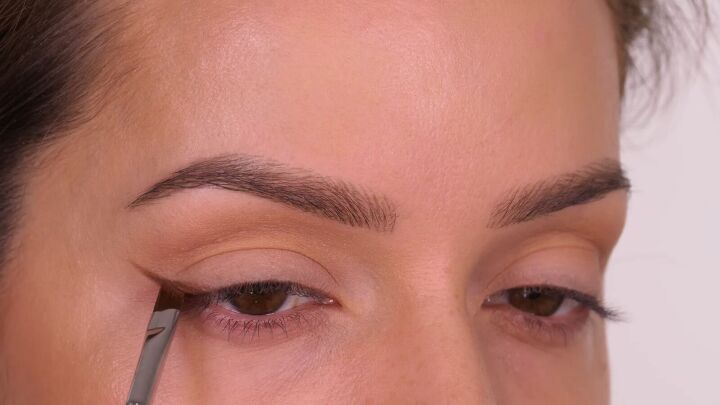
If you don’t have hooded eyes, you can fill in the eyeliner further. Use the tip of the bristles to edge your way to the center of the eyelid.
As you can see, when my eye is open, the wing is not distorted by the crease of my eye.
If yours is, then you need to make the wing slightly smaller.
If you’ve made any mistakes, remove the eyeshadow with micellar water on a cotton swab.
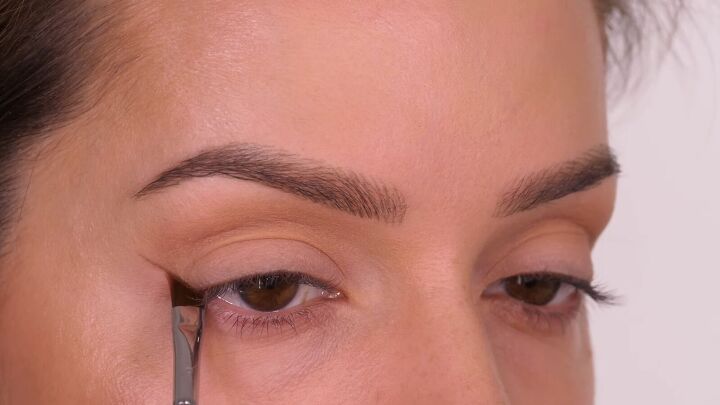
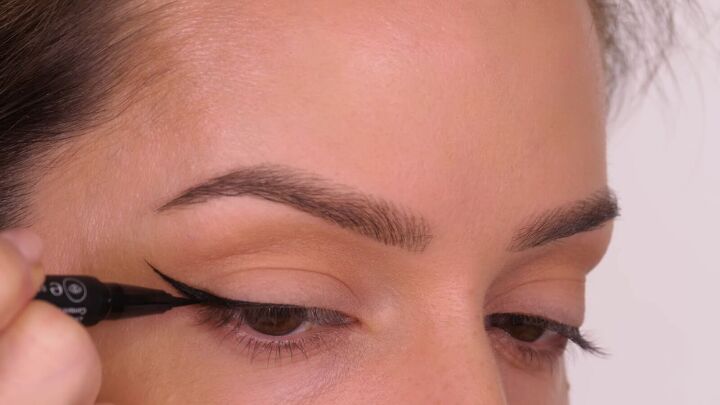
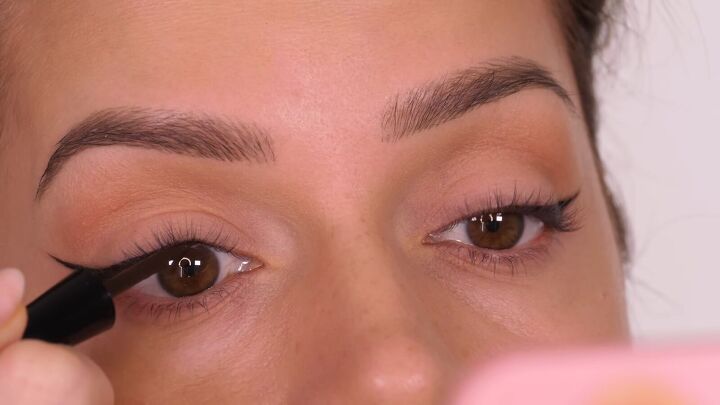
2. Fill in with liquid eyeliner
Trace over the eyeshadow map with liquid eyeliner. Start at the center of the lid (or as far out as you went for your eye type).
Pull the color back, keeping it close to the root of your lashes.
For tracing over the wing, turn your eyeliner pen around, pulling it from the outer corner toward your eye.
This will help you maintain a pointy tip.
I like to keep a small amount of the brown visible around the black to give a more diffused wing.
Optional step
For a crisper wing, take a tiny bit of concealer or foundation on a small, angled brush and run it along the outer edge.
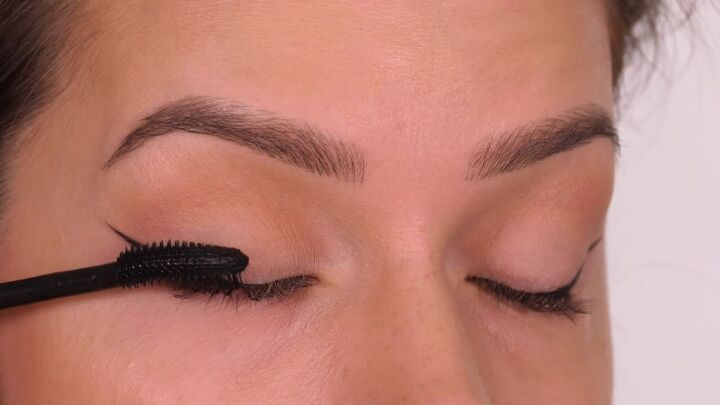
3. Tightline your upper lash line
Apply the liquid eyeliner to your inner lash line that looks pink.
This will allow you to avoid taking up space on your eyelid which would make your eyes appear smaller.
I recommend finishing up with some mascara.
Here’s the final look of this 3-step winged eyeliner for beginners:

How to do winged eyeliner for beginners
Now that you’ve learned how to do winged eyeliner for beginners, will you try out this winged eyeliner hack? Comment down below.
Then elevate your lash game with this ultimate beginners’ tutorial on applying false eyelashes.
The author may collect a small share of sales from the links on this page.


Comments
Join the conversation