How to Make a Cute Flower Necklace With Real Flowers

Hey, fellow jewelers!
In this tutorial - How to DIY Cute Resin Flower Earrings - I made these real flower earrings. I love them so much I wanted to take it up a notch and show you how to make a flower necklace with real flowers.
Tools and materials:
- Round nose pliers
- Long nose pliers
- Silicone tool
- Tweezers
- UV flashlight
- UV resin light
- Hand drill
- UV resin
- Dried real daisies
- Jump rings
- Clasp
- Small chain
- Plastic gloves
- File
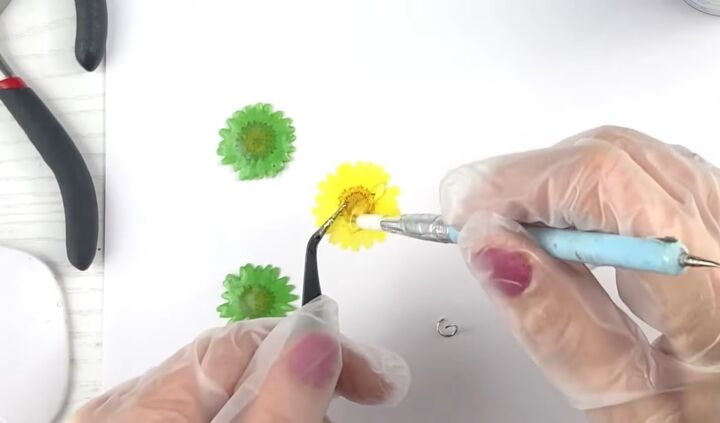
1. Paint flowers with resin
The first thing we want to do is you want to paint all of your flowers with UV resin.
Put your plastic gloves on for safety!
When picking up a flower with the tweezers, make sure you squeeze the hardest right in the middle because that is the toughest part of the flower.
If you squeeze on the petals, they will break. As you’re holding the flower, squeeze resin on one half and spread it all around the flower with your silicone tool.
Do not get the resin on the tweezers, or the tweezers will stick to the flower and break your flower.
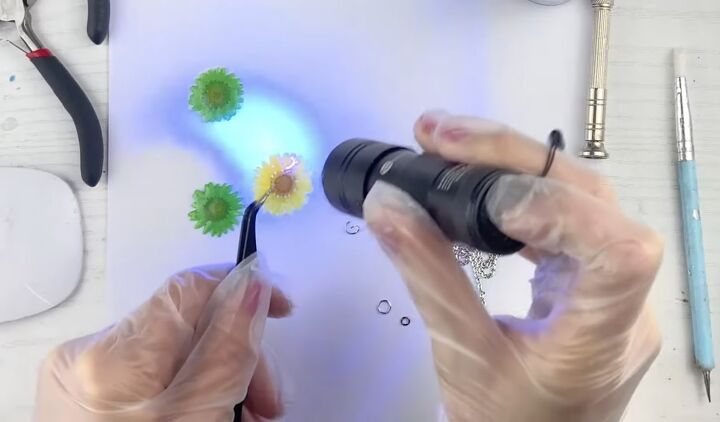
2. Put flower under UV light
Now you could put the flower under the UV lamp, but I like to hit it with my UV light first so it doesn’t drip.
3. Put resin on the other side
Proceed to put resin on the other side of the flower and then flash it with the UV light.
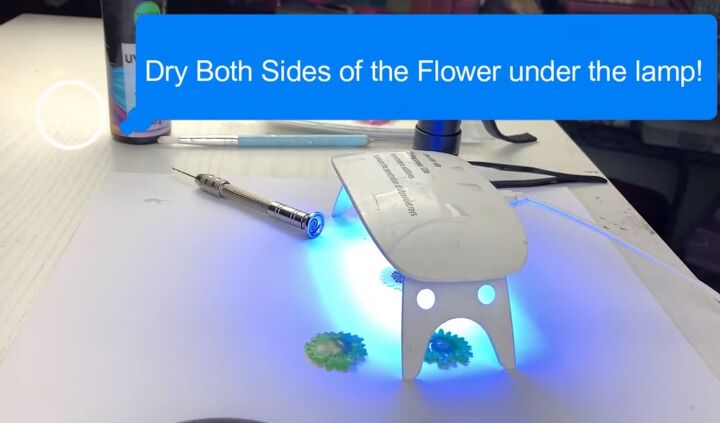
4. Put flower under the lamp
Now put the flower under the UV lamp. Both sides only need 30 seconds each.
5. Add more resin
If any parts of the flower don’t feel so strong and you don’t feel like they have enough resin, add more to them now.
Then do a flash dry with the torch and put it under the lamp to completely dry it.
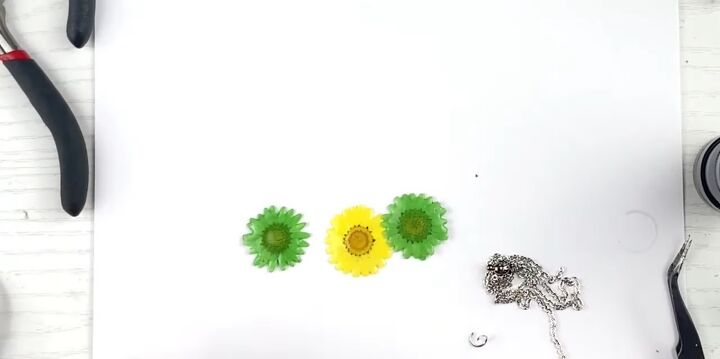
6. Repeat the process
Repeat the process so that you have three flowers in total.
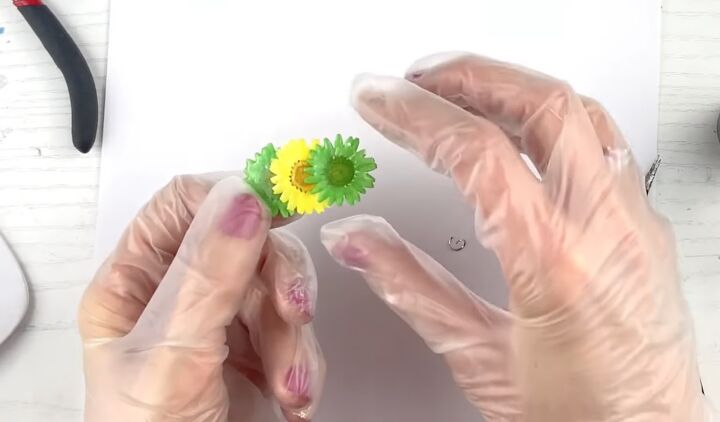
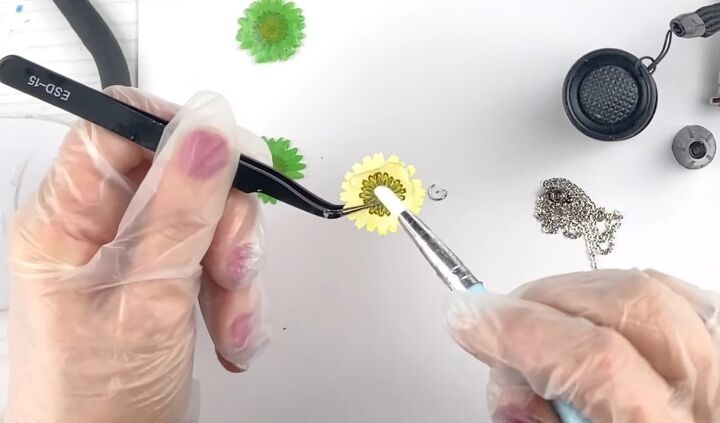
7. Assemble the flowers
Now think about how you want to arrange the flowers. You can make it so that the middle flower overlaps the two outer ones or that each flower overlaps the one next to it.
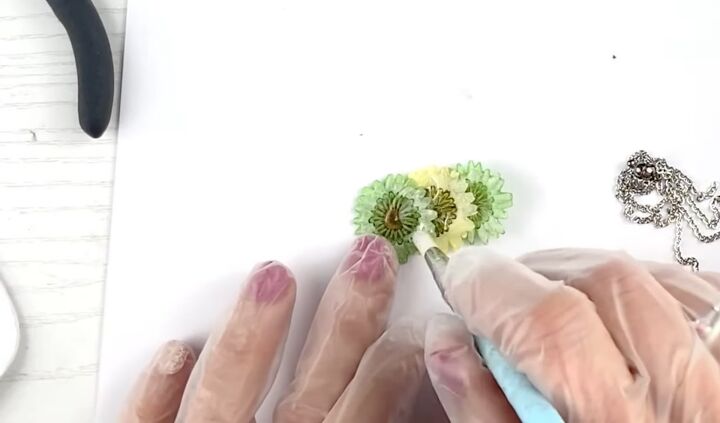
Take your UV resin and spread it around the part where it will stick to another flower, and then place it where you want it.
Hit it with the UV light to quickly glue it together and then add the next flower in the same manner.
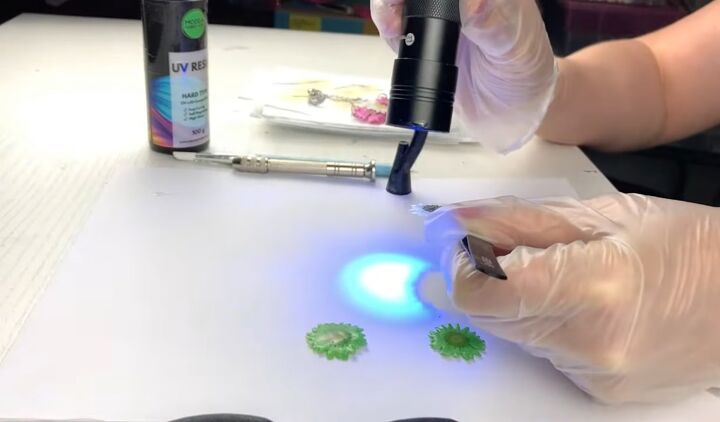
Once you have all three flowers stuck together, put more resin on the back of the flowers to make them more sturdy so they don't break off from each other.
You can do however many layers of resin you want until you’re happy with how firm it is.
Bear in mind that the more resin you put on, the more plasticky it looks, so if you want it to look more flower-like, make sure you're putting all the extra layers on the back.
Also make sure the resin from the back doesn’t drip onto the front because when you have drips, it looks ugly.
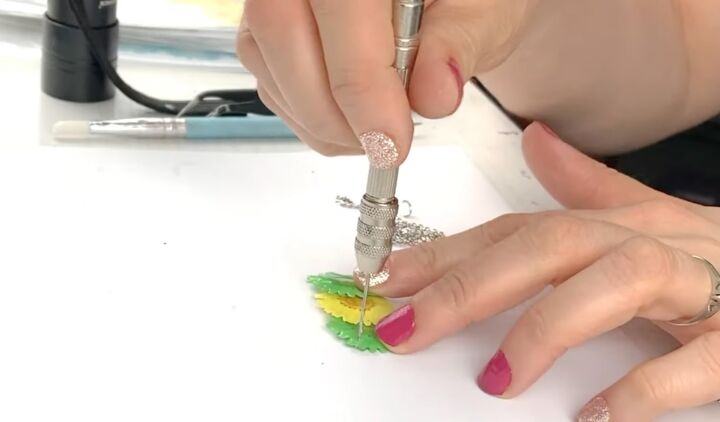
8. Add holes
Use your little hand drill to press down and make a hole. I do it manually, but there are also electric drills you can use.
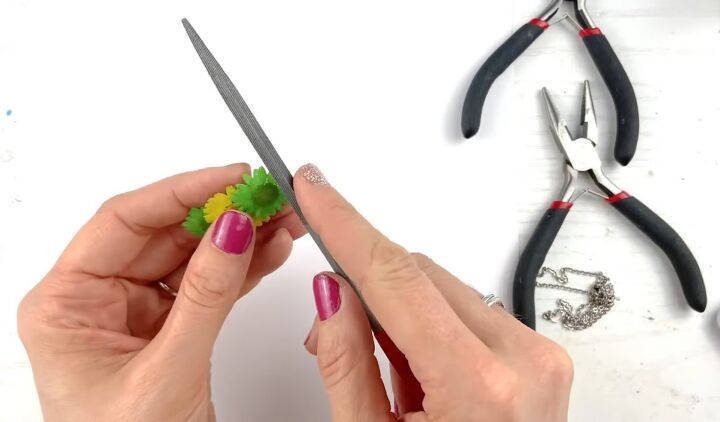
9. File the petals
The rough edges of the petals can make the flower feel uncomfortable on your neck, so now, file the petals slightly in one direction. Go in between the little gaps and on top of the petals.
If you’re giving this necklace as a gift, make sure you wear it yourself for half an hour to see if there are still rough edges because you don't want someone to wear it and think it's really pretty but annoying to wear.
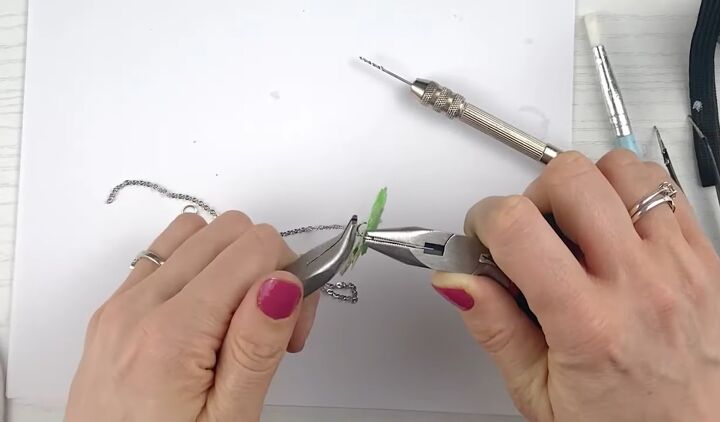
10. Add jump rings and chains
Open your two jump rings up and put them through the holes.
Then cut two pieces of chain to the size you want them and add the last link of the chain to each jump ring.
Then close up the jump rings fully without leaving any gaps.

11. Add clasp
The last thing to do is add the clasp. You can put on any kind of clasp, I like magnetic in this case because the necklace is so light that it won't pull the clasp open.
To add the clasp, place two more jump rings on the last links of the chain and then put them through the loops on the magnetic clasp.
Proceed to close the jump rings up.
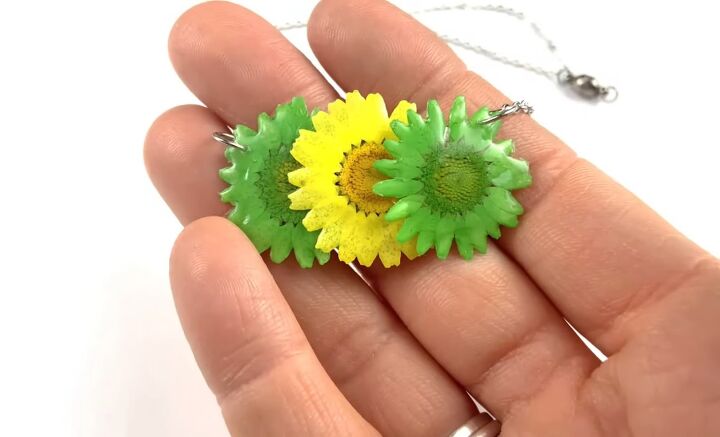
How to make a flower necklace with real flowers
And there, my fellow jewelers, you have the cutest pendant, real flower necklace. I love it!
This looks like the type of thing that is complicated to make, but as you have seen, it is actually very straightforward.
Next, check out my post on How to DIY Adorable Knot Earrings.
The author may collect a small share of sales from the links on this page.


Comments
Join the conversation