How to Make Braided Leggings - No-Sew Cutting & Weaving DIY

This is a tutorial on how to make braided leggings. For this DIY, I wanted to makeover my old, knee-length workout leggings.
Making old clothes new again is the best way to feel refreshed and cute without spending money to buy a whole new outfit. Plus, this technique for no-sew braided leggings definitely spices up those plain, forgotten leggings we all have hiding in the back of our closets.
So, if you want leggings with cutouts on the side, keep reading and I’ll show you exactly how to cut and weave DIY braided leggings.
Tools and materials:
- Ruler or measuring tape
- Pen or fabric pencil
- Scissors
- Leggings
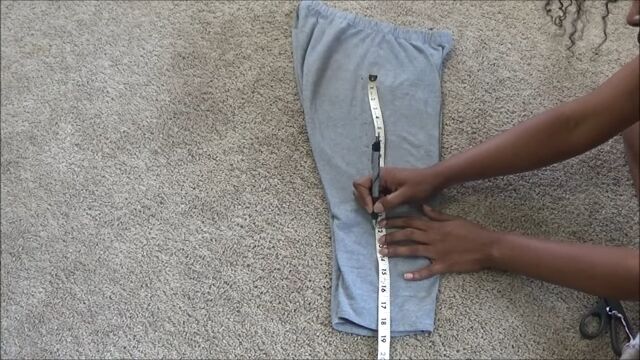
1. Measure where you’re going to cut
Fold your leggings in half, and place a ruler or measuring tape in the middle of the sides. Then, put markings at one-inch intervals from where you want the braiding to start, all the way down to the end.
I’m using a pen to mark the fabric here, but you can use a fabric pencil here as well.

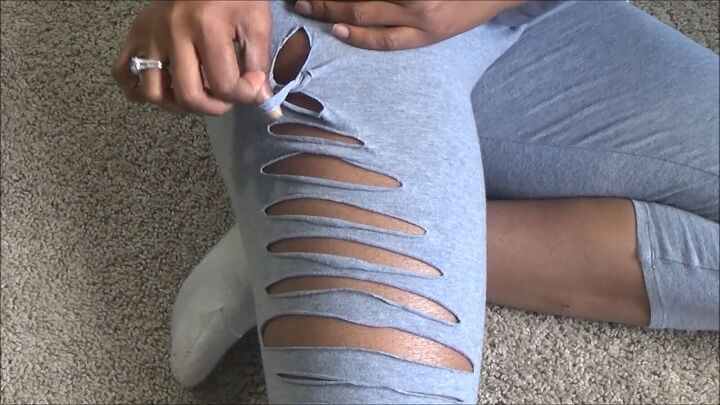
2. Cut small slits along the center of the leggings
Find the centermost mark and cut a long slit into the fabric. Afterward, you’re going to want to progressively shorten your cuts as you go down or up the leggings.
Each cut you make should be shorter than the last, so when you’re finished, it’s a diagonal line from the center to the final cut.
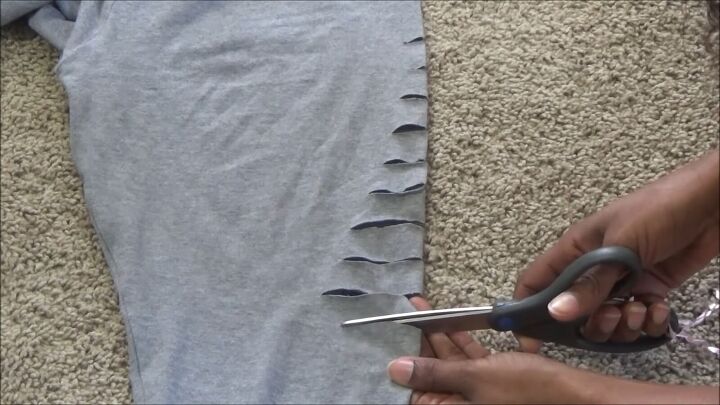
You should do this technique from the center upwards and downwards. The difference between cuts should be gradual but minimal, as you want the cut to look smooth and not too drastically different.
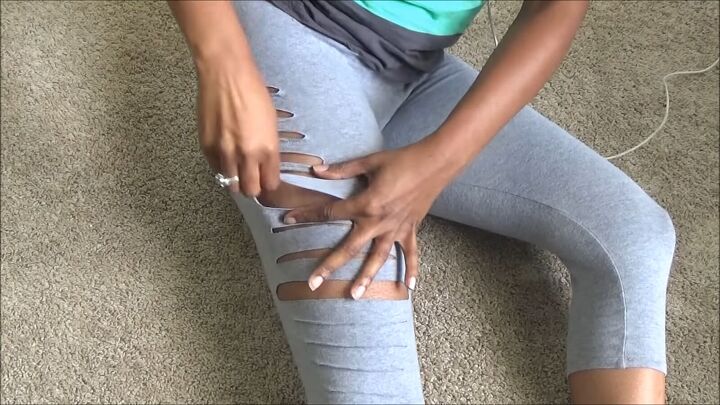
3. Stretch out the fabric to prepare for braiding
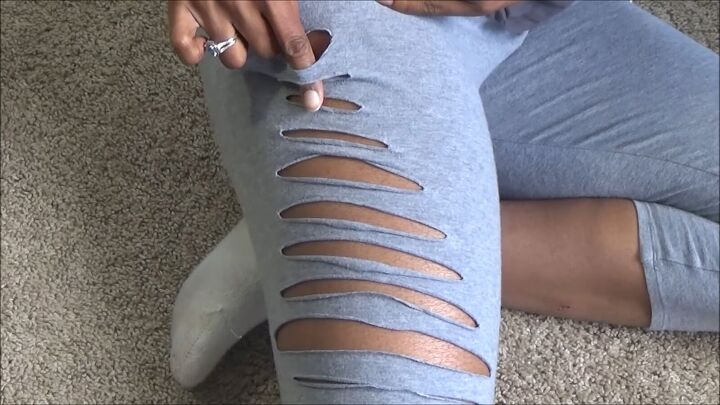
Once you’re finished making your cuts, put your leggings on and begin to stretch and pull at the fabric around the slits you cut. The goal is to make them look less like slits and more like holes.
Don’t stretch too much that they’re too loose or that you accidentally rip it though. The right length is wide enough that you’ll be able to braid with them.
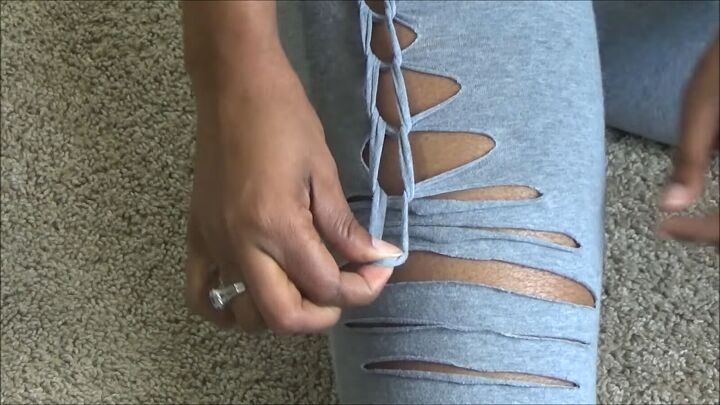
4. How to braid leggings
Now, to braid, take your finger under the fabric between the first two holes, pinch the second piece of fabric between your fingers, and pull up.
With the fabric now between your fingers, you’re going to do it again, grabbing the next piece of fabric and pulling up. Do this repeatedly, pinch and pull through, all the way down until you get to the last one.
Stretch the last piece of fabric really tight and then cut between the center.
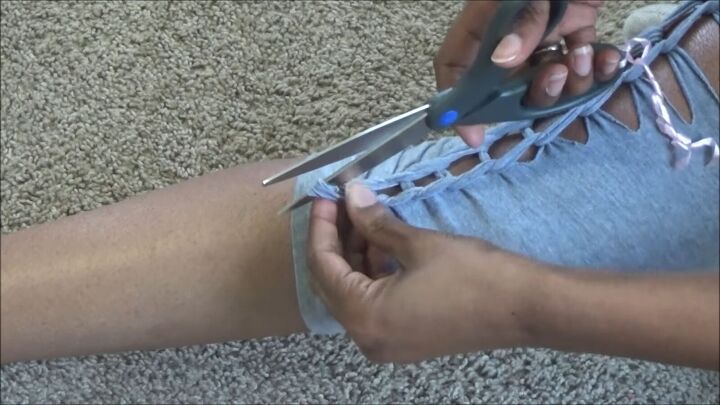
Take one of the now two ends and place it over the bottom of the pants and then tuck it under. Pull it up through that last hole and then tie a knot with the other end.
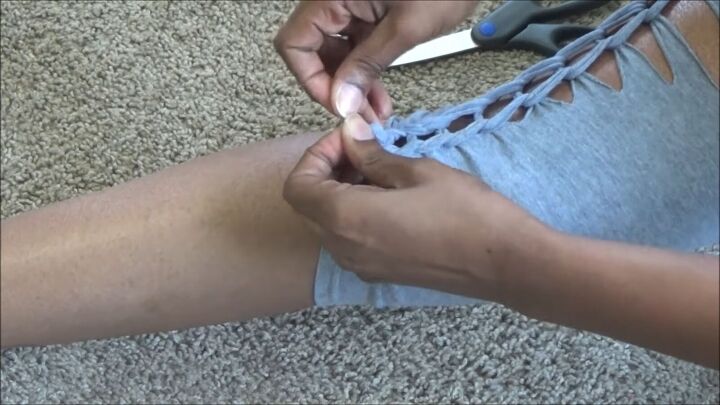
Make sure the knot is super tight, so it doesn’t come undone through normal, everyday activity.
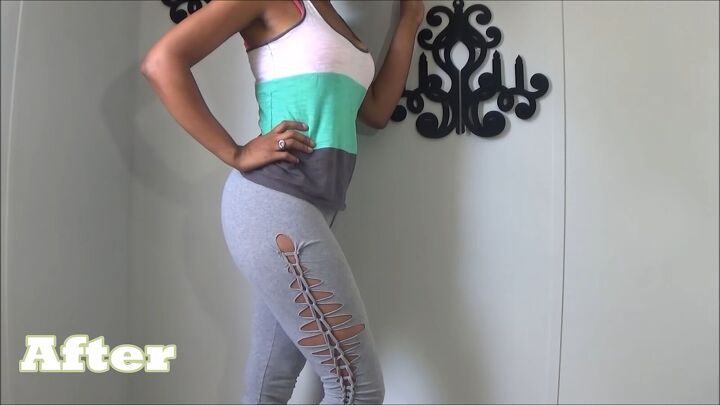
How to make braided leggings tutorial
You’re done! So that’s my quick, easy guide on how to braid leggings. I love this style a lot; it’s so much fun and a great way to upcycle leggings you don’t wear anymore.
If you try out this tutorial, let me know how it turns out in the comments below!
The author may collect a small share of sales from the links on this page.


Comments
Join the conversation
I Love it!!! But it does help when you have a Gorgeous body!!!!!!💓
Awesome sauce! Thanks for showing us this super cute and easy legging refresh!