How to Replace a Snap Button on a Jacket - Quick & Simple Tutorial

Oh, snap! Snaps are tricky to replace as finding the correct replacement parts can be difficult. In this tutorial, I'll show you how to replace a snap button on a jacket quickly and easily in just a few simple steps.
If you prefer, you can download this PDF version of how to replace a snap for your reference. Let's get started!
Tools and materials:
- Snaps
- Hand tools
- Hammer
1. Learn the difference
There are typically 2 kinds of snap buttons that are found on most garments: spring snaps and heavy-duty/camping snaps. Before you start, you need to figure out what kind of snap your jacket has.
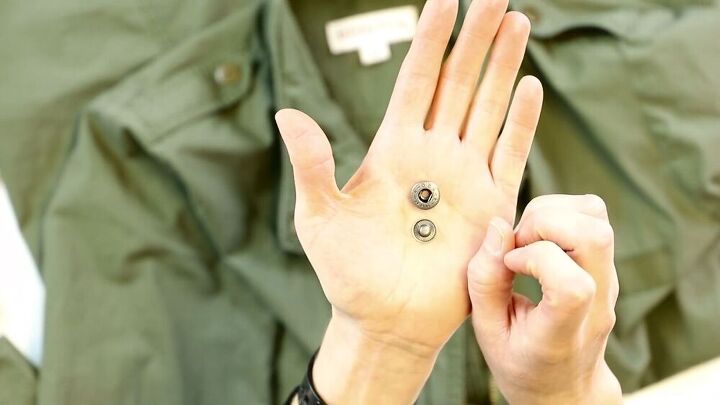
A spring snap (pictured above) has 2 wire bars that snap onto a nub to hold the pieces together.
There’s also a camping or a heavy-duty snap, which has a larger female part. This one also has a circular wire rather than bars, which goes around on the inside of the female piece.
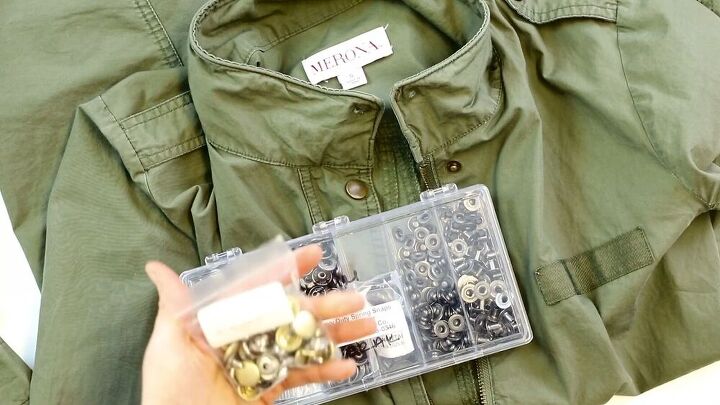
2. Get the materials
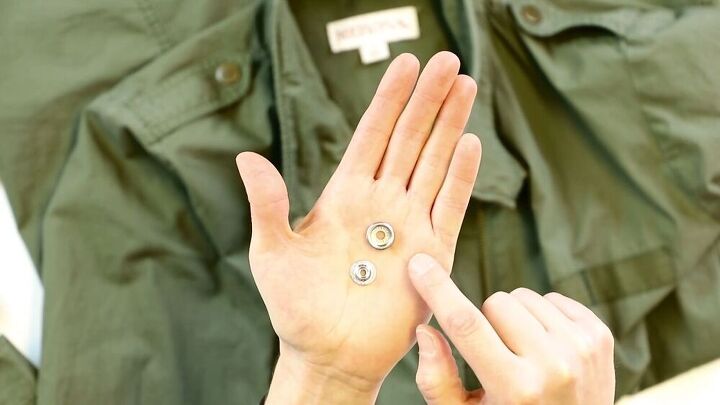
This jacket has a spring snap so I'll be using that for this tutorial.
If your jacket requires a heavy-duty snap replacement, the process is pretty much the same. Both types of snaps have a male and female part that need to be hammered together.
So, where do you get snaps? Online of course! They come in an assorted tray, or you can get a smaller amount of a specific color. I ordered mine from a website called Wawak; they sell a whole variety of snaps in gold, silver, antique brass, black, etc.
Amazon also has a lot of parts, but it's a little daunting to sift through the options.
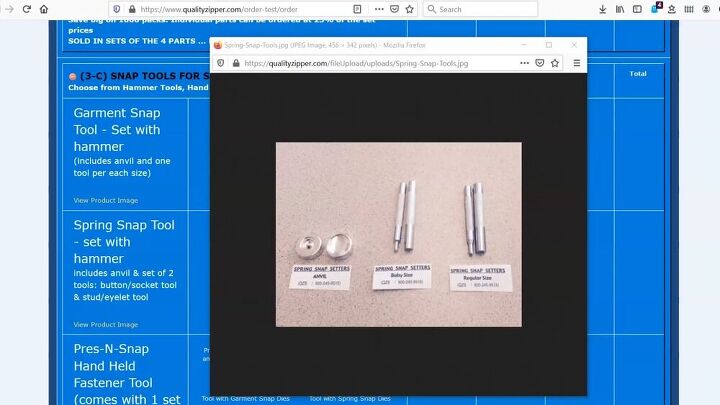
To install the snap, you will need a clamp or a hand tool that you hammer down with. Clamps can be on the expensive side, but it's consistent and pretty easy to use.
For this example, I will show you how to install the snap using tools that are cheaper to obtain, but work a little more inconsistently.
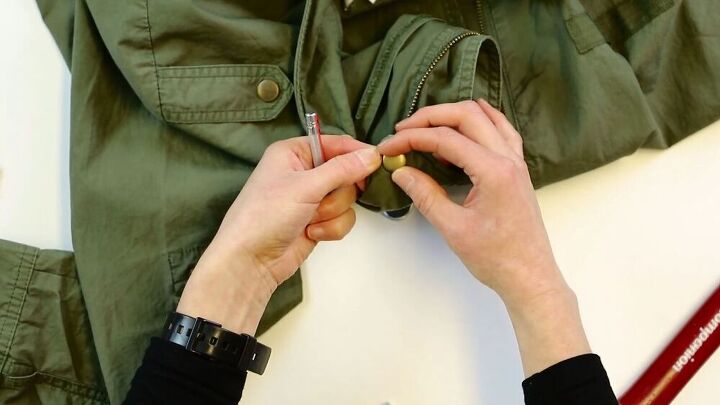
3. Learn how to remove a snap
In most cases, only one side of the snap breaks off, and the other is still intact. If your new parts work with the old, you can leave other side that's still attached as is.
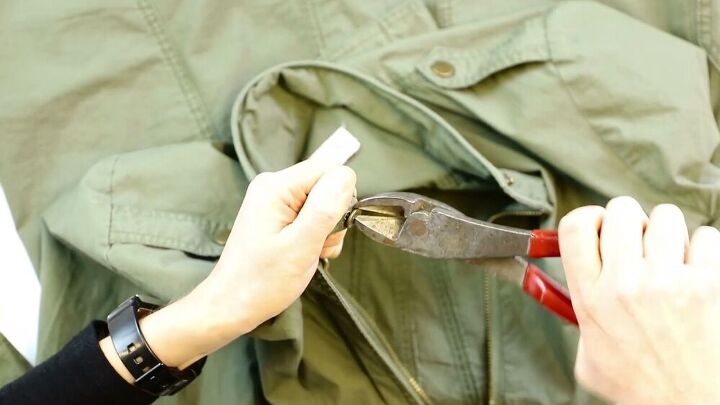
If the new and old don't want to cooperate, you'll need to remove the other side of the old parts and replace both. To do this, you will need a wire cutter or a pliers to pull at the piece.
For the female side, grab the snap with your wire cutter and pull on it enough so that you don't rip the fabric. Wiggle the snap as you pull, and it should come loose.
If it doesn't, you can gently and carefully cut the metal of the snap, being careful not to cut the fabric.
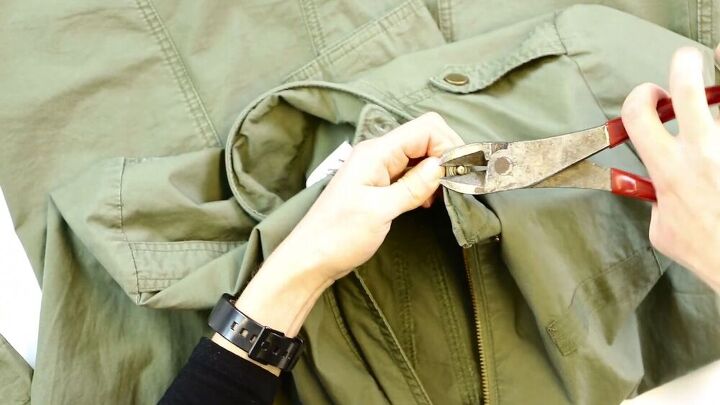
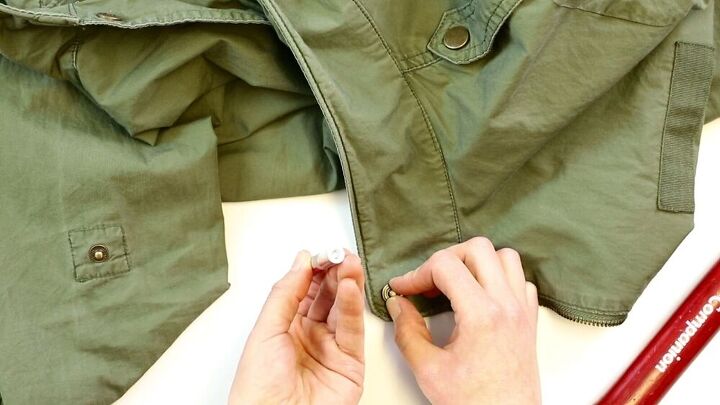
The male part is a little easier. Clamp into the nub of the snap and it should pop off. Then you can remove the back of the piece and the jacket is ready to get new hardware.
4. Replace the snap
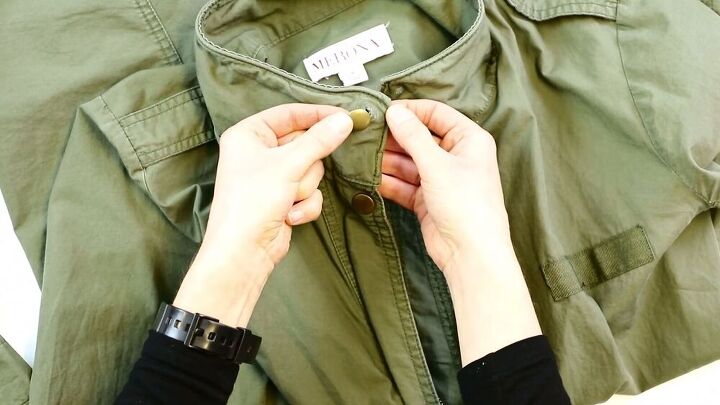
For the female side, which is the part that's visible on the outside, take the button piece and insert the post in the existing hole in the fabric on the outside of the garment.
On the inside of the garment, place the other female piece. You should be able to read whatever text or design is stamped on the edge.
If you don’t see anything stamped along the edge, you’ve got the piece upside down.

Take your hand tool for the female part and insert the pointed part into the tube of the button piece.

Take your hammer and bang on the top of the hand tool. You want to use moderate force - enough to join the parts, but not so much you damage the hardware.
Feel the snap. If it spins real loose, then that means it needs more securing. So, go ahead and hammer it down a couple more times.
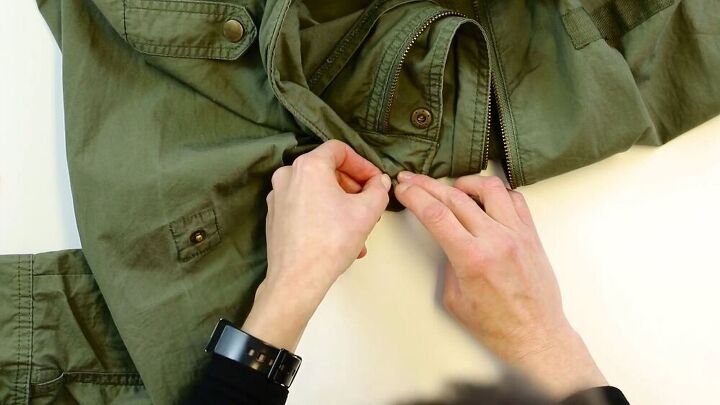
The same goes for the male side, although the parts are a little bit different. Place the bottom, flat part with the post under the fabric and make sure it's centered.
Next, place the top male part over the nub and hammer it down using the male hand tool. Remember to check to see if it's loose. If it is, give it a few more slams to secure it in place.

How to replace a snap button on a jacket
Test your pieces to make sure they work. If they do, hooray! You have successfully installed a snap! How easy was that?
Next time your jacket or coat's snap goes missing, there's no need to discard it. Just a few, quick steps and your favorite items are as good as new.
Let me know what you think of this tutorial in the comment section below.
The author may collect a small share of sales from the links on this page.


Comments
Join the conversation
Awesome idea!