Can You Tell This DIY Denim Bag Was Made From Jeans?

I’m back with another awesome DIY denim bag tutorial! It’s fun, and the result is super chic. This recycled DIY denim bag is perfect for going out as it holds enough space to store essential items and more! The main item you need is a pair of jeans, either old or thrifted. Did I also mention that this easy DIY denim bag is easy to make? Follow along and let me show you how to make a DIY denim bag; the result is simply exquisite!
Tools and materials:
- Denim pants
- Ruler
- Chalk
- Drawstring
- Scissors
- Glue gun
- Cardboard
- Pearl or any other embellishment
- Cookie cutter or an object to trace a shape from
- Sewing machine
- Thread
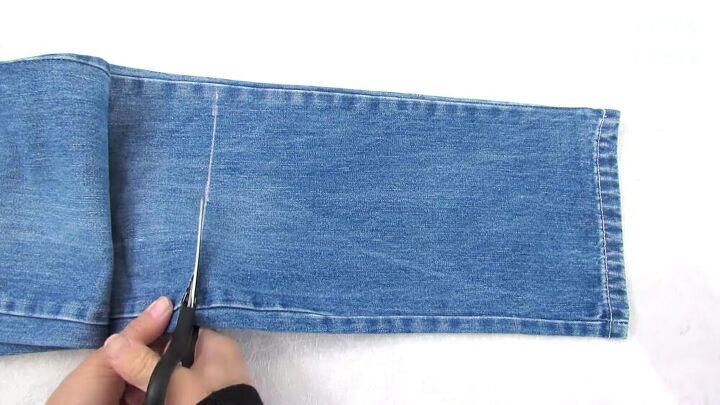
Cut the denim jeans
To make the body of the bag, simply measure 35cm on one of the legs and cut across.
Sew the sides
Turn the piece inside out and sew the side of the raw edge. Finish off the raw edge with a zigzag stitch to prevent fraying.
Next, at the corners of the sewn edge, draw 4x4 cm squares.
Cut the squares out accordingly.
Now flatten them out as shown and sew along with the opening. Finish off the stitch with a zigzag stitch to keep the denim from fraying.
Add the drawstring
Fold the top of your bag ⅓ quarters down and mark the sides with your chalk.
With smaller scissors, cut slits along with these marks.
Feed one end of the drawstring through one slit and the other end on the adjacent slit. Make sure to tie a knot on the ends of the drawstring so that it won’t escape.
Then, turn the DIY denim back inside out and sew a line across the slit to secure the drawstring in place.
Add cardboard
Now, measure the bottom of your bag with a ruler and cut a piece of cardboard with the same measurements.
After you have your cardboard piece, transfer the shape to the denim jeans. Cut a little seam allowance around the original shape, too.
You’ll need two denim pieces, so be sure to cut out two of the same shape.
Place the two rectangular pieces right sides facing, and sew around the inner rectangle. Leave one of the shoulder sides open.
Snip the corners and turn the pocket inside out.
Next, snip the corners of the cardboard piece and insert it inside the pocket. Then fold the raw edges of the opening and sew right across to close the gap.
Lastly, insert your hard piece inside your easy DIY denim bag.
Optional-Add decorations
You can give your DIY denim bag a funkier and upstyle vibe by adding some cute denim cut-out flowers. To do this, simply trace a flower shape ( or any shape) on your denim pants and cut out the shape.
Make a couple of these lovely flower shapes in different sizes and draw some leaves, too.
Now, simply layer the flower shapes on top of each other, including the leaves on the sides. Finish off your creation with a stunning white pearl embellishment, or even a lovely rhinestone would look great.
Glue the layers together, and lastly, glue your beautiful denim flower on the DIY denim bag.
Woohoo! Would you look at that beautiful DIY denim bag? All we did was take a pair of denim and transform parts of it into a lovely and easy DIY denim bag. Thank you for joining me, and I hope you now have the inspiration to make a DIY denim bag for yourself.
Enjoyed the project?
Suggested materials:
- Denim pants
- Ruler
- Chalk
- Drawstring
- Scissors
- Glue gun
- Cardboard
- Pearl
- Cookie cutter
- Sewing machine
- Thread
The author may collect a small share of sales from the links on this page.


Comments
Join the conversation
Yes, I can tell it was made from jeans by the hem seam that is on the flap. A bit of lace or trim to hide it might make me believe it was made from plain denim.
Super CUTE and I LOVE the custom denim flowers!