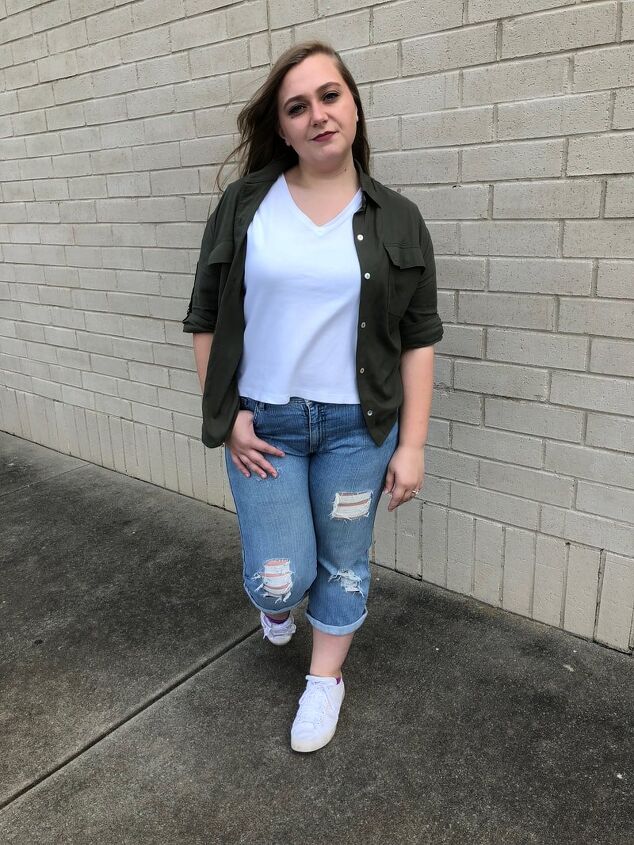
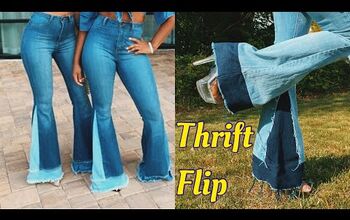
DIY Distressed Boyfriend Jeans | How to Make Ripped Jeans

I have a love hate relationship with distressed jeans. Why would I buy a pair of ripped jeans when I am just going to fall down and put holes in them on my own? But I can't deny how cute they are (especially with Fall right around the corner) and how much I have been wanting a pair of distressed boyfriend jeans lately. So, in true creative fashion, I decided to make my own pair of DIY Distressed Boyfriend Jeans! That way I can stop my fixation while going easy on my pockets!
My brand new fashion tutorial will teach you how to make ripped jeans using stuff you already have around the house! (And, no. It doesn't involved you falling down in order to rip holes in your pants like I do).
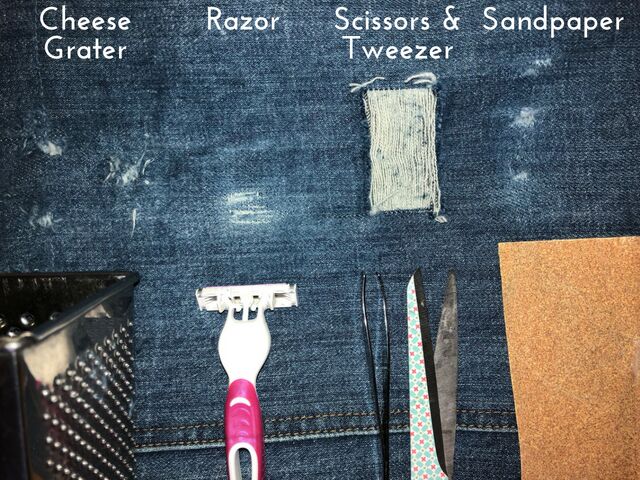
These are the four different kinds of holes that you can make using household objects. As you can see, the scissors and tweezers make your typical "big" hole that exposes all the white threads. But, a cheese grater, razor, and piece of sandpaper can give you more of a variety in the way you distress your jeans.
The cheese grater, depending on the size, can distress more surface area faster and will poke small holes all over, the razor creates a thin white hole, and the sandpaper roughs up the blue and leaves only a little of white peaking out. Rub each tool vigorously against the jeans to achieve the kind of holes as pictured above.
TIPS:
✨Practice on another pair of jeans first. Ideally, you could use the scraps left over from your DIY Jean Skirt like I did. But, if you haven't done a project like this before, another pair of jeans will suffice.
✨Use chalk to map out where you want holes on your DIY Distressed Boyfriend jeans before you start cutting.
✨Place something in the leg you are working on like a rolled up magazine or something you can't, or don't mind, cutting through to make sure the back of the jeans stays in tact. I used an old, narrow cutting board.
✨Don't be afraid to start small. Some of the cutest distressed boyfriend jeans have small holes and distressed details around the pockets, cuffs, and hems.
✨Don't be afraid to think outside the box! Just because I haven't listed it here, doesn't mean you can't use it to distress your jeans. Short of letting my puppy just chew away at my pair of boyfriend jeans, I used everything I could think of. Do you know of something else you could use to make ripped jeans? If so, let me know in the comments below!
Without further ado, here is my tutorial for how to make ripped jeans!
Steps:
1. Pick a pair of jeans to distress. I picked my boyfriend jeans out at Goodwill, but you can use any old pair of jeans that you don't mind ripping up. For a true boyfriend jean fit, you will want to steer clear of skinny jeans. Pick a pair that is loose and comfy on you and roll up the legs to make the look extra comfy.
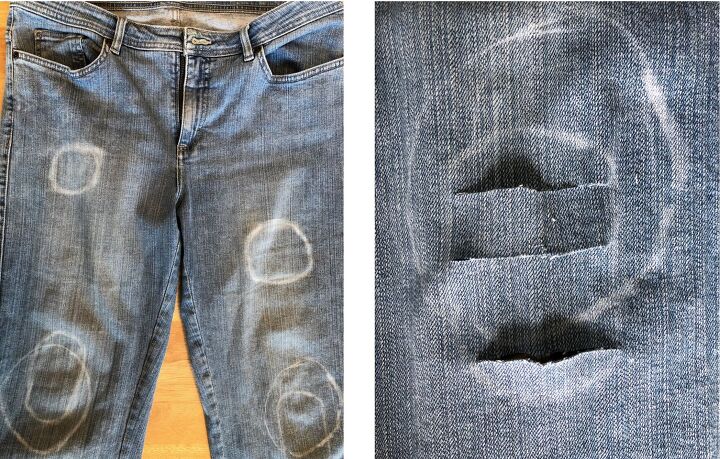
2. Try on your jeans and, with a piece of chalk, mark where your knees are. Also mark anywhere else you would like to add a hole to your DIY Distressed Boyfriend Jeans. If you're anything like me, you might change your mind a couple of times. If you do, no worries! Just use the chalk to fill in the spot you decided on. (Once you take the jeans off, the chalk marks may not stand out so feel free to redraw them or define them further.)
3. Lay your jeans down on a flat surface and put something in the leg to keep you from cutting through. With scissors, cut 3 or 4 horizontal lines parallel to each other within the lines of the holes you drew. There only needs to be a few inches between each cut. You can make the cuts as wide or as narrow as you want.
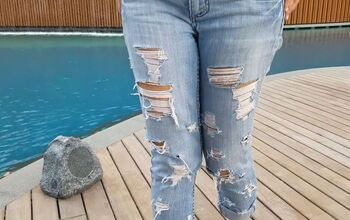
4. Using tweezers, you will start to pull apart the threads within the holes of your DIY Distressed Boyfriend Jeans. You want to pull the vertical blue threads out, not the horizontal white ones. It may take some time to start distinguishing the two apart. To help, use sandpaper to rough up the edges and make the ends of the thread stand out more.
5. Anywhere you see between the large holes that need some more distressing, take the cheese grater and vigorously grate the boyfriend jeans until the material is worn down and you can see white thread and material.
6. Once you are finished making all the big holes you drew, now you can distress some smaller details on your DIY Distressed Boyfriend Jeans. My favorite places to distress are on the pockets and near seams. To do this, just run a razor or some sandpaper over the area until you start to see white threads and blue fuzz is everywhere.
7. OPTIONAL: pin, glue, or sew down the rolled up bottoms of your jeans so they will always be the same length.8. Wipe any remaining chalk off and rock those DIY Distressed Boyfriend Jeans!

The author may collect a small share of sales from the links on this page.


Comments
Join the conversation