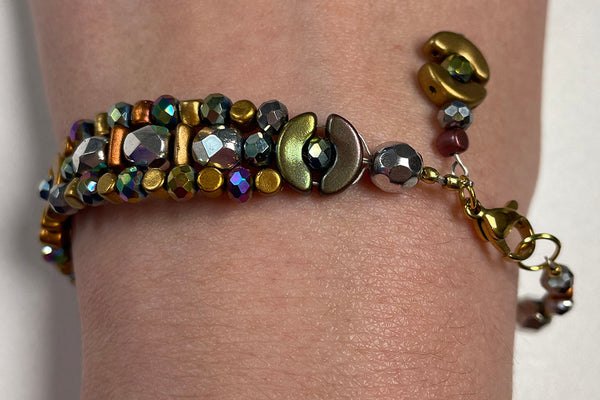
Mixed Metal Bracelet Tutorial: IT'S A LIE
This bracelet turned out to be one of my all time favourite pieces of jewellery that I’ve made.
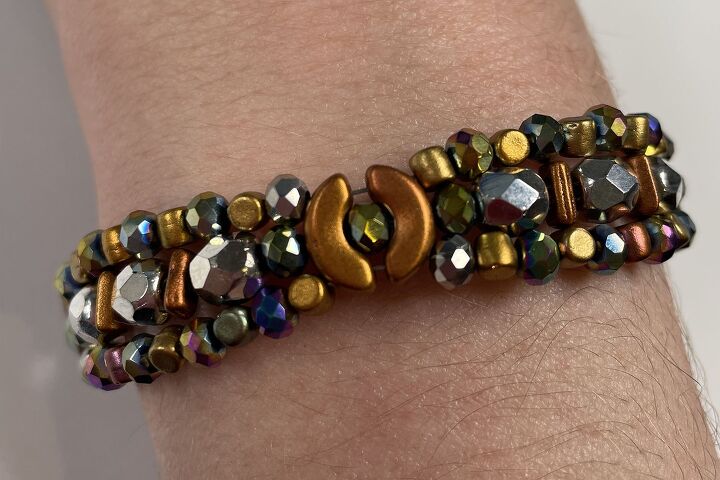
I love how the faceting of the beads catch the light and the colours sparkle.

I told a little fib here - this bracelet isn't actually made out of metal, it's made from glass beads, but they are electroplated so they look like metal.
I’m using some of the 2-holed beads from the Les Perles Par Puca range, as well as some other glass beads.
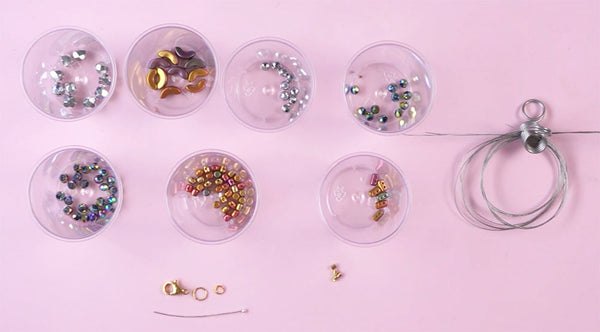
Materials
To make this bracelet you will need:
- 6mm Crystal Silver Czech Glass Firepolished Faceted Beads x10
- 10x5mm Yellow Gold Metallic Iris Arcos Par Puca Beads x10
- 4x3mm Electroplated Glass Faceted Rondelle in the following colours:
- Platinum x 9
- Green x 11
- Multicoloured x 24
- 3x2.5mm Yellow Gold Metallic Iris Minos Par Puca Beads x 33
- 5x3x2mm Yellow Gold Metallic Iris Piros Par Puca Beads x 6
- 2mm Silver Magical Crimp Tubes x4
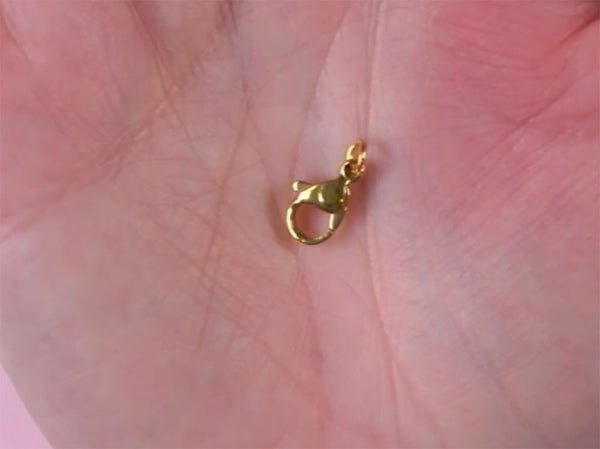
- 12mm Gold 304 Stainless Steel Lobster Clasp x 1
- 4mm Gold Jump Ring x 1
- 7mm Gold Jump Ring x 1
- 4cm Silver Ball Pin x 1
- 0.38mm Silver Grey Tiger Tail x 90 cm (1 yard)
Tools
Instructions
Watch the video or read the instructions below.
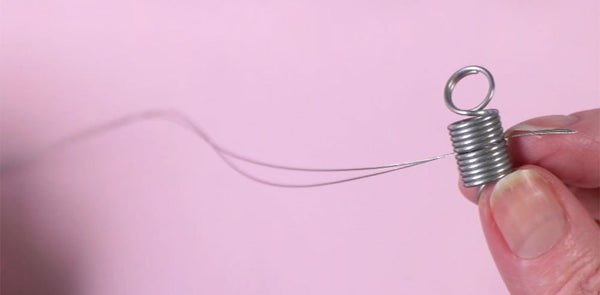
Cut the Tiger Tail
You will need to cut 4 pieces of Tiger Tail approximately 30cm (12 inches) long.
Match up the ends of 2 pieces and put the bead stopper on those 2, leaving about 10cm (4inches) tail. Note, I didn’t do this and I had to move my beads down.
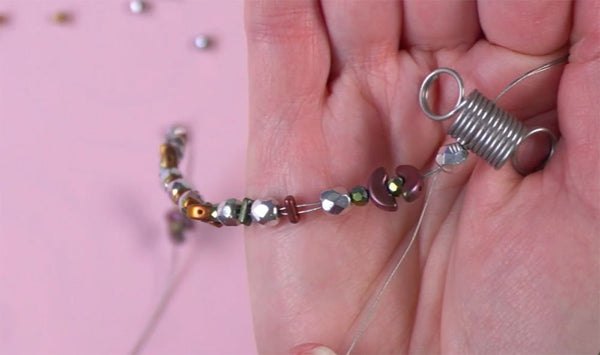
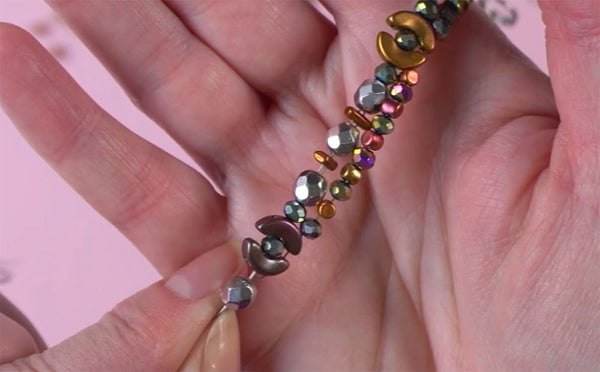
Thread the Centre Strand
Note:There is a bead layout diagram at the bottom of this post.
Onto both strands thread on one of the 6mm Crystal Silver beads, then thread on the Arcos bead through the centre hole. Then thread on one of the 4mm Green electroplated beads.
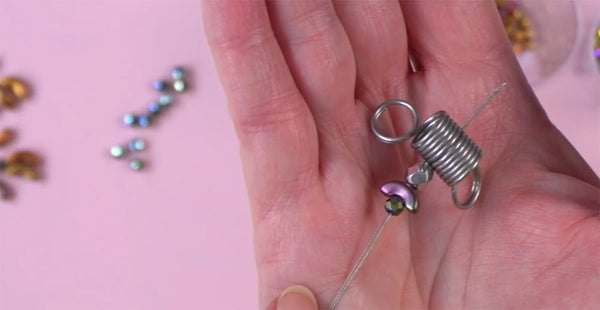
Choose one of the Arcos beads that is similar in colour to the one you just put on. Thread it onto both strands in the opposite direction so that the curve forms a cup around the green bead.
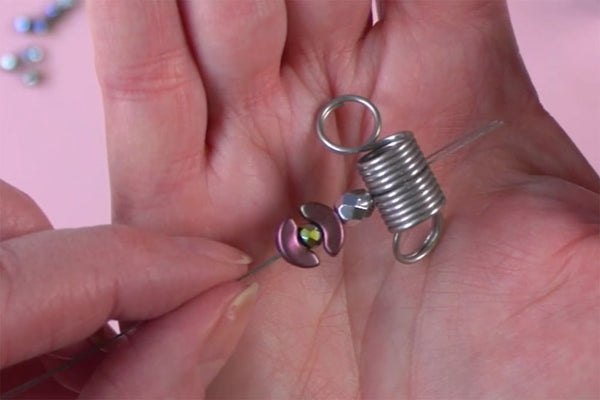
Thread on another green bead, then a 6mm silver crystal bead.
Next split the tiger tail and thread one strand through each hole of one of the Piros beads.
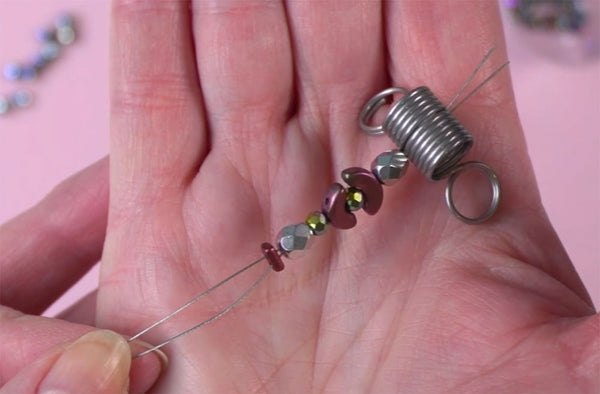
Thread on another crystal silver with both strands going through the bead, then another Piros bead with one strand going through each hole. Thread on one more of the crystal silver beads.

Then add one more of the green beads.
Repeat from the first Arcos twice more. At this point you can add another bead stopper loosely on the end.
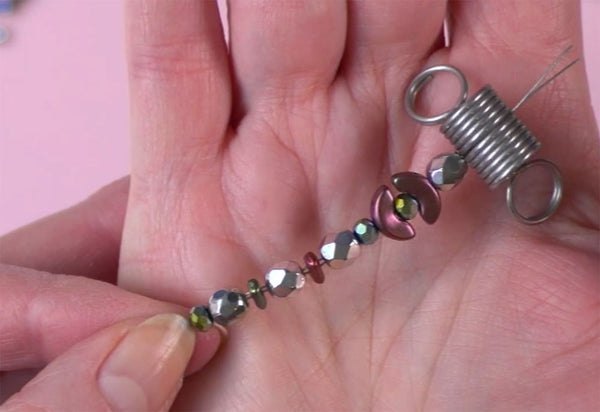
This is the centre strand.
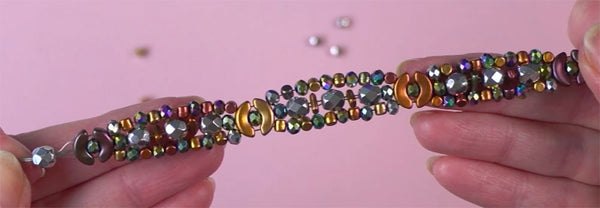
Thread the Second Strand
Tuck one of the remaining strands of tiger tail into the bead stopper, remembering to leave about 10cm (4 inches) so you can attach the clasp.
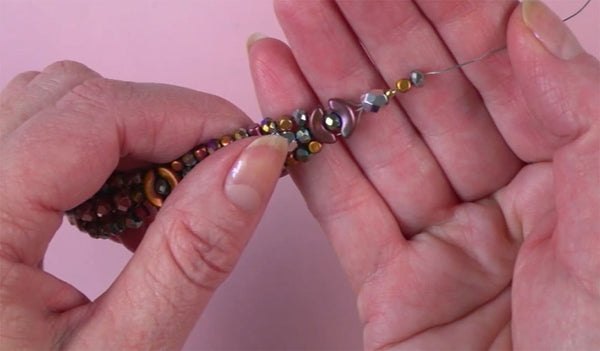
Thread on one of the 6mm crystal silver beads.
Thread the tiger tail through hole on the side of both the Arcos beads.
Thread on a Minos bead, then an electroplated multicoloured bead, and then repeat that until you have nine beads.
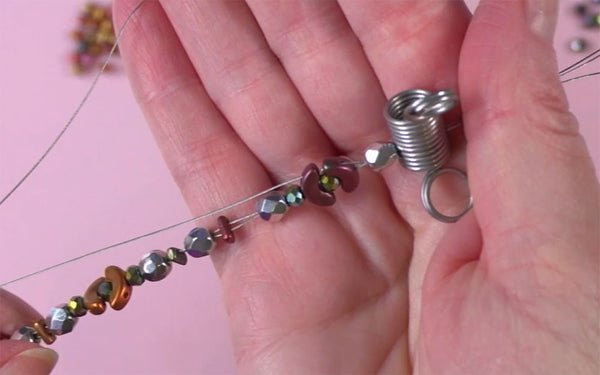
Add an electroplated platinum bead.
Thread the tiger tail through the Arcos holes on the same side as before.
Repeat that two more times, going through the last two Arcos beads.
Thread the tiger tail through the last 6mm crystal silver bead.
Thread the Third Strand
The third strand is basically the same as the second strand except that the beads are reversed in that you begin with a platinum electroplated bead and end with a Minos.
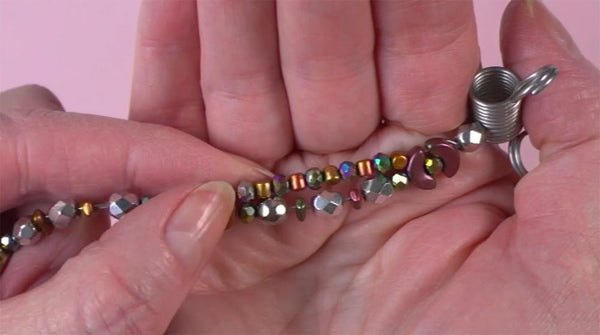
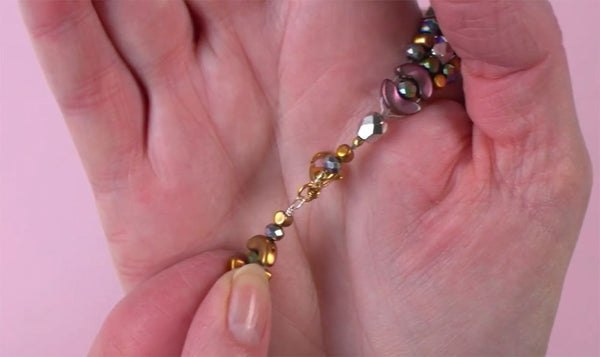
String the Ends
Remove one bead stopper. Thread all four strands of tiger tail through a Magical Crimp Bead.
Squeeze the crimp bead with the Magical Crimp Forming Tool. If you have never used this tool before, or used crimp beads you can watch this video with three ways to crimp.
I love how this Magical crimping tool makes such beautiful crimps.
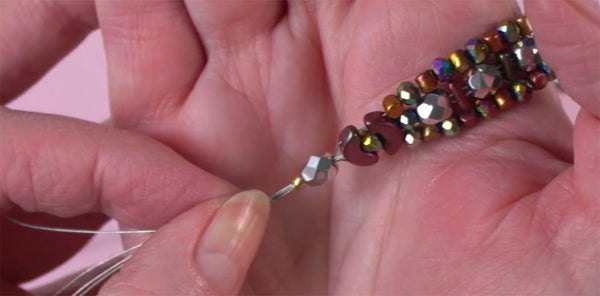
Once everything is nicely crimped and held firmly, trim 3 of the 4 strands of tiger tail nice and close to the crimp bead.
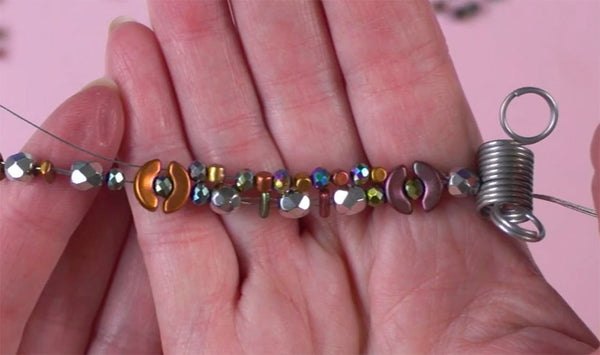
Thread on another Minos and an electroplated platinum bead.
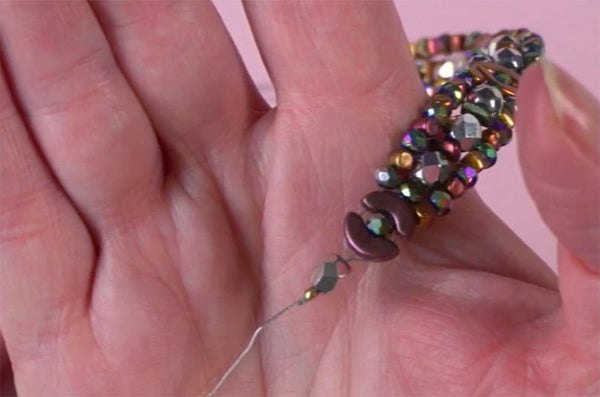
Open the 4mm jump ring using the two pairs of chain nose pliers. If you’ve not done that before you can watch this video all about jump rings.
Thread on the loop of the clasp and close the jump ring.
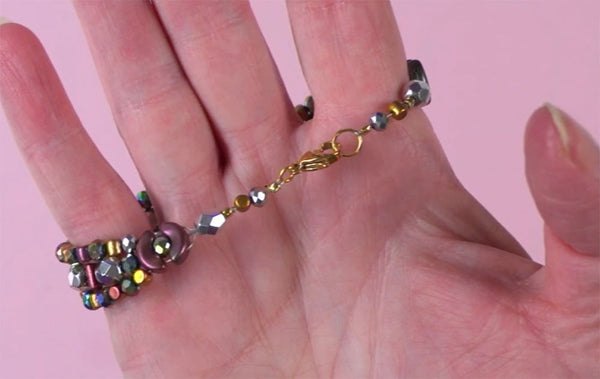
Onto the tiger tail, thread on a crimp bead, and the 4mm jump ring. Bring the tiger tail back down through the crimp bead and the last two beads. Make sure everything is pulled up firmly, making sure there is enough room for the clasp to move, and squeeze the crimp bead with the crimping tool. Trim off the end.
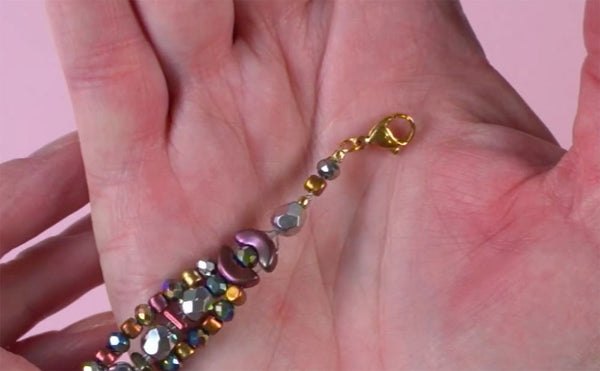
Repeat for the other end, except you will add a 7mm jump ring instead of the 4mm with the clasp.
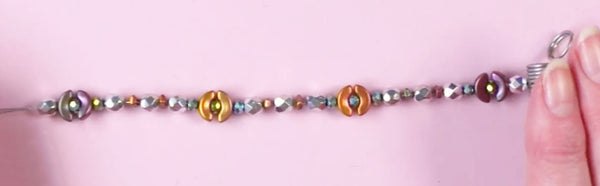
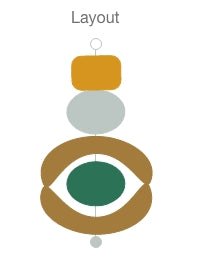
Layout Diagram
Here is a layout diagram of all the beads for the finished bracelet.

Make and Add the Charm
Onto the ball pin thread the beads in the following order:
- Arcos
- Green Electroplated
- Arcos
- Platinum Electroplated
- Minos
Make a wire wrapped loop at the top of the beads, threading it through the 4mm jump ring by the clasp before doing the wrapping. If you’ve never made a wire wrapped loop before, or need more help, watch this video.
That’s all there is to it. I know there’s lots of steps to this bracelet but if you take your time and work through them one by one, it’s actually quite easy, and it’s certainly worth it to get this beautiful bracelet.
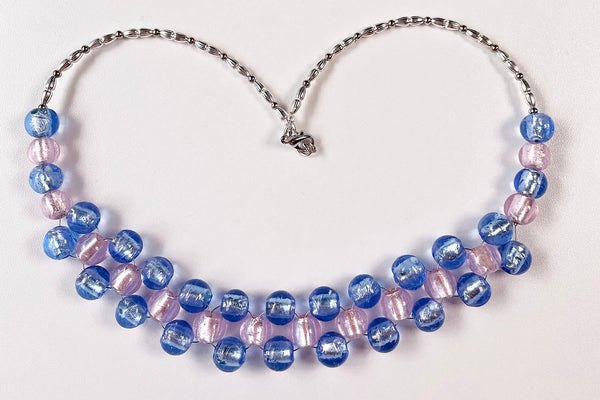
Jewellery I’m Wearing
If you would like to make the necklace that I’m wearing in this video, you can see the tutorial here.
REMEMBER TO PIN FOR INSPIRATION AND SHARE WITH YOUR FRIENDS!!

The author may collect a small share of sales from the links on this page.


Comments
Join the conversation