How to DIY Spiral Earrings

Today, I am going to be teaching you how to make spiral earrings.
They’re super fun to make, and once you know how to do it, you can use the technique in many different ways. Grab your tools and let’s begin.
Tools and materials:
- 16 gauge wire
- Earring wires
- Round nose pliers
- Chain nose pliers
- Wire cutters
- Steel block or anvil
- Chasing hammer or rawhide/nylon hammer
- Ruler
- Earring wire
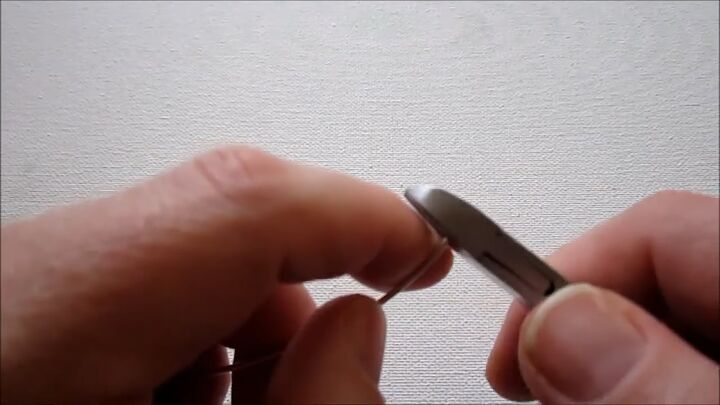
1. Make a flush cut
Make a flush cut on the end of the wire using the back of your wire cutters.
2. Make a loop
Hold the wire in the round nose pliers. The wire should be at the top of your pliers but not poking through.
Twist with your right hand away from you and with your left hand, wrap the wire around the pliers to form a loop.
Go as far as your wrist will allow, and then readjust. Complete the loop by twisting away again.
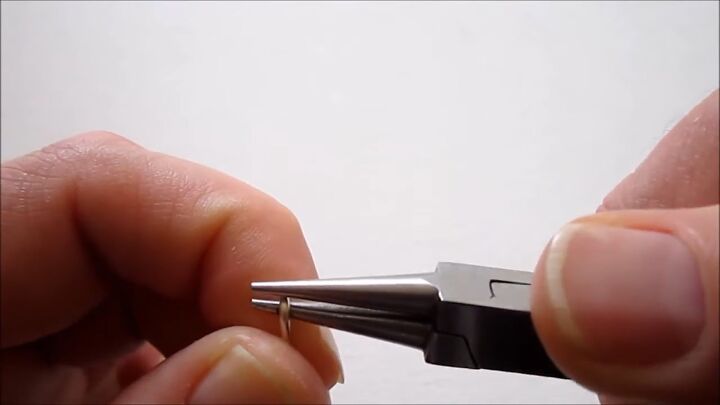
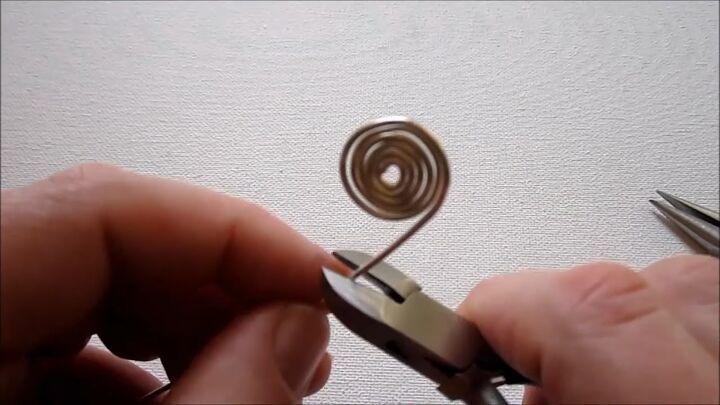
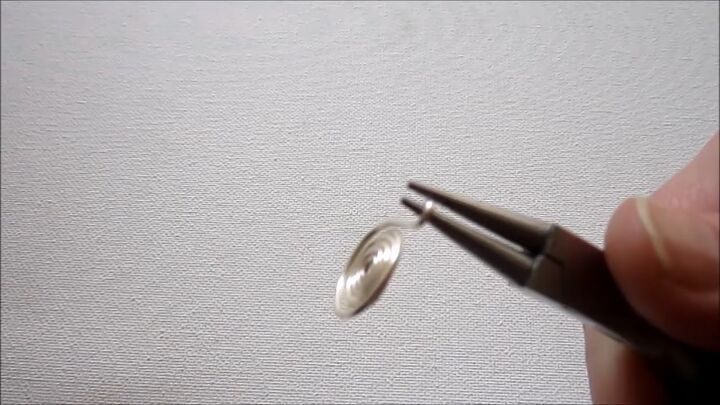
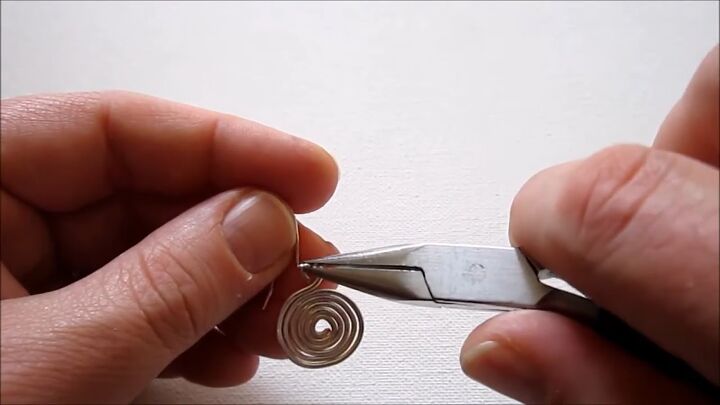
3. Form the spiral
Hold the loop in the chain nose pliers and push the wire up. Then readjust the pliers, twist your wrist and push up again.
Continue doing this, pushing the wire into the spiral to make a nice tight spiral. Stop when you have got the spiral the size that you want it to be.
Bear in mind that the bigger the spiral gets, the harder it is to keep everything together.
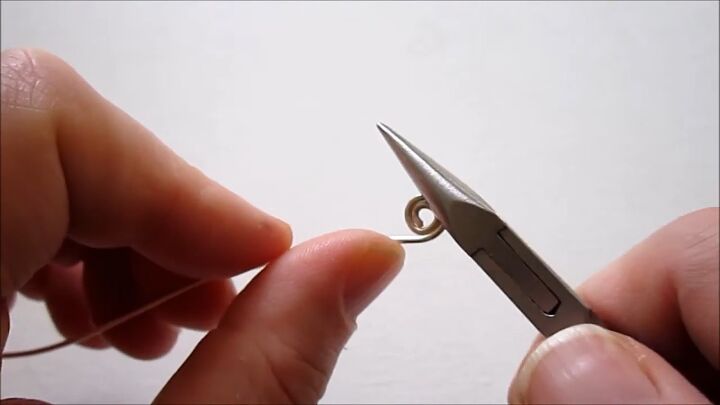
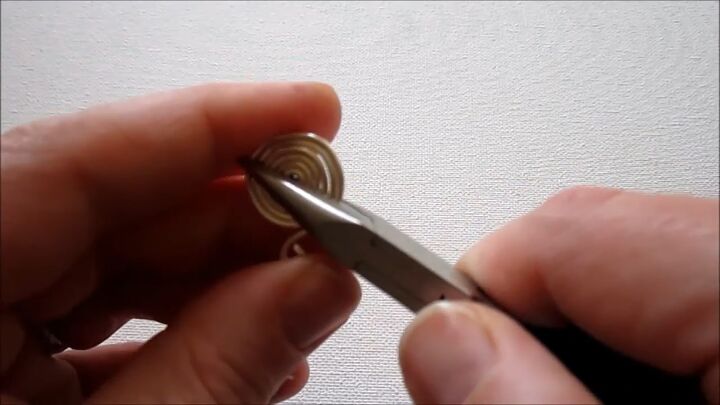
4. Leave a tail and cut
Cut the ends with a flush cut, leaving a tail of about half an inch from the spot where the wire last touched the spiral.
5. Make a loop at the top
Take the round nose pliers again and make a loop at the top of the wire.
Just like before, line up the wire with the top of the pliers, twist away, and then readjust the wire. Then complete the loop.
6. Push the loop down
Push the wire beneath the loop you just made down onto the spiral to join it up with the rest of the spiral.
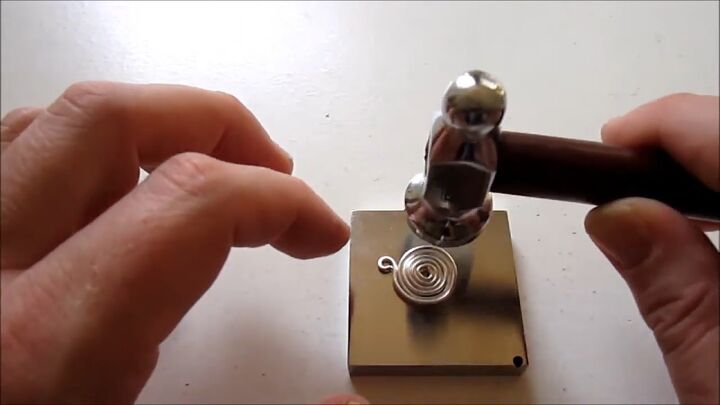
7. Hammer the spiral
You can now decide if you want to keep the wire round exactly how it is now, not changing it or flattening it at all. If that’s how you want it to be, then you’d use a rawhide or nylon hammer.
Or if you want to flatten the wire, which is what I'm going to do, you would use a chasing hammer.
Place the earring on a steel block or anvil and proceed to hammer it on one side. Then flip it over and hammer the other side.
The more you hammer, the flatter it will get, and the more it will spread out. You can decide how much you want to hammer it. Just pay attention to what you're doing.
You don’t really need to hammer the top loop, I did, but it doesn’t really matter either way.
8. Make the second earring
Repeat the same process for the second earring.
When you’re making the spiral, hold it up to the first earring to make sure that the spiral is the same size.
9. Attach the earring wire
The final thing is to add the spiral design to the earring wire.
Before you add it to the earring wire, you want to think about the direction you want your earrings to face. I like mine to go the same way and be identical. Some people prefer to do mirror images of the earrings.
Open up the earring wires the same way you would open up a jump ring. Hold the spiral in your hand, take your chain nose pliers, and pull the loop out toward you.
You don't want to open it up, you want it to stay as a circle. Slide the top loop of your spiral into the earring wire and then close it up. Go back and forth a few times to harden it up a little more and set it into place.
Repeat this for the second earring.
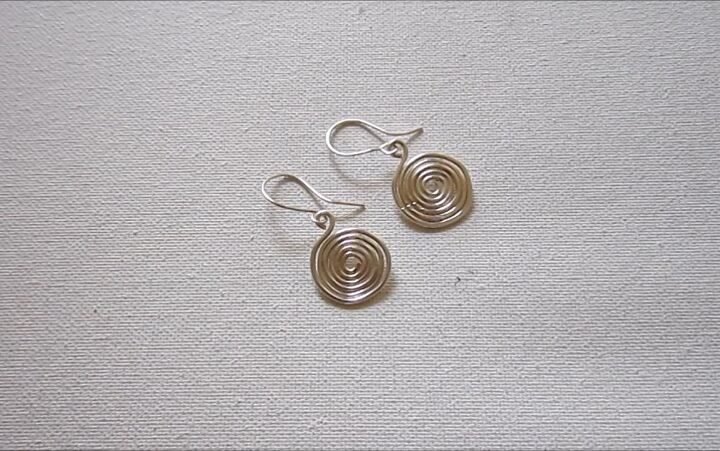
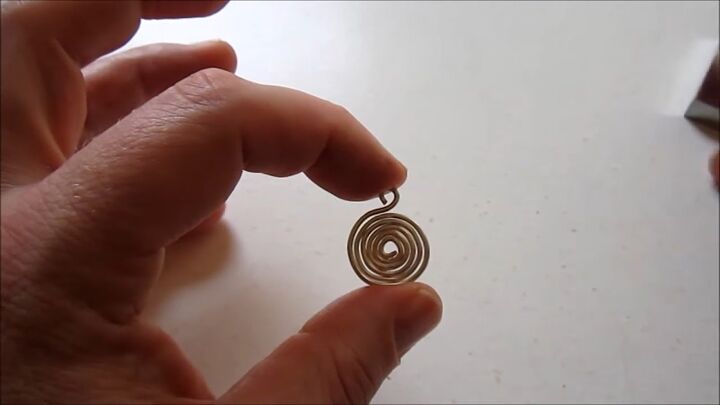
DIY spiral earrings
Here we have our final earrings.
The design is so simple and understated yet funky and fashionable at the same time. Because the earrings are plain silver, I can’t think of a single outfit that they wouldn’t look great with!
If you enjoyed this tutorial, leave a comment and check out my post on How to Make Cute Button Earrings.
The author may collect a small share of sales from the links on this page.


Comments
Join the conversation