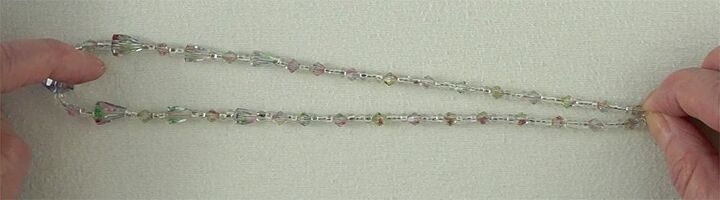
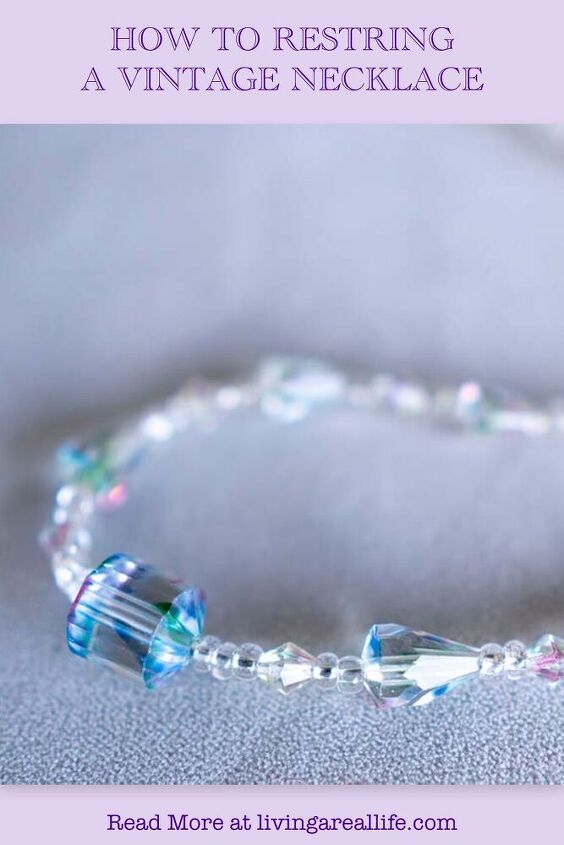
How to Restring a Vintage Necklace
I inherited a few pieces of jewellery from my Mum and I’ve been worried about wearing them as they are very fragile so I decided to restring them.
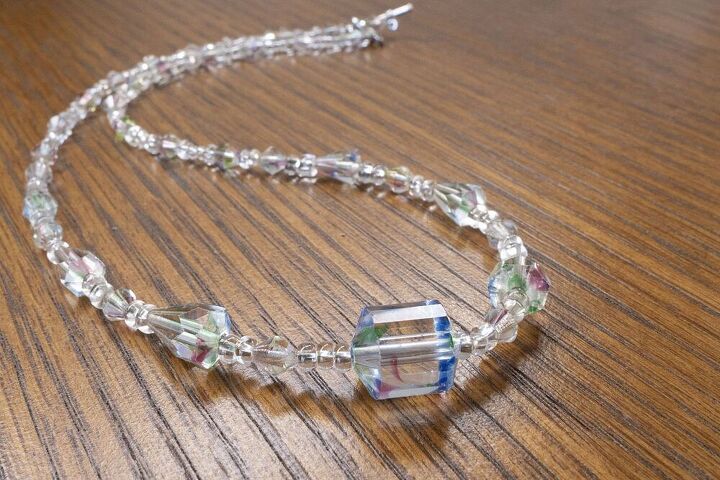
Today, I’m sharing how to go about restringing a necklace so that you can do the same should you need to.
Materials
Here’s what you’ll need to restring a necklace:
A necklace
Stringing Material – I used 0.38mm Silver Grey Tiger Tail x70cm
A Clasp – I used a 13.5mm Silver Toggle Clasp x1
Crimp beads – I used 1.5mm Crimp Beads x2
Tools
Chain nose pliers
Flush cutters
Scissors
A bead design board or a flat surface
Note: If you’re not using a bead design board then I suggest laying a piece of fabric on your surface, so the beads don’t roll away.
Instructions
To learn how to restring a vintage necklace, please watch the video or follow the instructions below.
Step 1 – Remove the Clasp
Lay the necklace on the bead design board and carefully snip off the clasp using either the flush cutters or the scissors (my flush cutters wouldn’t cut the thread so I used scissors).
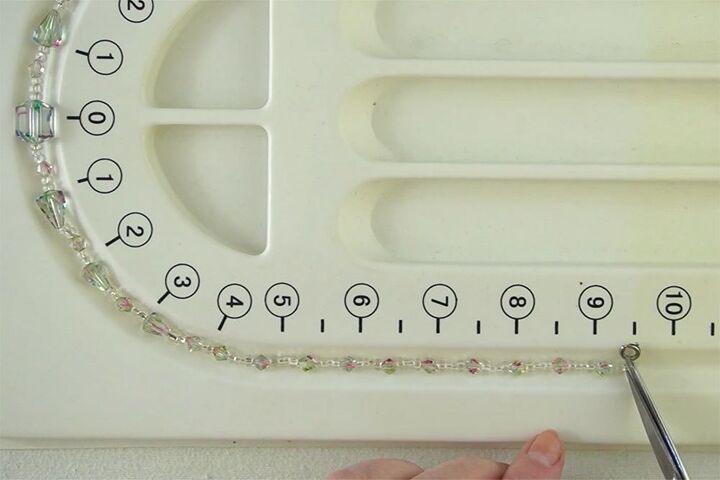
Step 2 – Unstring the First Half
Carefully remove the stringing material from the first half of the necklace, making sure that you don’t change the order of the beads. Leave the second half of the necklace threaded so that you can refer to the pattern if necessary and they won’t move while you’re restringing the first half. There are some tips on how to do this in the video.
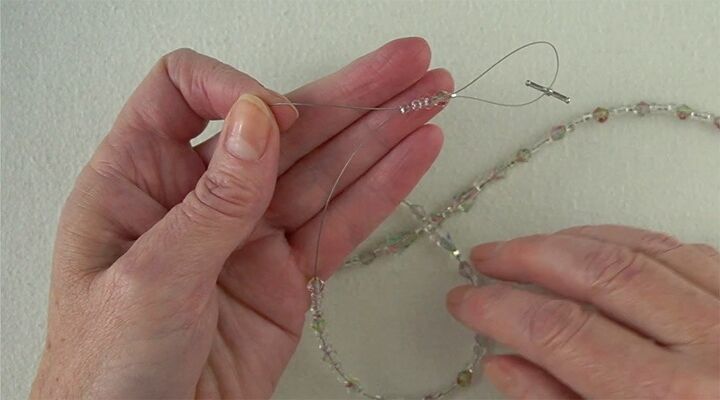
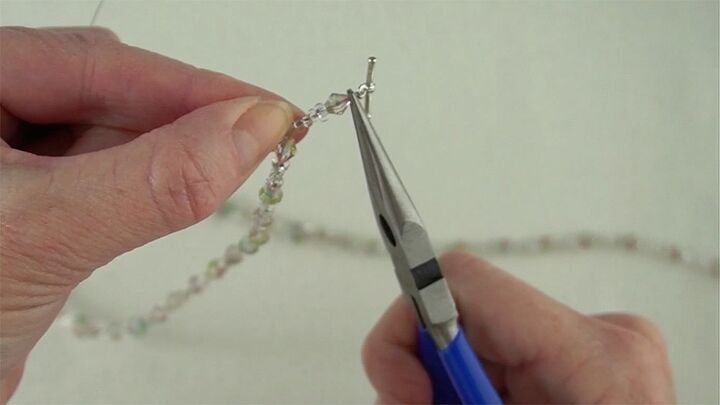
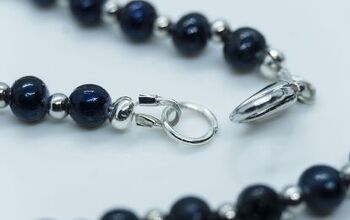
Step 3 – Add One Piece of the Clasp
Lay one of the crimp beads on the table with the hole facing up. Using the end of the Tiger Tail like a needle, pick up the crimp bead. Thread on one end of the clasp, then thread the Tiger Tail back down through the crimp bead.
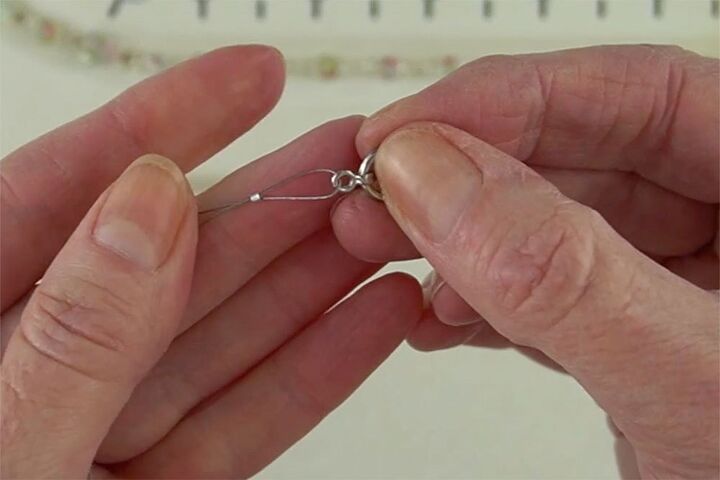
Push the crimp bead up close to the clasp. It needs to be close enough so that the Tiger Tail is hardly visible, except you do need your clasp to be able to move around slightly. Use your chain nose pliers to squeeze the crimp bead flat.
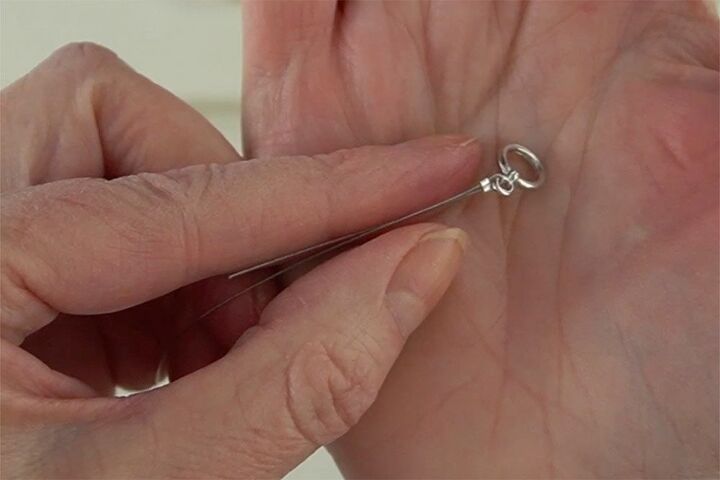
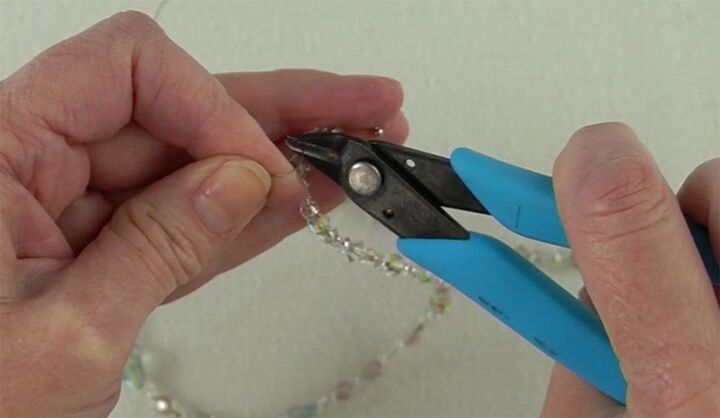
Using the flush cutters, trim the short end to about 1.5cm from the crimp bead.
Step 4 – Restring the First Half
Using the Tiger Tail like a needle and checking constantly that the beads are in the correct order, string on the first half of the beads.
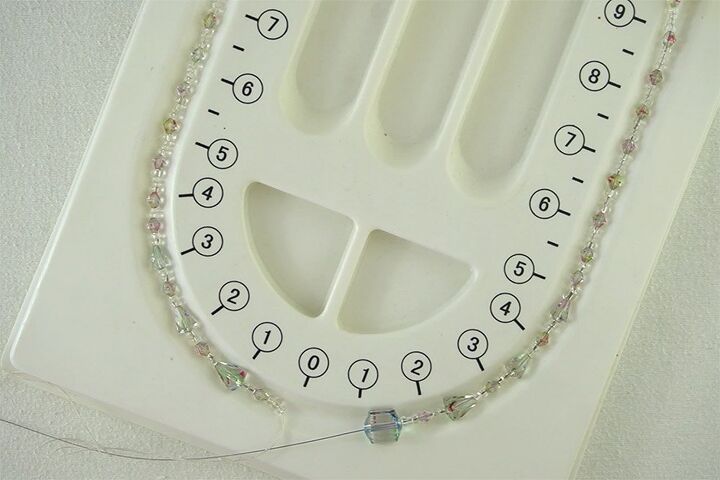
Double check that the beads are in the correct order and that they match the other half of the necklace.
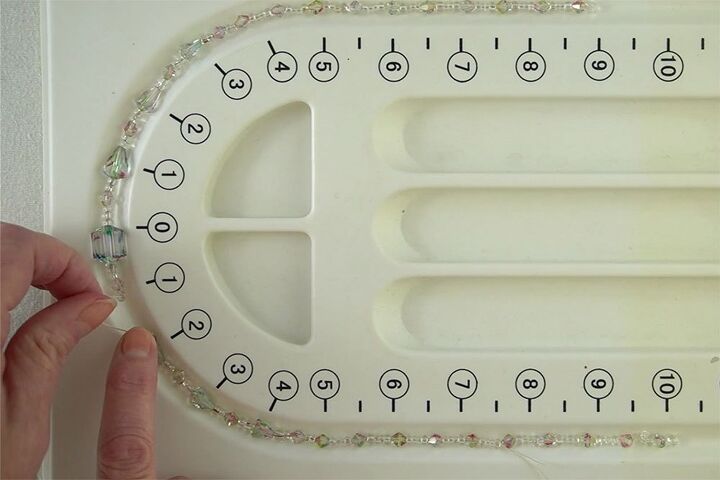
Step 5 – Unthread the Second Half
Place your fingers over the beads at the bottom of the second half where the thread is coming out. Carefully, pull the stringing material out of the beads, ensuring that everything stays where it is. Very carefully remove your fingers making sure that the beads don’t stick to your fingers.
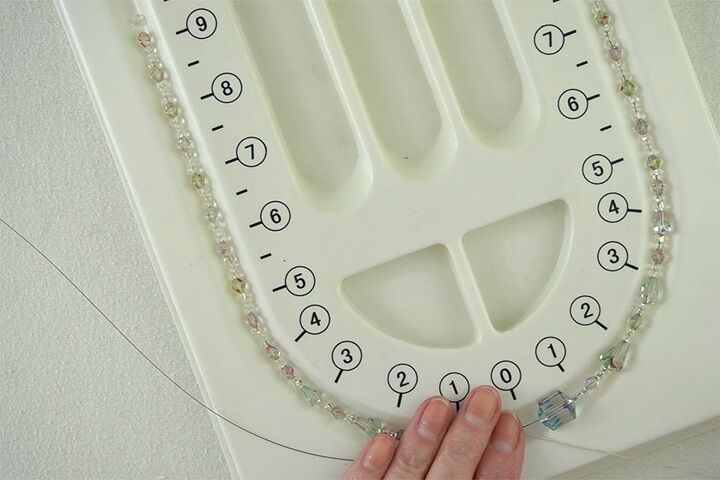
Step 6 – Double Check Pattern
Lay the half of the necklace that you have restrung on the board next to the remaining beads and double check that the pattern is correct. My necklace was missing a bead in the second half so I took on from the end and placed it in the gap – it’s more important for the beads to be in the correct order close to the front on the necklace, rather than at the back, by the clasp.
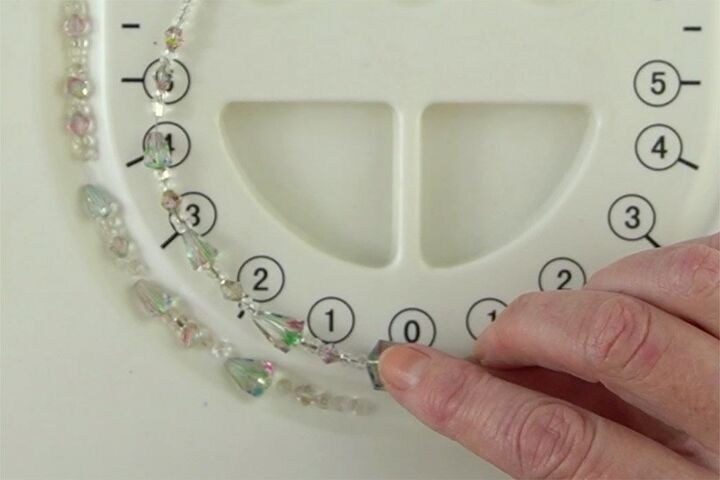
Step 7 – Restring the Rest of the Beads
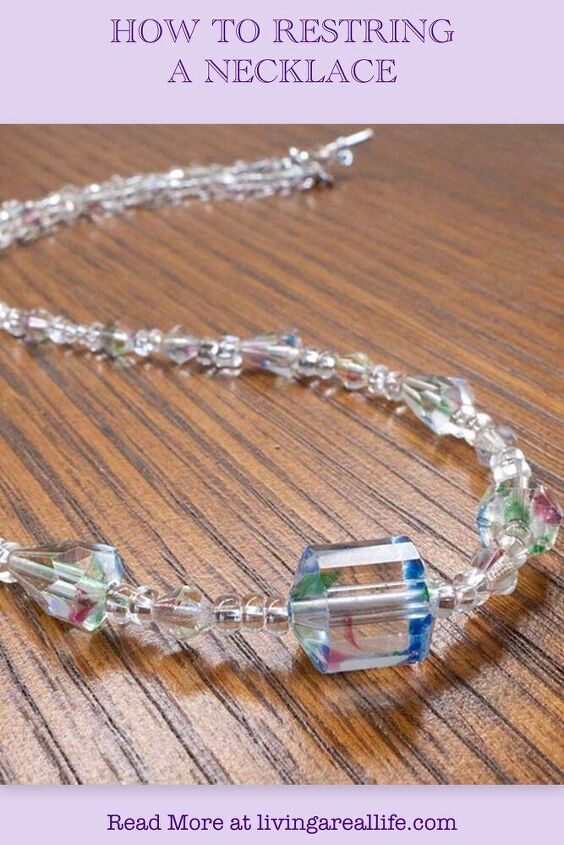
Using the same method as before, restring the remaining beads until you have all the beads on the Tiger Tail. Double check that both sides of the necklace are the same length by holding the beads and clasp at one end level and the focal bead or centre of the necklace at the other. Pull it apart so that you can tell if you have the same number of beads. You can see that I am missing one bead at the clasp end.
Step 8 – Add Second Half of Clasp
To add the remaining piece of the clasp, you just repeat step 3 above. Thread the tail back down 3-4 of the beads before you squeeze the crimp bead.
Make sure that there are no spaces between the beads when you pull the Tiger Tail tight and the crimp bead right up close to the clasp.
Trim off the excess Tiger Tail.
Now you know how to restring a necklace. Whether it’s vintage or something you brought at the local store, if you love it, it’s worth restringing.
I hope this post has helped you out.
If so…..
PIN FOR INSPIRATION AND SHARE WITH YOUR FRIENDS!!
⇓ PIN THIS ⇓
The author may collect a small share of sales from the links on this page.


Comments
Join the conversation
I definitely need to re-string some vintage necklaces.