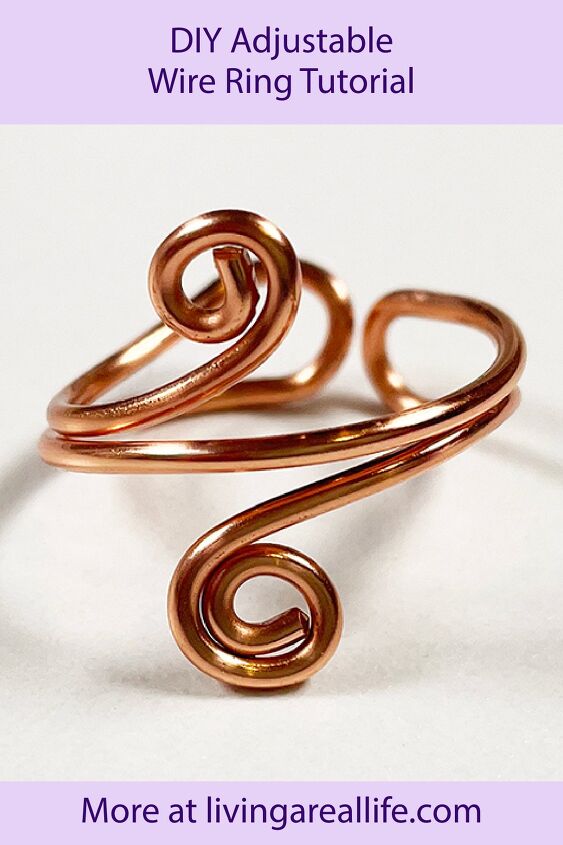
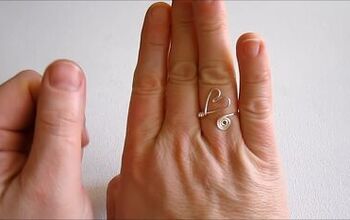
DIY Adjustable Wire Ring
Lately I’ve been playing with making wire rings. This one is so simple but really lovely. It’s also adjustable so you don’t need to worry too much about getting it to be the perfect size. It’s also a great gift idea if you don’t know the person’s ring size.
Materials
Here’s the materials you need to make this ring:
You could also use an 18 gauge wire for this ring but it wouldn’t be quite so sturdy. Remember that the smaller the number, the larger the diameter of the wire (it’s fatter).
Tools
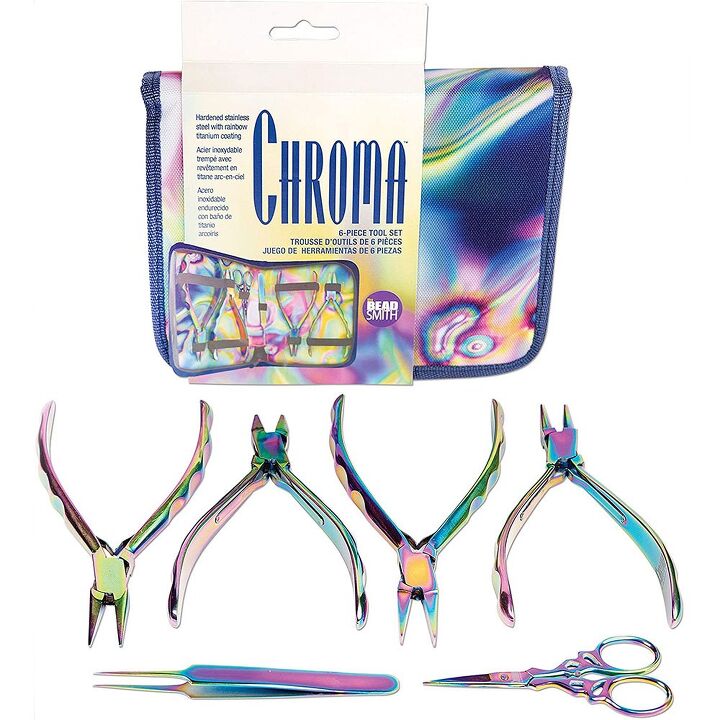
The tool set I’m using in the video is the 6 Piece Chroma Plier Set. It’s so very cool.
Instructions
Please watch the video or read the instructions below.
Cut the Wire
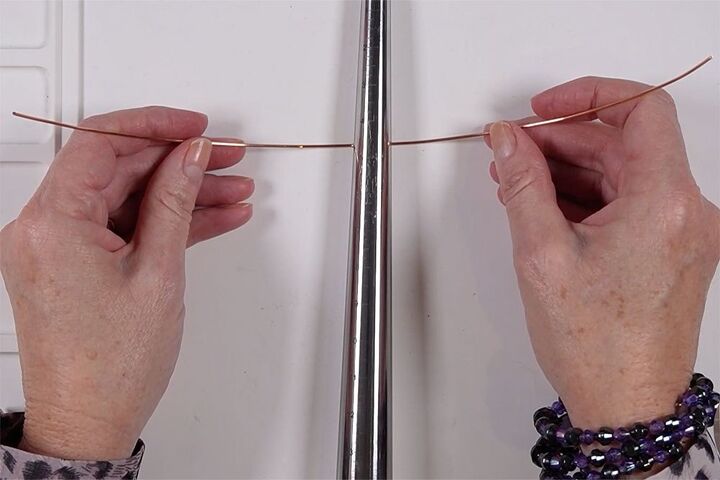
Unroll a piece of wire 25-30cm long. Before you cut it off the roll, use your nylon jawed pliers to straighten the wire – you just need to remove any major kinks.
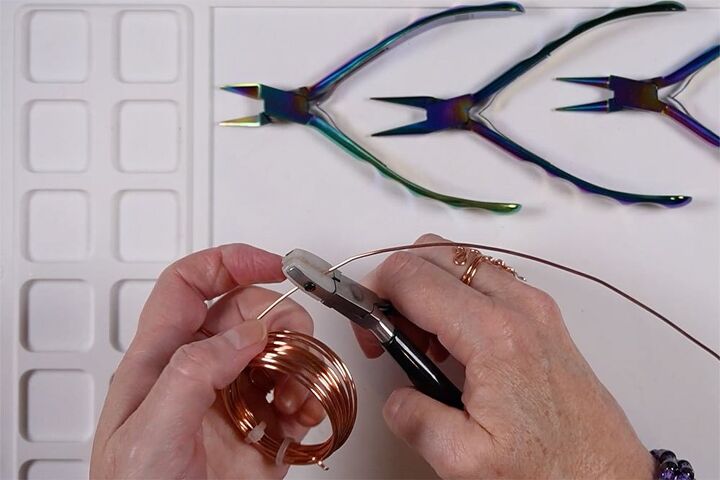
Don’t worry about the curve, that will be fine.
Cut the wire.
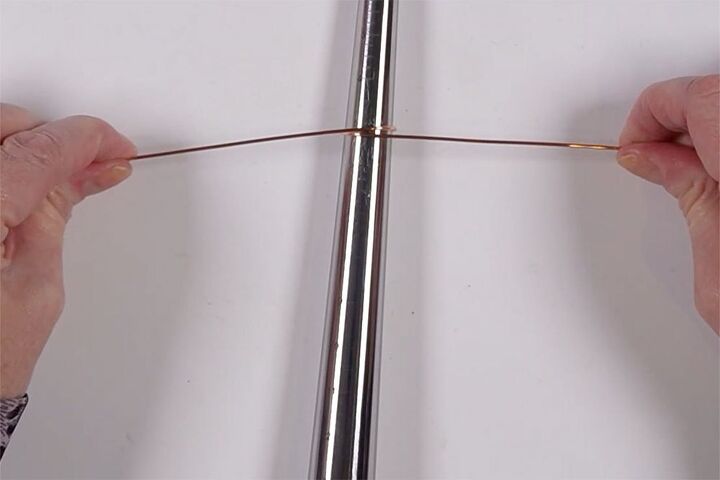
Choose the Size
The mandrel has sizes marked along the length. I chose a size 5 because my fingers are quite small and the ring will become larger as you make it. In other words, choose one size smaller than you wish the ring to be. This is not too essential as remember, our ring is adjustable.
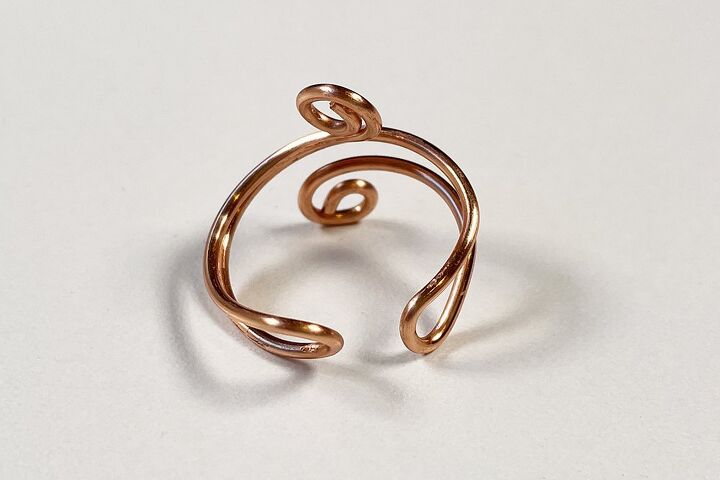
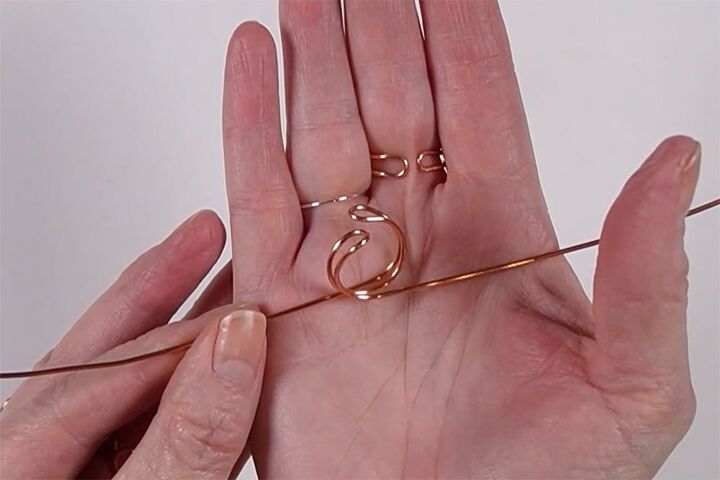
Shaping the Back
Place the centre of the wire under the mandrel at the size you have chosen – for me size 5, with the curve of the wire facing upwards.
Bring each end of the wire up and wrap it around the mandrel, pulling it tightly and crossing the two pieces over each other.
Remove it from the mandrel. It should be a loop with the wire crossing over and two long ends.
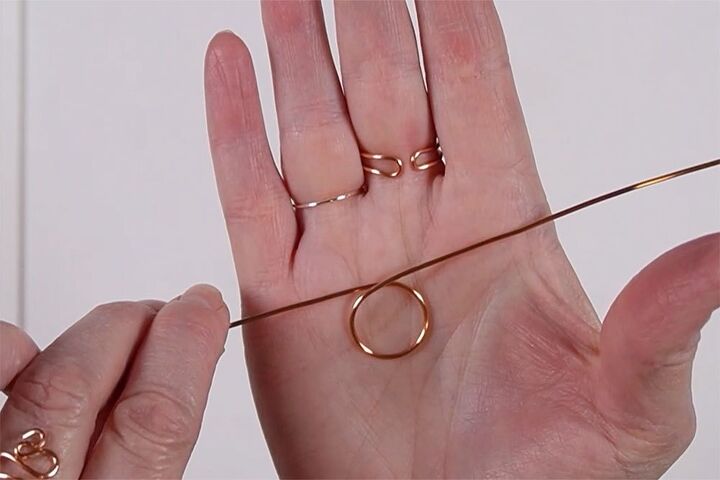
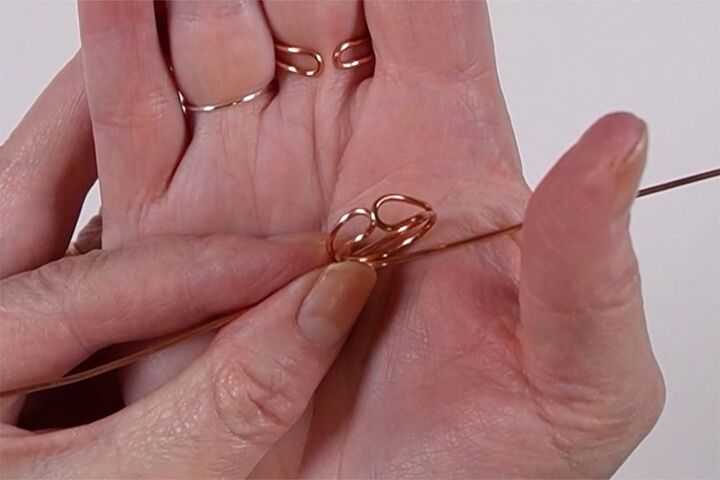
Place the round nose pliers between the two wires where they cross. The loop should be flat against the side of your pliers. You want to make sure the wire is quite close to the fat end of the jaws of your pliers.
Push the wire around the plier until it comes back on itself and crosses under the other wire.
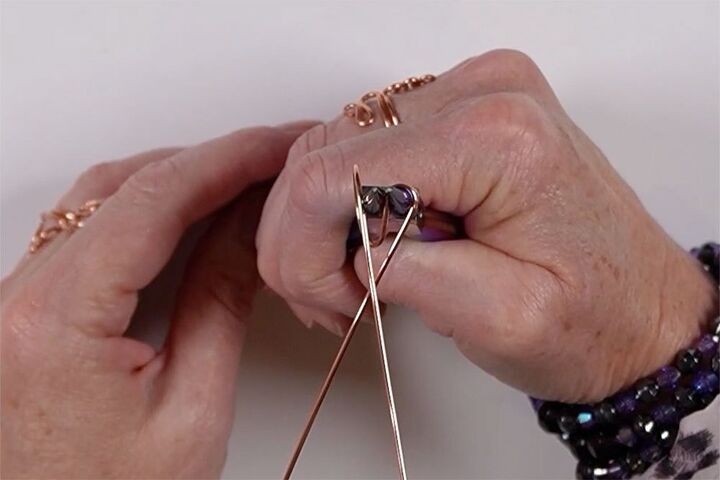
Turn the work around and repeat for the other side. Your aim is for the two loops to but up against each other.
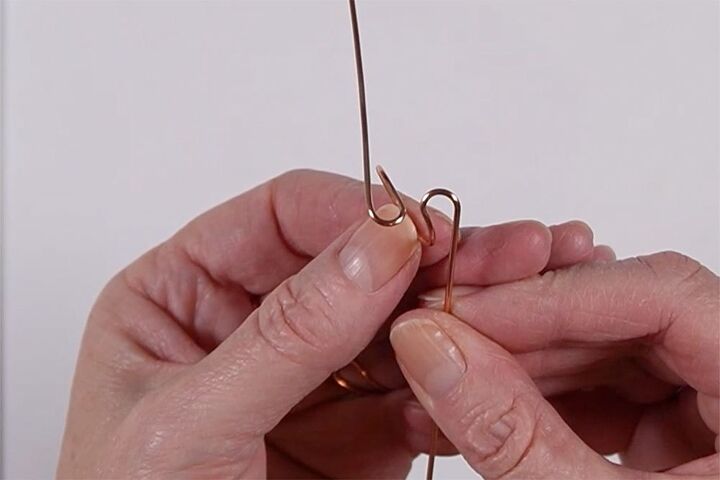
If necessary, use your nylon jawed pliers to straighten everything out. The nylon jawed pliers will not mark the wire.
Use your chain nose pliers to give the loops a squeeze so that they close up a bit and the wires cross.
Place the ring back on the mandrel – you will see that it now fits a size 6. Holding your thumb over the loops at the back, wrap one wire to the top of the existing loop and one to the bottom until they cross over.
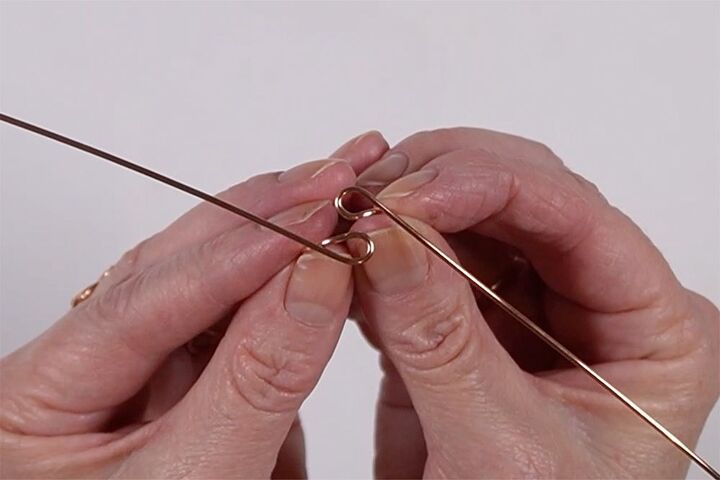
Remove it from the mandrel. It should look like this.
Adjust the back loops so that they but up against each other.
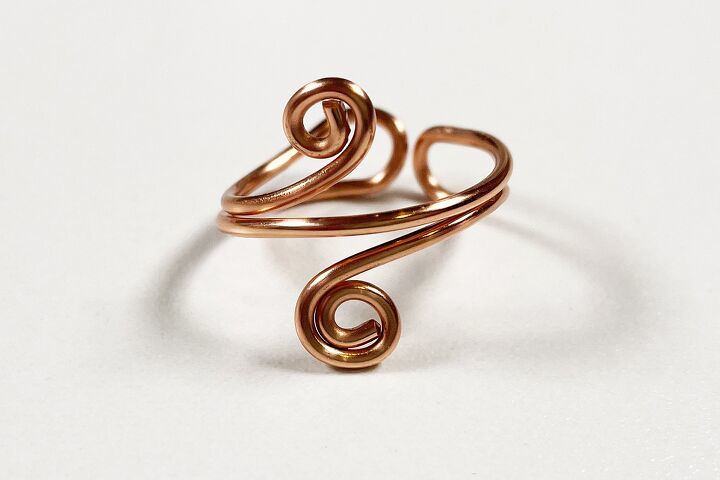
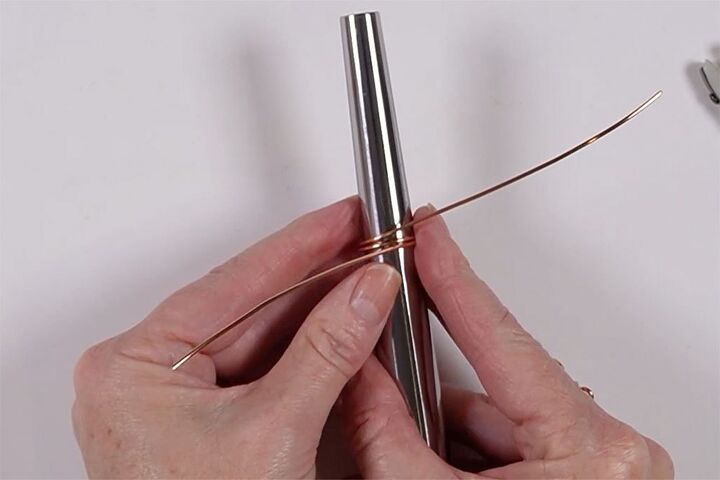
Shaping the Spirals
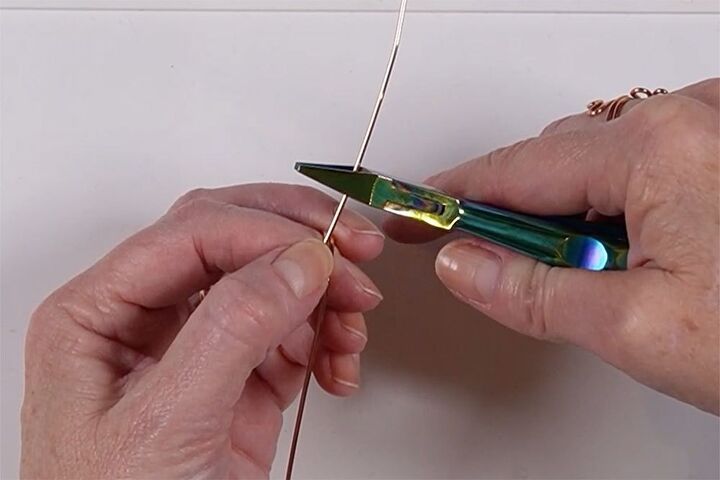
Trim each end of the wire to about 2cm from the edge of the ring. Make sure you have the flush side of your cutters facing the ring when you make the cut.
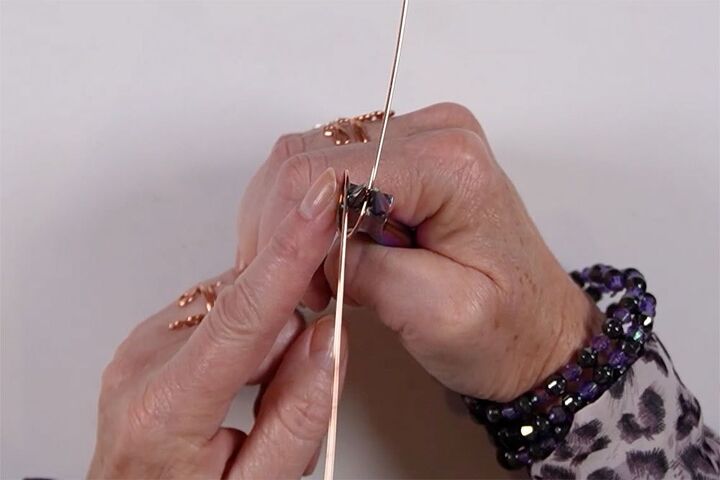
Using the tip of the round nose pliers, make a tiny loop in the end of the wire. If you’ve never made loops before, you can watch this video for a full tutorial.
Repeat for the other piece of wire, ensuring the loop goes the opposite way.
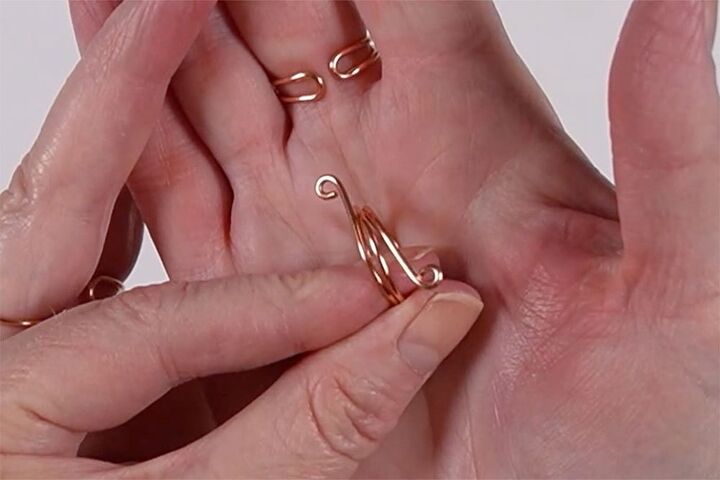
Hold the small loop in the jaws of the nylon jawed pliers so that the end of the loop is just inside the jaws.
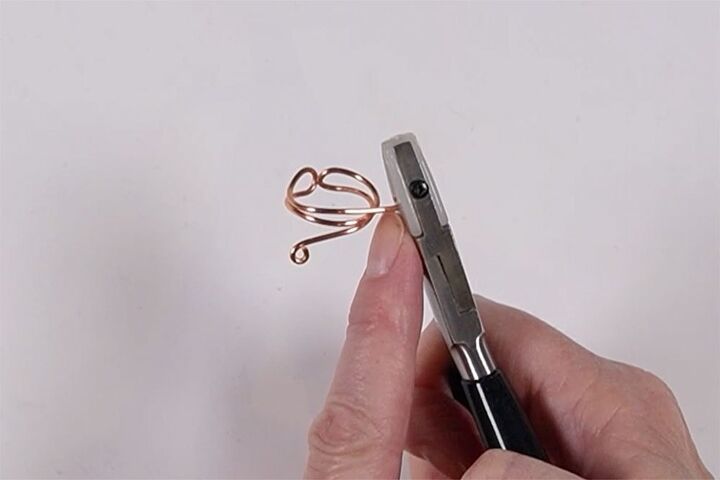
Holding really firmly, rotate the pliers towards the ring (move your elbow away from your body). Readjust the pliers and continue working until you have the number of spirals that you want. Take your time with this step, turning a little bit at a time.
Repeat for the other side.

How did you enjoy this tutorial? It’s a little different but I love it. What about you?
⇓ REMEMBER TO PIN THIS PROJECT FOR INSPIRATION AND SHARE WITH YOUR FRIENDS!!⇓
If you like my blog be sure to click on the RECOMMENDED button and SHARE it with your friends! It’s the best way for my blog to grow so I can continue to give you great content. I would love for you to be part of my family so sign up to receive my emails. Every time I post a blog, I will send you an update email. Also, follow me on Facebook HERE, Instagram HERE, and Pinterest HERE.
Come by and say Hey!
The author may collect a small share of sales from the links on this page.


Comments
Join the conversation
thank you for this!!!!