Date Night Jumpsuit Refashion
My husband and I try to have date night every 2 weeks, but we get lazy and don’t do anything about it. Logistically, it takes more planning and forethought than I care for – arranging the babysitter, deciding where to go, deciding what to do and trying to get it all done by 11 pm. Honestly, it’s easier to stay at home, order pizza and watch Lip Sync Battle on Tivo. This year, I want to get better at date night, like, actually have a date night. I’m trying to convince myself that making a date night outfit will make me commit to it.
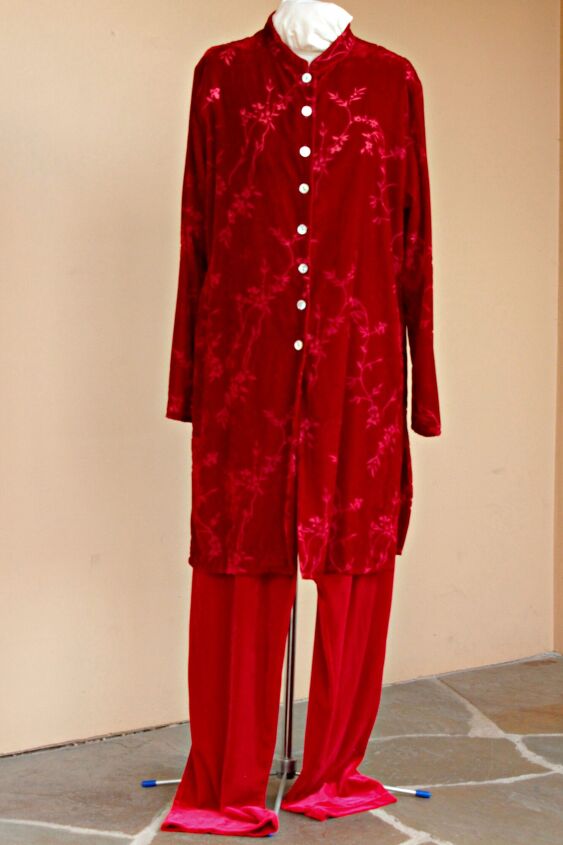
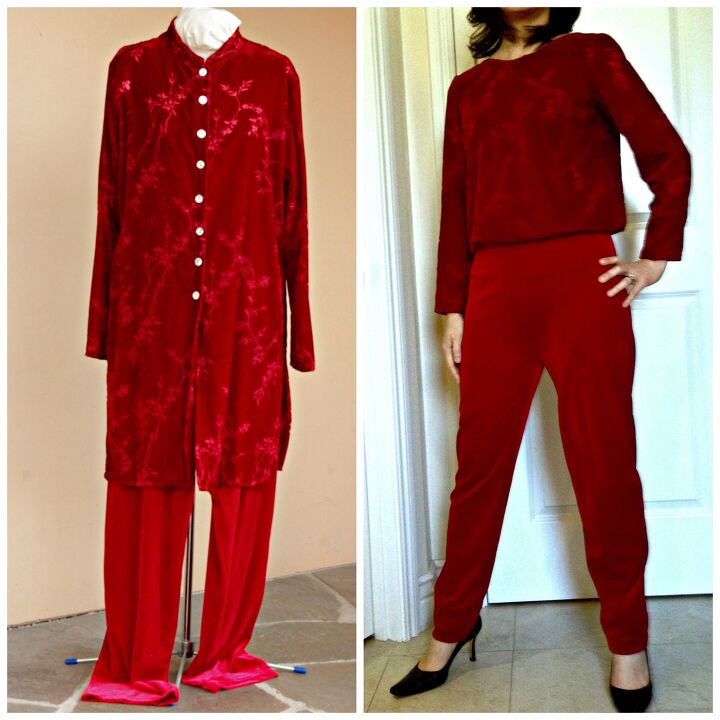
I bought this outfit at the thrift store because velvet and velour from the 90’s are making a comeback. I had no idea what to do with it, so it sat in my junk room guest room for the longest time. With my new commitment to date night, I thought this would make a great date night jumpsuit.
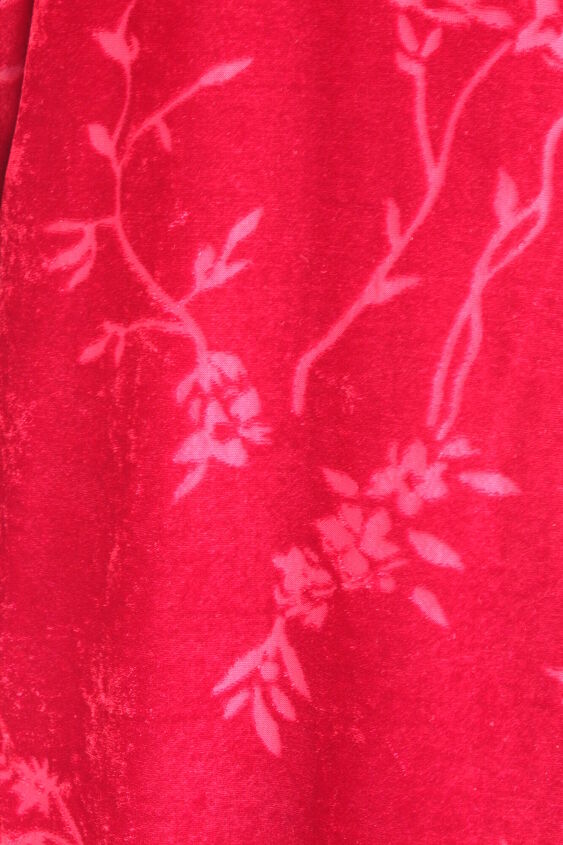
The top is burn out velvet and the bottom is velour. Here’s a closeup of the top, a lovely burnout velvet. By the way, photographing velvet and velour is a pain in the a**. Depending on the light and angle, it can suck in all the light and look super dark or completely reflect all the light and look super bright. Sooooooooooooo annoying. In this tutorial, you’ll see various of shades of red ranging from dark burgundy to bright tomato red. I’ve read how professional photographers hate velvet and velour, and now I understand why. If any of you have any tips, please share them with me.
Here’s an overview of my refashion:
- Remade the top using my Laurel pattern from Colette.
- Took in the sides and crotch of the pull on velour pants. Shortened and hemmed the pants.
- Attached the top to the pants at the waist.
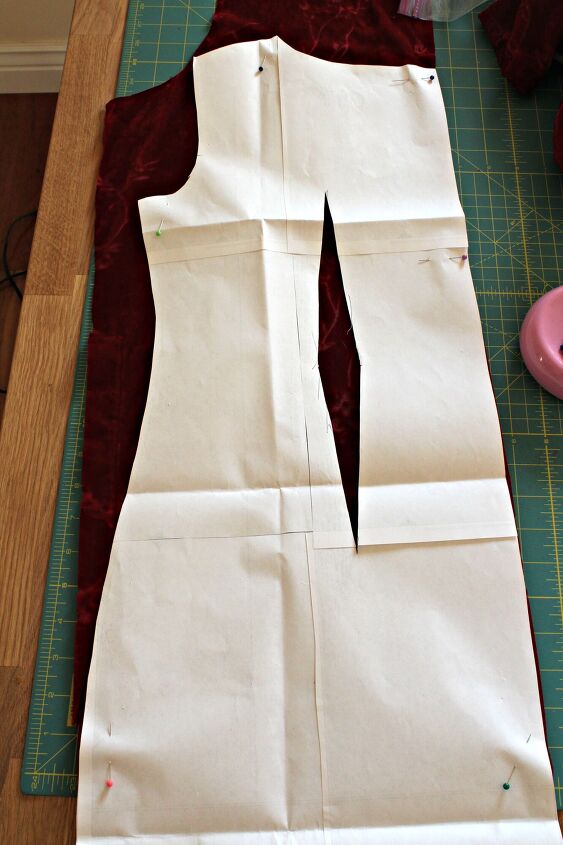
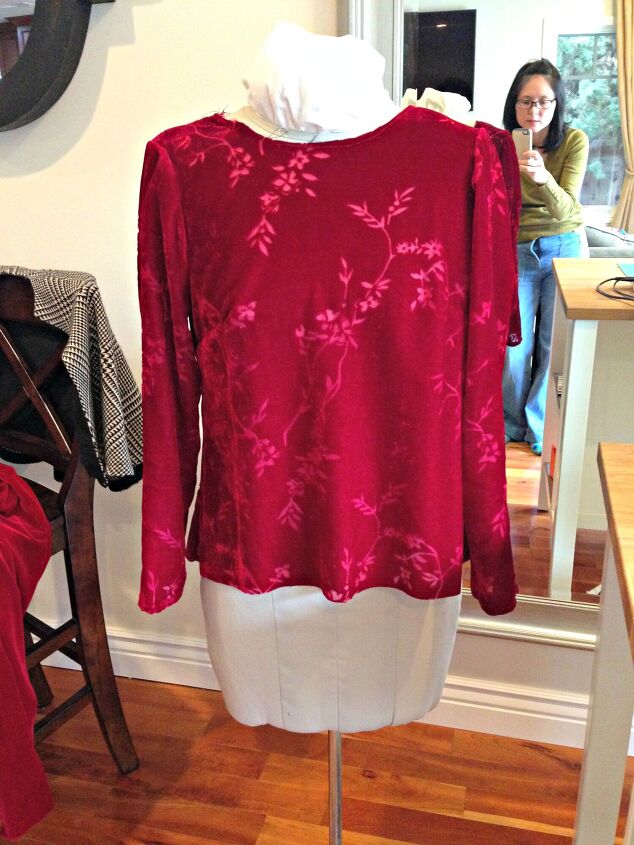
I reused my Laurel pattern from Colette (same one I used for my Bell Sleeve refashion) for the jumpsuit top. To get the blousy effect, I didn’t sew the back dart (yay, less sewing).
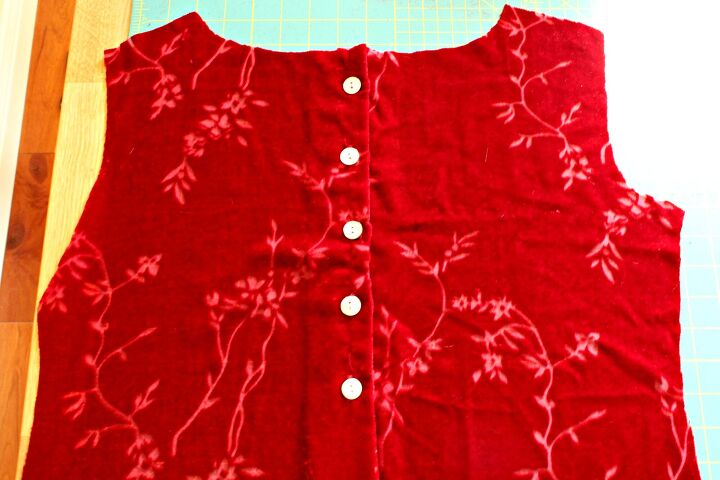
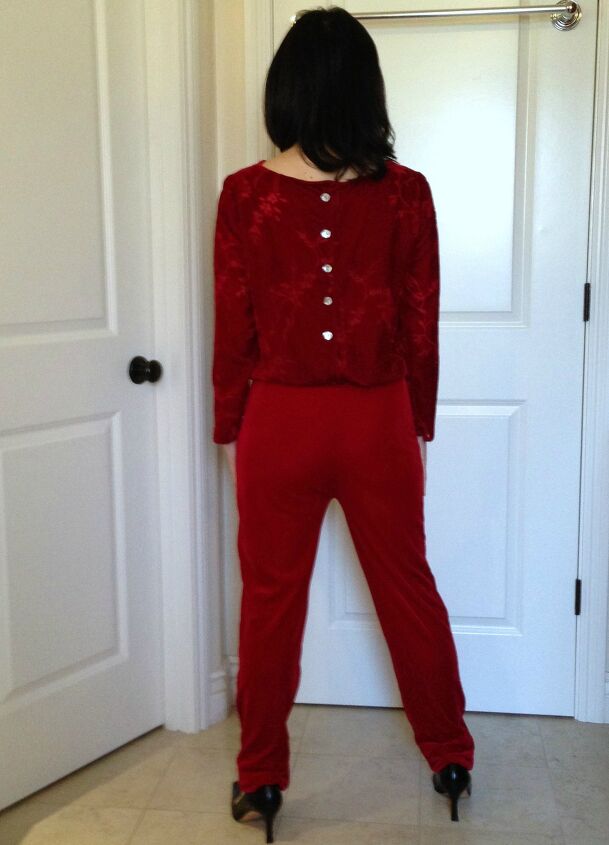
I used the front of the shirt for the back of the jumpsuit and reused the buttons and buttonholes (yay, less sewing again). The buttons look white in the picture, but they are actually gray-ish shell buttons. Either way, the buttons stick out like a sore thumb. Why didn’t they use red or black buttons? I’m thinking of replacing them with covered buttons made with leftover velvet or velour.
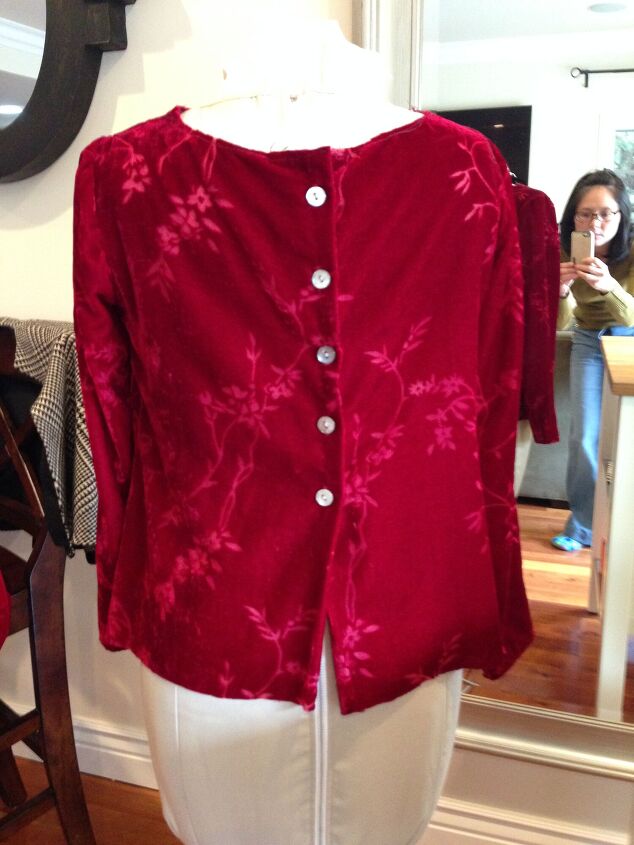
I cut out the rest of the pieces from the old top and sewed it into the new top. I cut the shirt off at hips for 2 reasons. First, I wanted the top to be blousy. Second, I needed enough ease so I can bend over comfortably. I found out the hard way with my first jumpsuit refashion that if I didn’t add this ease at the waist, the jumpsuit will be perpetually riding up my butt.
*Update – My sister just pointed out that my fly is wide open in these pictures. My first instinct was to run home and delete these pictures. Once I got over the initial shock and embarrassment, it struck me as funny, so I’m leaving it in so you can get a good laugh at my expense.
I finished the neckline with home made bias binding. It’s so much cheaper to make your own bias binding than buying it at the store.
Next, I tackled the velour pull on pants. I got so carried away with sewing that I forgot to take pictures. Pretend you see pictures of me taking both sides in 1″ and taking in the crotch about 3″.
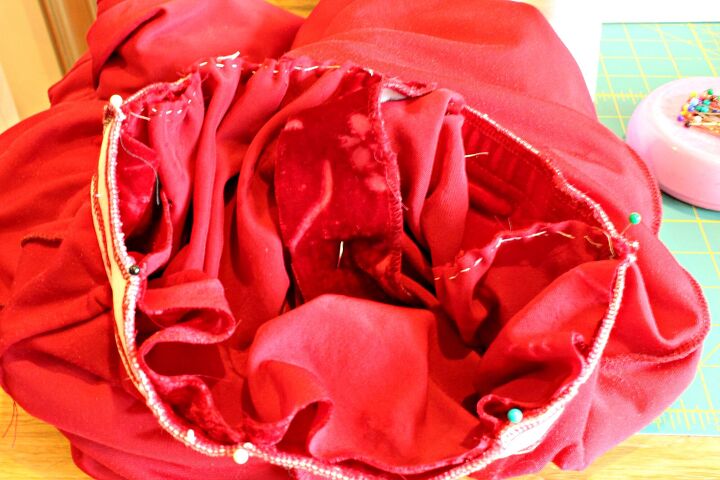
With right sides together, I attached the top to the velour pants at the waist. The top was wider than the waist, so I stretched the elastic waist to fit the top while I sewed.
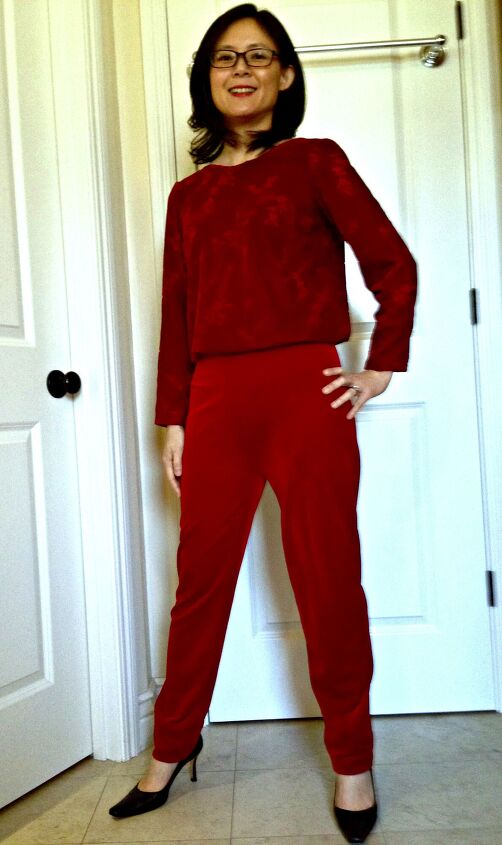
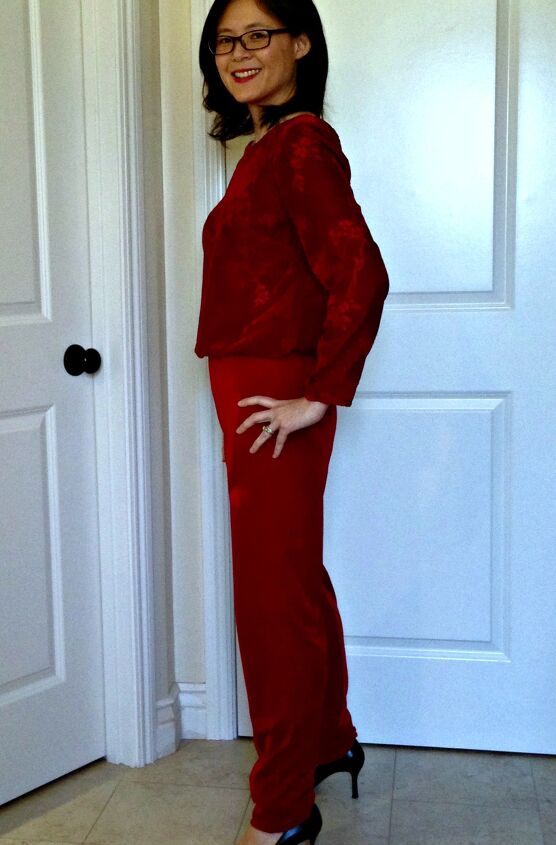
Looking at the photos, it’s clear to me I need to take up the hem of the pants about an inch. I don’t like the way the fabric pools round my ankles. These pictures make me want to cry. The jumpsuit is so cute in person but drab and lifeless in these pictures. Stupid velvet and velour. So luscious and beautiful in person, but almost impossible for amatuer photographers like me to shoot. I hope these pictures don’t deter you from working with these fabrics or scare you away from this project. It’s an easy project where you sew the top to a pair of pull on pants. Just make sure you have enough ease in the waist so you can bend over and have a long enough closure in your shirt so you can pull it over your hips.
The author may collect a small share of sales from the links on this page.


Comments
Join the conversation
I have to be honest- looking at the outfit before I was not expecting much. But you have really knocked it out of the park! Adorable jumpsuit! Looks cozy too for a cold winter night.
You are very talented! I love the new look and would definitely change the buttons, otherwise...perfecto!