How to Do Cute Messy Buns on Long Hair in 4 Different Ways

Today I want to create four messy buns for you. These looks are super easy and super quick. I hope you like them! Let’s get into it.
Tools and materials:
- Bobby pins
- Hair tie
Messy bun 1
1. Like a ponytail
Start off like you are putting your hair into a ponytail. Then, you are going to take your hair and spread it around your hand.
2. Create the bun
Grab the hair with one hand, then remove the other hand and grab it with that hand as well.
3. Tie up the bun
Wrap the hair tie around the little bun that you have created,
This looks funny at first, but in the end, it will look cute!
4. Spread out the bun
Spread out the bun with your hands by pinching and pulling it. The messier the better of course!
It should look something like a big ole mushroom.
5. Wrap remaining hair
Take the rest of the hair that is hanging out and wrap it around the base. Secure with bobby pins.
6. Fluff
Fluff out the bun until it is more even.
Pull out the hair around your face.
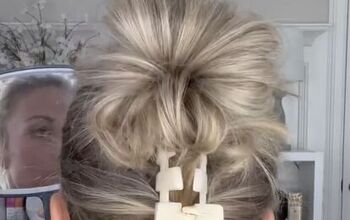
This is the front and back of messy bun number one. Super cute!
Messy bun 2
1. Tie up the bun
Pull your hair up and tie it into a little bun with the rest of your hair facing forward.
2. Divide
Divide the hair that is left in front into two sections and tuck them into your hair elastic
3. Adjust
You're going to want to play around with this one. Stretch it out, twist it around, tuck in more pieces.
Play around with it until it looks more cohesive.
4. Bobby pin
Any pieces of hair that are sticking up and looking crazy you can just bobby pin in place.
5. Adjust the bun
Pull out and loosen the hair in the front. Thus will make your bun a little smaller and make the whole look a bit more cohesive and super cute!
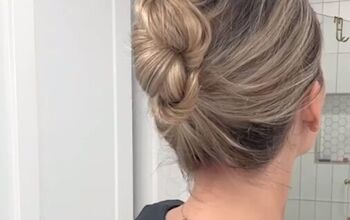
This is the front and back of messy bun number two. Super stylish and cute!
Messy bun 3
1. Tie up the bun
Pull your hair up and tie it into a little bun with the rest of your hair facing forward.
2. Wrap the hair
Wrap the remaining hair around your hair and tuck the ends into the hair elastic.
3. Stretch it out
Stretch everything out with your fingers.
4. Bobby pin
Go around and bobby pin the sides in place.
Make sure there aren’t any gaps in the hair.
5. Pull out the hair
Pull out the hair in the front to create that messy look.
This is the front and back of bun number three. This bun is super casual and effortless!
Messy bun 4
1. Put your hair up
Put your hair up in a high ponytail.
2. Divide
Divide your ponytail into two sections and twist them around each other.
3. Fluff it out
Fluff out that twist by pinching and pulling gently with your fingers.
4. Create the bun
Wrap the twist around the front of your elastic towards the back.
5. Secure in place
Secure the twist in place all around with bobby pins.
6. Adjust
Pinch and pull the bun once it is securely in place to create a messier look.
That is it for bun number four! This bun is a little more elevated and stylish.
Messy buns tutorial
I hope you guys like these messy bun tutorials! Messy buns are such a creative and effortless way to look trendy, comfy, and stylish. They are quick, cute, and best of all, super easy to do!
Let me know what you think in the comments below.
Enjoyed the project?
Suggested materials:
- Bobby pins
- Hair tie
The author may collect a small share of sales from the links on this page.








Comments
Join the conversation
Lovely....People always tell me "how can you deal with all that hair". I think it takes less time to do my hair being long......I can have a different look everyday.... Thanks for sharing your messy buns......😊
Thanks for this! They are all super cute and look easy to accomplish. So many times these tutorials look like they need a stylist to achieve. Bravo!