How to Use Nail Vinyls to Create Colorful & Fun Nail Vinyl Designs

Having my nails looking on point always puts me in a good mood and makes me feel ready to conquer the day! In this DIY, I'm going to show you how to create nail vinyl designs and tell you all my tips and tricks on how to make them look fabulous.
Tools and materials:
- Nail vinyls
- 2x colored nail polish
- Top coat
- Tweezers
- Acetone
- Small brush
- Scissors
- Sponge
1. Apply base and topcoat
First of all, pick the color of your choice as a base and then apply a quick-drying top coat. Wait for it to fully dry before you apply nail vinyl otherwise, you will get messy nails, and the vinyl will pick up the nail polish - it will look like a total mess.
You don't want to skip applying a fast-drying top coat because this really helps and smooths the whole base.

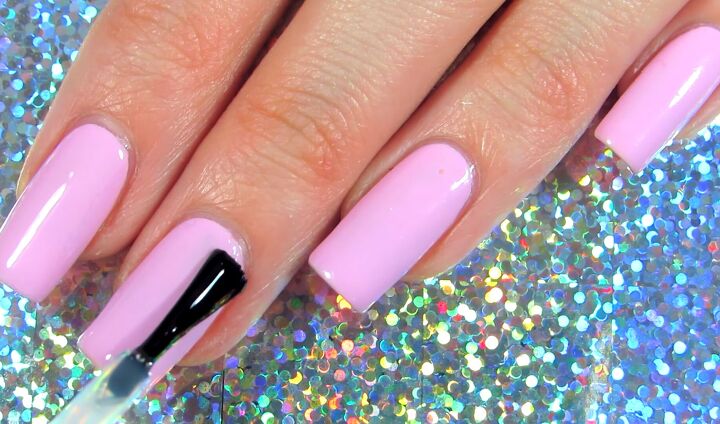
2. Apply the nail vinyls
Next, select the vinyl that you would like to apply; there are so many different types on the market. Pick them up with tweezers or something pointy apply them to your nail. Then secure them by pressing the vinyl down with your finger.
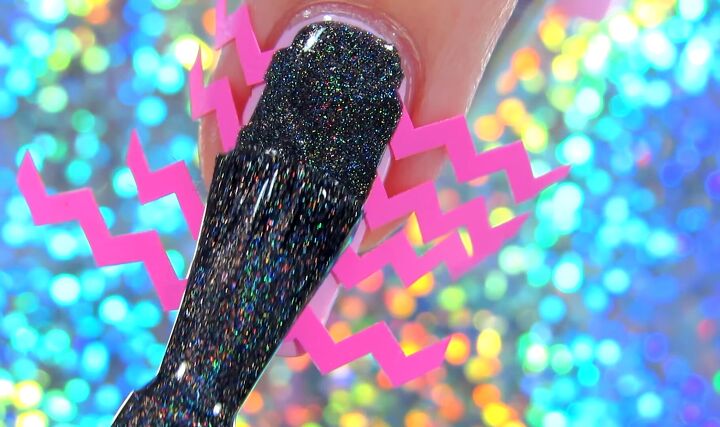
3. Apply nail polish
Once you've stuck the vinyl on, apply some nail polish. Here, I've gone for one in sparkly black.
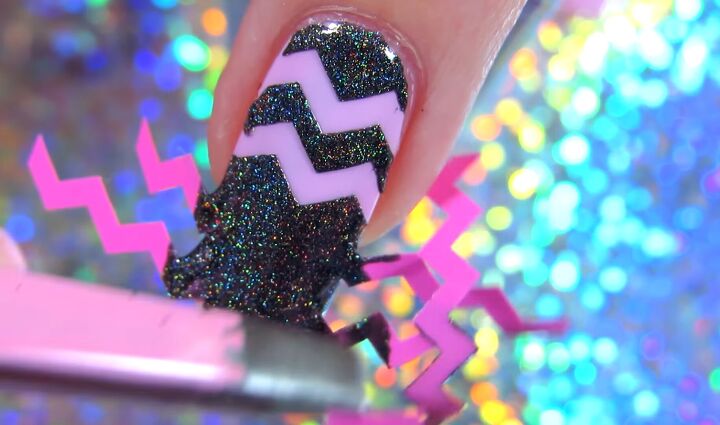
4. Remove the vinyl
As soon as you've applied the polish, take your tweezers and remove the vinyl immediately. You don't want to wait for it to dry.
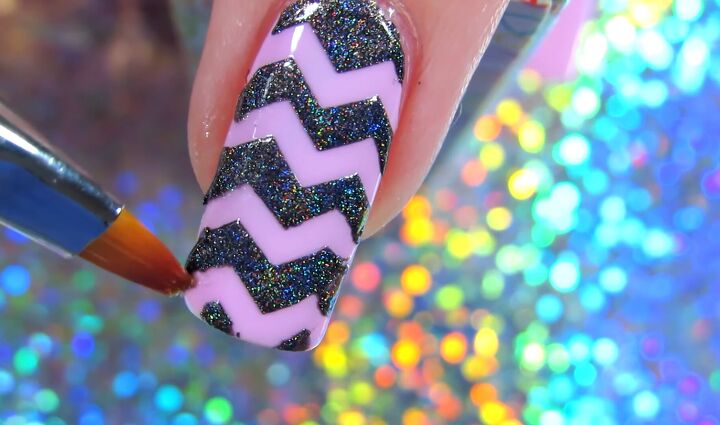
5. Clean the nail up and apply top coat
If you have any bleeding of color, you can use acetone and a small brush to clean it up. Because we had the base very smooth and we applied a fast-drying top coat, you can easily remove the color bleeding without damaging the color of the base.
Once everything is cleaned up and nice-looking, finish it off with some top coat.

More tips and tricks
Let's go to another type of vinyl. Whereas the previous design was made up of separate vinyl pieces, this one is a whole strip with hearts on it.
To apply it, as before, place it on your nail, apply the nail polish, and then you want to remove the vinyl kind of fast but not too fast because you don't want the color to bleed.
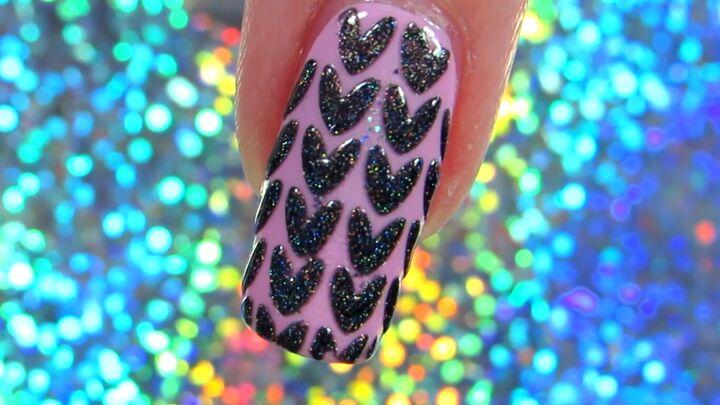
Then, top it up with a top coat, and you're good to go.
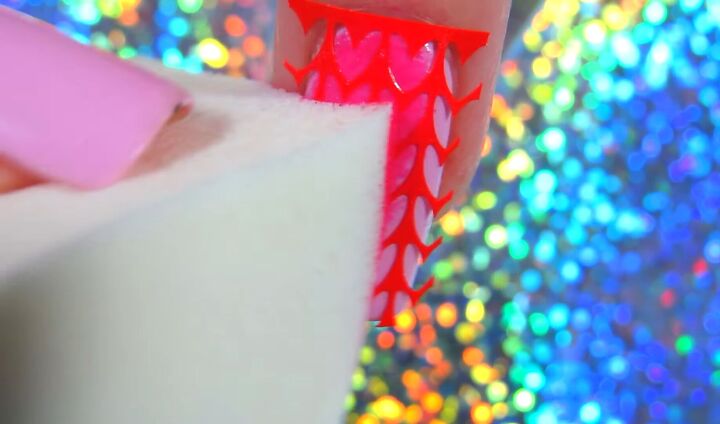
Another method to apply the vinyl is to trim off any excess you have and make sure everything is pressed down nicely. Then take a cosmetic sponge, apply nail polish on the sponge and just sponge it on. Once done, remove the vinyl with your tweezers.
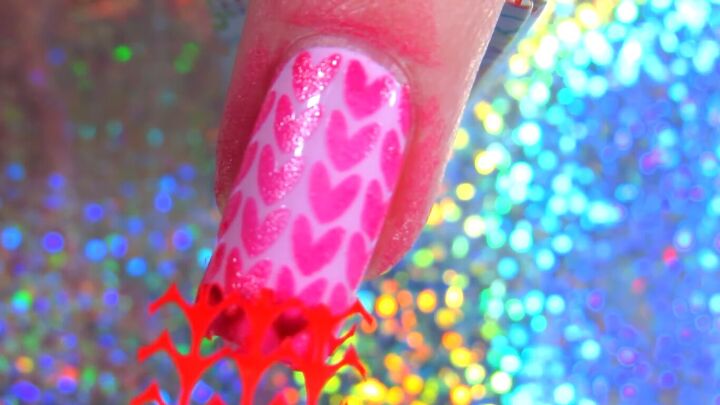
You can remove the polish that got on your skin with some nail polish remover.
Nail vinyl designs tutorial
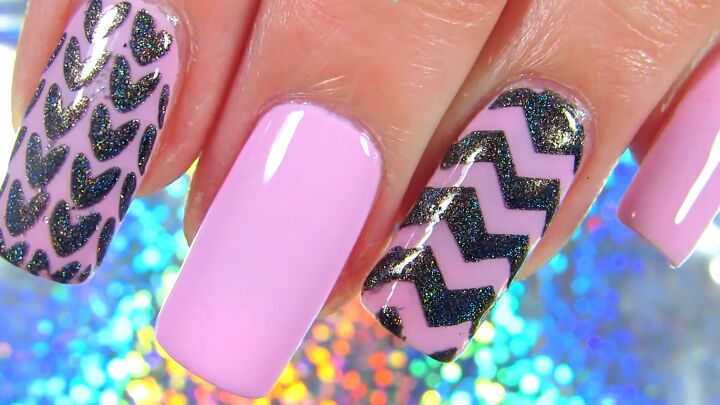
That is how you can perfectly apply vinyl nail decals! They're quicky, easy, fuss-free and the finished look has your nails looking fabulous.
There are so many nail vinyls to choose from, so you can experiment with different designs and colors of nail polishes. I hope you enjoyed this DIY and you’ll give it a go!
The author may collect a small share of sales from the links on this page.


Comments
Join the conversation
Luv it, but can't do it myself, due to hand surgery.