1940s Nurse Ratched Hairstyle Tutorial

In this 1940s hairstyle tutorial, I’m going to show you how to get the Nurse Ratched hairstyle!
This vintage hairdo comes from the Netflix series, Ratched, and it is gorgeous! Let’s get into it.
Tools and materials:
- Hair roll
- Hair clips
- Bobby pins
- Hairspray
- Comb
- Brush
I’ll be doing this look with a hair extension strip since this look will be in three parts and my hair is quite fine and thin.
If your hair isn’t fine or thin, you’ll be just fine without it.
I’ll also be using this makeshift hair roll. An easy way to make one is to cut a hair donut in half.
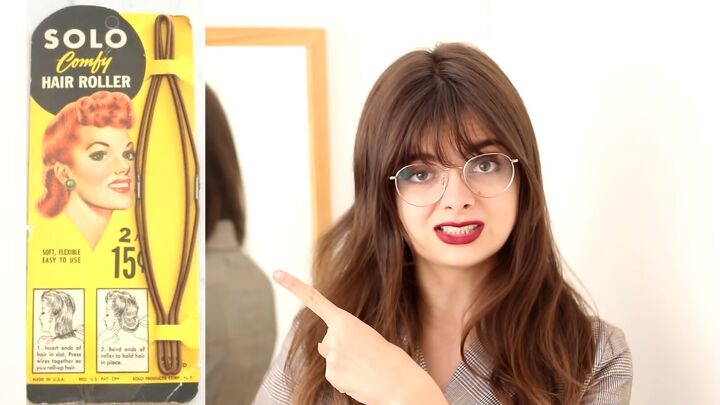
In the 1940s, there was a super handy tool for that.
It would clamp the hair in between, pinch it shut, and then roll it up. I prefer a handmade tool like mine because it makes the roll a bit fuller.
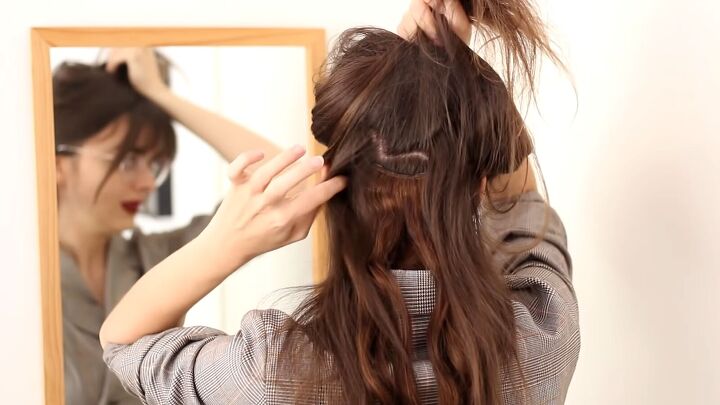
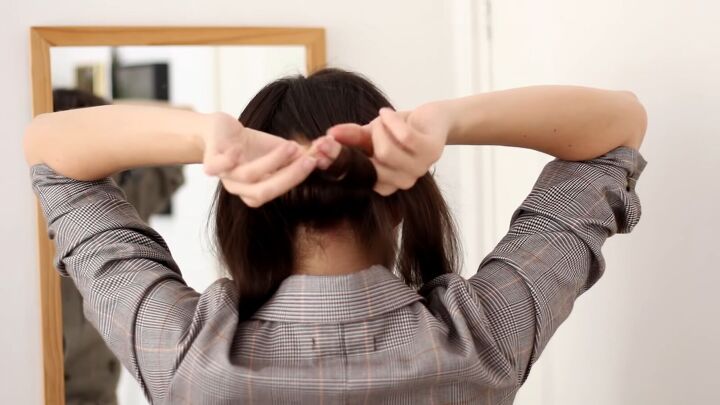
1. Part your hair in half
We’re working from the bottom up, so start by parting your hair in half. Split the hair right around the ear level, and clip away the top half.
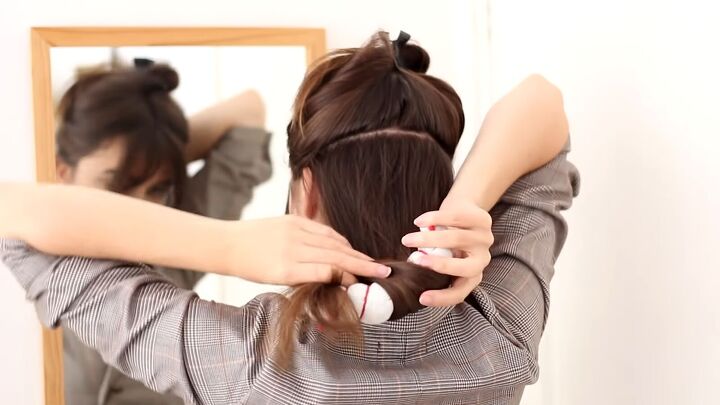
2. Roll up the bottom section of your hair
Brush through the bottom half of the hair. Then, starting as far down as you can reach, roll the ends around the roll.

Twist the roll up and roll it towards your head.
Try to get it as close to your hairline as possible. Spread out your hair so you don’t see any of the roll.
Use bobby pins to secure it down.
The way I’m pinning my hair is by taking the bobby pin from the middle of the roll, flipping it over, and pushing it between the roll and my hair.
If you’re using a hair donut, you can push the bobby pin into the donut.
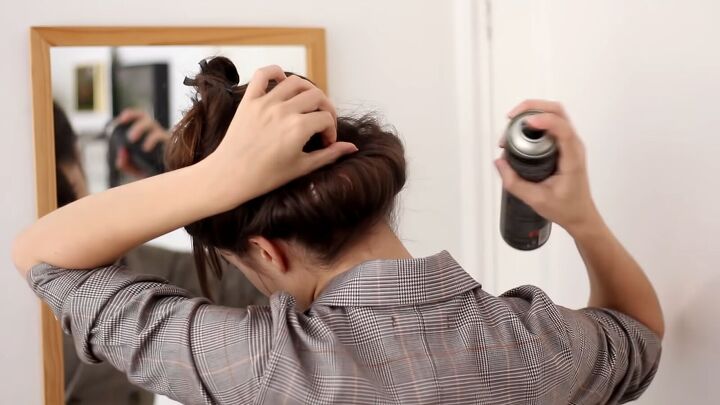
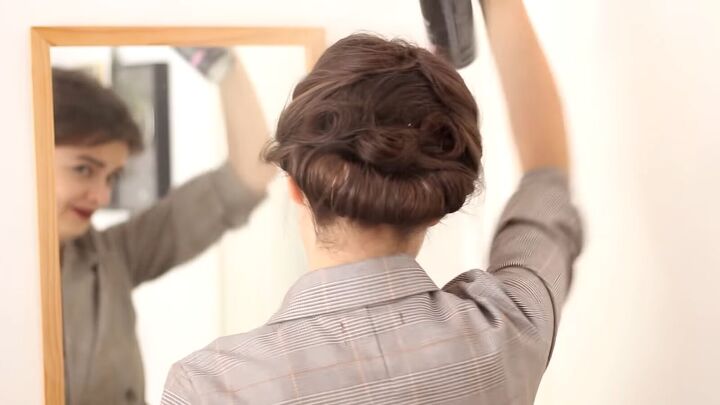
3. Hairspray
Hairspray is a necessity, especially if you have flyaway neck hairs.
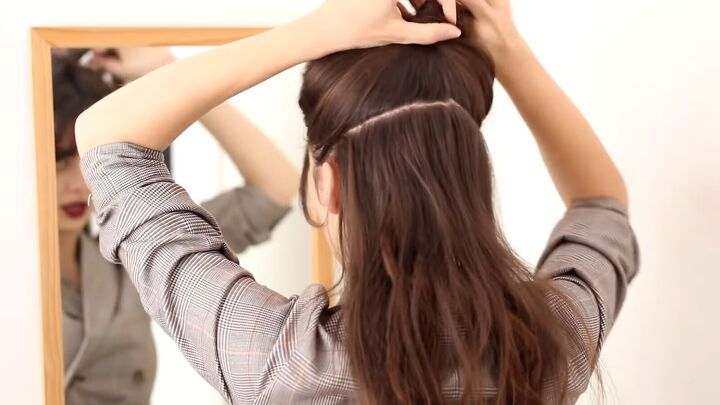
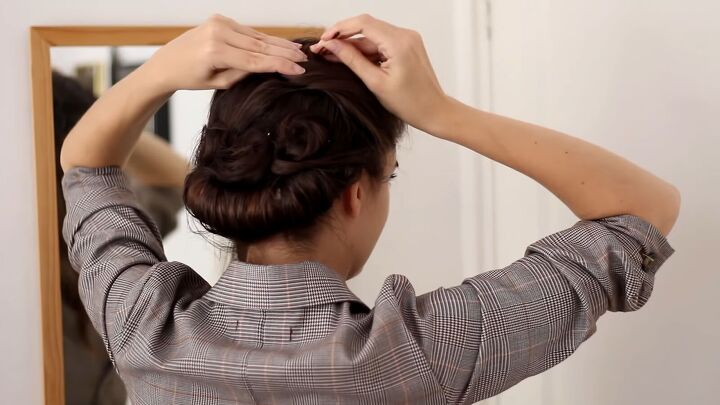
4. Section your hair
Let down the top section and split it into two parts.
Nurse Ratched has two victory rolls in the front of her hair, and the back of her hair is arranged in rolls along the top of the bun roll we just did.
So, you’ll need to separate the front of your hair from the back. Do this from the crown to just above the ear. Clip away the front sections for now.
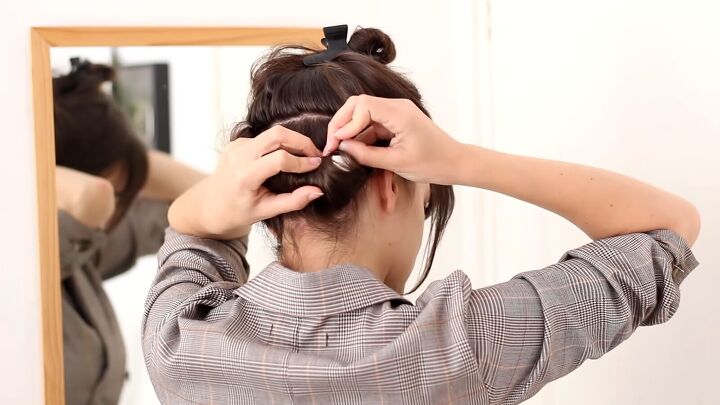
5. Create a pin curl in the center
Separate the back hair into three equal sections. Roll the center section around your fingers to create a pin curl.
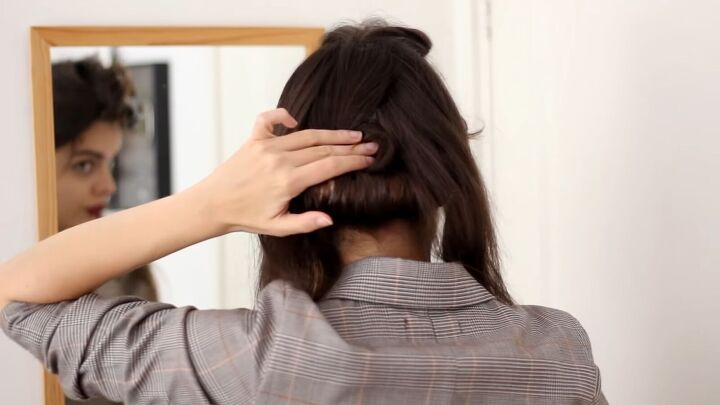
Gently push it off your fingers, maintaining the curl, and pin it so it sits on top of the bun roll.
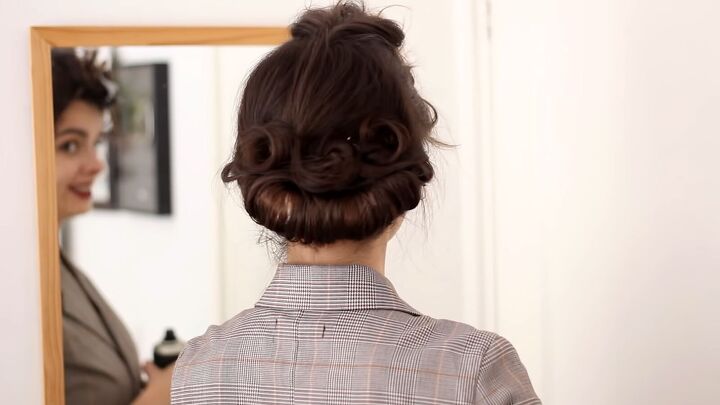
6. Create pin curls with the other two sections
Repeat step 5 with the two side sections. These pin curls can be quite large since we want to cover up the majority of the top of the bun roll.
Try to avoid making them overlap. They should sit next to each other.
Also, ensure these two curls face inward so the bulk of the hair is on the outside.

7. Hairspray
Hairspray the pin curls.
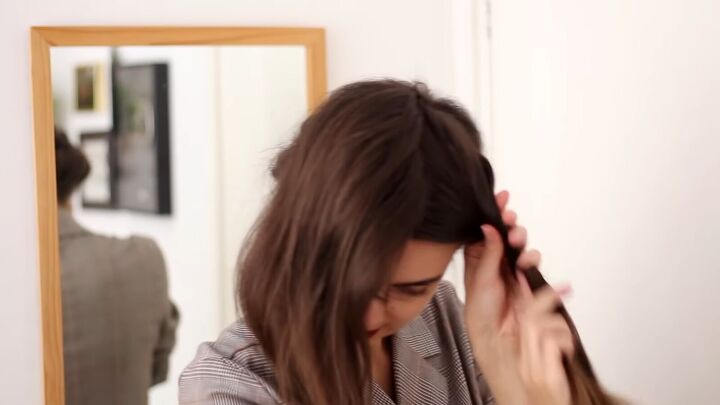
8. Part the front section
Split the front section down the center. You can clip one side away for now.
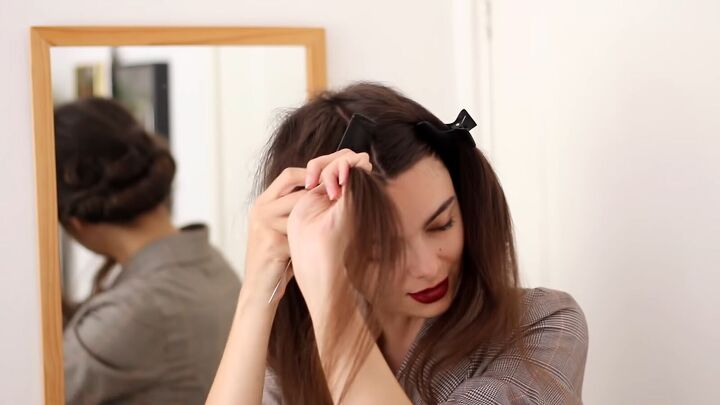
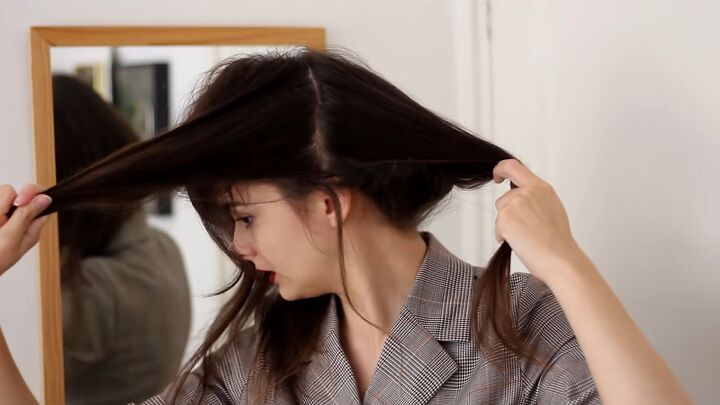
9. Backcomb the front sections
Time for the victory curls. Victory curls are easier to do on curled hair, but they can still be done on straight hair.
Brush through the unclipped section, and then backcomb all of it—especially the front part.
Be sure to split the hair into smaller sections as you backcomb, rather than only backcombing it as one chunk.
Backcombing is so important to making victory curls because we need the hair to be moldable. It’s a lot harder when the hair is slippery.
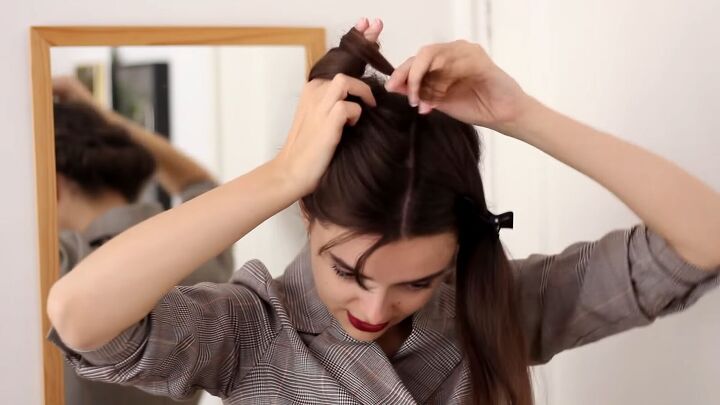
10. Create a victory roll and pin it to the crown
Pull the hair up to your crown and then wrap it around your fingers, such as you did with the pin curls.
Only start rolling it when the curl is already where it needs to be.
Pin it down somewhere around the crown.
You’ll need to use a load of bobby pins until you’re sure it won’t go anywhere.
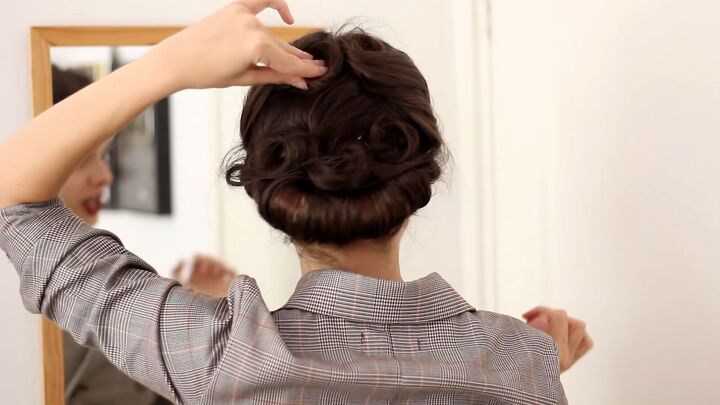
11. Create a second victory roll
Do the same thing from the previous step.
Make sure your rolls meet up in the back and touch. Preferably, you want them to be around the same size.
12. Hairspray
Finish the hairstyle off with hairspray.
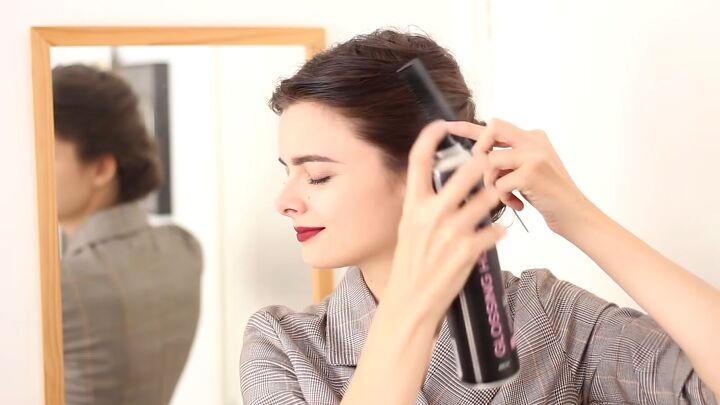
This can also help stick up any bangs if you have them.

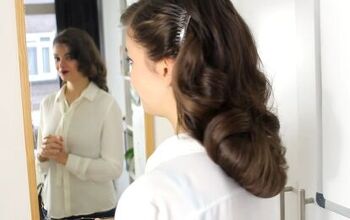
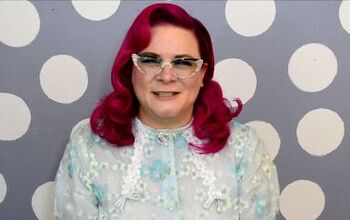
Nurse Ratched hairstyle
Here’s the finished Nurse Ratched hairstyle! This is a modern version of the iconic vintage hairdo, but it looks just as gorgeous and authentic as in the show.
Let me know how your take on this hairstyle went below!
Next, learn How to Cut Curtain Bangs: Easy DIY Hair Cutting Guide.
The author may collect a small share of sales from the links on this page.


Comments
Join the conversation
VERY CUTE. WILLBE TRYING IT.