How to DIY a Cute and Easy Lounge Cardigan Set

I saw a great lounge cardigan on TV that I fell in love with and wanted to DIY.
Luckily, I found a gray hoodie and sweatpants that almost matched, plus a denim jacket and a pair of denim shorts.
Put them all together and you have a loungewear set with denim accents for a fraction of the designer price!
Tools and materials:
- Loose sweatshirt or hoodie and sweatpants
- Denim jacket
- Denim shorts or jeans
- Scissors
- Sewing machine
- Narrow presser foot or zipper foot

1. Pieces to upcycle
I love that the sweatshirt has a dolman sleeve, so it will sit really well as a cardigan.
The pants are the wrong length for me but I think I can make them work with a denim waistband.
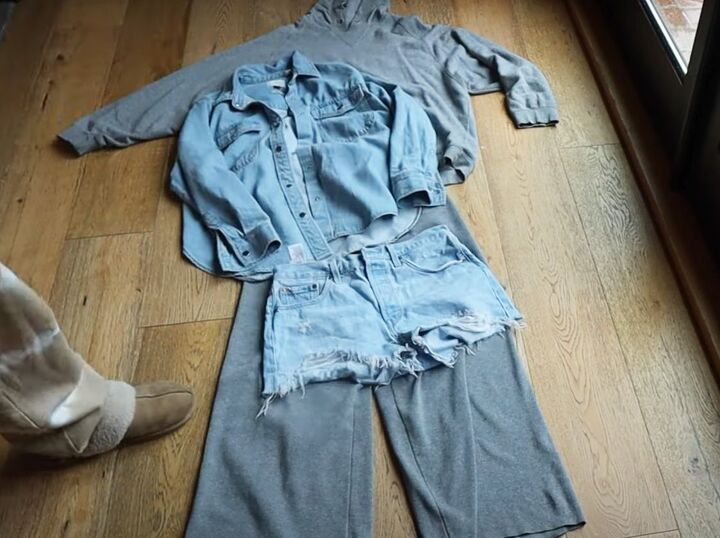
The denim jacket is almost the same length as the sweatshirt and the shorts were cheaper than buying jeans.

2. Prepping for upcycle
I cut the hood off the sweatshirt and cut it open down the center front.
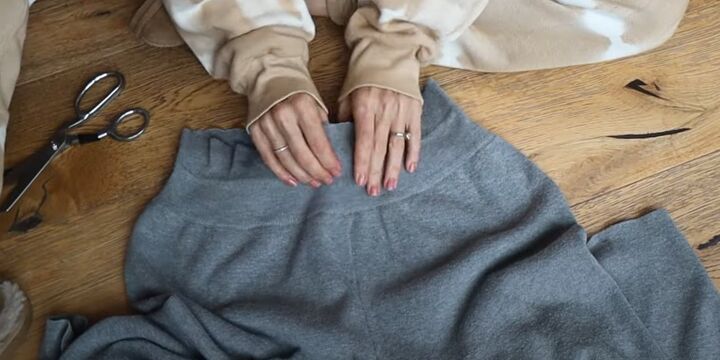
First I cut the elastic out of the sweatpants because I thought I could use the ribbing to make them longer.
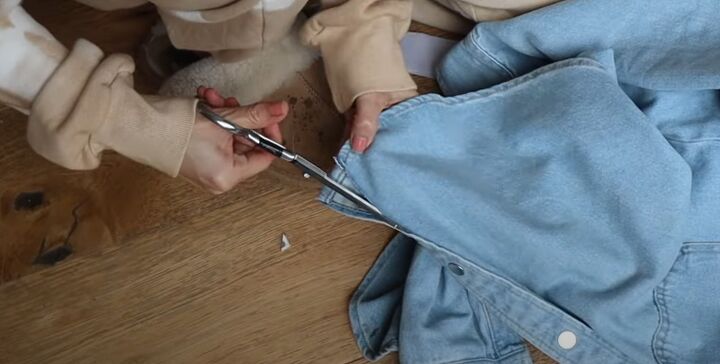
I cut off the lower part of all the shorts belt loops, leaving the upper part attached to the waistband.
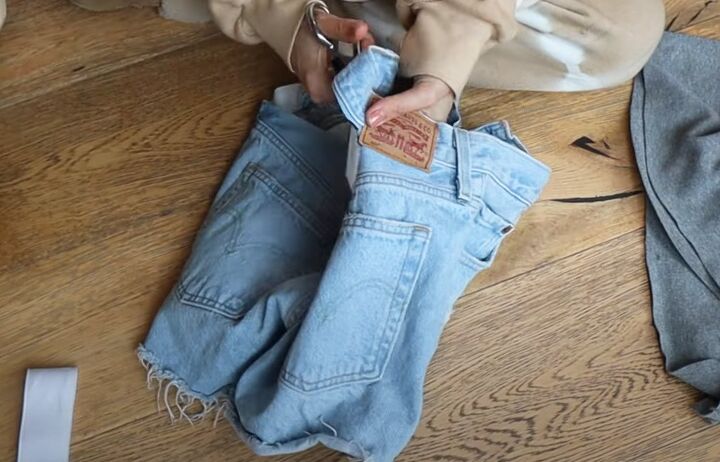
I cut off the waistband itself, leaving a small seam allowance, and cut around the outer label.
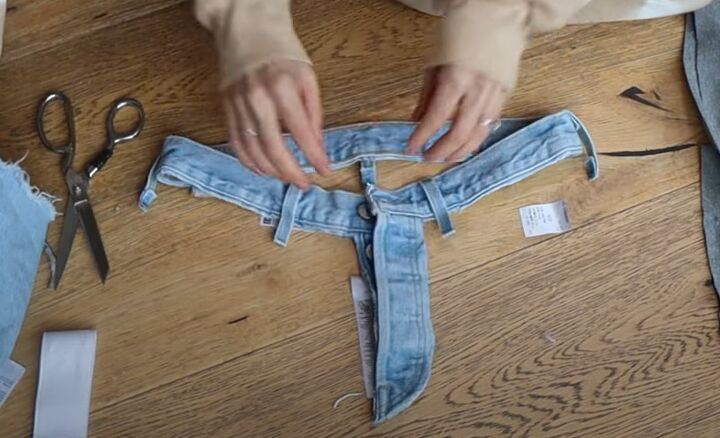
I also cut off the button fly with the waistband, in case I wanted to use it later.
For the denim jacket, I kept the plackets and collar in one piece.
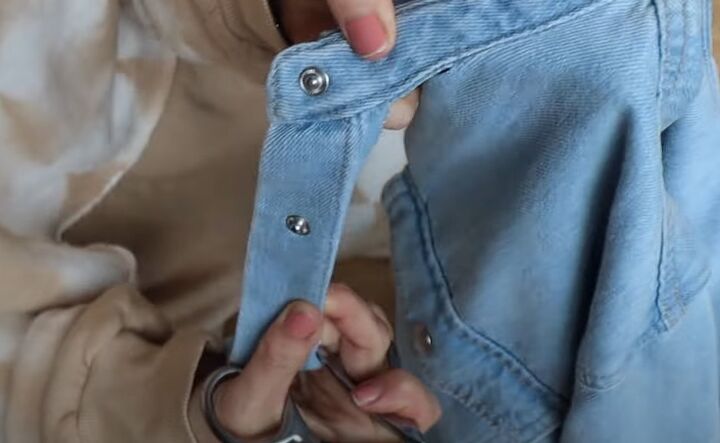
I cut off the button placket, leaving a seam allowance, and continued cutting around the collar stand close to the stitching.
I removed the buttonhole placket by cutting just under the stitching.
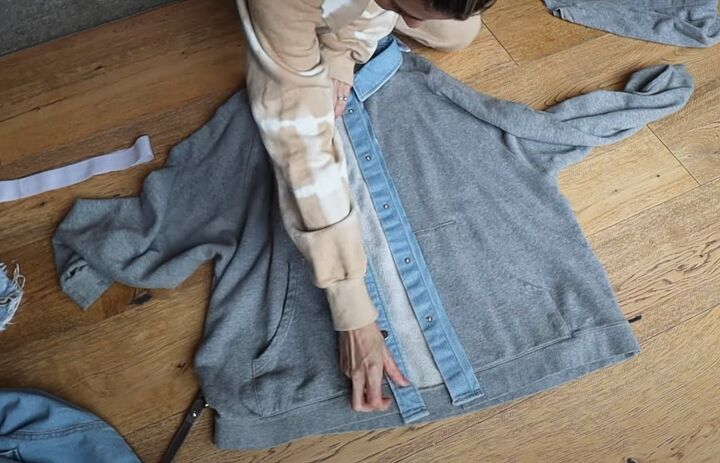
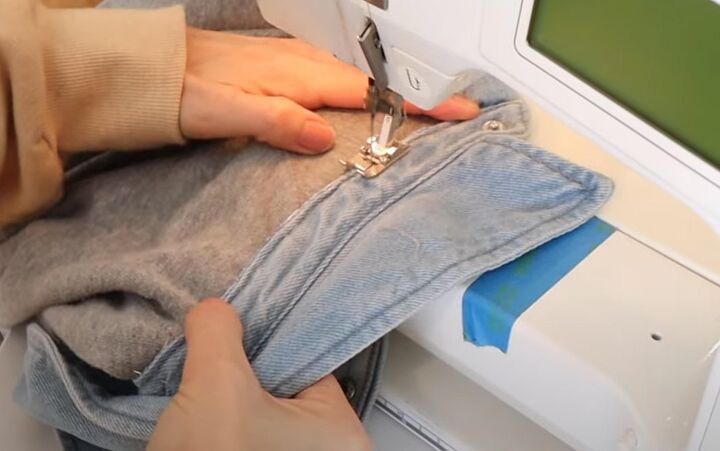
3. Adding the collar
I placed the denim sections around the edge of the sweatshirt.
The plackets were almost exactly the right length so I had very little adjustment to make there.
The sweatshirt neckline was larger than the collar.
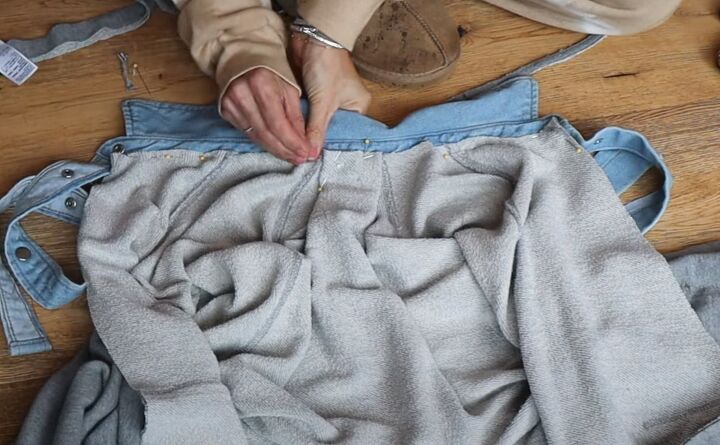
I pinned the collar in place from the center front to the shoulders on both sides so the extra fabric would be at the back.
I pinned the excess fabric into a pleat at the center back.
I attached the right front edge of the jacket to the buttonhole placket, leaving the buttonholes (or snaps in this case) free.
On the other front edge I turned the seam allowance under to cover the raw edge of the sweatshirt.
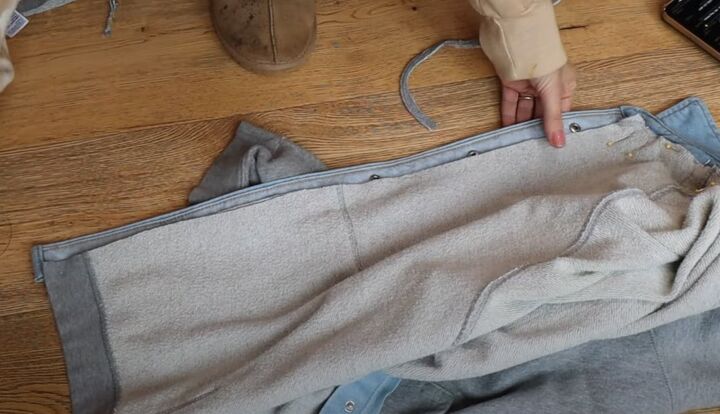
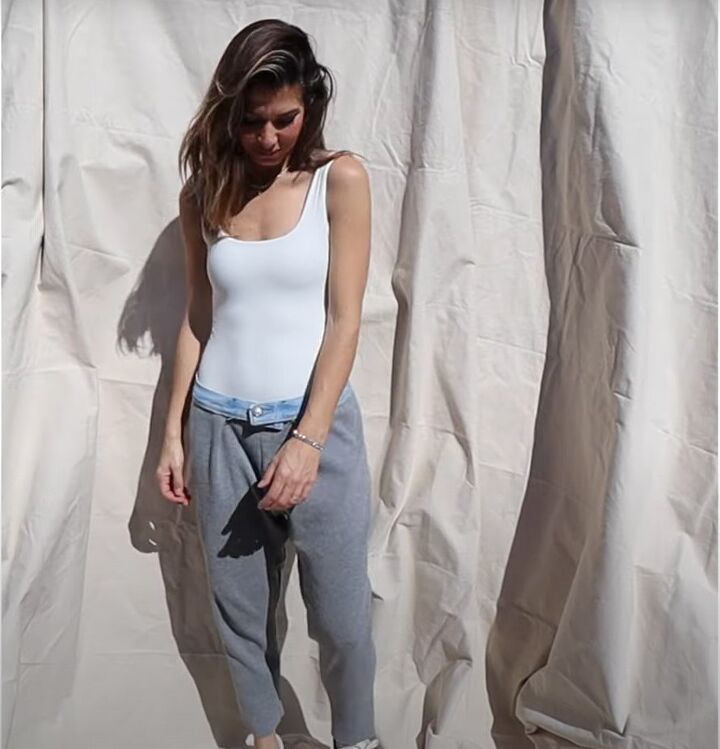
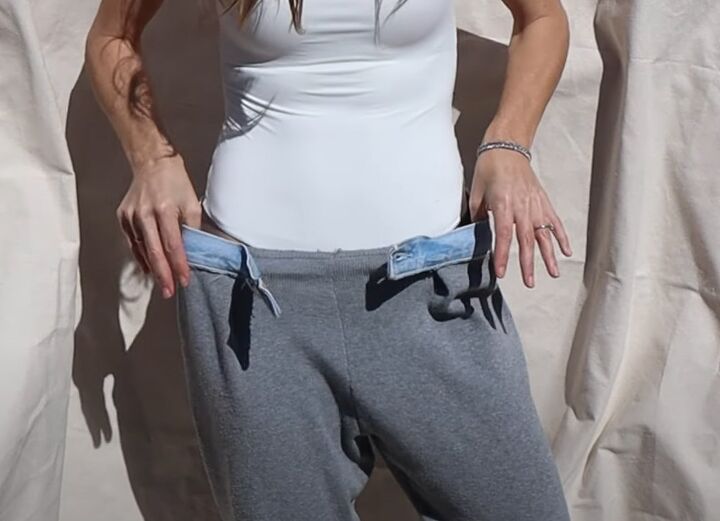
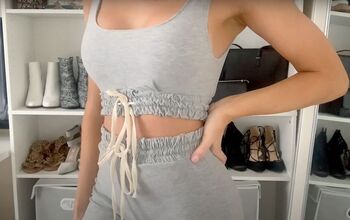
4. The sweatpants waistband
I first pinned the waistband to the top of the ribbing but that clearly wasn’t going to work.
I cut off the ribbing but the front fly still looked wrong so I removed that completely and also cut off the belt loops.
As the pants waistline was much bigger than the waistband, I decided to gather the excess into two pleats instead of distributing it evenly.
5. Sewing
I used a thread that matched the stitching on the denim, so I could sew in the original stitching lines.
I attached the collar first, then sewed each placket from the bottom upwards.
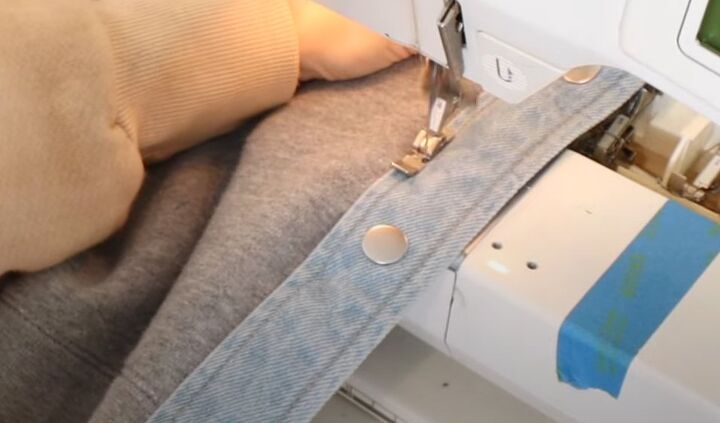
I had to use a narrow presser foot for the side with the top of the snaps in order to get past them.
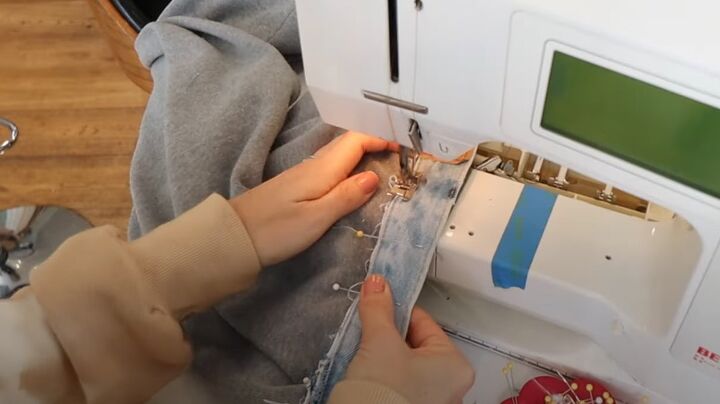
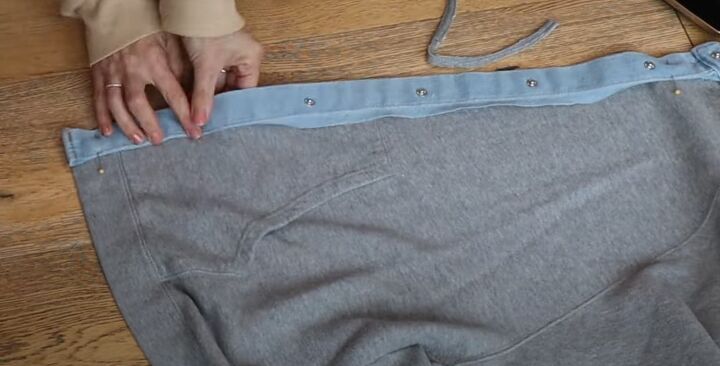
I sewed the waistband on, again using the original stitchline.
I realized that I needed to leave a small section unsewn at the front so that I could get the pants on and off.
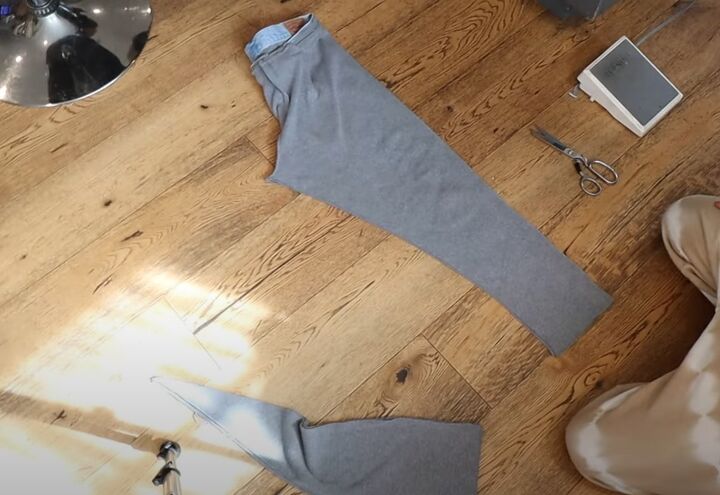
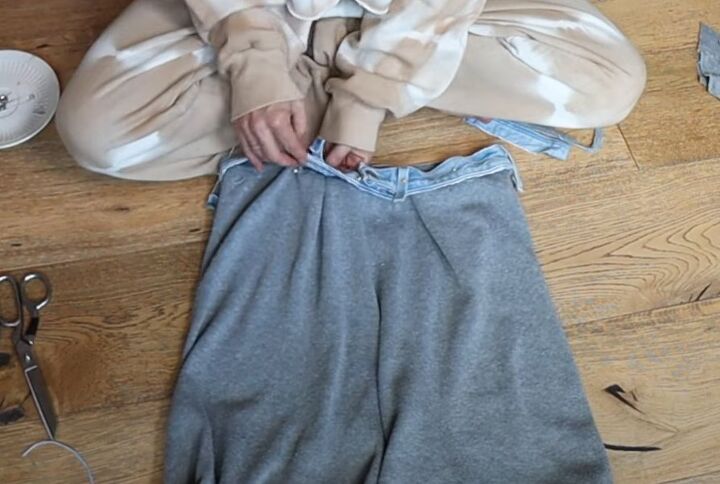
6. Pants adjustment
I wasn’t happy with the width of the pants legs.
I folded the pants in half at the center front and starting at the ankle, I trimmed off almost half the width to make a tapered leg.
I resewed the inner leg seams.
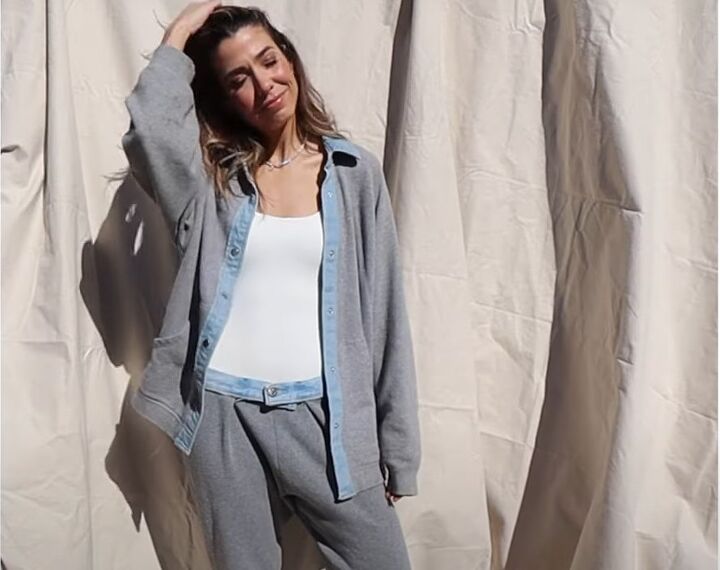
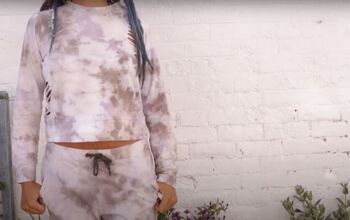
Lounge cardigan set
The lounge cardigan has become an absolute favorite of mine. I’m obsessed with it! It looks amazing and it’s so comfortable and cozy and relaxed.
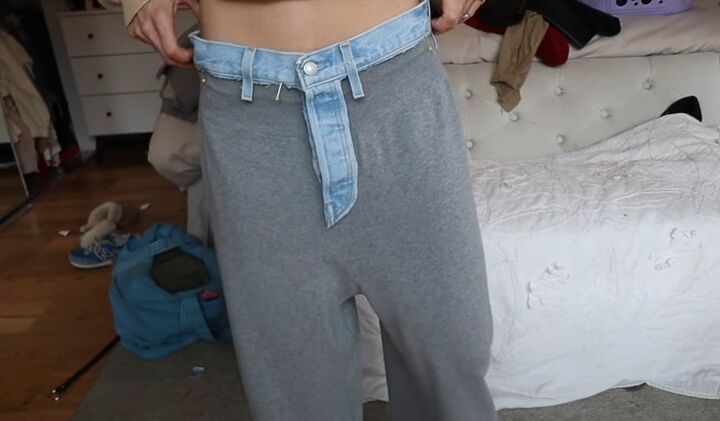
The pants are really fun and I think tapering them made all the difference. I love the way the waistband overlaps and gathers the excess fabric at the front.
I hope you try this one. It’s so customizable to whatever you can thrift and to your style to give you a unique look.
I'd love to hear in the comments what you think of it.
Next, learn How to Make a Scarf Into a Zendaya-Inspired Top You Can Wear 9+ Ways.
The author may collect a small share of sales from the links on this page.


Comments
Join the conversation