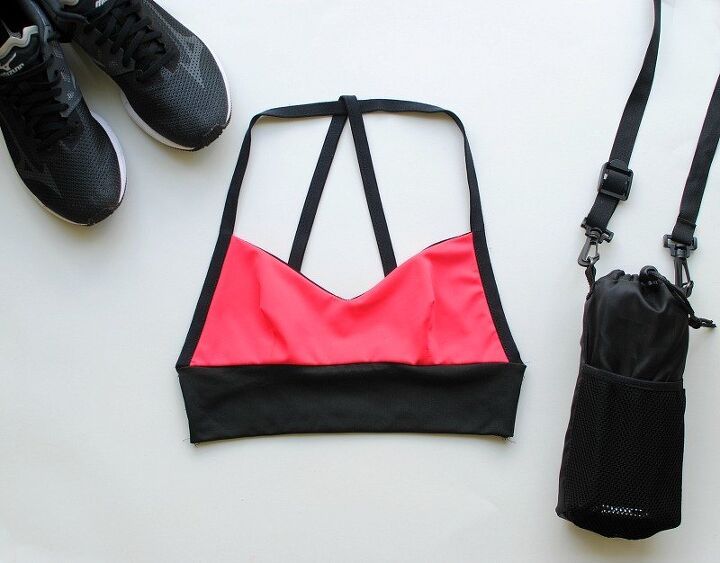
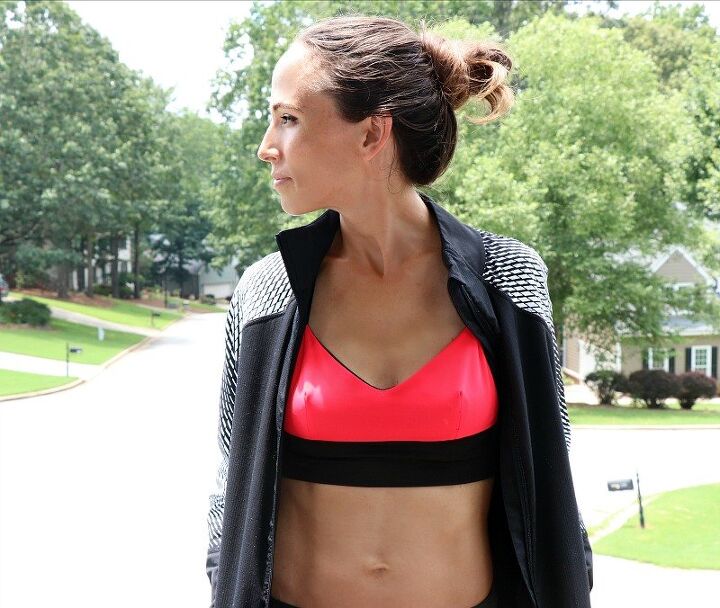
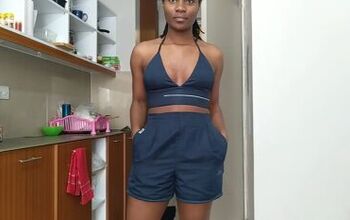
DIY: Sports Bralette
Give a girl a good sports bra and a pair of shoes and she can take on the world...am I right? Lately, I've been creating a lot of Sportswear tutorials with Dritz. It's fun to combine my 2 passions of running and sewing together. I use to be intimidated by such projects but Dritz products makes sewing Sportswear and even Swimwear easier than you think. For this tutorial we wanted to show you how to create a sports bra with the many different elastics Dritz has to offer. Their Fold-Over Elastic is my favorite and makes finishings edges not only simple but also adds additional support and a contrasting detail. This low impact sports bralette is versatile for yoga and even Swimwear. Get the details below and make your own.
Supplies:
- Dritz 1" Fold-Over Elastic
- Rotary Cutter
- Cutting Mat
- Pattern Weights
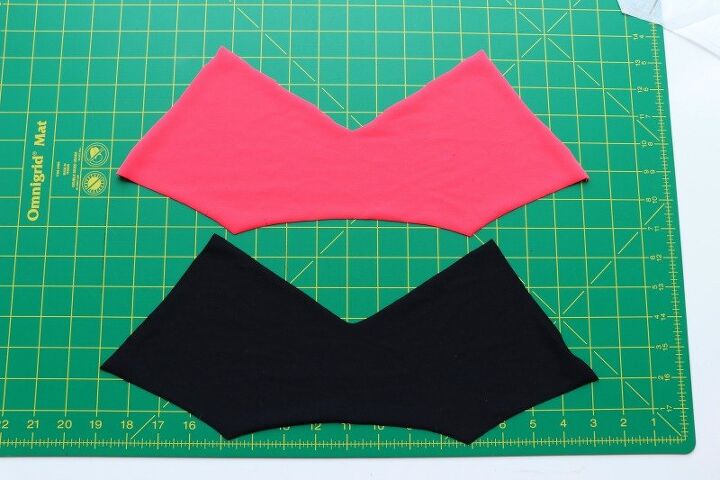
- Matte Tricot Knit: 1/2 yard of watermelon and 1/2 yard of black
- Pattern or garment to draft
- Brother 1034DX Serger
- Brother Sewing Machine
- Ball point needle (twin needle optional)
For the pattern: I used a mix of this Burda pattern and my own drafting. It was printed out as one side so I traced it to be one whole piece. I prefer cutting slippery fabrics like spandex as one rather than on the fold. I also drafted the back and bottom band hems which are basically just strips of fabric. Mine measured 6.5" x 13.5" (cut 2). You will need to adjust for your personal measurements + seam allowance. For the back straps and halter I used Fold-Over Elastic.
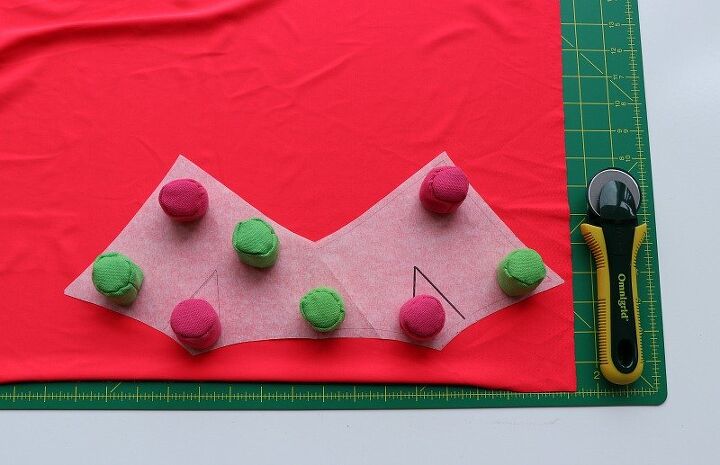
When cutting out materials I always use the Omnigrid products: rotary cutter, mat, and pattern weights. This keeps things more accurate and also makes the cutting process more efficient.
I've cut out a liner to include on the front bust as well.
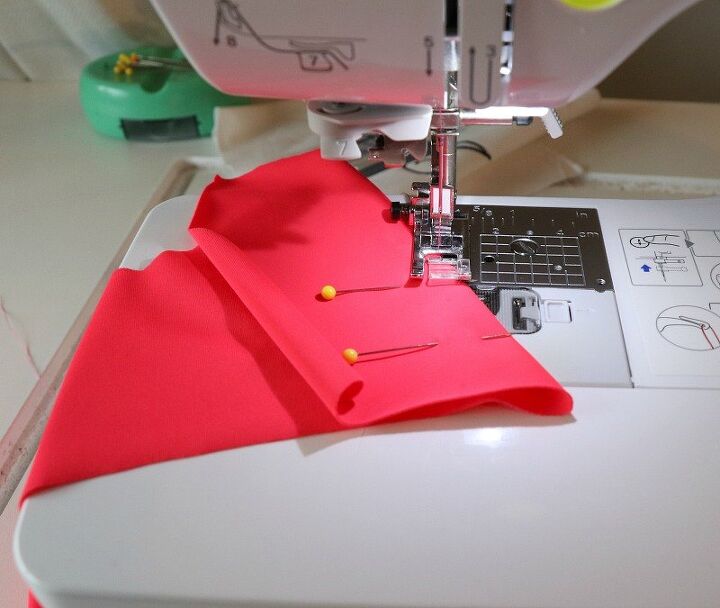
Sewing the darts. Because I'm using a spandex/nylon blend I'm sewing with a zigzag stitch.
Place liner and outer pieces rights sides together and sew along the top edge. Clip around the center, trim down the dart seam allowance, and flip right sides out.
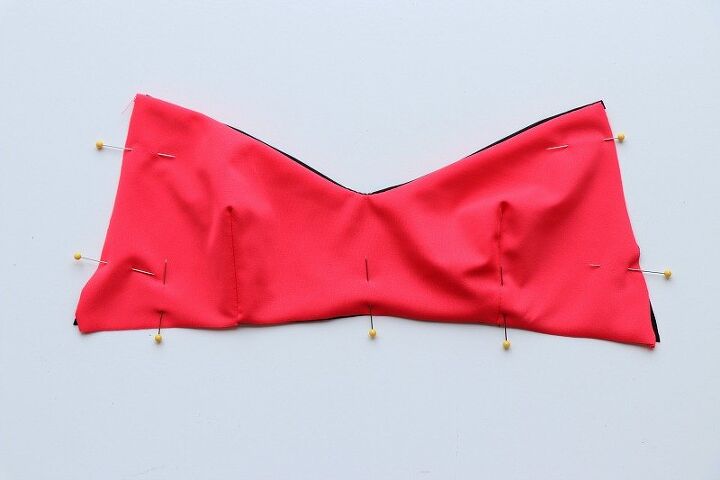
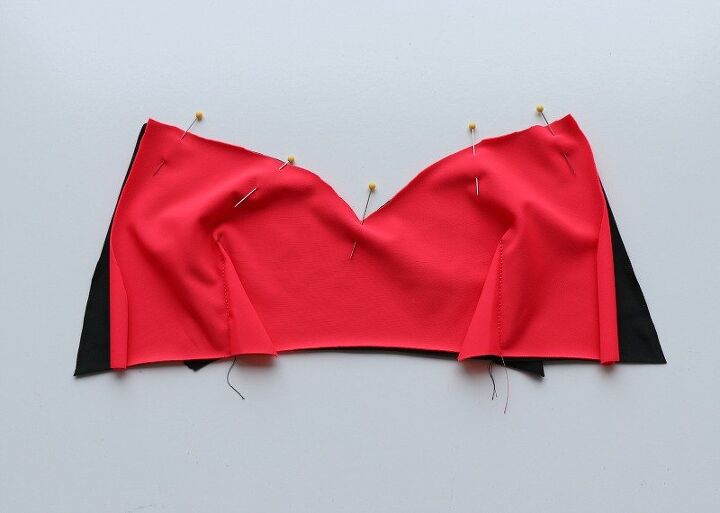
Pin the bottom and side edges and either serge or zigzag stitch together.
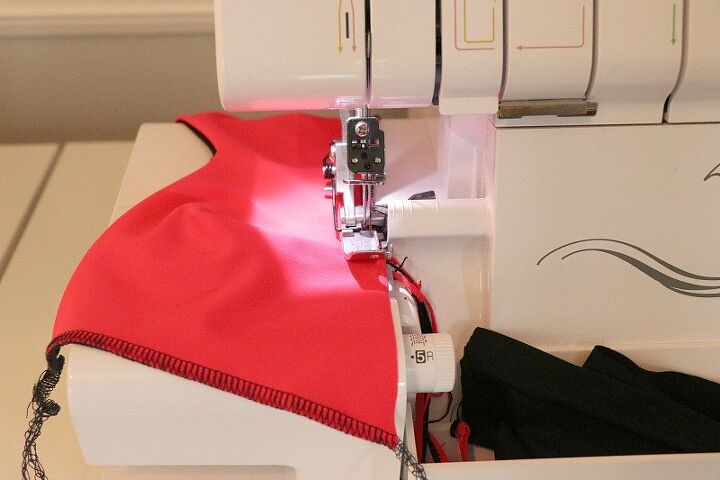
I usually do a mix of serging and sewing.
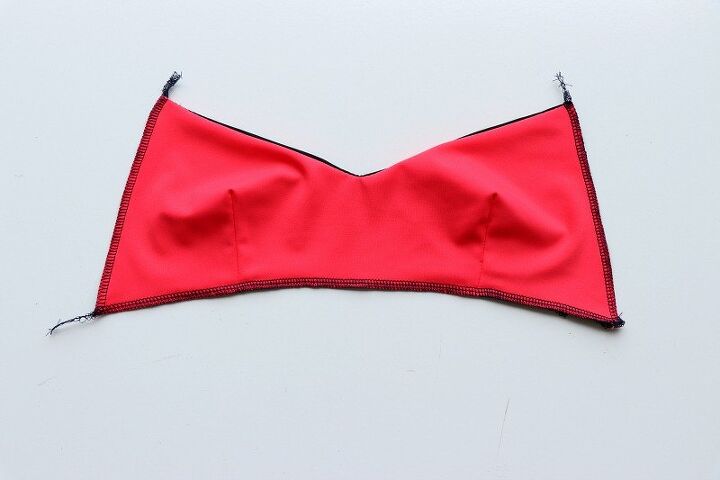
Use Dritz "1 Fold-Over Elastic (FOE) for the side edges. Pin the FOE along the sides and zigzag stitch all the way around to the other side (including the halter portion). You will need to get your measurement for this.
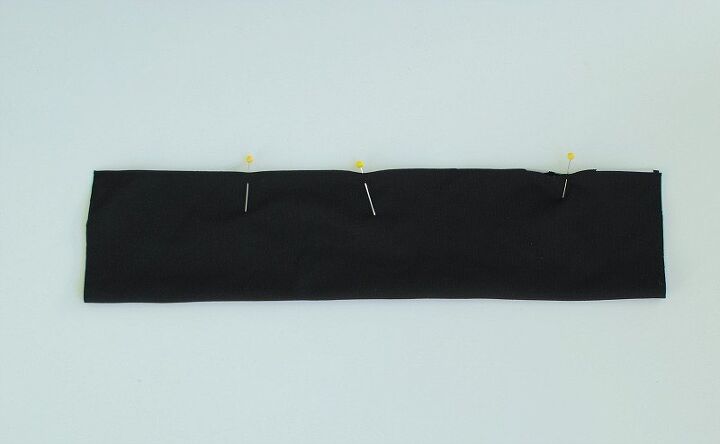
Take both of your band hem pieces and fold right sides together and sew or serge (1/4 SA). Flip right side out and press the seam so it's in the center back.
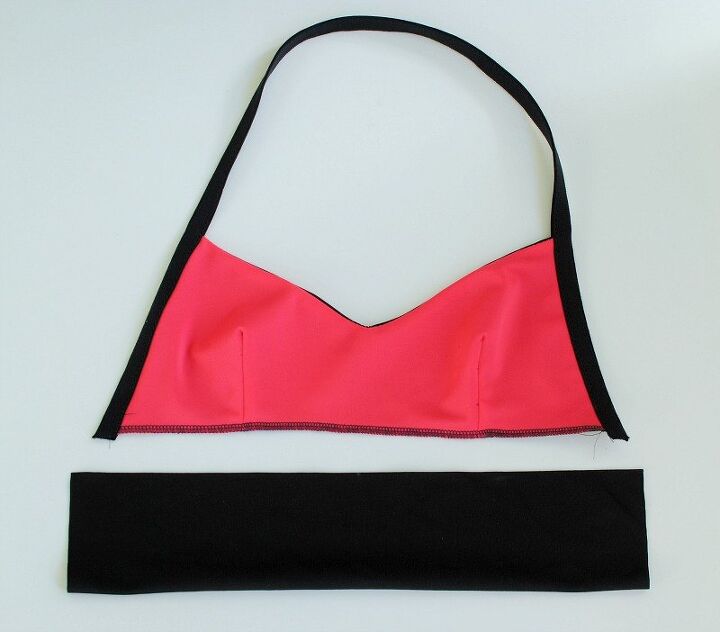
Place front band hem right sides together and sew top and bottom together. You should have about a 1/2" of the band hem hanging over for seam allowance.
Now place the back band (which is hard to see cause it's black as well) so front and back are right sides together and sew the side seams.

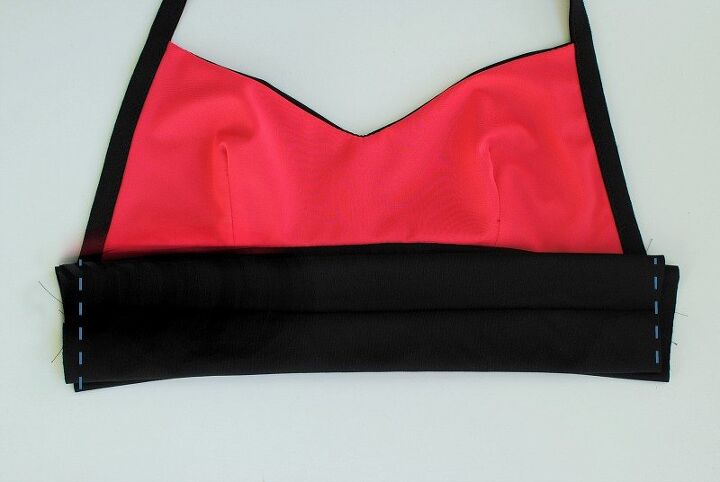
(Optional) For additional support, I like adding Dritz 1" Plush-Back Elastic along the bottom hem. It's super soft and you sew it along the bottom edge (wrong side). Just sew it in a loop about 1" smaller than the band hem and top stitch into place. You can follow the tutorial here for a more detailed tutorial on sewing elastic along the hem.
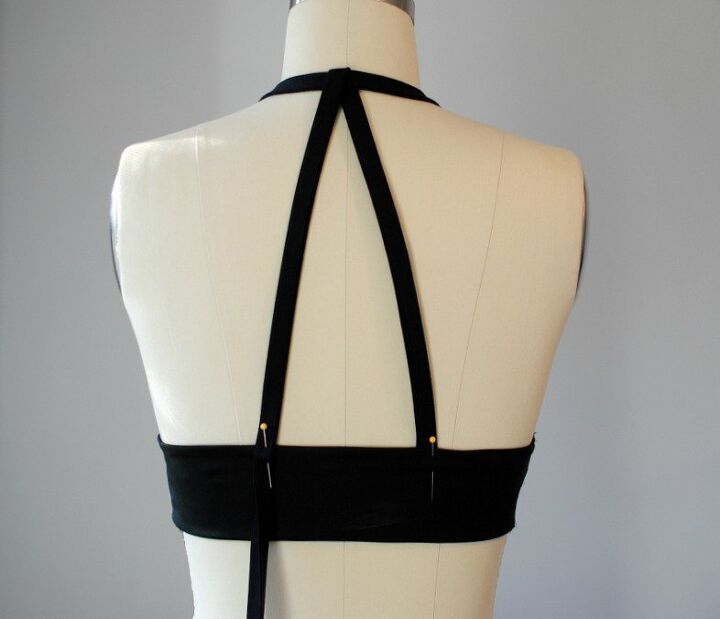
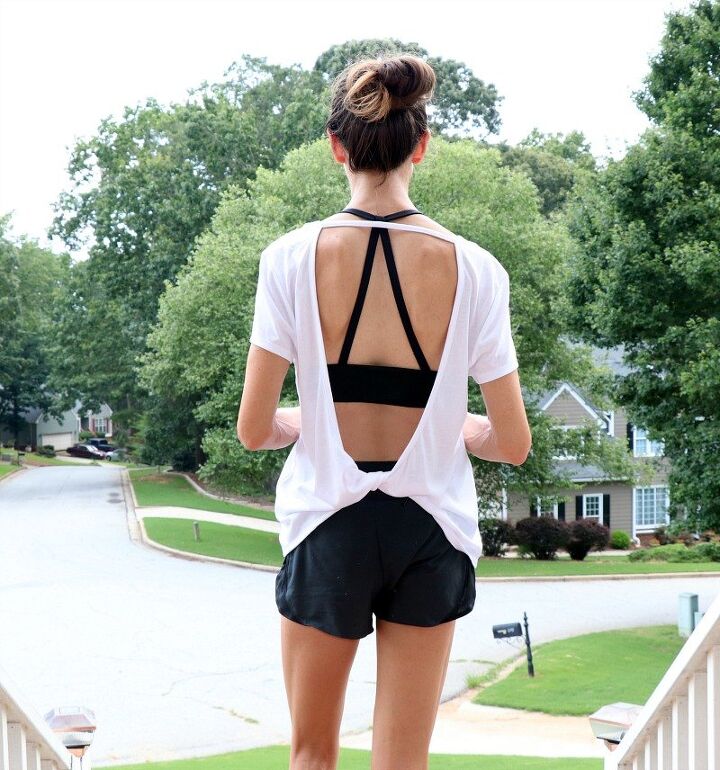
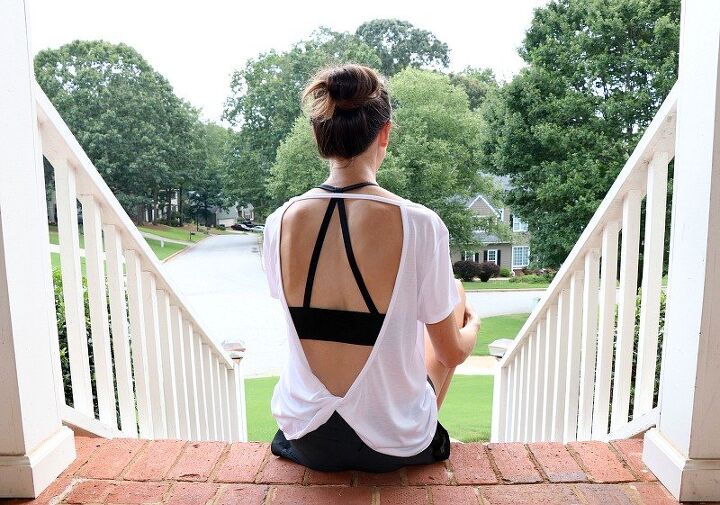
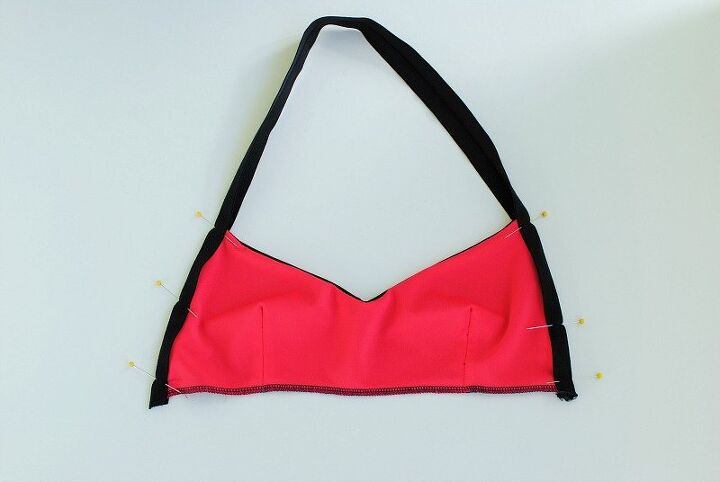
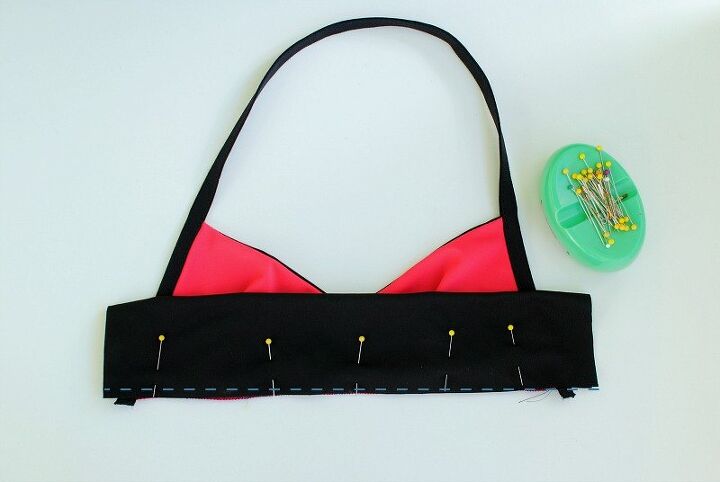
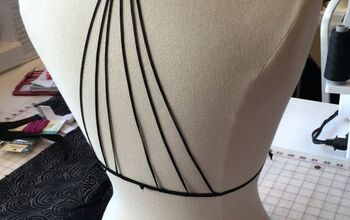
Now for the back straps: I used another strip of FOE and attached it to the center back and wrapped it around the halter strap. You can do all sorts of fun here by criss crossing the straps or weaving them. I did sew the FOE strip together so it didn't separate.
Sew the straps along the top edge of the band hem and you're good to go.
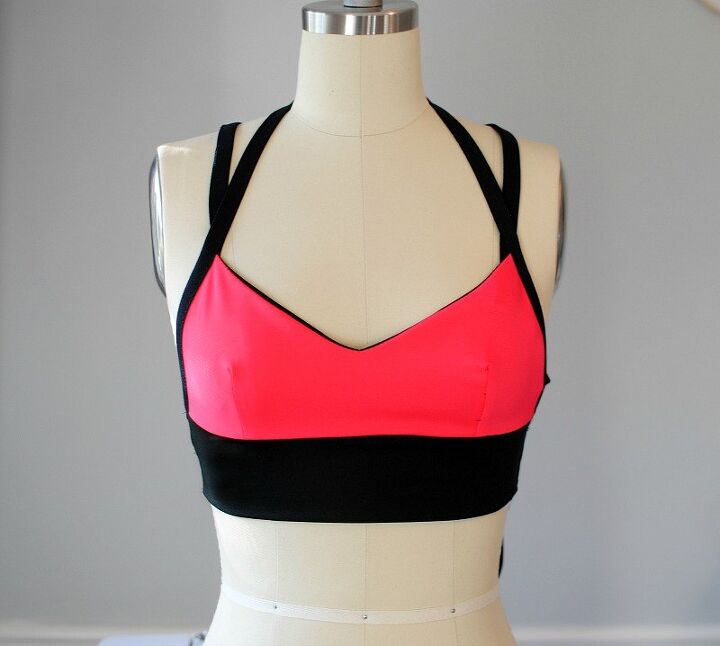
I like how this turned out! I would say it's more a low impact sports bra for workouts like yoga and even could be a great bikini option. If you want a more high impact sports bra try this one here.
*In collaboration with Dritz.
I received compensation from Dritz®, and some of the materials featured here or used in this project were provided free of charge by Dritz®. All opinions are my own.
The author may collect a small share of sales from the links on this page.


Comments
Join the conversation