How to Create a Beautiful Butterfly Bleach Design on Jeans

I saw these butterfly bleach designs on jeans online and I loved them! I thought it was so creative and cool to bleach shapes and pictures onto clothing. So, I thought I could do this too because I have some jeans and some bleach. Without further ado, let’s get into the tutorial.
Tools and materials:
- Cardboard
- Box cutter
- Scissor
- Pencil
- Reference picture
- Marker
- Masking tape
- Bleach
- Water
- Cup
- Paintbrush

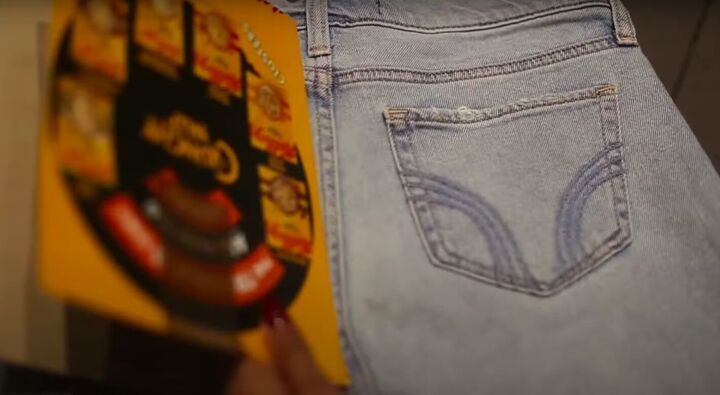
1. Pull up the inspiration photo
This was the inspiration photo I found for my butterfly bleach jeans. You can use this one as a reference like me, or print out a butterfly picture to use as a stencil if you prefer.
2. Make the butterfly stencil
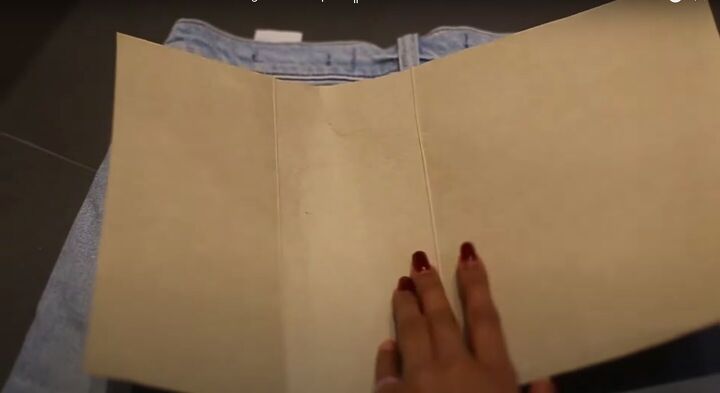
Cut the cereal box into a piece of cardboard that covers the entire backside of the jeans.
Create a fold in the cardboard at the center point of the jeans.
Tip: If you are using something like a cereal box, you can use the folds it already has.
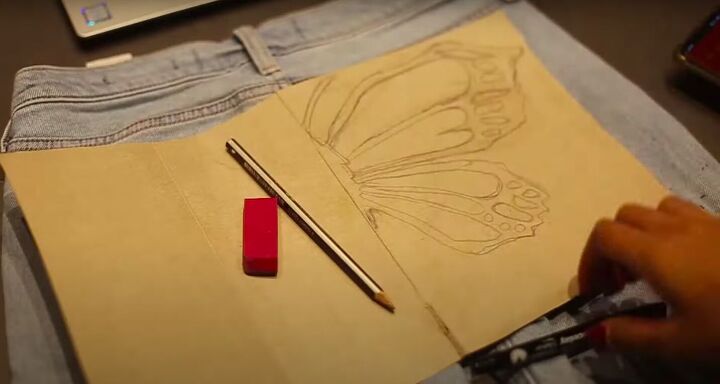
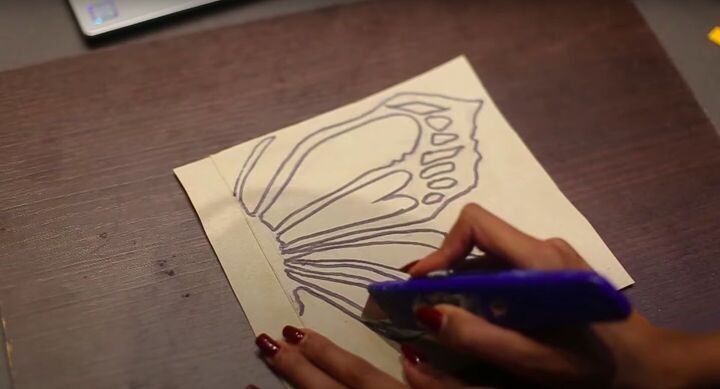
Draw a rough outline of the butterfly using the inspiration image for reference. It’s okay if you don’t draw very well, it doesn’t matter.
If you notice, I am only drawing half of the butterfly. I decided to use the same stencil for each half of the butterfly in order to keep it looking neat and symmetrical.
You could transfer the design onto the other side of the cardboard if you prefer.
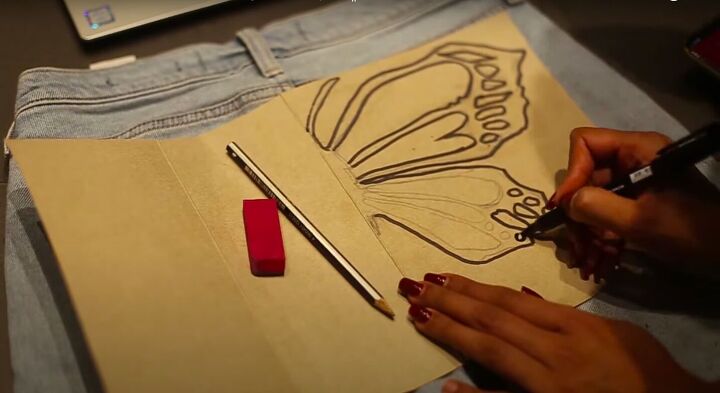
Once you're happy with your design, use a marker to outline the butterfly drawing.
Use a scissors or box cutter to cut out the butterfly drawing along the marker.
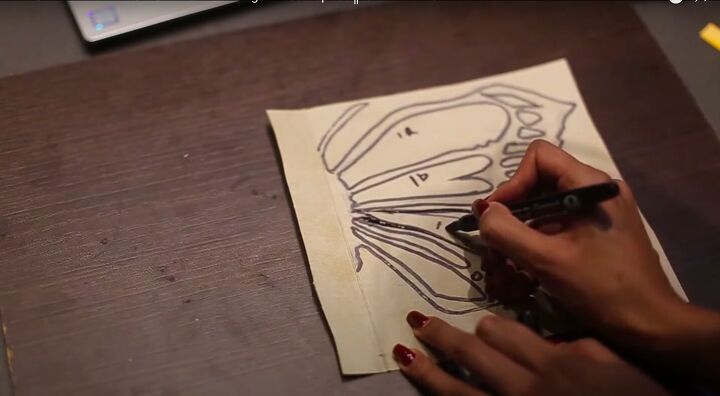
Label each portion of the wing. I am doing this because I do not want them to get mixed up with each other as I cut them out.
Everything that I am labeling will not be bleached. Only the surrounding bits of denim.
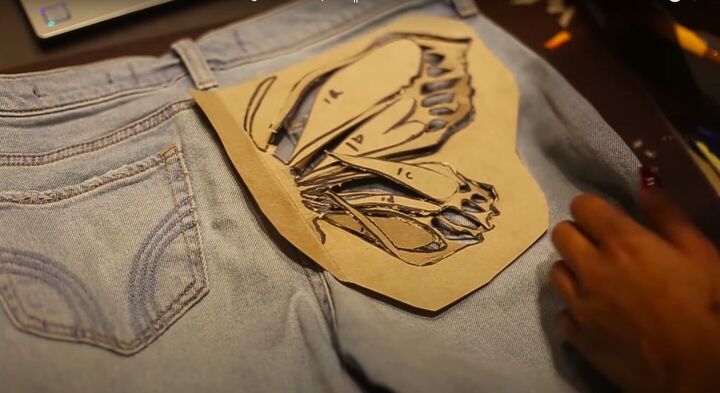
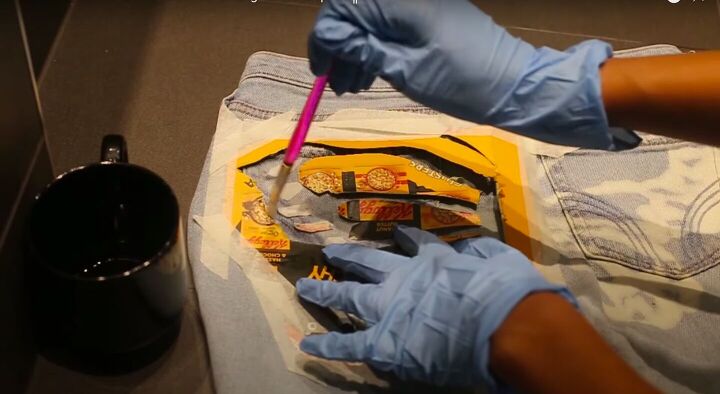
3. Position the butterfly stencil
Place the entire butterfly stencil on the backside of the jeans, including the parts you labeled.
Once you like how everything is positioned, gently remove the inner part of the butterfly stencil, making sure that all the labeled wing parts stay in place.
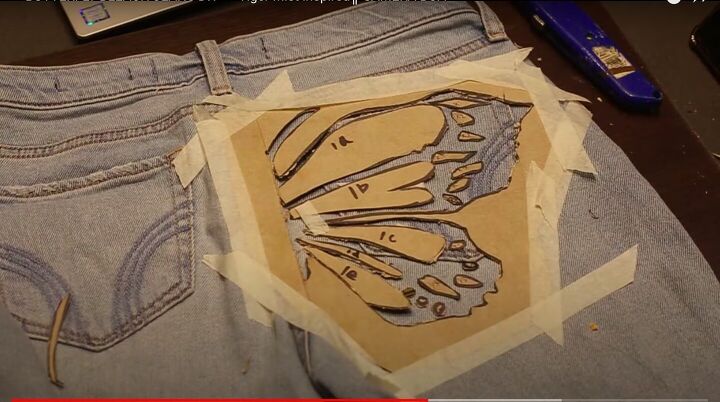
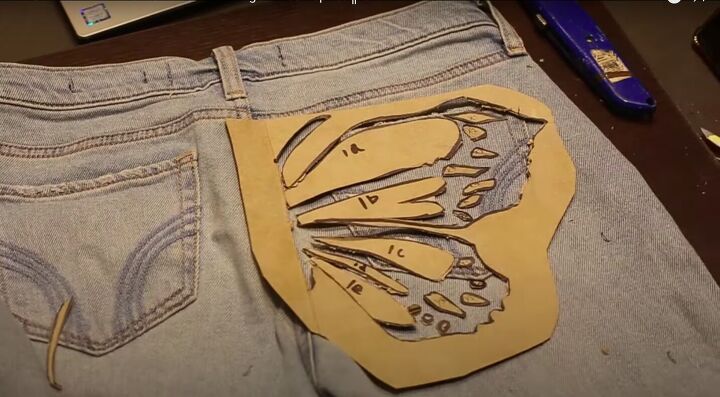
4. Secure the stencil with tape
Secure the butterfly stencil in place with masking tape. Be careful not to ruin the placement of the wings.
Tip: Do not make the mistake I made! Take care to secure the tiny bits of the wing in place with small pieces of masking tape! Otherwise, they will move when you are applying the bleach.
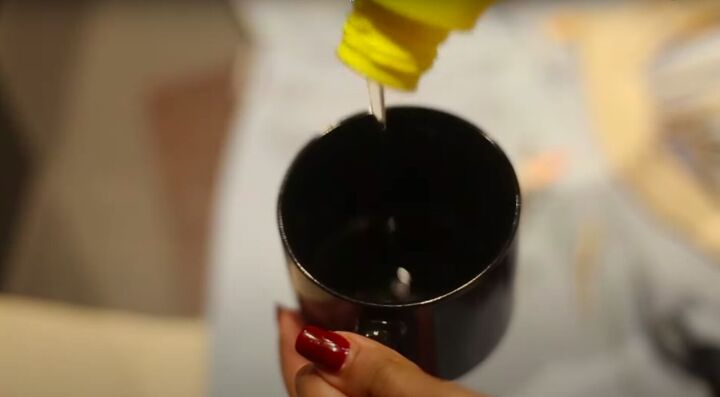
5. Mix the bleach solution
Mix together equal parts bleach and water to get around half a cup of solution total. Mix with a paintbrush.
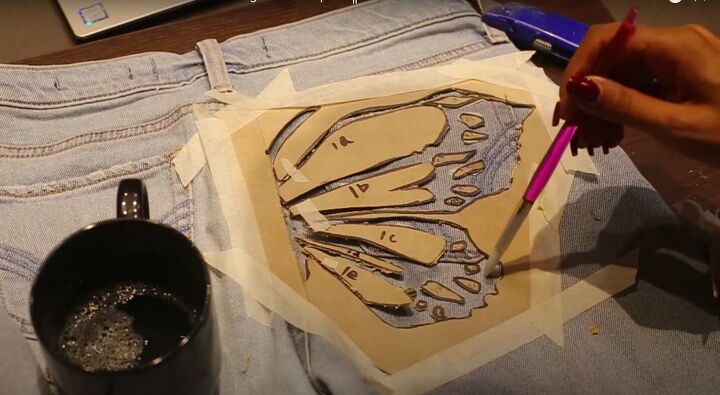
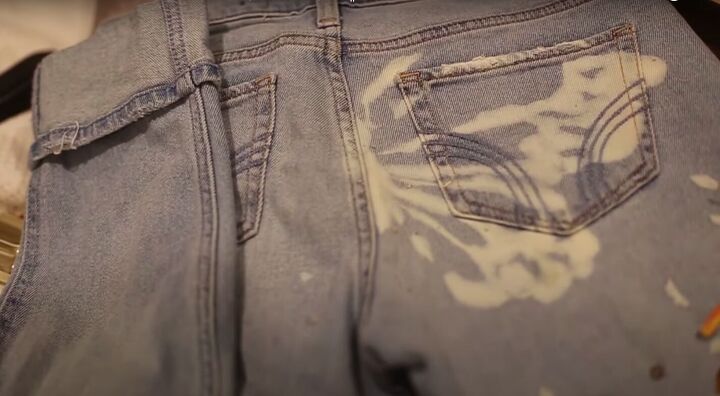
6. Paint on the bleach
Use a paintbrush to paint on the bleach solution between the stencils to create the butterfly shape. Apply a few coats of bleach solution to each section as you go.
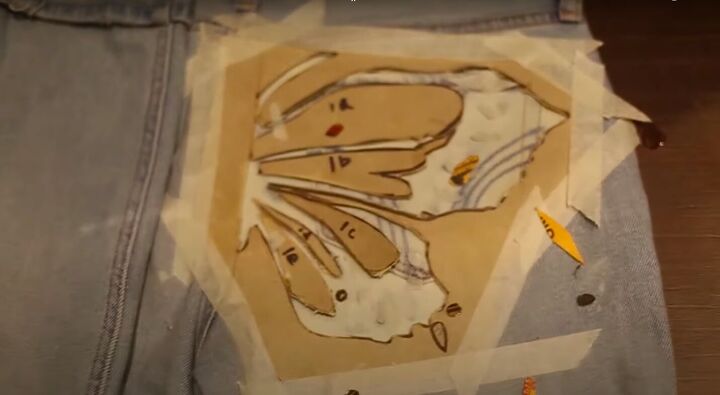
7. Set
Allow the jeans to set for two hours so that the bleaching effects can surface.
8. Remove the stencil
Gently remove the stencil, making sure not to tear any part of it. Remember, you are using it for the other side.
9. Repeat on the other side
Repeat the same process on the other side. Remember to flip the cardboard stencil when doing so, to create symmetrical wings.
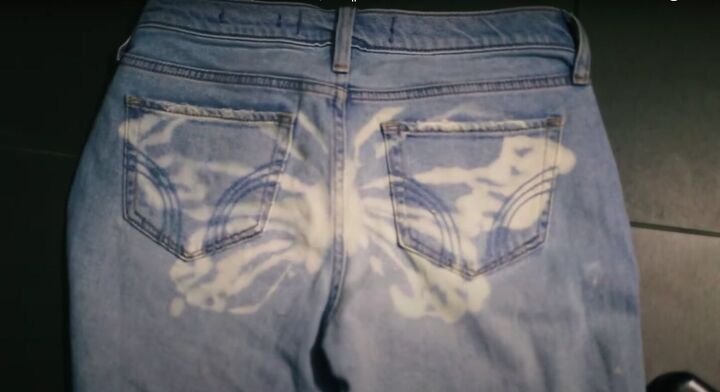
As you can see, I learned from my mistakes and did a more accurate job on the left side by securing the smaller parts in place better, so you can see the difference
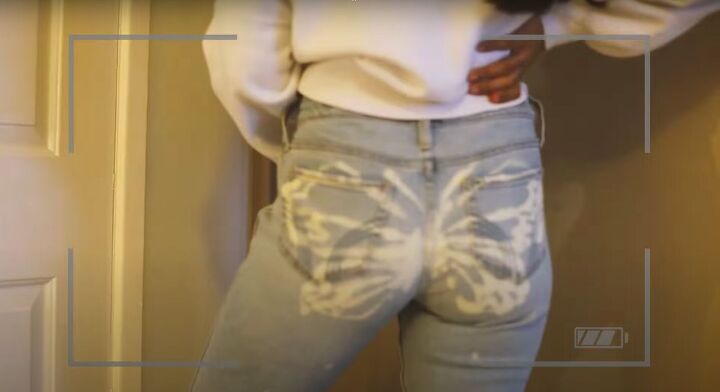
Butterfly bleach design on jeans
There you have it everyone, gorgeous bleached butterfly jeans! It's not exactly like the inspiration photo, but it is beautiful and does look like a butterfly.
Now you know what to do (and what not to do!), I'm sure your butterfly bleach design on your jeans will turn out even better than mine!
Let me know what you think of this tutorial and the final results in the comments below.
The author may collect a small share of sales from the links on this page.


Comments
Join the conversation
Well-done! A great idea for many upcoming ‘Beach-Bleach’ themes and your timing is perfect:) But even after, I visualize a scatter of Fall oak and maple leaves perhaps drifting alongside my hip…TY soooo much!
Oh, I would love to do the bleach painting, but I don’t trust myself not to mess it up. There is no going back if the bleach/water solution spreads too much on the left, or on the right, or if it runs downwards. I do applaud your great job, you brave woman!