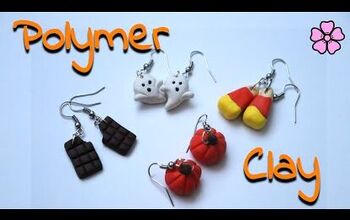
Polymer Clay Snowman Earrings
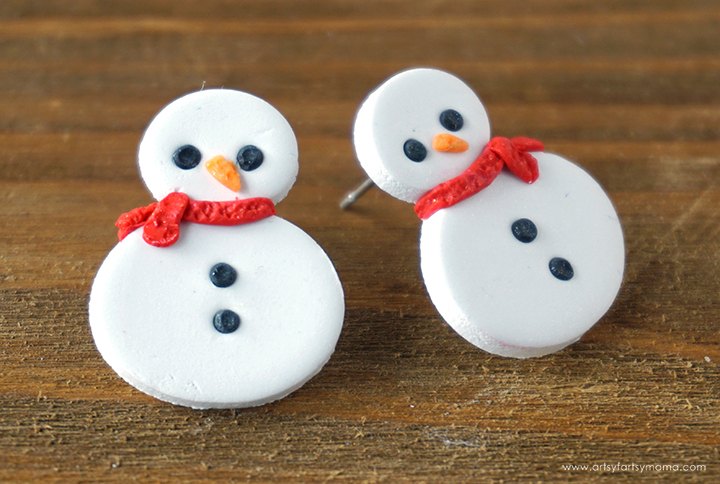
There are so many things you can make with polymer clay, but one of the easiest is jewelry! I'm so excited about this new pair of Snowman Earrings, and they are so fun to make. Even if you are new to working with clay, this is a pretty simple project and can be customized to fit your personal style. What better way to welcome the new winter weather than with a new pair of earrings?!
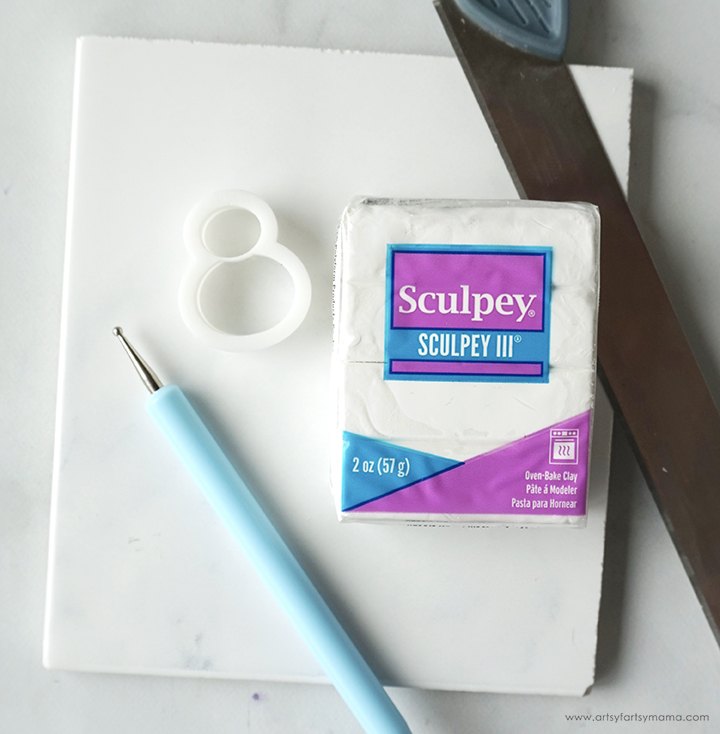
To make these adorable Snowman Earrings, you will need these supplies:
- Sculpey Polymer Clay: white, black, orange, red
- Ceramic Tile or Oven-Safe Work Mat
- Snowman Clay Cutter
- Clay Roller
- 2 Craft Sticks
- Clay Sculpting Tools
- Clay Slicer Tool
- Strong Adhesive
- Earring Posts
- Gloss Glaze
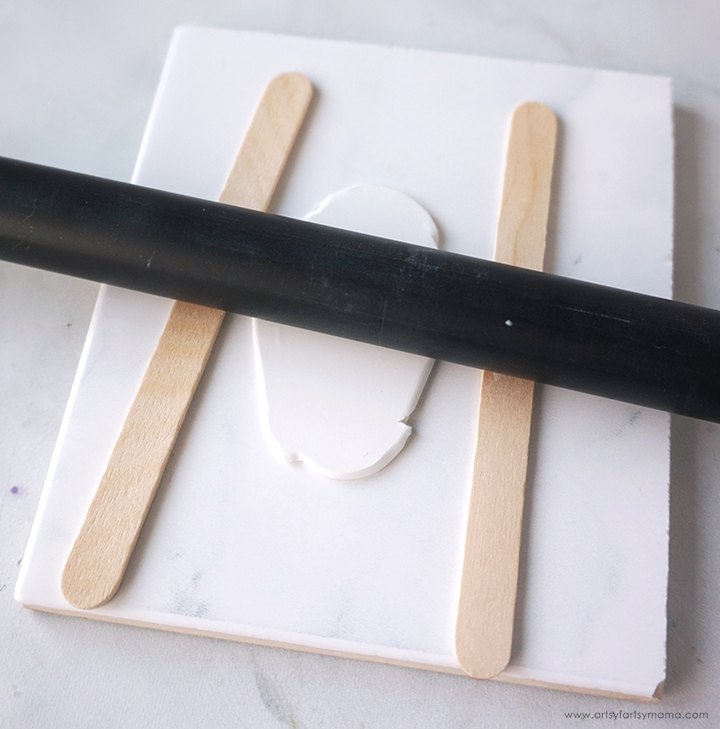
Take a small section of white polymer clay and knead it well until it is a smooth, pliable texture. Lay two craft sticks down parallel to each other, and then put the clay in between. Use the roller to flatten the clay. Having the sticks on either side of the clay will help to flatten the clay to an even thickness.

To cut out the earrings, I used a small snowman cutter. Place the cutter over the clay and gently press it straight down. Pull the cutter straight up. If the clay stays down, leave it there. If it comes up with the cutter, be careful how you remove it. Poking through the top to push the clay out will leave dents or holes in your work. If the clay stayed down after cutting, peel away the excess clay and leave the snowmen pieces in place.
- Place a piece of plastic wrap over the clay first, and then cut the clay.
- Your clay or workspace might be too warm. Put the clay in the fridge or freezer to cool it down before cutting.
- This one is a bit strange, but you can put your mouth over the cutter and blow to set the clay free.
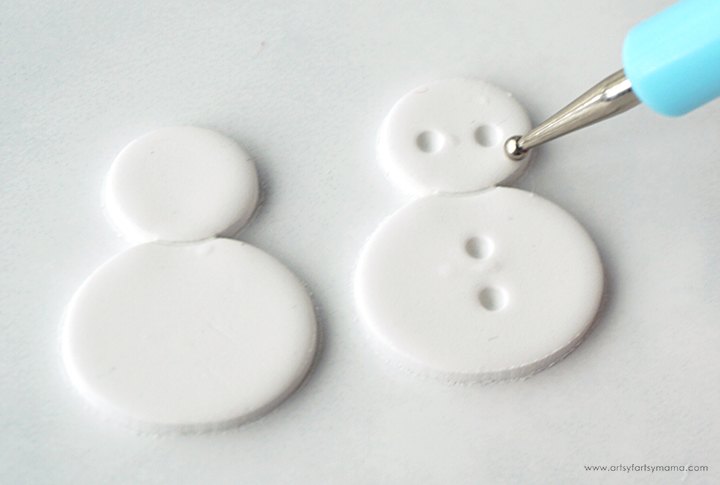
Use one of the smaller ball-point sculpting tools and gently poke holes for eyes and buttons into the clay. Don't push all the way through the clay to the bottom - I would go about halfway, if not a little less.
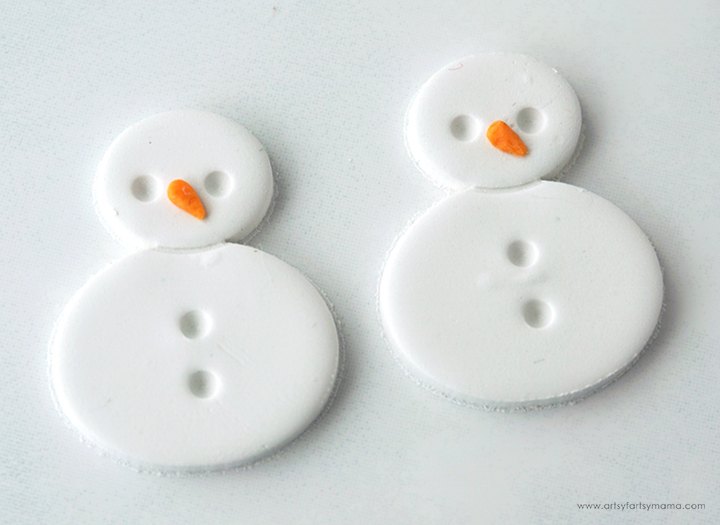
Take a small piece of orange polymer clay (about the size of a sesame seed) and roll it into a little worm. Split the clay in half, and then shape the pieces into a carrot shape for the nose. Use your fingertip or one of the pointed sculpting tools to gently press the noses into place.

Next, roll out 8 small balls of black polymer clay (each slightly smaller than a sesame seed). Use your fingertip or one of the sculpting tools to gently drop the clay into each of the divots to fill in the eyes and buttons on the snowmen, but don't press it down yet. If the clay ball seems to be the wrong size, you can gently roll it out of the divot to remove it and make adjustments. Once the clay fits into the divot, gently tap the clay down with your finger to keep it in place.
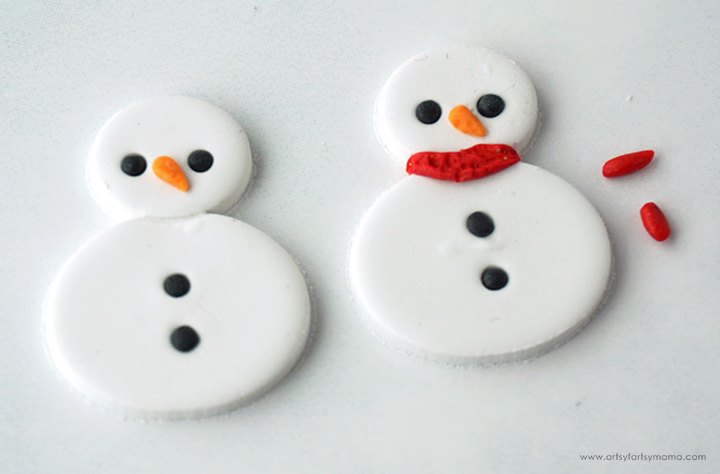
Choose a color of polymer clay for your snowman's scarf. Roll out a small worm about 1"-1.5" long. Split the piece into three pieces, one a little longer than the others to fit along the neckline of the snowman. Using a sculpting tool to gently press the longer piece into place, along the front and the sides of the neck.

Add one smaller piece on the side of the snowman, connecting to the scarf edge. Lastly, place one more small piece on the front of the scarf to look like the fold. For the other snowman, I put the front piece on the opposite side. Once the scarf pieces were in place, I used the sculpting tool to add texture to the scarf.
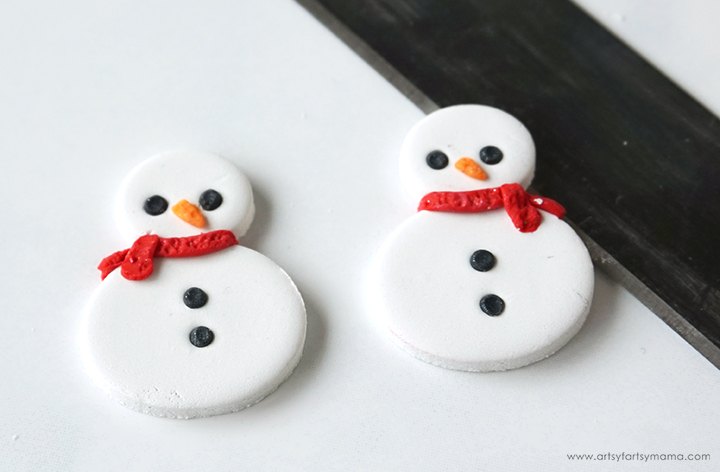
Preheat your oven and bake the earring pieces. Most polymer clays are usually baked at 275º for 15 minutes per quarter inch thickness, but refer to your specific clay packaging directions to make sure. Once baked, let the pieces cool completely before handling.

Turn the pieces over and add a tiny drop of strong adhesive on the head area. Next, center an earring post on the adhesive and let it dry completely.
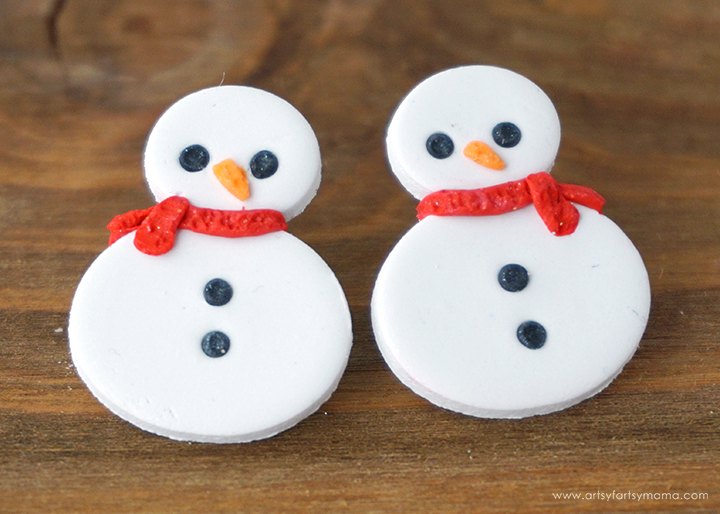
Once the glue has set, the earrings are complete! To protect your earrings and keep them looking good as new for as long as possible, I recommend covering them with a clear coat. Gloss Glaze is easy to apply and dries fairly quickly. Just add a little bit of glaze on the top of the clay pieces, and gently spread it around using a toothpick.

The author may collect a small share of sales from the links on this page.


Comments
Join the conversation