Protect Your Hair This Winter With This Easy DIY Satin-lined Beanie

We love our beanies in winter, but they can mess up our hair.
It’s quick and easy to add a satin lining to them, to both protect our hair and make the beanie more comfortable.
I’m doing one for my son today, but the method is the same whatever the size.
Tools and materials:
- Satin lining fabric
- Knitted beanie
- Fabric marker
- Scissors
- Pins
- Sewing machine
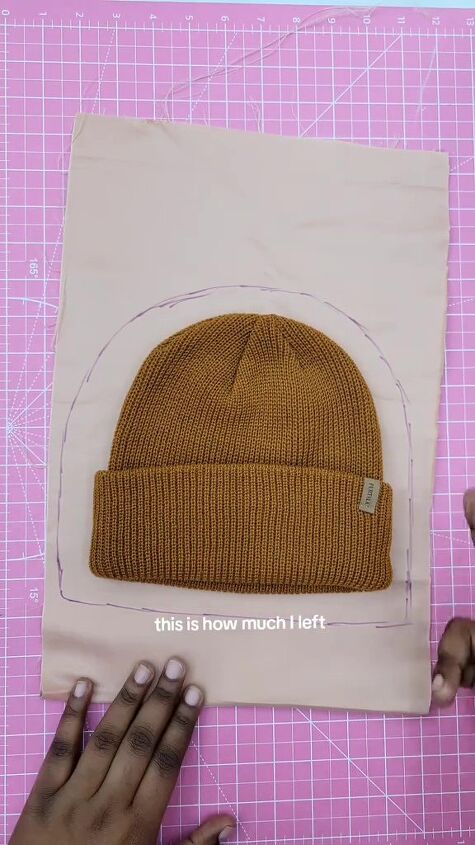
1. Trace the beanie
Fold your satin lining in half with the right side inside.
Place the beanie in the center and trace around it.
You need to add an allowance all around because the beanie will stretch but the lining won’t.
This is the amount I allowed and I wish I’d made it a little larger.
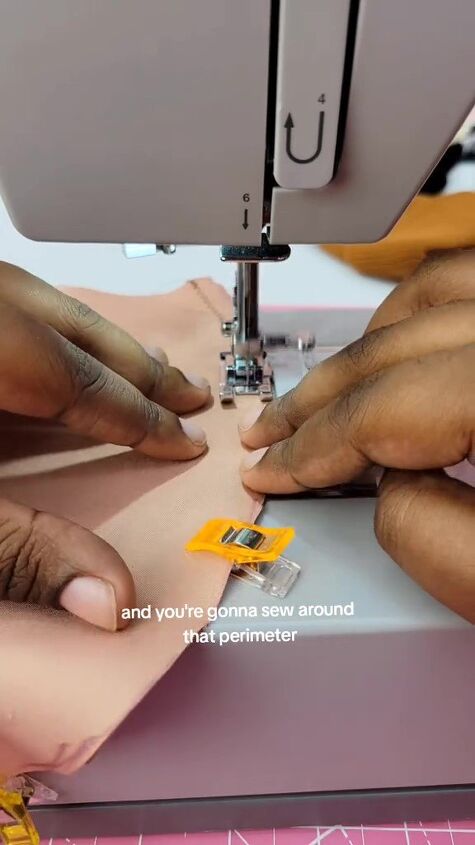
2. Sew the lining
Cut out the lining.
Sew the curved edges together with a zigzag stitch. I used a quarter inch seam allowance.
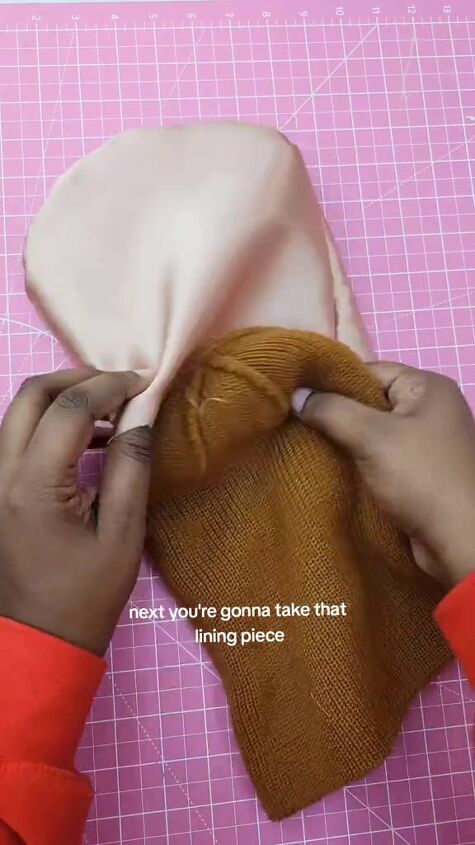
3. Attach the lining
Flip your beanie wrong side out and your lining right side out.
Tuck the beanie inside the lining.
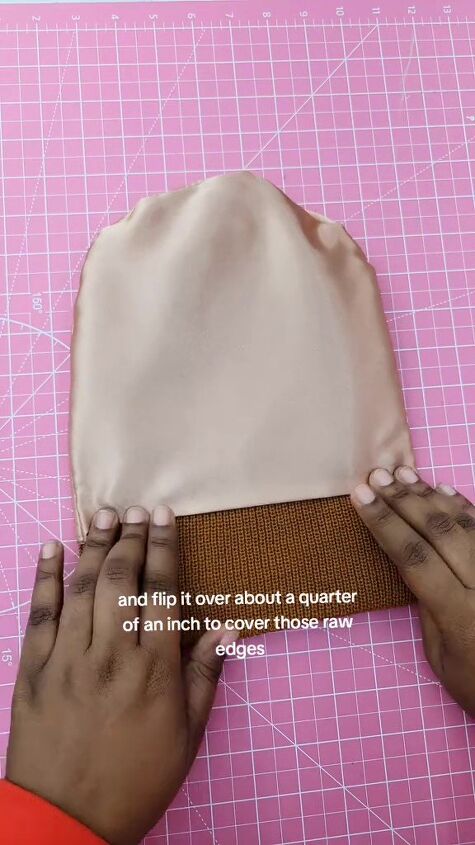
Grab the bottom edge of the lining and turn it under by about a quarter of an inch to hide the raw edge.
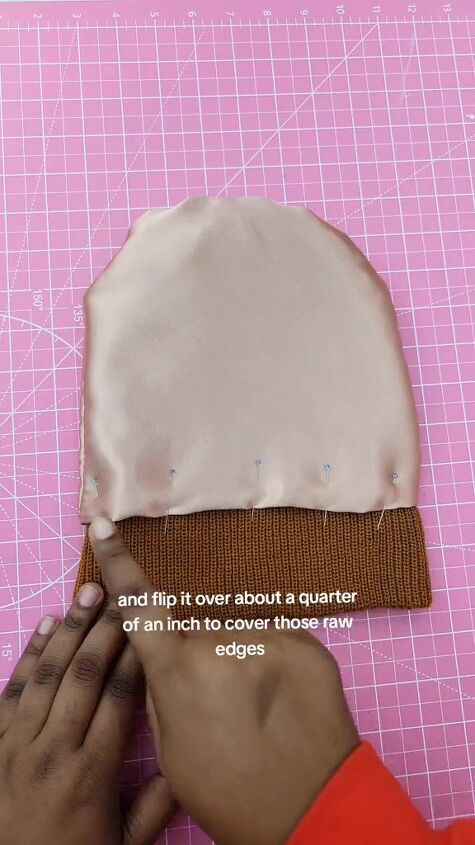
Pin the lining to the beanie.
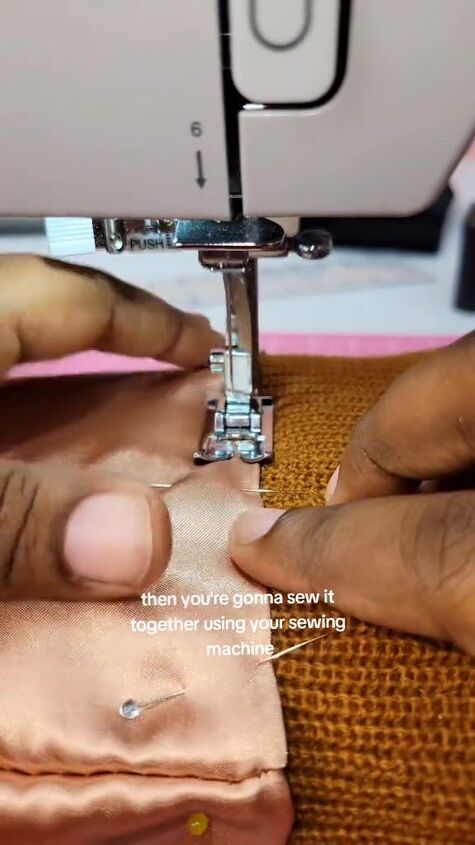
Sew them together around the lower edge of the lining.
Use a zigzag or stretch stitch and stretch the beanie to fit the lining as you sew.
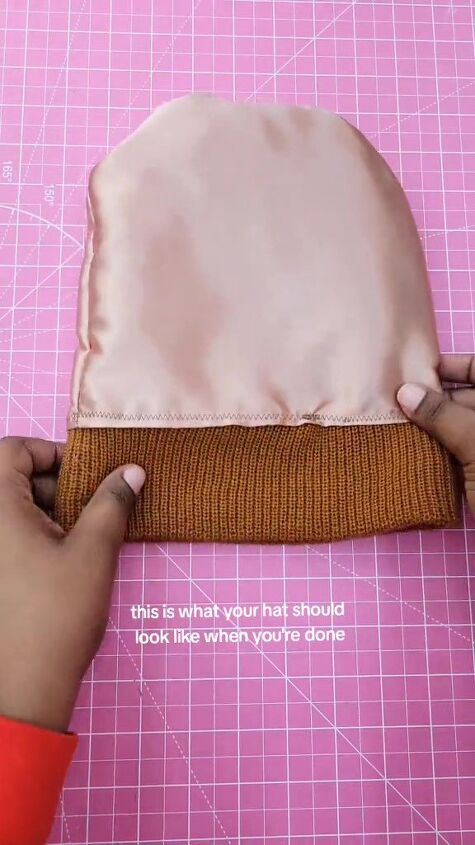
Turn your hat right side up and flip up the cuff, and you’re done!

You can match the lining shade to the hat or add a pop of color, it’s up to you.
DIY satin-lined beanie
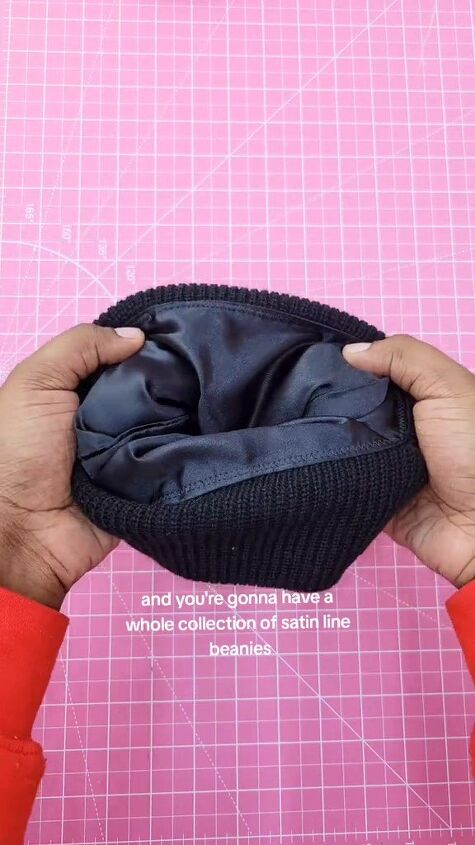
Once you’ve lined one beanie, you won’t be able to stop. You’ll soon have a collection of them.
What do you think of this idea? Comment down below.
Next, learn How to Sew a French Seam.
Follow me on TikTok: @kenjahb
The author may collect a small share of sales from the links on this page.


Comments
Join the conversation
Great idea! Thanks!