How to Refashion a $5 Plaid Skirt Into a Cute Capelet
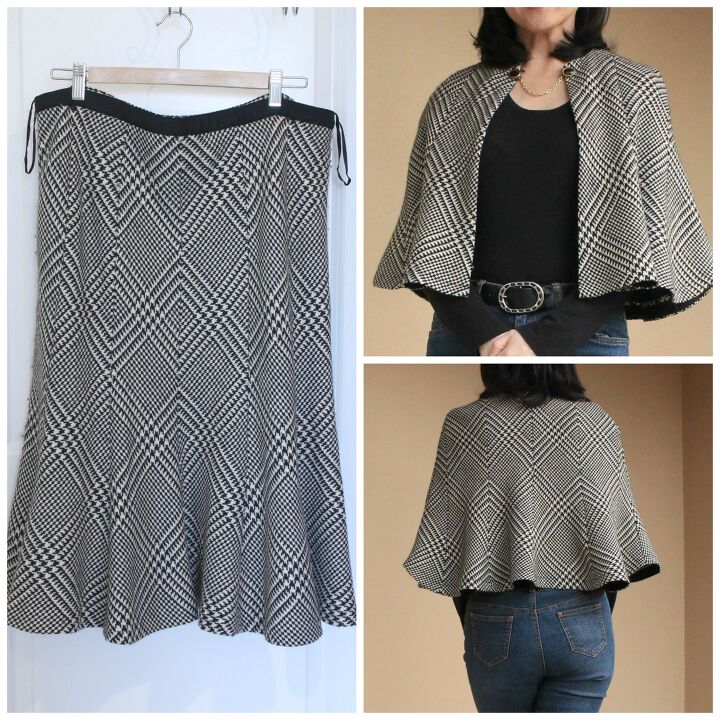
The first thing I stalk at thrift stores is large skirts because they usually have beautiful patterns with enough fabric for me to play with. This $5 plaid skirt was made of the softest wool and had a classic plaid pattern. The princess seams gave the skirt a feminine flare at the bottom. Don’t ask me why, but I immediately thought “capelet” when I spotted the skirt. In this post, I’ll show you how to make a capelet from a skirt using a free capelet pattern by Thunderlily on Burda Style. I was able to finish this project in an afternoon and wear it out to dinner.
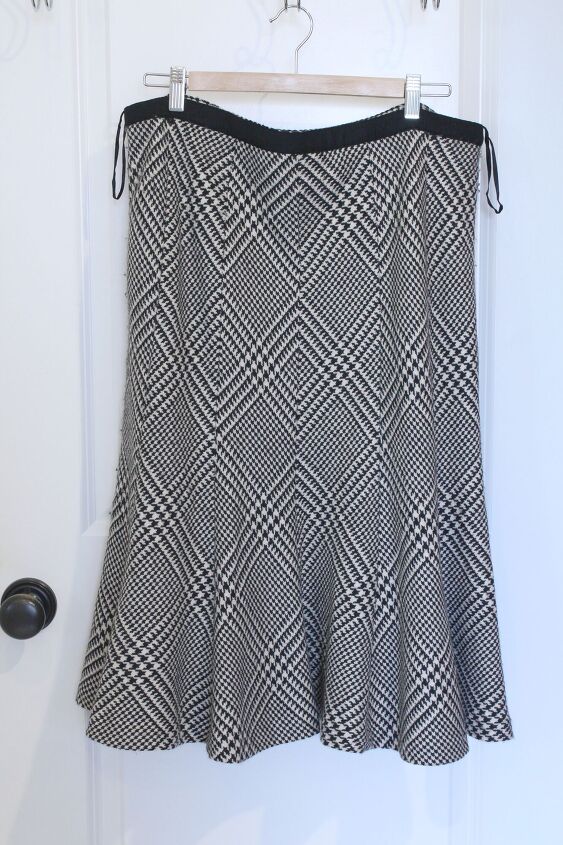
Look at how perfectly the plaid is lined up. I’ve read how tedious it can be to match the plaid, so I wanted to preserve this pattern matching in the capelet. As I mentioned in previous posts, I’m a lazy sewer, and I try to reuse the original construction to save time.
I found a free capelet pattern by Thunderlily on Burda Style. The original pattern had a cool collar tie and sawtooth edge along a button closure, but there wasn’t enough fabric in the skirt for these decorative touches, so I only used the lining pattern.
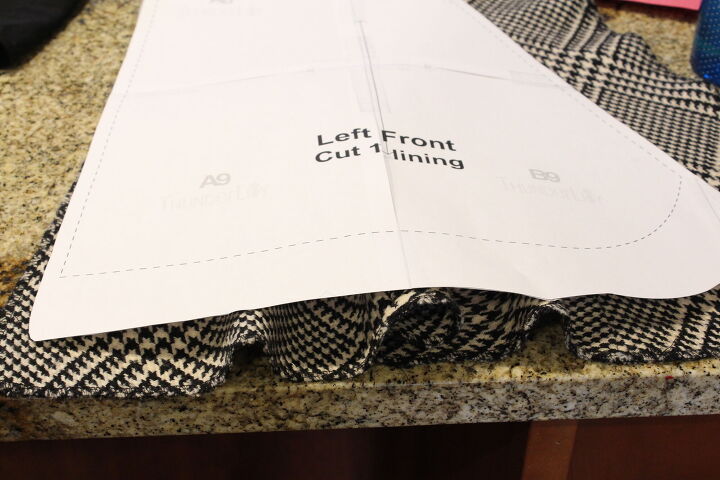
I didn’t want to lose the flairs in the skirt, so I didn’t lay the fabric flat under the pattern.
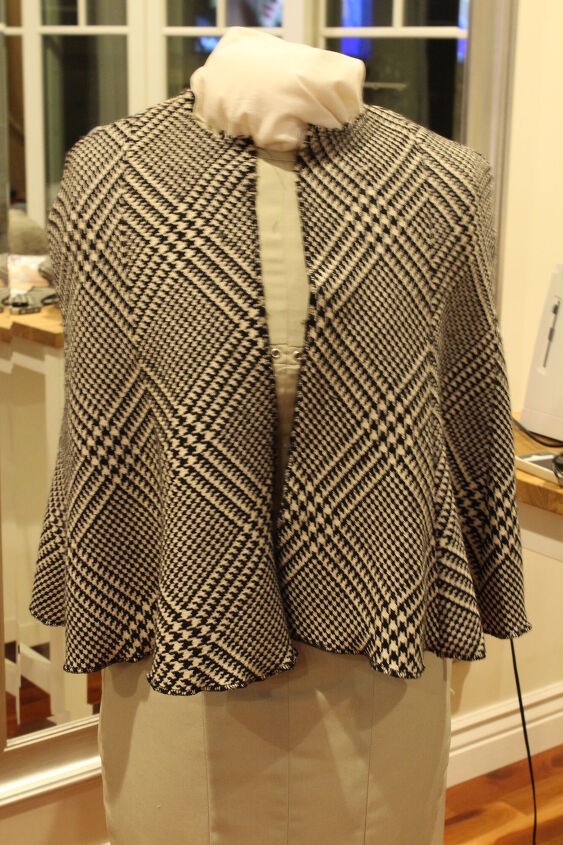
I cut out the front and back pieces, and then sewed the pieces together at the side.
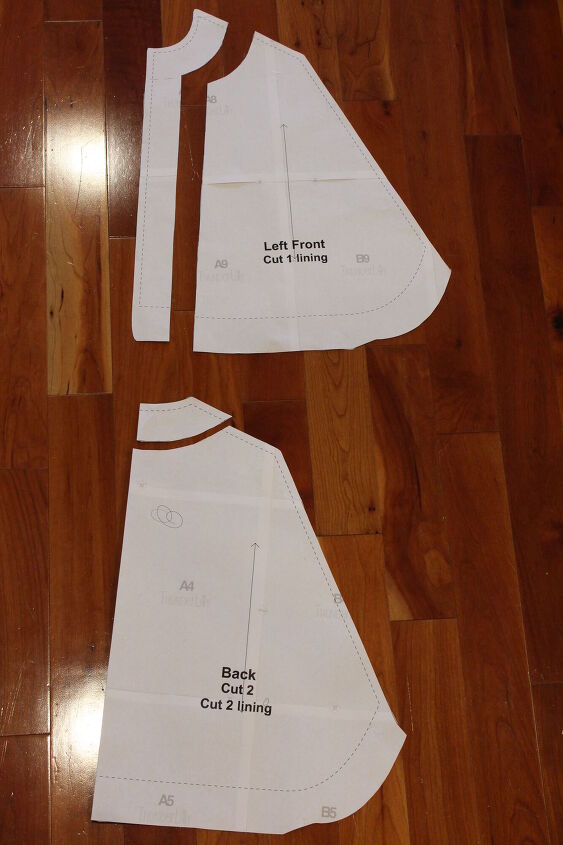
I used the skirt lining for the capelet lining. There weren’t any flairs in the lining, so I laid the fabric flat when I cut it out. One thing I did add to the lining that wasn’t in the instructions was a facing along the front opening and collar. The wool fabric has a loose weave, and I was concerned it would stretch out of shape around the collar. To make the facing pattern, I cut out the pattern 2 inches in from the collar and front edge. Then I cut the facing from a twill fabric reinforced with stabilizer. I sewed the facing onto the lining, and then sewed the side seams of the lining just like the front. If your fabric has a tighter weave, you can skip the facing.
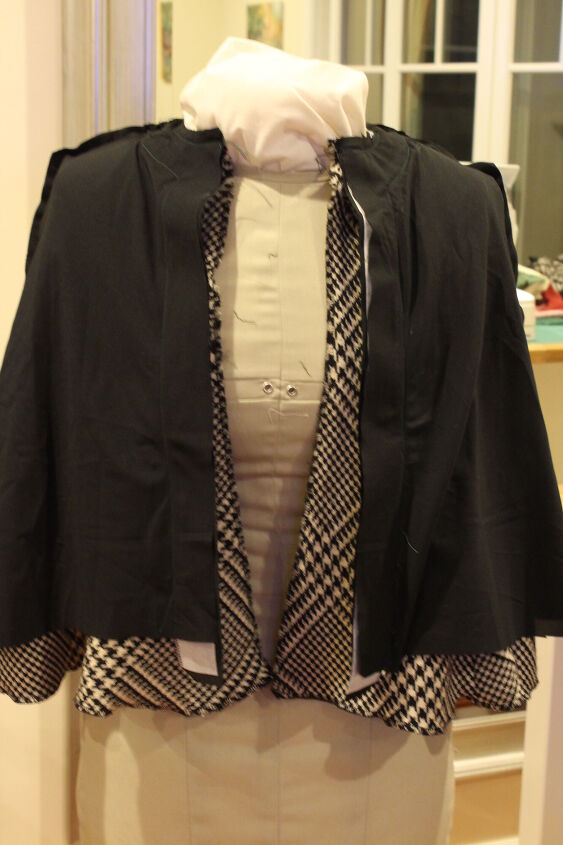
I cut the lining shorter than the wool fabric so the capelet could swing freely. I finished the bottom of the lining with the serger. With right sides together, I sewed the capelet to the lining along the front opening and neckline, then I flipped it right side out. I finished the hem of the wool fabric with bias tape.
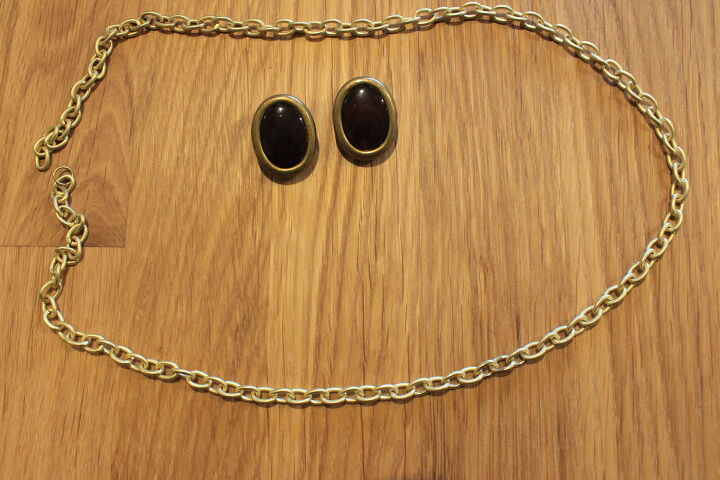
This capelet was a little too snug when I tried to close it at the neck. When left slightly open, it felt just right, but I was afraid it would slide off my shoulders. To solve this problem, I improvised a sweater clip by hacking together a thrifted pair of earrings and leftover necklace chain from a jewelry project. I cut the chain down to about 3 inches and attached it to holes in the back of the clip on earrings.
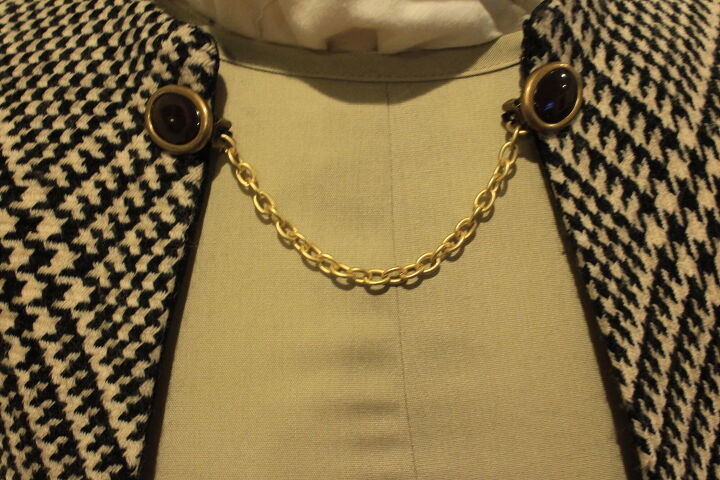
This finishing touch was thrown in at the last minute, but I love the polish it adds to the capelet.

Most capelets I see in store tend to be longer, but I like the cropped look to this pattern.
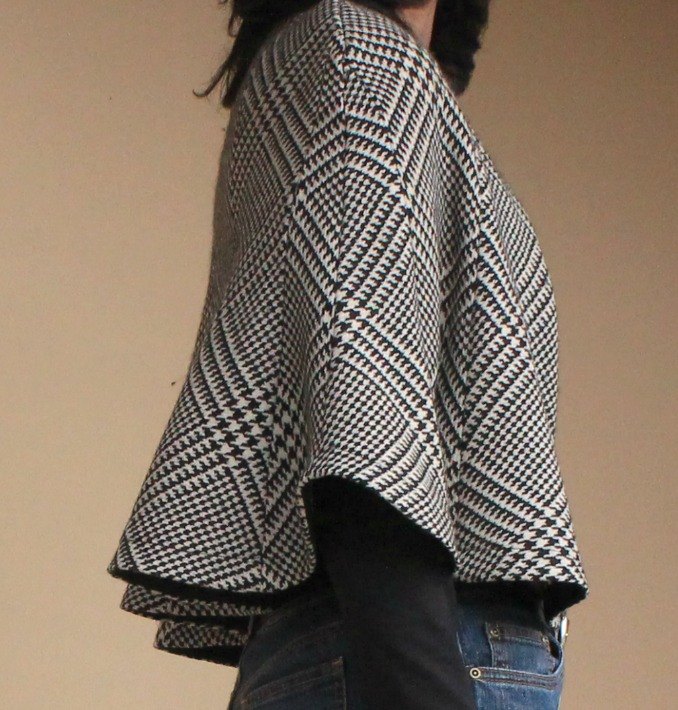
Here’s a view from the side.
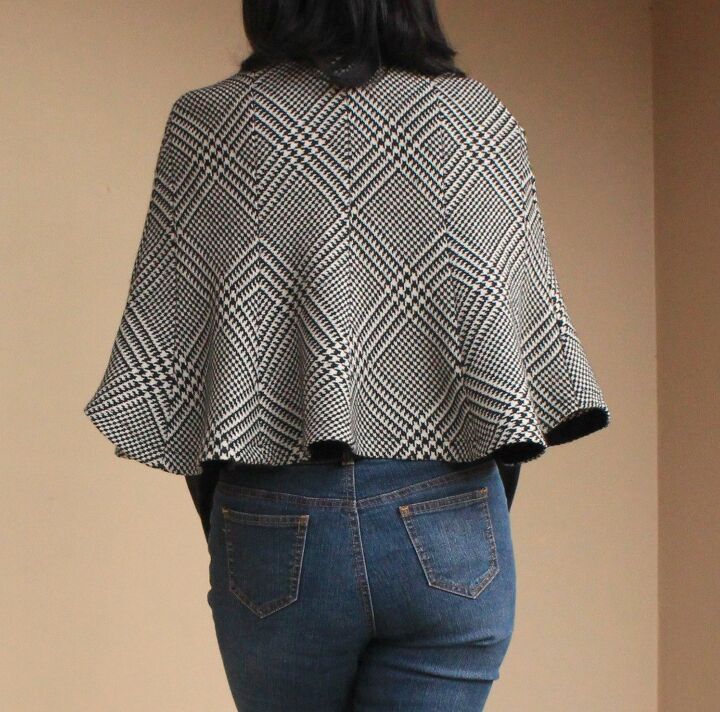
And here’s a view from the back.

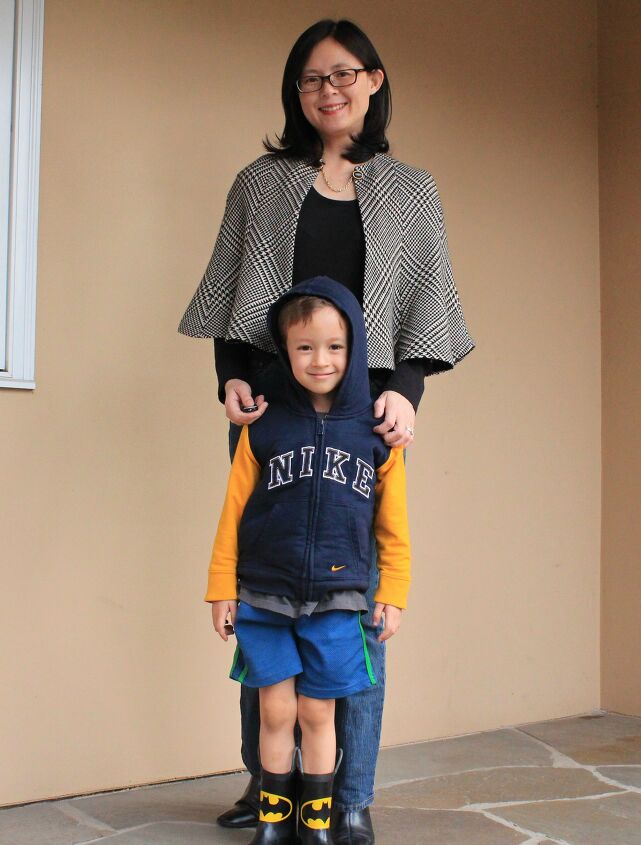
The pattern is size 0 and isn’t offered in any other sizes, but this is a simple pattern that can be easily altered. It didn’t take long to whip up this sassy little capelet as there weren’t many pieces and the sewing was straightforward. I can see myself pairing the capelet with many outfits. It’s an easy garment to throw on at the last minute.
The author may collect a small share of sales from the links on this page.


Comments
Join the conversation
I, too, cannot find the pattern. Can you give a current site? Thanks.
Looks like the pattern is no longer available :(