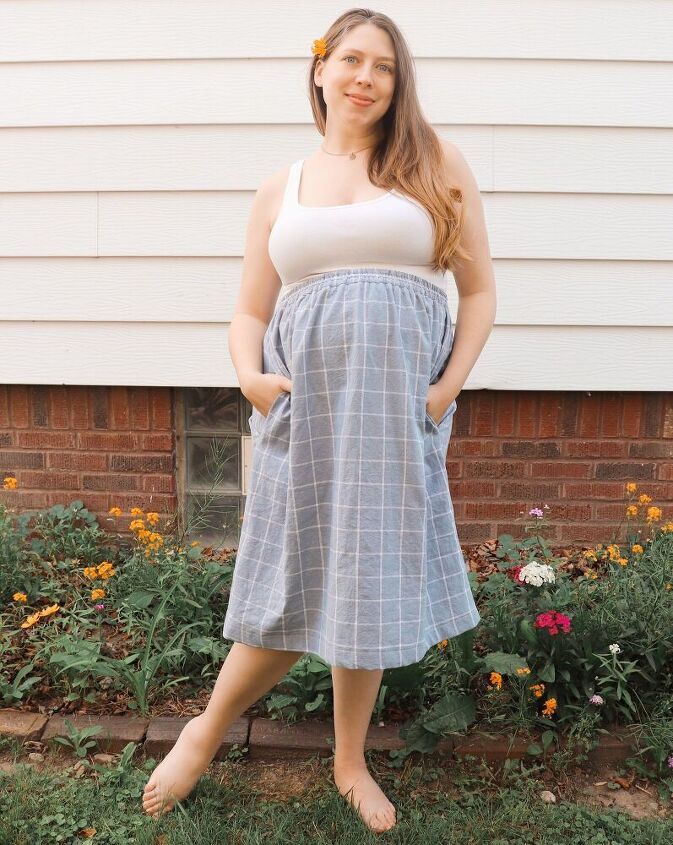
Elastic Waist Gathered Skirt Tutorial
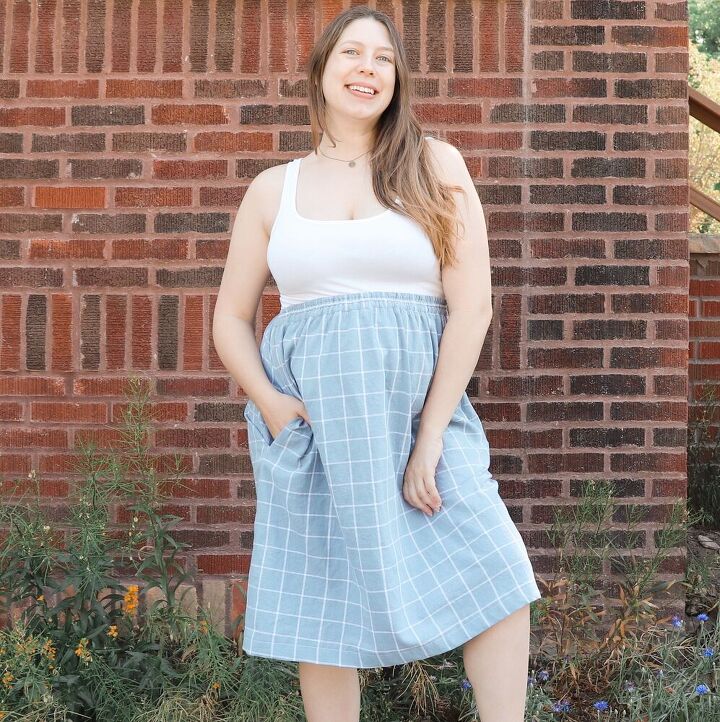
Whether you’re looking for the perfect beginner sewing project or just something easy you can whip up in an afternoon, this elastic waist gathered skirt tutorial is for you! This simple gathered skirt is a wardrobe staple, and super easy to make! Using only a few squares of fabric, this project is excellent for beginner sewists. Bonus- it has pockets! Add one to your summer wardrobe by following this elastic waist gathered skirt tutorial- just keep reading to find out how!
To be honest, this project came about by accident. I’d originally cut out this gorgeous linen fabric ( similar) with the intention of sewing the Hinterland Dress by Sew Liberated. However…I cut out my project 4 sizes too small! Lesson learned: the saying “Measure twice, cut once” is NOT A JOKE, people! At the time I just threw my fabric cuttings into the UFO pile never to be heard from again.
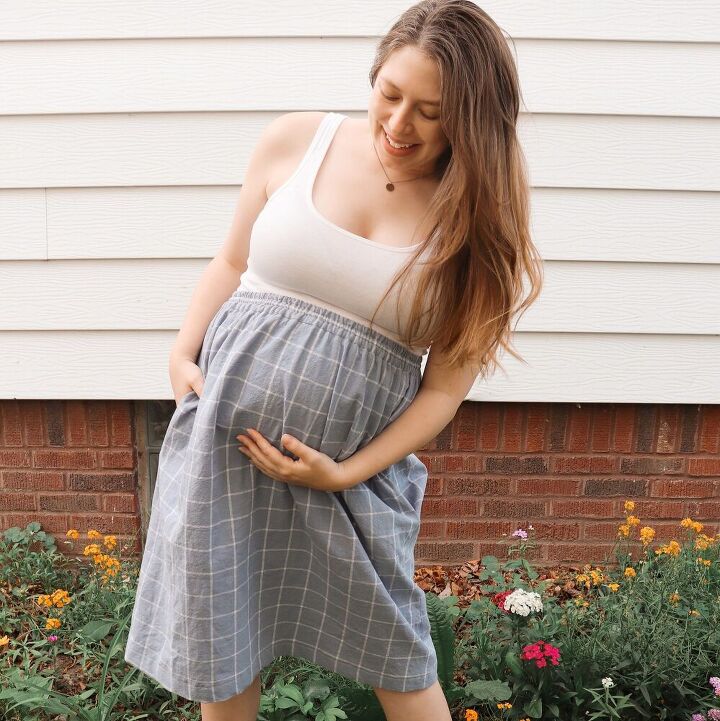
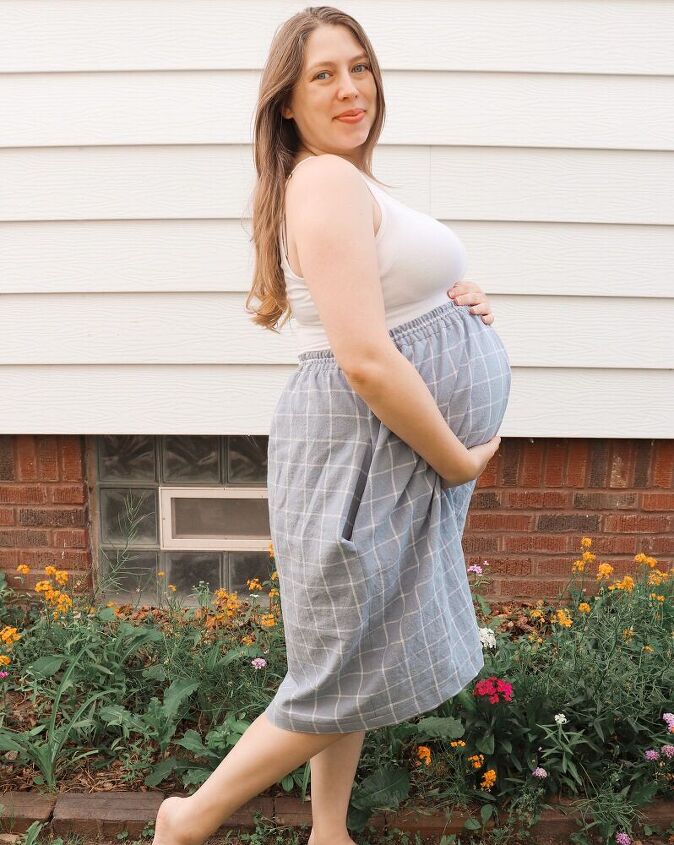
That is, until, I needed to make a simple skirt to add to my summer wardrobe that would fit over my 8-month baby bump. It’s huge, you guys. Nothing fits over it at this point so I was desperate to make something work! I realized that the skirt pieces I’d cut for the dress were just made up of simple squares, and that gave me the idea for this tutorial! Anyone can make this simple elastic waist gathered skirt. Just follow the steps below!

- Woven Fabric
- 1/4 in Elastic
- Tailor’s Chalk (or another marking tool)
- Measuring Tape
- Scissors
- Thread to match your fabric
- Sewing Machine

- Any lightweight woven fabric will work well for this project. If you’re a beginner, I’d suggest linen or quilting cotton since they are easy to sew with. The amount of fabric and elastic you’ll need will depend on your body measurements, but I’d suggest buying at least 2 yards to start. Make sure to pre-wash your fabric to prevent your skirt from shrinking later on.
- The measurements provided below are for a simple gathered skirt. If you’d prefer a fuller-looking skirt, simply cut your fabric wider than the measurements provided.
- To get your waist measurements, stand up straight and bend to the side (think of “I’m a little teapot” tipping over, lol) Where your body bends is your natural waist. Wrap the measuring tape all-around your body at this point. For your length, start at this waist point and measure down to your preferred length. Add 1 inch for the hem.
- The project is sewn using a 1/2 in. seam allowance unless otherwise stated in the instructions.
STEP 1: Find your waist and length measurements (read tips above if you’re not sure how to do that). Use the formula below to find out the proper measurements for your skirt based on your body measurements. If you’d like a fuller skirt, follow the second formula below. Measure and cut out your fabric pieces.
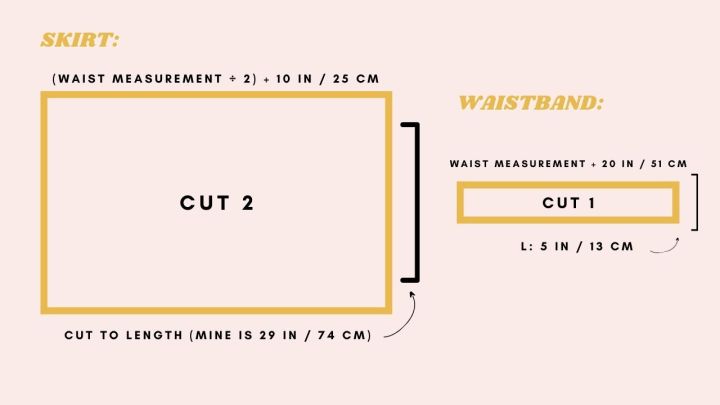
For the pocket pieces, you can use your favorite pocket bags from a different sewing pattern as I did. You can also download and print off a free pocket pattern piece here and here. Cut out 4 pocket bags.

STEP 2: Measure how far down your skirt you’d like your pockets to sit. For reference, I placed mine 5 inches down from the top of the skirt pieces. Pin pocket bags in place on the wrong sides of both the front and back skirt pieces. Sew.
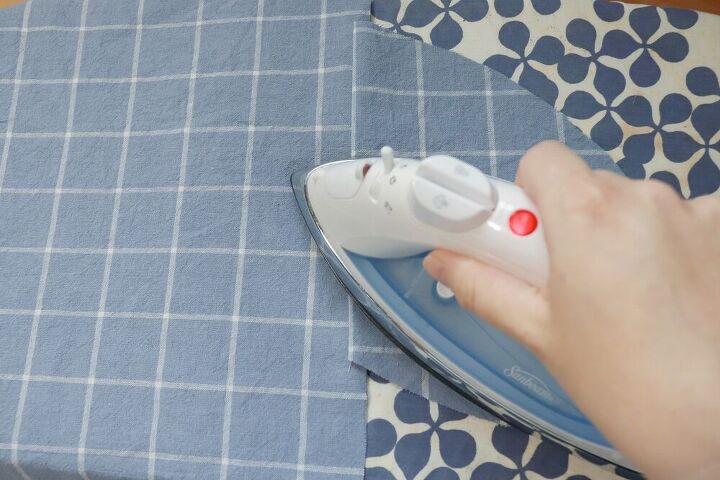
STEP 3: Press your pocket bags away from the skirt pieces. Topstitch in place as close to the seam as possible.
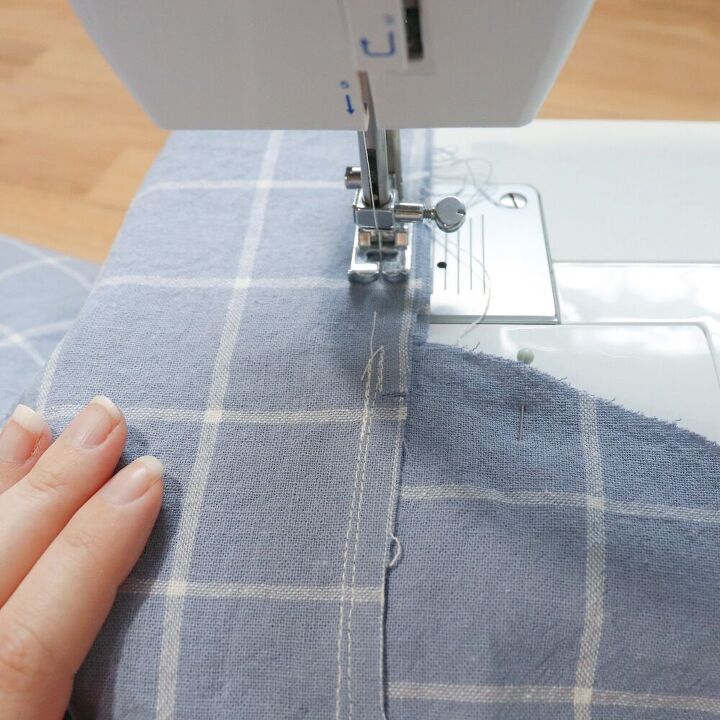
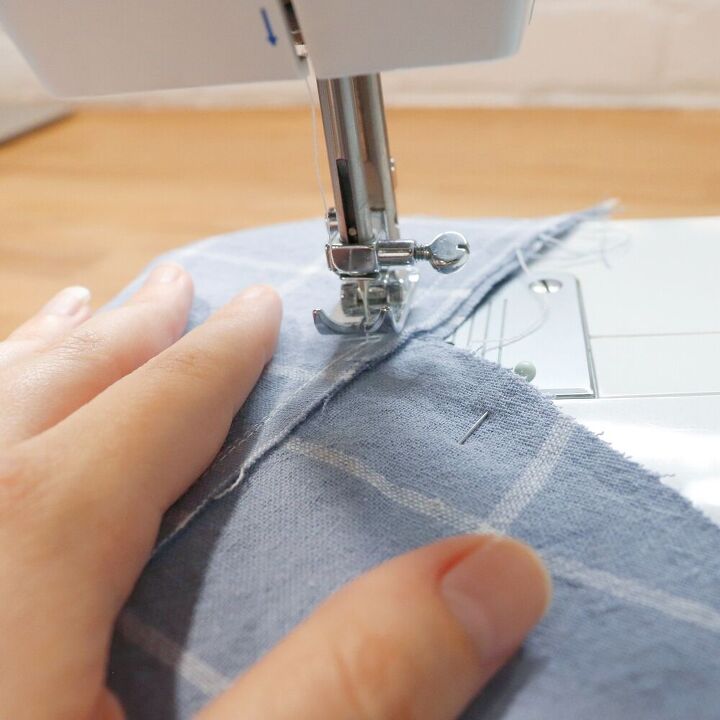
STEP 4: *optional* Finish off all raw side seams. You can sew along the sides and pocket pieces of the skirt using a serger or zig-zag stitch to prevent the edges from fraying. You can also skip this step and simply finish all your seams with pinking shears (like I did) if your fabric doesn’t fray much in the wash.
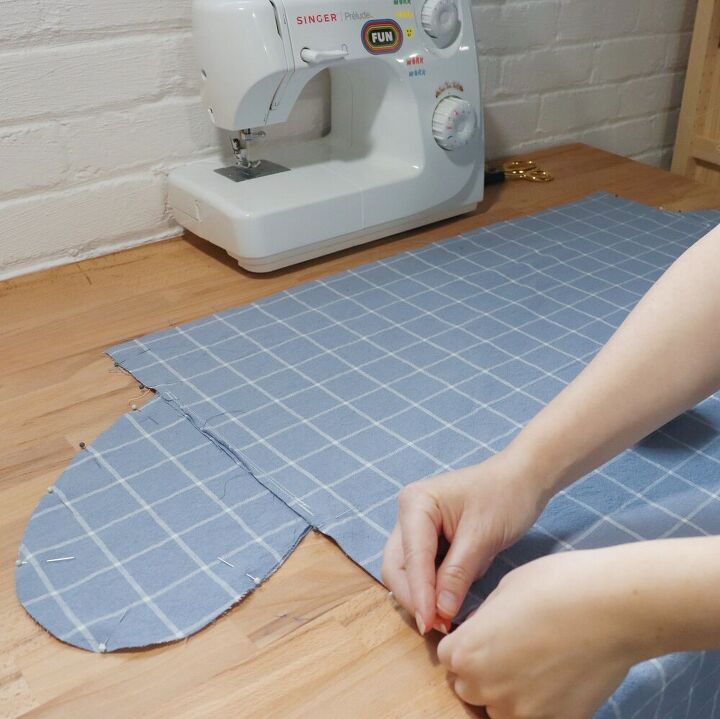
STEP 5: Lay the front skirt piece on top of the back skirt piece with right sides facing. Matching all sides and pocket pieces, pin in place.
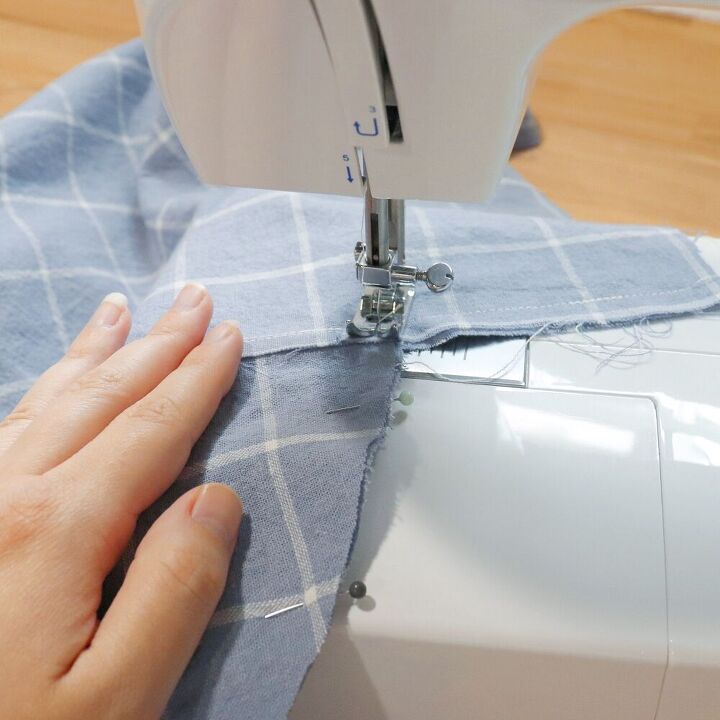
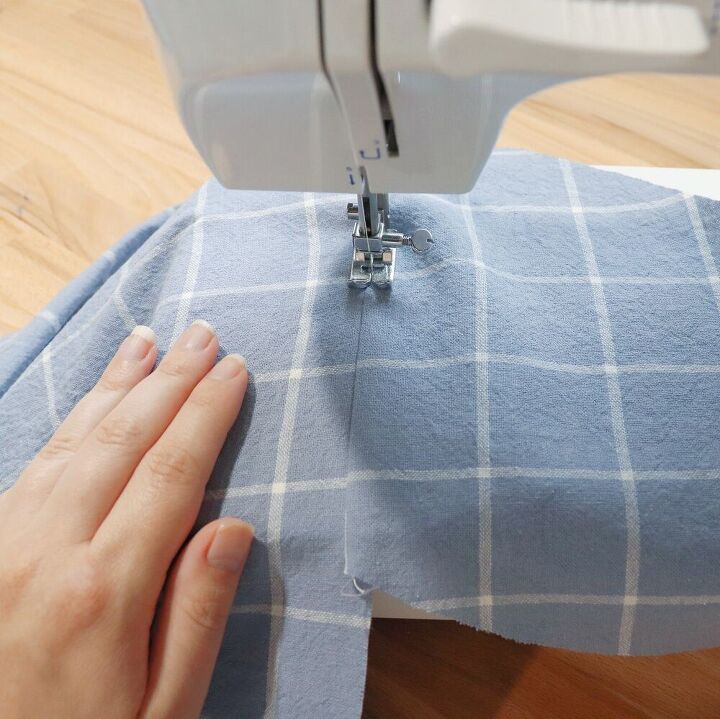
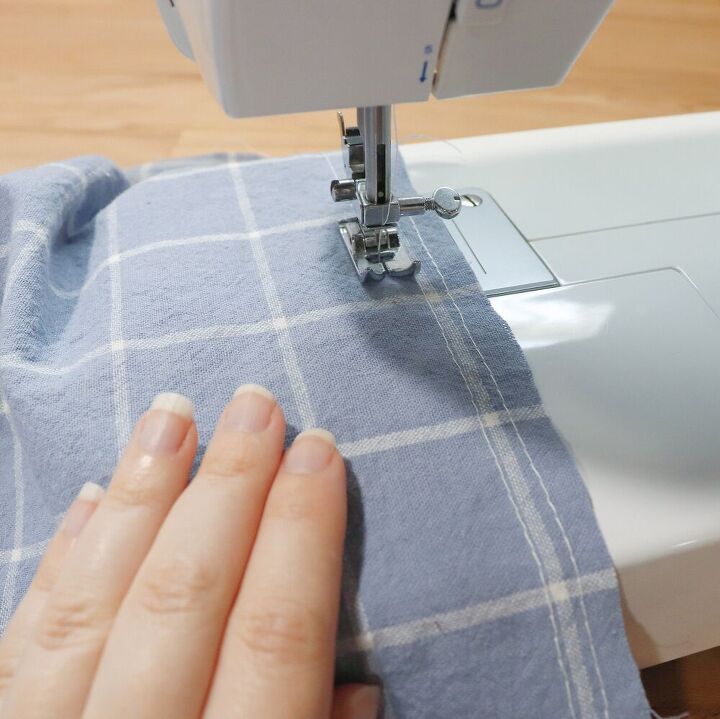
STEP 6: Sew along the edges. When you approach the pocket bags, insert your needle into the fabric, then lift the presser foot. Pivot your fabric. Then, lower the presser foot back down and sew along the edges of the pocket bags. Press seams open or towards the back. Press pocket bags towards the front of the skirt.
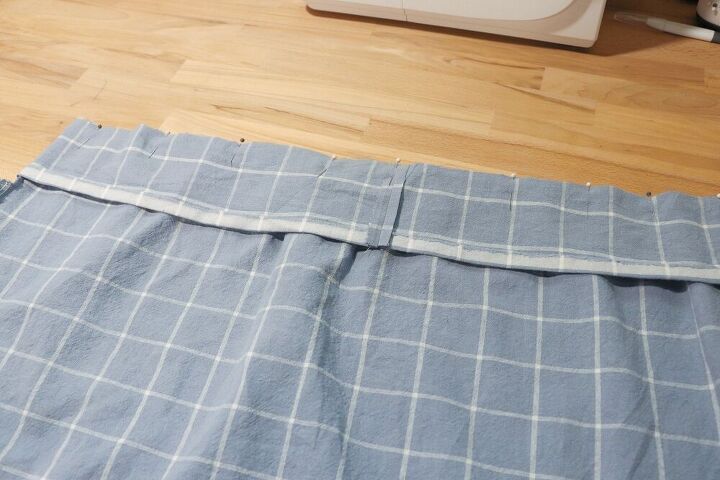
STEP 7: Adjust your sewing machine to the longest possible stitch length. Sew 3 rows of gathering stitches, each about a 1/4in apart starting from the top of the skirt, making sure to leave long tails at the beginning and end of each row.
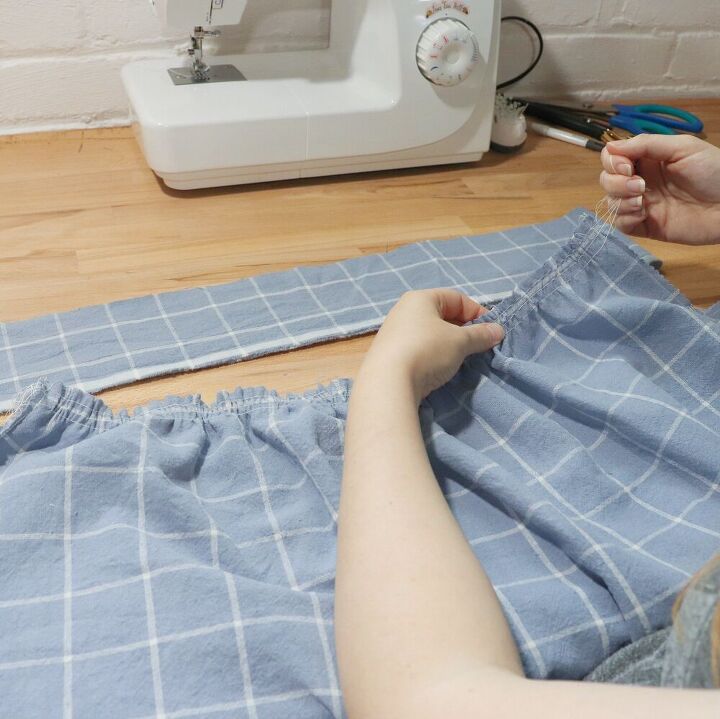
STEP 8: Pulling on the long thread tails to create your gathers. Be sure to evenly space your gathers as much as possible. Your skirt should be gathered until it is approximately the same width as your waistband piece folded in half.
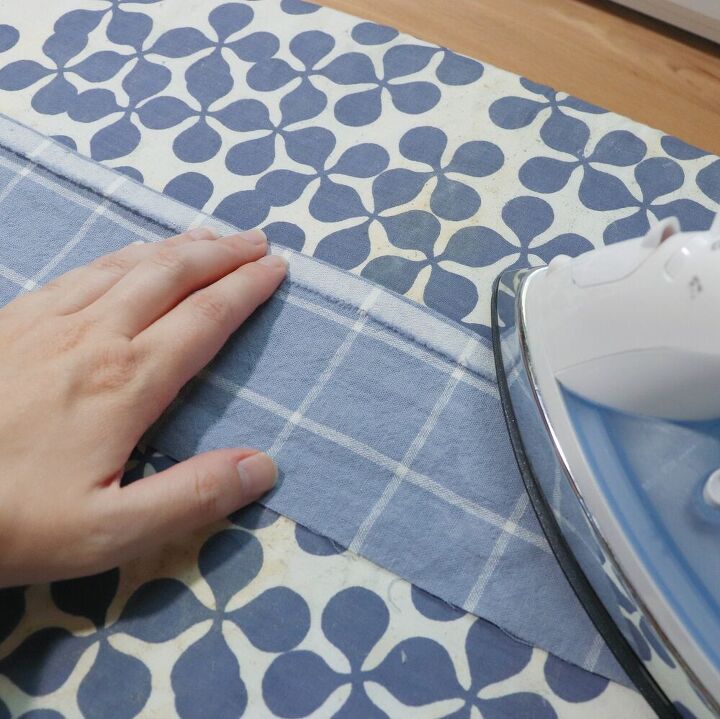
STEP 9: Sew together the raw edges of your waist band piece. Press the seam open. Then fold down one edge of the waistband 1/4 in and press.
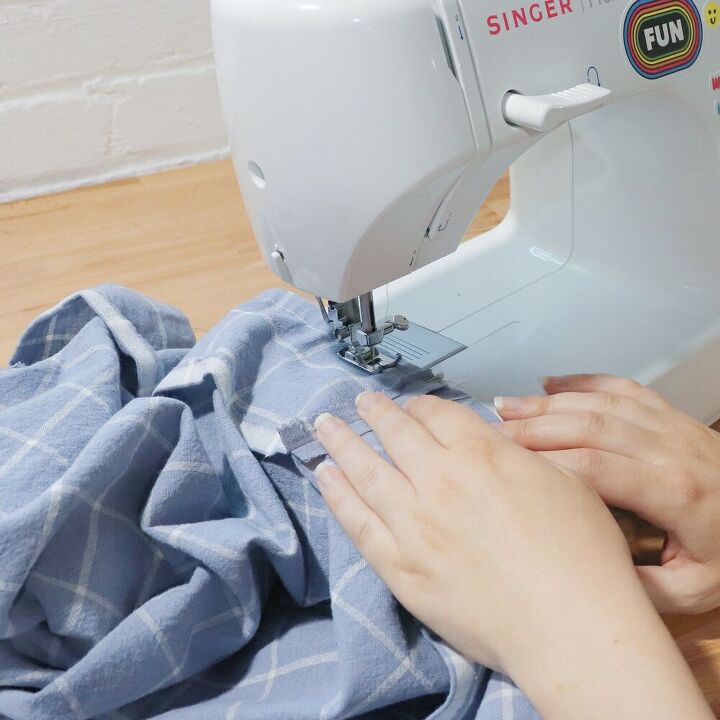
STEP 10: With the seam centered in the back of the skirt, pin the un-folded edge to the top of the skirt, right sides facing. Sew.
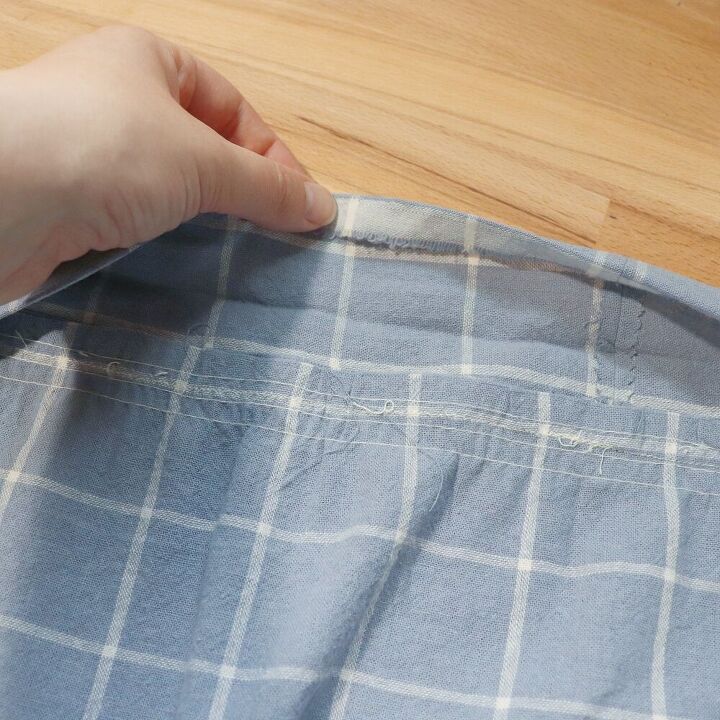
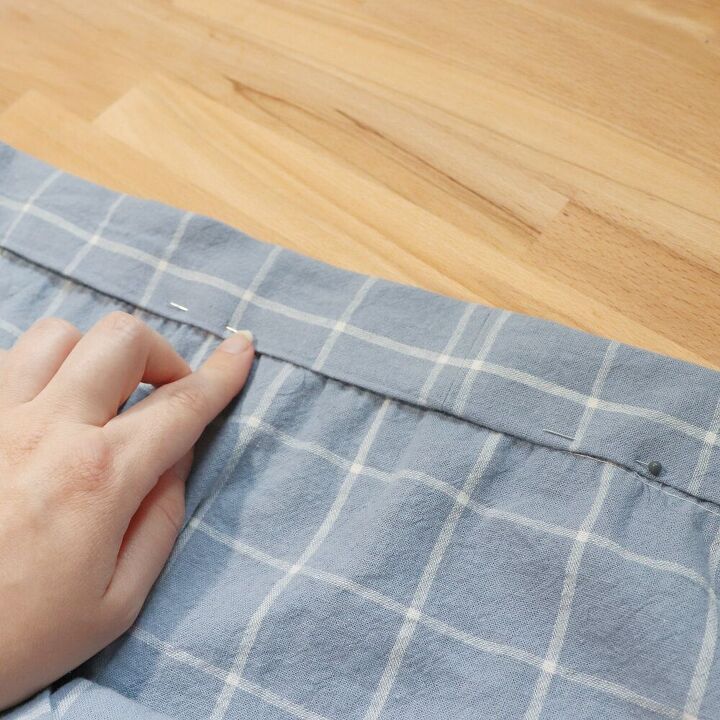
STEP 11: Turn the waistband up and press. Then, fold down the folded edge of the waistband to cover the raw edge of the skirt. Press and pin in place.
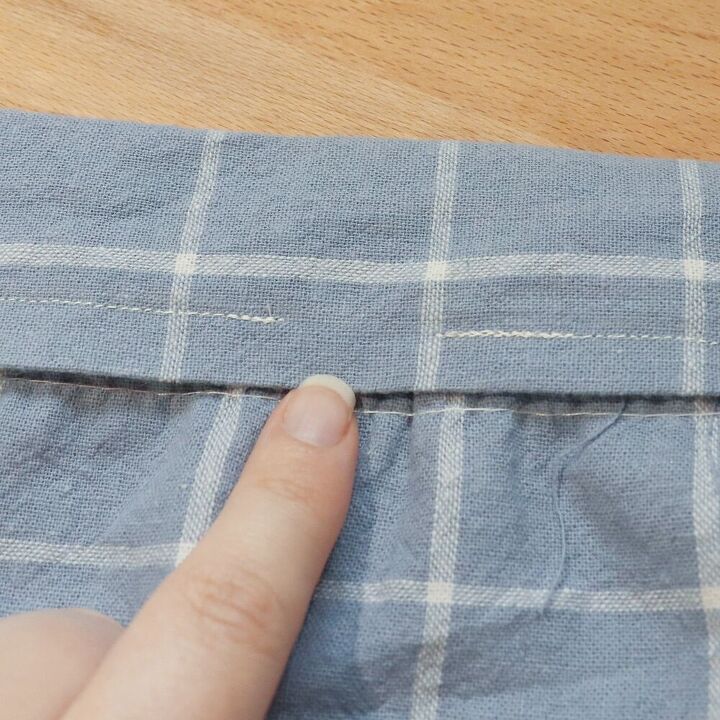
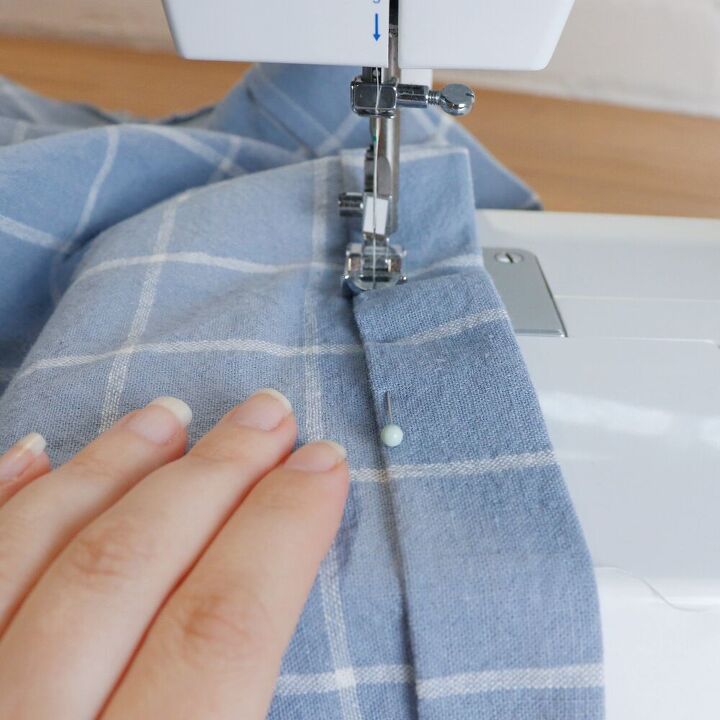
STEP 12: Sew along the waistband of the skirt, making sure to leave a small gap (about 1in) open in order to insert your elastic.
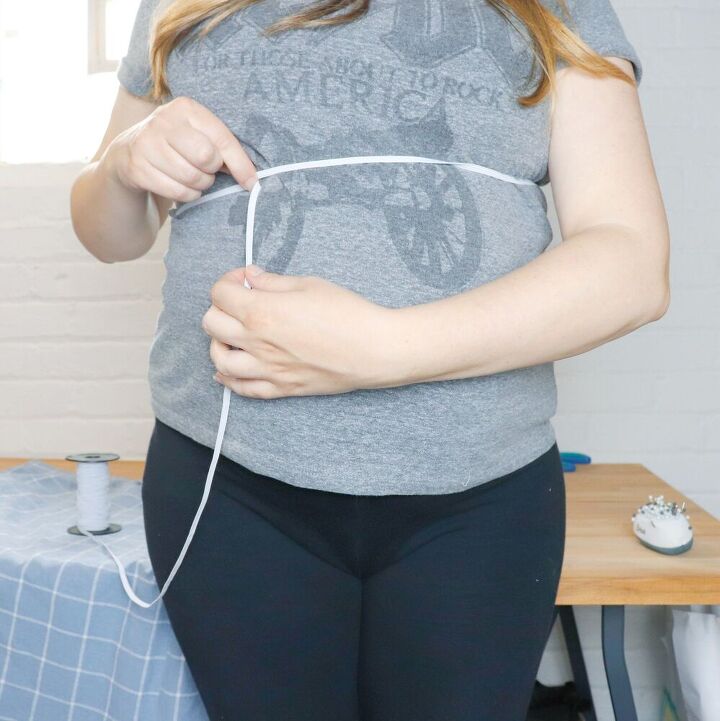
STEP 13: Cut your elastic pieces. Do this by wrapping a piece of elastic around your waist until it fits snuggly. It should be slightly stretched, but not too tight. Cut your other 2 pieces to length.
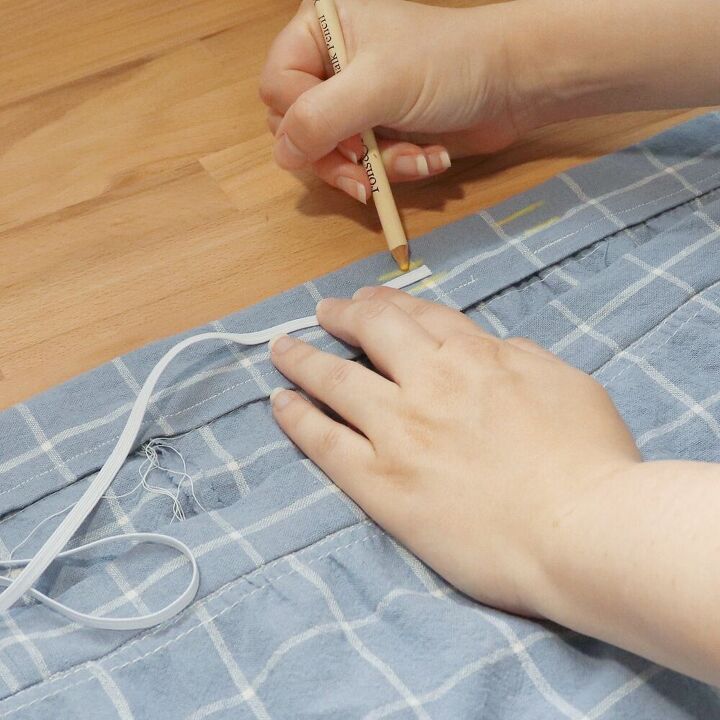
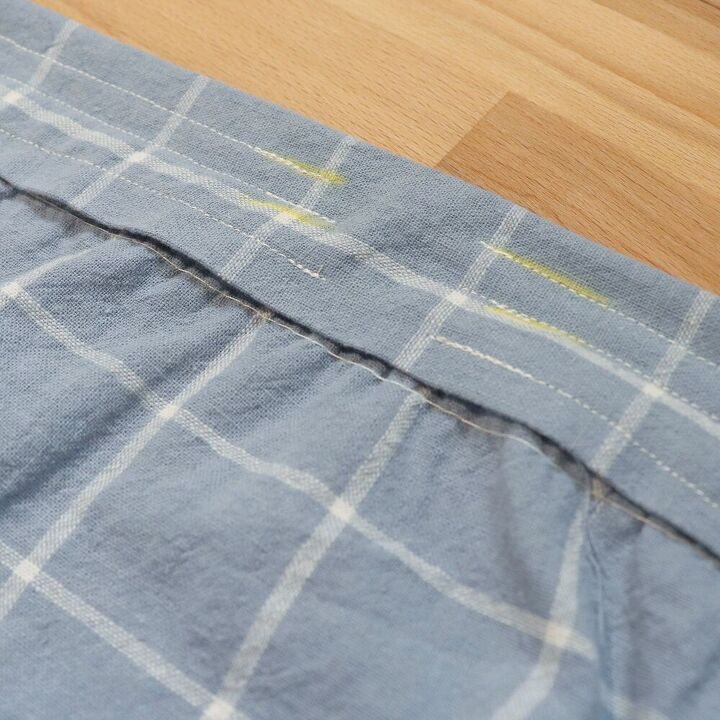
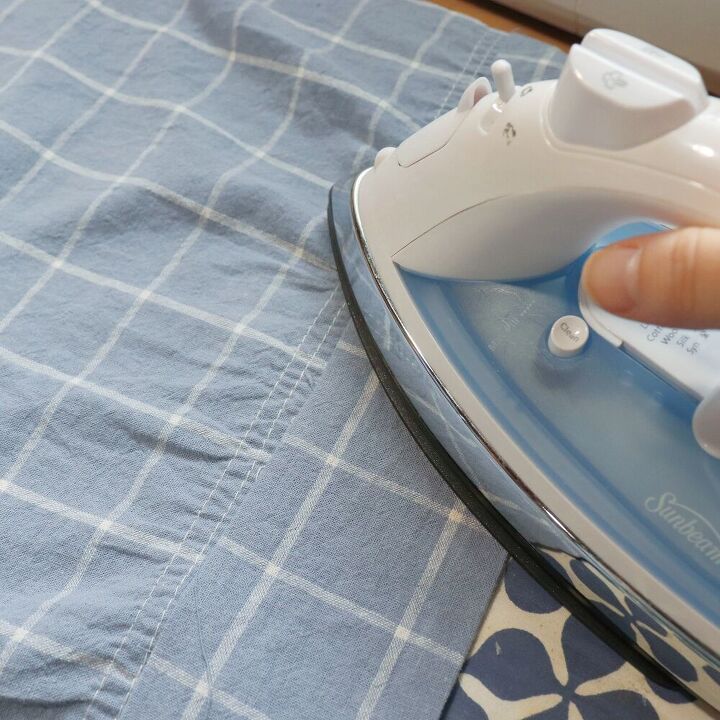
STEP 14: Using your elastic pieces as a guide, take a piece of tailor’s chalk and mark how wide your elastic channels will be on your waistband. Sew two rows (creating 3 channels total), leaving a 1 inch gap to insert your elastic.
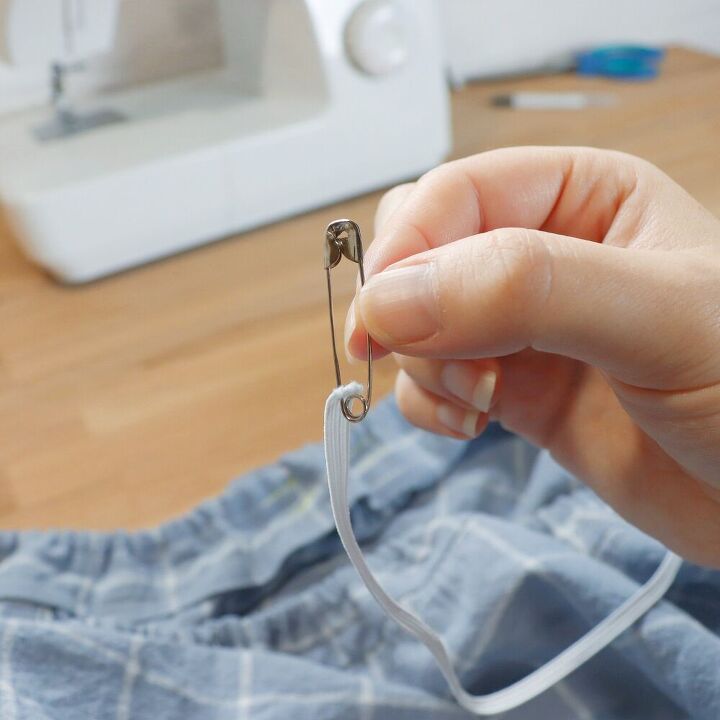

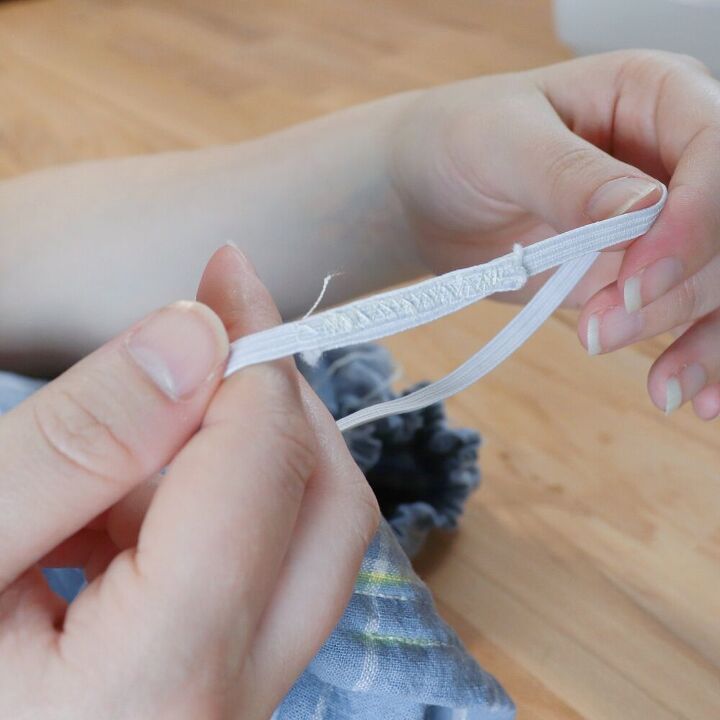
STEP 15: Attach one end of the elastic to your safety pin and feed it through the top channel. Once you get to the end, pull your elastic ends tight and layer them on top of each other. Sew together using a zig-zag stitch. Repeat two more times for the other elastic pieces.
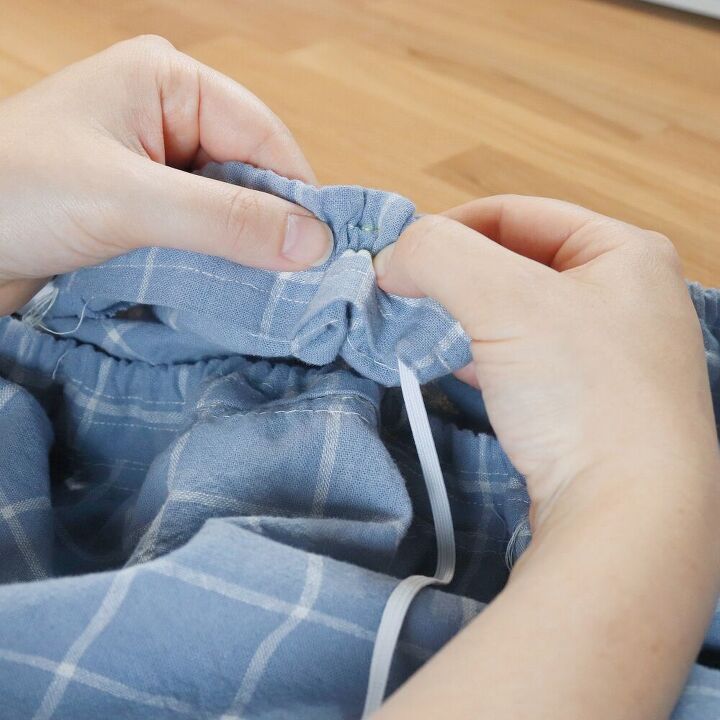
STEP 16: Adjust your waistband to distribute the gathers evenly and making sure none of your elastic pieces are twisted inside of the channels. Sew the openings closed.
STEP 17: Fold the bottom of the skirt up 1/2 in twice. Press and pin in place. Then sew to hem your skirt!
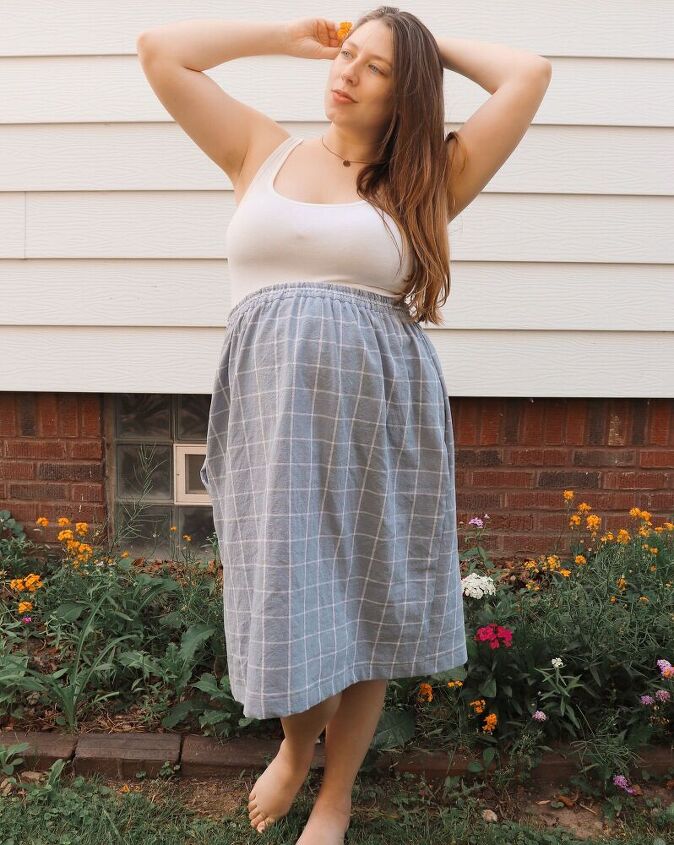
You did it! Now you have a gorgeous and easy to waist elastic waist gathered skirt! I love how customizable this piece is. It’s also a great pallet cleanser between sewing projects as it comes together so quickly and easily! Rock this skirt with sneakers and a graphic tee, or keep it easy with sandals and a basic tank.
Ready for some more beginner-friendly sewing projects? Use your scrap fabric from this project to sew your own set of reusable napkins! If you’d love to see another maternity-friendly make, check out my sewing pattern review for the Billie Sweatshirt Dress. I’ve been living in this baby throughout my pregnancy!
If you use this elastic waist gathered skirt tutorial, be sure to follow and tag me on Instagram so I can see and share your gorgeous makes! Until next time,
Happy Making!
-XO-
C
*post contains affiliate links. learn more here

The author may collect a small share of sales from the links on this page.


Comments
Join the conversation
Love this skirt! Beautiful!