How to DIY a Super Cute Back Twist Sweater

Today, I’m going to show you how to create a back twist sweater. I have been wanting to try creating one of these twisted sweaters for a long time. The style is so unique and sophisticated.
Tools and materials:
- Pins
- Ruler
- Scissors
- Hand needle
- Marking tool
- Measuring tape
- Oversized sweater
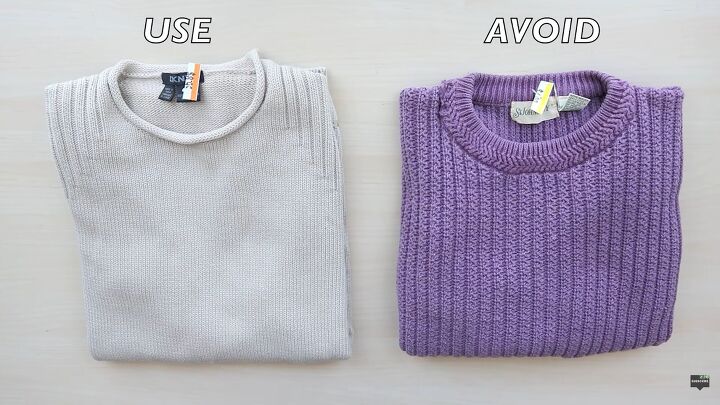
1. Chose your sweater wisely
Before we start, let's talk about which sweaters to use and which sweaters to avoid.
Use a sweater without a collar strip as it won’t be needed and cutting it off could cause the sweater to warp. I also recommend getting a sweater with a flat knit.
More intricate ones tend to be bulkier, and the twist will create added bulk. Make sure the sweater you use is lightweight.
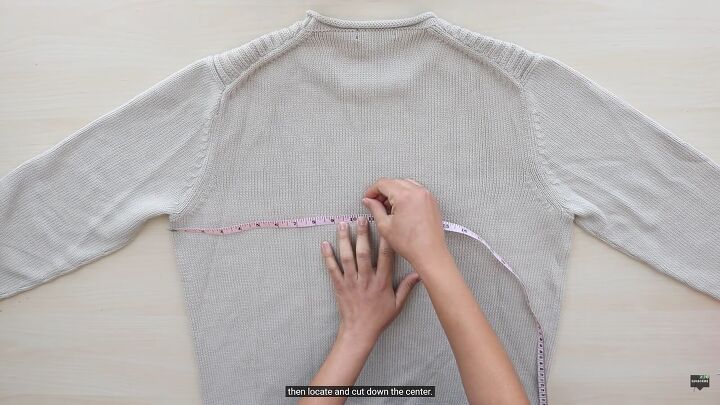
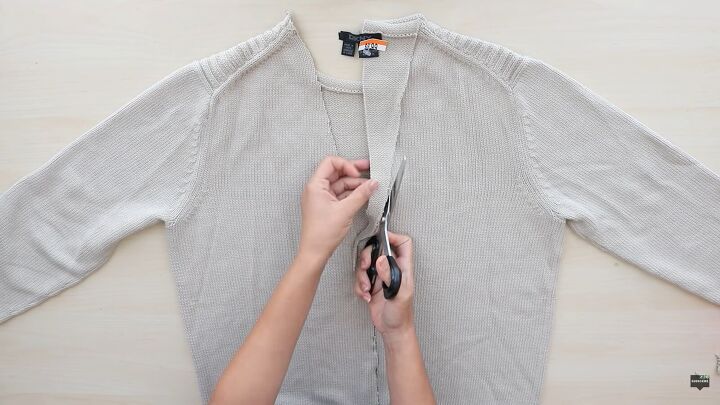
2. Measure and cut down the middle
Lay down the sweater with the back facing up. Locate the center of the sweater and mark it from top to bottom.
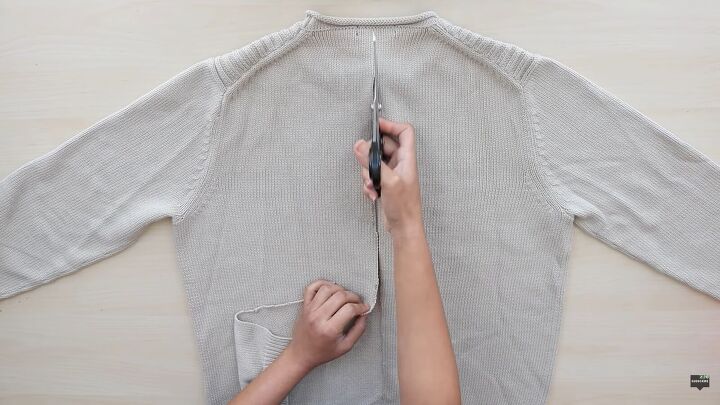
Cut along the center line and be very careful not to nick the front of the sweater.
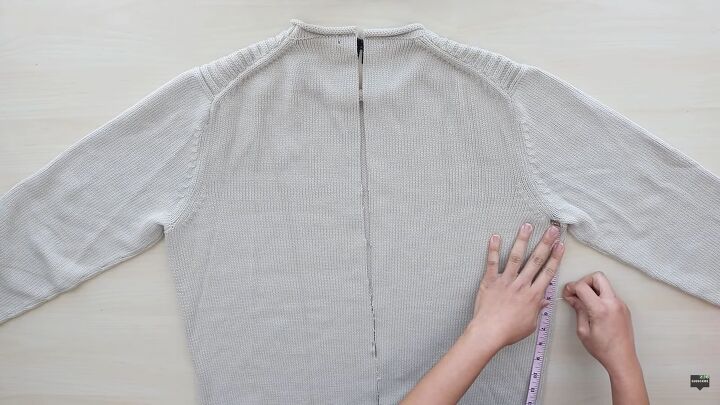
3. Chose the twist point
Decide where you want the twist. I chose the middle which was roughly 5 inches below the underarm.
I measured and marked it with a pin on both sides.
4. Deep V
From the midpoint to the shoulders cut a deep V.
Use the scrap from the first side to help cut the second side to make sure they are symmetrical.
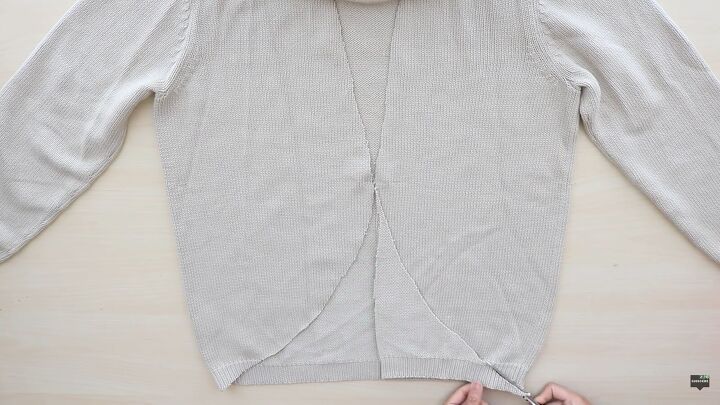
5. Cut a curve at the bottom
For the lower half of the sweater, cut a curve from the hem to the midpoint. Use the scrap from one side to cut the other to keep it symmetrical.
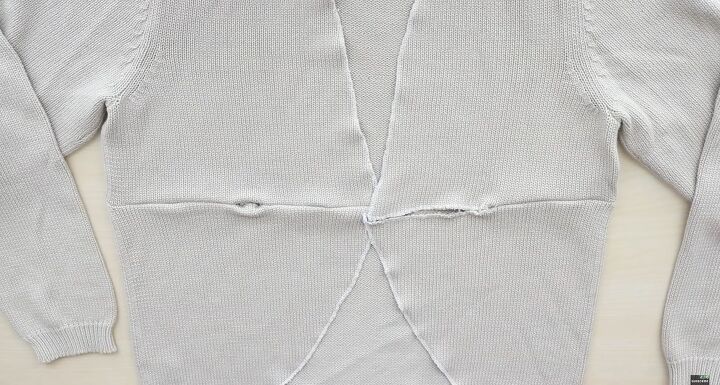
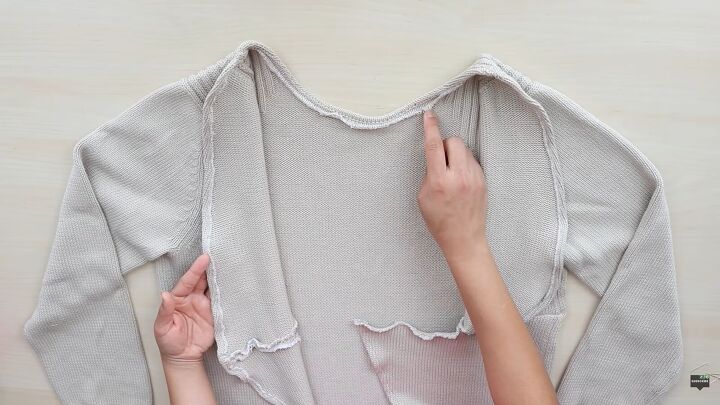
6. Final cuts
Now go ahead and cut across the midpoint stopping a half inch from the side seams.
After all of that cutting it should look something like this.
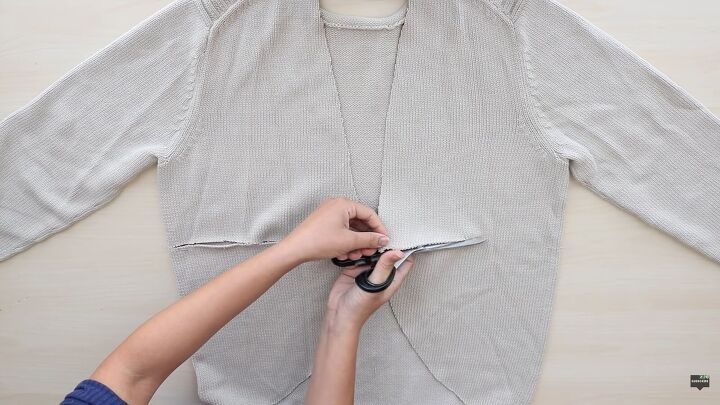
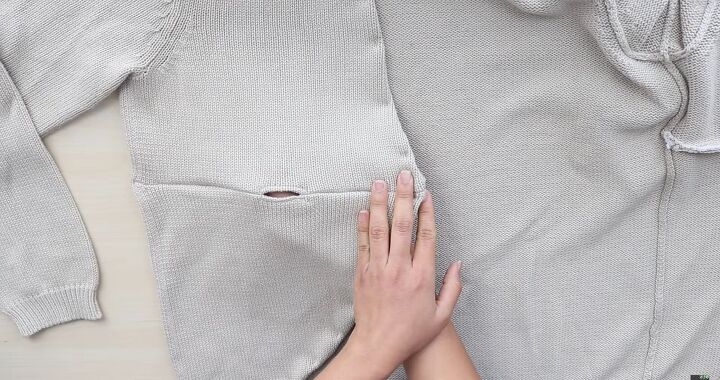
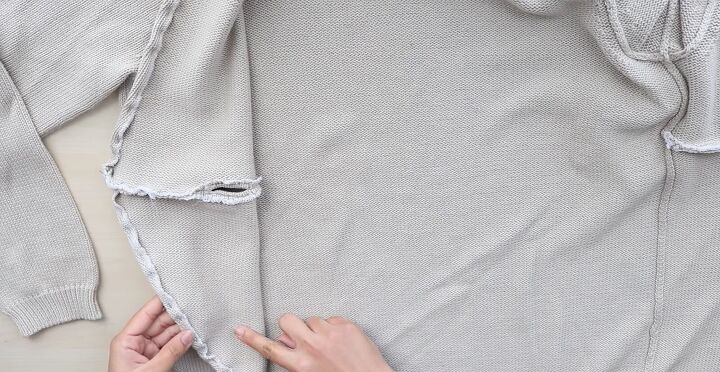
7. Clean the edges of the flaps
Before doing anything else, surge or zigzag all the raw edges to prevent them from fraying.
This also makes finishing the edges much easier later on.
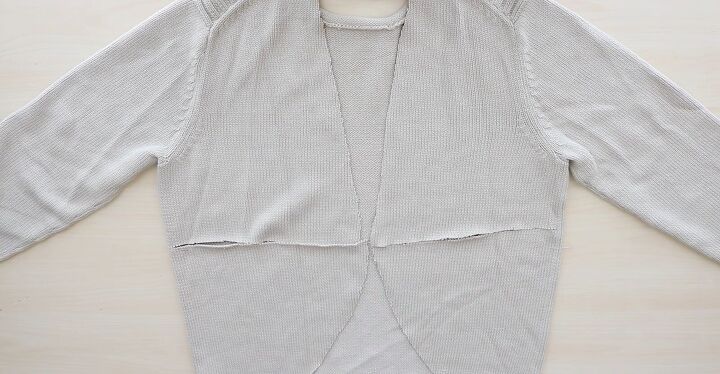
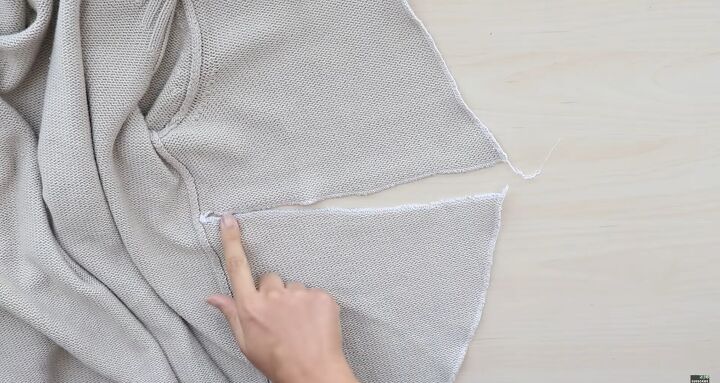
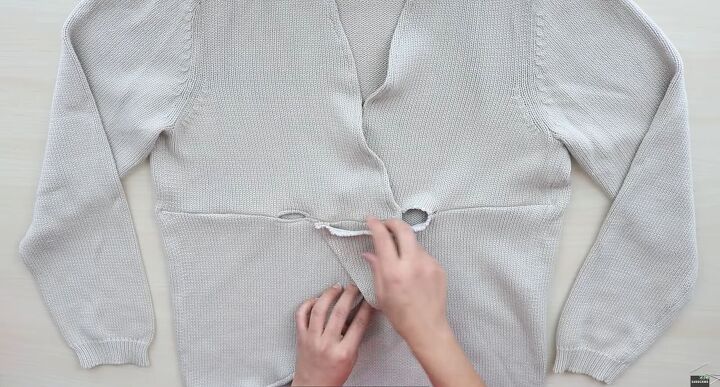
8. Pin and sew
On one side, pin and sew the midpoint halfway. Sew using a small zigzag stitch and a ballpoint needle.
On the other side, close the midpoint leaving a 1 to 1.5 inch gap at the center.
With the seam laying flat around the gap sew ¼ inch around the edge.
When done, it should look like an oversized button hole.
9. Finish the edges of the sweater
Finish the edges of the center back by folding it back once and secure it with a zigzag stitch. Include the neck to make it one continuous seam.
When sewing, do your best not to stretch the seam. Sew by hand the areas you can’t get with your machine.
Clean up the neck once you’re finished with the seam.
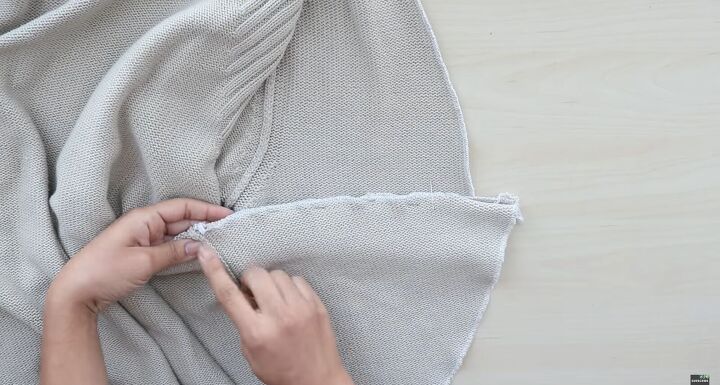
10. Create the twist
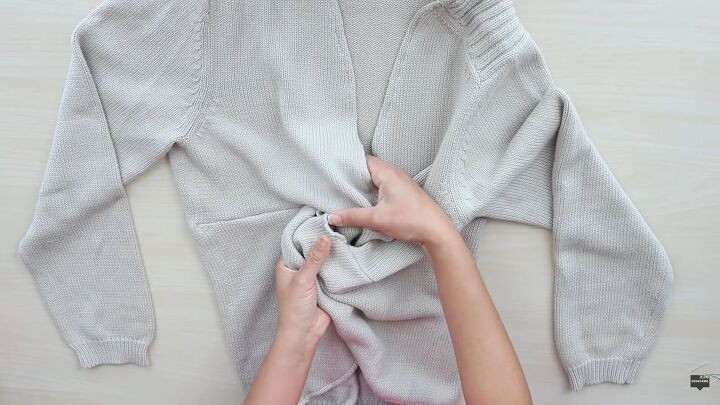
Now it’s time to create the twist.
Take one of the flaps and thread it through the hole from the front to meet the other flap in the back.

Once in the back, with right sides facing each other, pin the flaps together along the unfinished side.
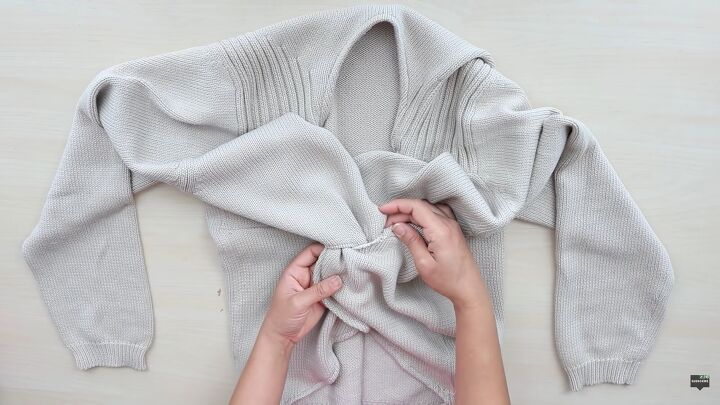
Doing this will form another gap.
Before sewing, check the front to make sure the gap is the same width as the first one.

11. Finishing touches
Now for the finishing touches, which you will need to do by hand.

Fold under the edge of the gap and adjust and pin the twist to your liking.
Once you’re happy with it, grab a needle and thread and whip stitch everything into place.
On the wrong side, whip stitch the flaps to the midpoint seam to clean things up a bit.
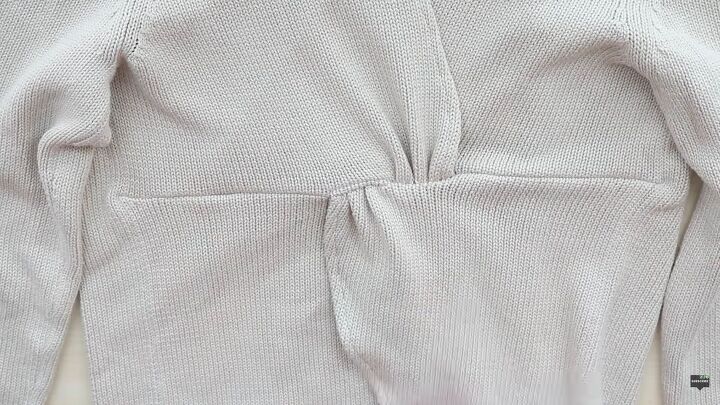


Back twist sweater
We’re done. It’s that simple!
It is so classy looking and adds so much personality to a once ordinary sweater. I am so pleased with the way mine came out.
How does yours look? Tell me in the comments. I love hearing from you!
The author may collect a small share of sales from the links on this page.


Comments
Join the conversation