Easy Swing Curl Clump Method Tutorial

I’ve been doing the clumping method for 3 months now, and while I adore the technique, I’ve tweaked it to make it even better.
A problem I ran into was the back of my hair having stretched-out curls because you typically style everything with your head upside down. I was losing curl bounciness and definition.
I also struggled with product distribution, because the crown area wasn’t getting enough product and it was dry and frizzy as a result.
As a result, I came up with my own swing curl clump method. Let’s get into it.
Before you start applying your product, make sure your hair is washed and conditioned. I also rinsed my hair with rice water and left it on for 20 minutes.
Check out my post on How to Make an Easy Fermented Rice Water for Healthy Hair after this tutorial.
Tools and materials:
- Leave-in conditioner
- Hairbrush
- Hair gel
- Diffuser
- Finishing spray
- Hair net

1. Brush your hair to the side
Instead of keeping your hair upside down after rinsing it, separate your hair into the middle and brush it onto both sides of your head.

2. Apply leave-in conditioner
Apply about 2 tablespoons of leave-in conditioner — one tablespoon on one side, and another tablespoon on the other. Rake the product in with your fingers.
I have short, shoulder-length hair but your hair might be longer. Listen to your hair: if it needs more hydration, then use more product.

3. Brush your hair forwards
Brush your hair from the back to the front to get rid of the separation in the middle.

4. Finger curl and scrunch each section
Divide your hair into three different parts and work on them one at a time. The first part is going to be the front section.
Brush the hair and naturally separate it.

Curl a section around your finger to combine the stringy parts together into a clump to get that nice definition.
Then, do a hair scrunch.

5. Repeat the clumping technique with the remaining sections
The second part should come directly behind the first, splitting the remaining back section horizontally rather than vertically.
Be careful of the orientation of which side your hair is going to be on. If it’s on the side, try to keep the hair falling toward that side.

The reason we divided our hair is to make sure the back section, which tends to get stretched out, gets its own curl definition.

6. Scrunch hair all over
Next, you should scrunch hair all over.
While scrunching hair, rotate your head from one side to another.

7. Scrunch gel into your hair
Once all of the water is drained out of the hair from scrunching and your hair has a nice curl definition all around, it’s time to add the gel.
I’m using 2-4 pumps of my DIY flaxseed gel and scrunching it into my hair. I like to add gel right after I scrunched the water out of my hair, but you can put it in right after you use the leave-in conditioner as well.
The reason I don’t do this is because, if you put it on soaked hair and then scrunch all of the water out, half of the gel is down the drain too.
This way, I’m not wasting product and I’m actually getting the effect of the gel.

8. Plop your hair
I don’t like to plop my hair in a microfiber towel or cotton t-shirt, because I feel like it traps the humidity and product into your hair and scalp. It opens the pores so your scalp absorbs all of the product.
You want that for your hair, but not your scalp, especially if there are any bad chemicals or fragrances. You want the hair to circulate and you want your scalp to be able to breathe.
So, I’d rather use a hair net. You can plop for however much time you have. I did it for about 10 minutes.

9. Diffuse your hair.
It took me about 6-8 minutes to dry my hair using a diffuser.

10. Apply a finishing spray
If you notice any frizz, you can use a finish spray. Spray a little on your hair and then distribute it through your dry hair.
You can also apply it halfway through diffusing.

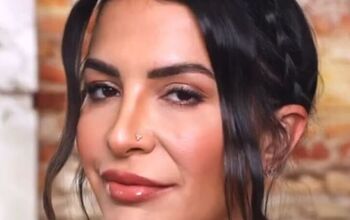
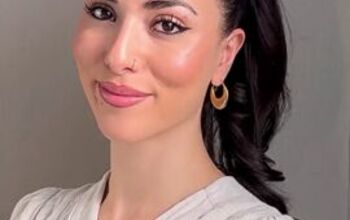
Swing curl clump method
Here’s the finished result of my hair after using this swing curl clump method! It has a very nice definition and great hold.

There are curls all around, especially underneath the top layer of my hair, which usually doesn’t curl a lot.
Let me know if you will try this technique in the comments below, as well as your own tweaks to the clumping method!
The author may collect a small share of sales from the links on this page.


Comments
Join the conversation