Fabric Spray Dye Project Fun | Elise's Sewing Studio

We are a participant in the Amazon Services LLC Associates Program, an affiliate advertising program designed to provied a means for us to earn fees by linking to Amazon.com and affilated sites.
We may earn money or products from the companies mentioned in this post.
It’s summertime, and I spend less time at the sewing machine, but I’m looking for fabric-related projects I can do outside. I was thinking about dye projects I could do outside, such as fabric spray dye.
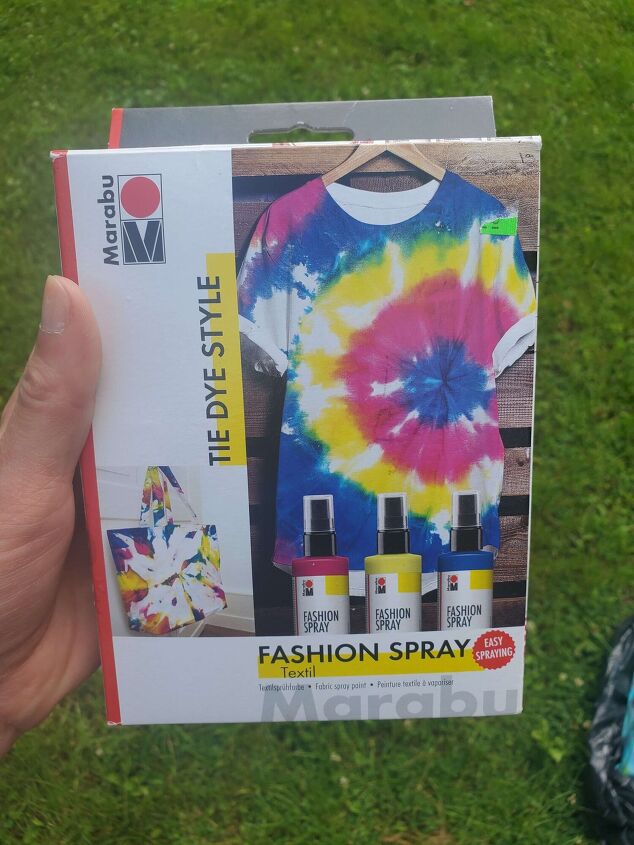
I had a box of Marabu Fashion Spray Tie Dye kit I hadn’t used yet, and it was time to try it out!
I’ve done plenty of fabric dye projects where you make up a dye bath and then submerge the whole project to dye, but I haven’t tried fabric spray dye before.
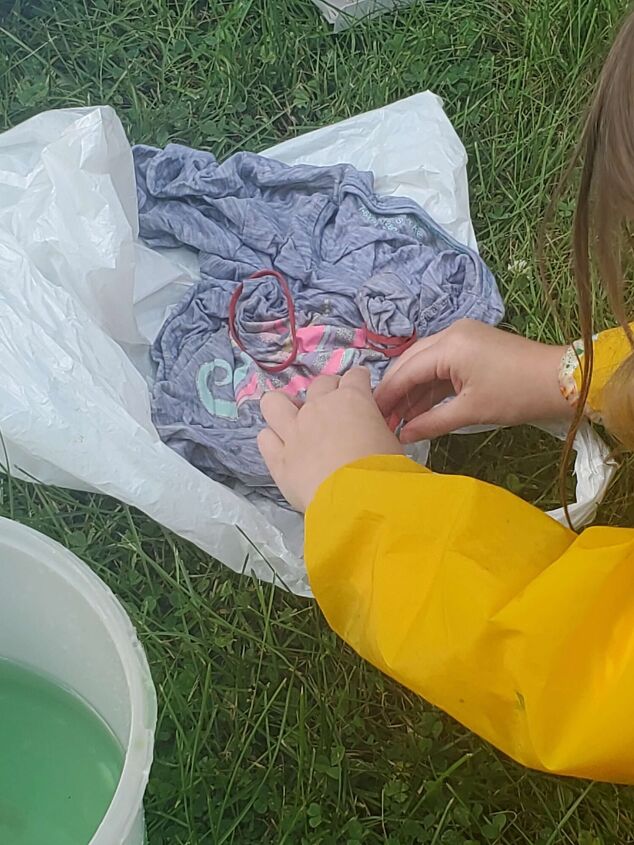
Like most dye projects, wet your fabric first. This helps it absorb the dye better and more evenly.
We set up in the yard and put some plastic under our wet projects for the dye. I filled up a bucket of water to wet the fabrics.
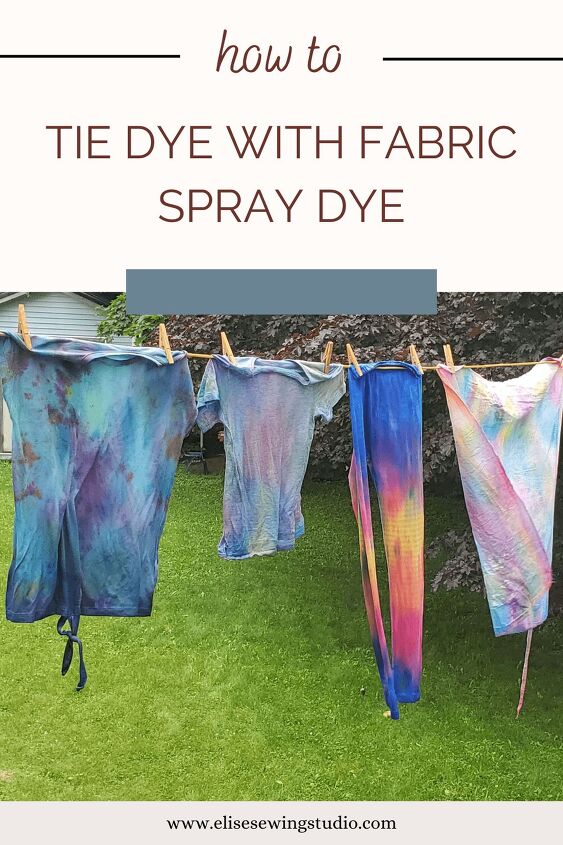
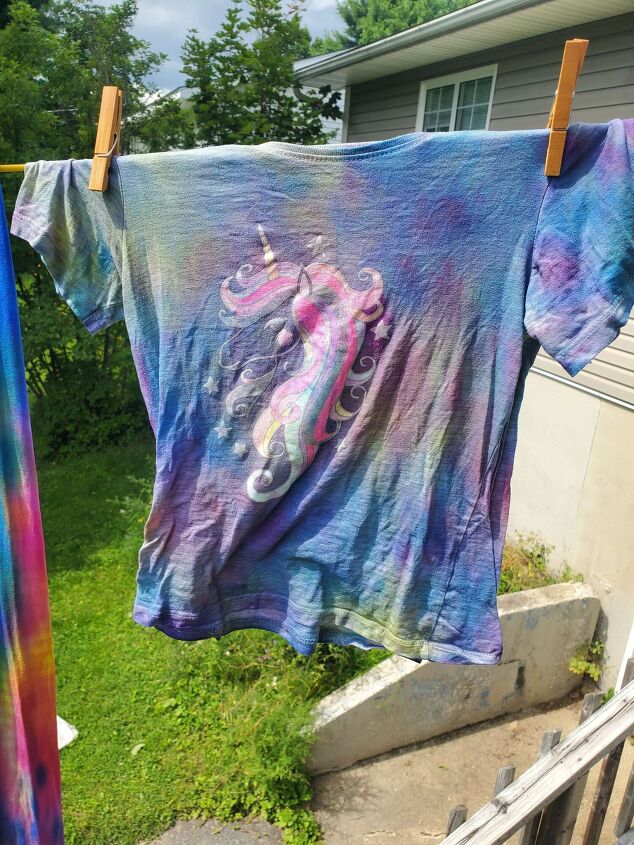
We had a few different projects to dye. I had a leftover piece of cotton I dyed, and my kids picked a couple of t-shirts and a pair of leggings that were a bit stained so that the dye could give these items a new life.
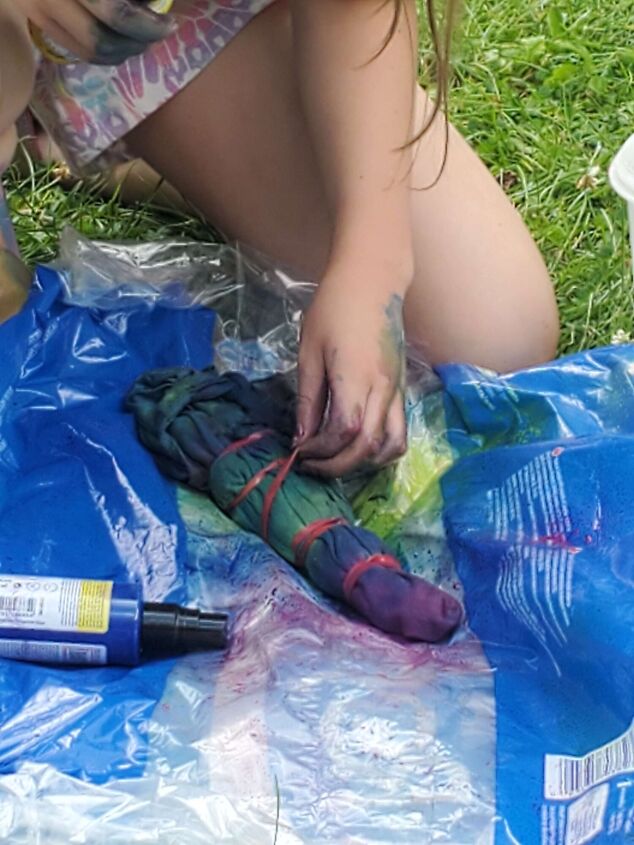
This dye is for natural fibres or up to 20% synthetic fibres (such as polyester). Synthetic fibres typically don’t dye well with most dyes. We wet our projects and did some different tye dye patterns. I rolled my fabric up and tied it in 3 spots (this fabric had 3 ties attached to it from a previous project).
My kids used elastic bands in a few spots and scrunched it up.
Tye dye isn’t an exact science. Tieing the fabric means that the fabric will absorb less dye in the area that was tied, creating a difference in colour. Don’t expect your project to look a certain way, just experiment and have fun.
Our kit came in 3 colours, and they were pretty vivid. My oldest daughter really sprayed her leggings heavily with the spray and created more of a colour-blocking effect.
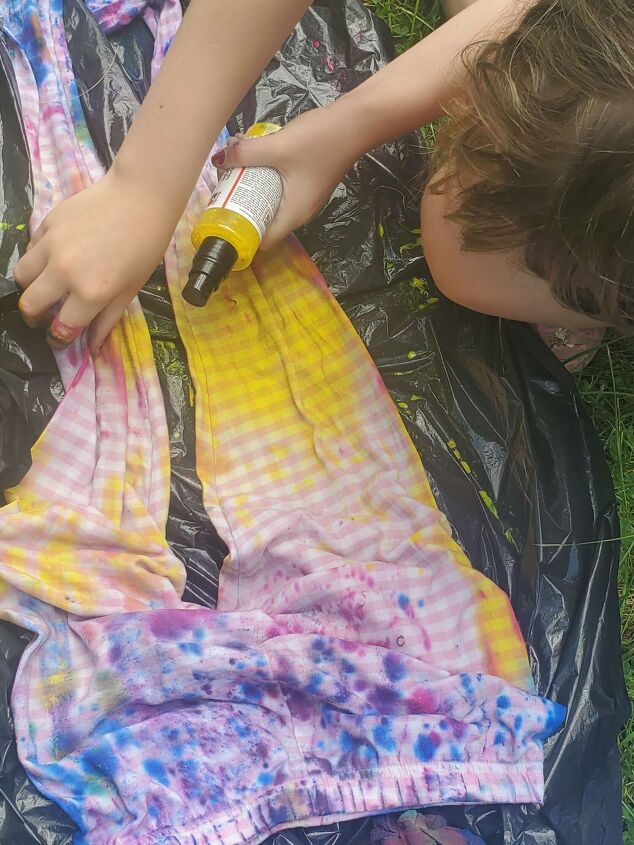
I had sprayed mine around my tied fabric, then unrolled it. I decided it needed more colour, so I sprayed more colours in strategic spots.
Once I was happy with the result, I hung it on the line to dry before fixing the dye.
After the fabric dried, I checked the instructions to “fix” the dye – this means to set it so it doesn’t run. It said that it could be fixed in the oven or with an iron.
I chose the iron as some of these clothes had elements such as elastic and screen printed images I did not want to expose to such high heat. I put an old tea towel on my ironing board, then the project, and then another old tea towel on top before ironing.
I chose to rinse it afterwards to get rid of any excess dye, although it did not call for it in the instructions.
Some colour ran – but this was more because it was excess dye (this is normal when dying anything).
The project looked pretty much the same after rinsing. I just did this to test that the dye was fixed and it would be less likely to put dye on other items when washed in regular laundry later. I will still avoid washing with whites just to be safe.
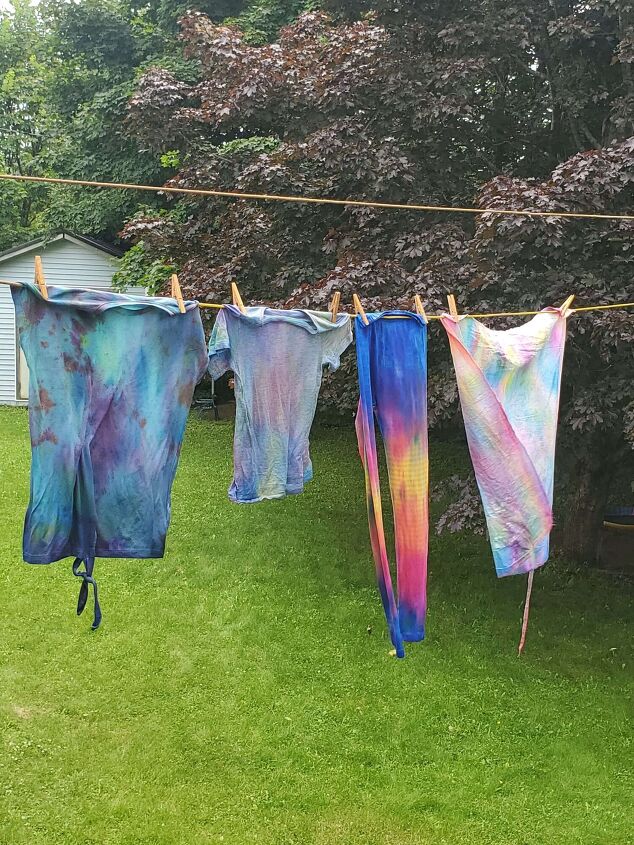
I’m happy with how our projects turned out, and we still have dye left for more projects!
Since it is spray dye, I might try using a stencil and spraying within the image on fabric. I might also create a resist technique by laying leaves and flowers on the fabric. Spray around them, then remove them once dry to create an outline.
This product was easy enough to use as a closely supervised project that’s easy enough for kids but still fun for adults – a win during summer when the kids are off school!
I want to try creating images on tote bags next using stencils or resist techniques.
We like how vibrant the colours are, and that the dye is ready to go in spray bottles (no mixing or large dye baths required). I’m looking forward to using this product again, and might get the same product in other colours.
Let me know if you have tried similar projects in the comments below.
For more dye projects, check out Dye a Tshirt with Onion Skins
The author may collect a small share of sales from the links on this page.


Comments
Join the conversation