Drab to Fab: DIY Ruched Top

I found this plain button-down blouse and immediately knew what I wanted to do with it! I wanted to sew a DIY ruched top. This shirt is made of great fabric and is so enjoyable to work with.
Tools and materials:
- Cotton button-down shirt
- Seam ripper
- Pins
- Rotary cutter
- Sewing machine
Cut your fabric
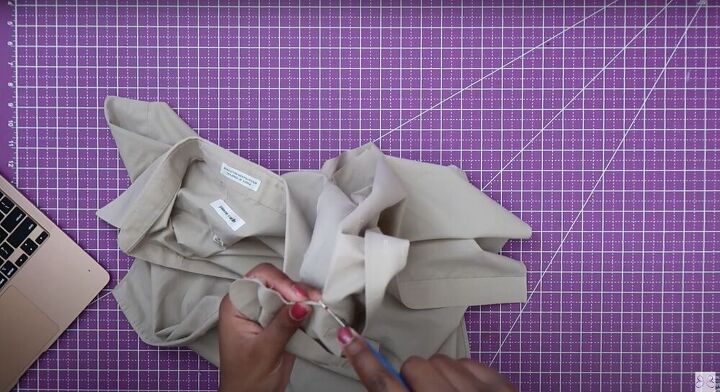
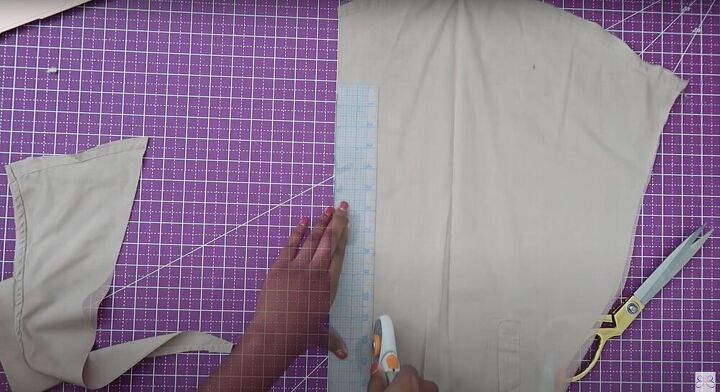
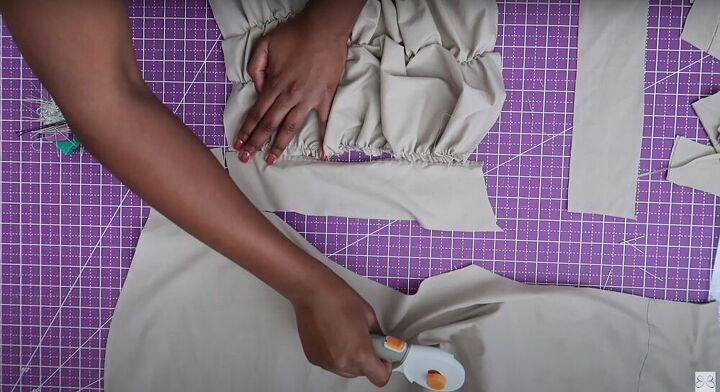
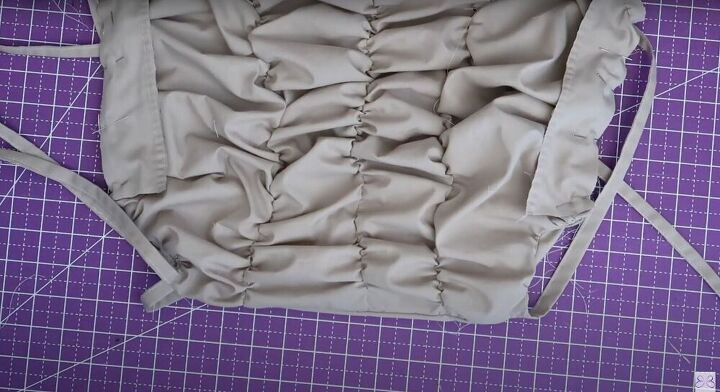
For the first step, we are pretty much dissecting this blouse. Rip the side seams, cut off the arms, cut off the buttons, get rid of the pocket on the front. Simply, break the shirt down to its raw materials. Next, take your two (buttonless) front pieces and lay them on top of each other. Pin them right sides together all the way down the center front. Once that’s done, measure four inches down from the neckline, and draw and cut straight across. Sew the center seam using a gathering foot to create that ruched look. (I then continued sewing with the gathering stitch over the arms and side seams and finished with two more gather stitches between the center seam and the side edge on either side.)
Make your straps
Cut the arms open and then cut two-inch wide strips from the fabric. Next, connect the strips by the short side in order to make a strap that is right for your body and desired length. (To sew the sides together, place the strip’s right sides together and sew.) Press open your seams and then fold both sides in towards the center to find the raw edges. Next, fold over again, (in half) and then do a straight stitch down the edge to hide the raw seams.
Create your backside
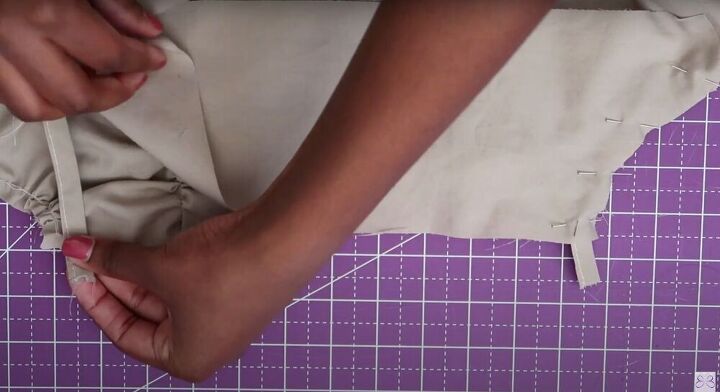
For the backside of the shirt, we are going to be creating side facing. Place the edge of the shirt beside your fabric and measure out the perfect size (so that it fits perfectly when you sandwich in your loops.) Cut out two pieces of side facing. Next, cut eight 2.5 inch pieces from your straps (to be used as loops).
Create your facing
To create the neckline facing, place the shirt on the rest of the fabric (leftover from the back of the shirt) and then outline the side seams (partially), the entire arm area, and the entire neckline. Your end result should be very similar to the shape of the shirt. This ensures the facing will fit perfectly and allow you to sandwich in your straps.
Finish the shirt
Add your 2.5-inch loops inside the blouse, with the side facing and the loops pinned to the right side of the shirt. Place the loops about an inch and a half apart, with four on each side. Use a straight stitch to secure the loops and finish it with an overlock stitch. (Before adding the overlock stitch remember to press your seams, cut off threads and clean up your work!)
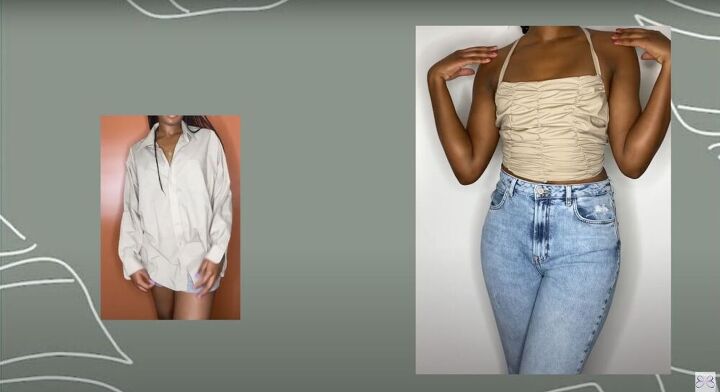
This easy DIY ruched top is the perfect transformation for your old cotton blouses. It is a fun and more modern twist on a piece that would otherwise go to waste. Don’t underestimate the power of great fabric!
The author may collect a small share of sales from the links on this page.


Comments
Join the conversation
Really cute! Flattering on you, and the color looks so versatile, you could pair that with so many things and create different looks!
Thank you!!