How to DIY a Cute Woven Crop Top

In this post, I'm thrift flipping a double layer woven crop top from two pairs of leggings. This is a no-sew project that's quick and easy to make.
It's given an extra special look with fabric weaving to add a unique feature to your tops. I'm using leggings in complementary colors so the weaving stands out.
Tools and materials:
- 2 pairs of stretch leggings
- Scissors
- Tailor's chalk or marker
- Piece of cardboard
1. Cut out base layer
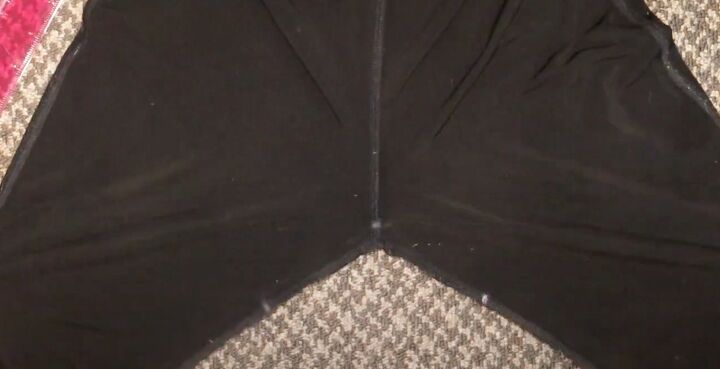
Turn your base layer leggings inside out and lay them out flat, matching the seams.
Measure and mark 3 inches down each leg from the crotch seam.
Measure and mark a half inch inch up the crotch seam.
Connect the three points and cut along the line. Trim the edges straight.

2. Try on
Try the top on by putting your head through the hole you've just cut and your arms through the legs. Make any adjustments necessary.
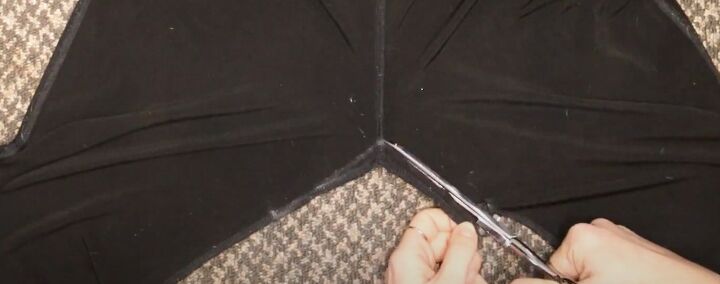
3. Cut the area to weave
Turn the top inside out and lay it down flat with the neck edge towards you. Slide a piece of cardboard between the front and back.
Draw the outline for the section you want to cut on to the fabric. I decided to weave along the edge of the V neck.
Draw a second line very close to the edges of the section you're cutting, so you don't cut too far. Mark the initial cut lines as a guide.
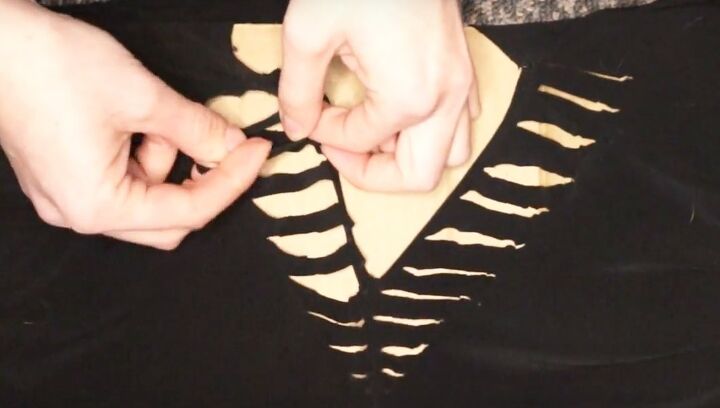
I'm doing a simple ladder weave up each side of the neck so I drew horizontal lines from the center point of the V, without crossing the front seam.
Cut horizontally across the section you drafted. Be careful not to cut outside the marked area.
Continue to cut up both sides of the V neck.
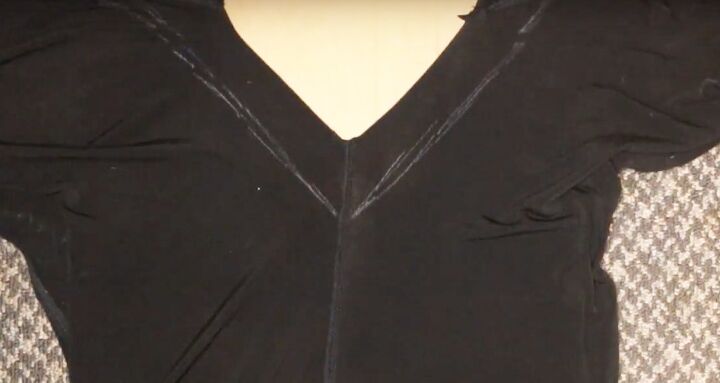
4. Weave the cut area
Stretch the fabric and turn the shirt right side out. Put the cardboard back inside.
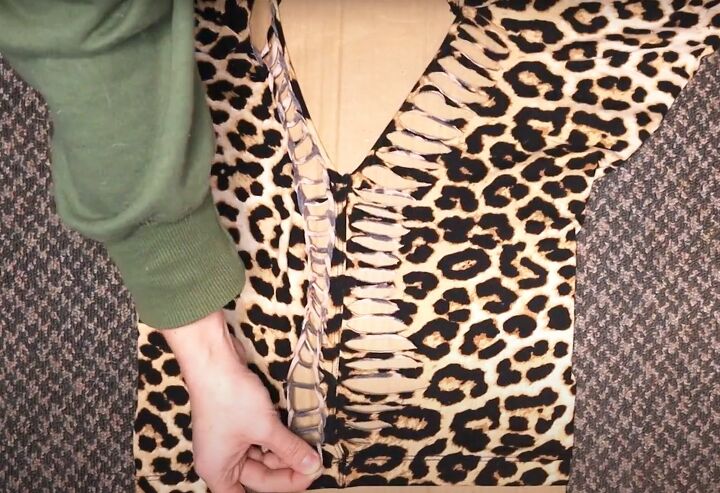
Starting at the top of the neck on one side, pick up the top strip of fabric. Pull it down over the second strip, then pick up the second strip and pull it up over the first.
Pick up the third strip and pull it up over the second. Continue ladder weaving until you read the lowest strip on that side.
Pick up the last strip, cut it in half and knot the ends together through the bottom hole.
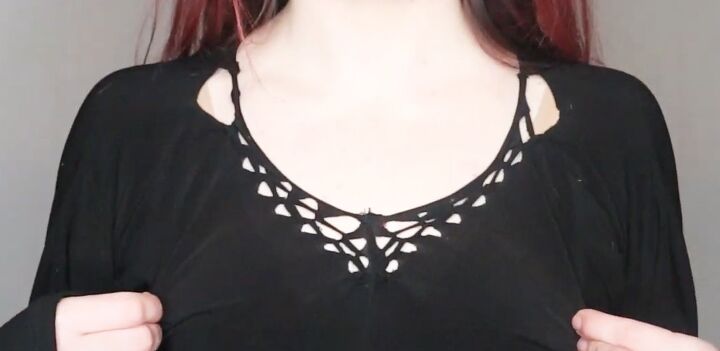
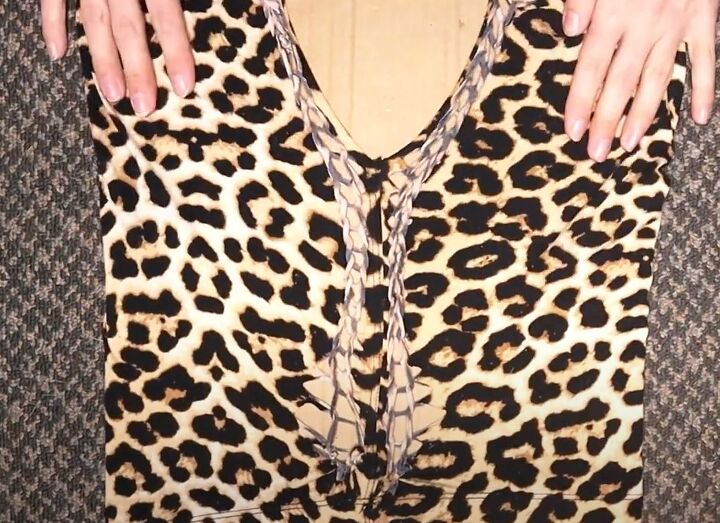
Repeat on the other side of the neck. Pull the woven section so it lays evenly on each side.
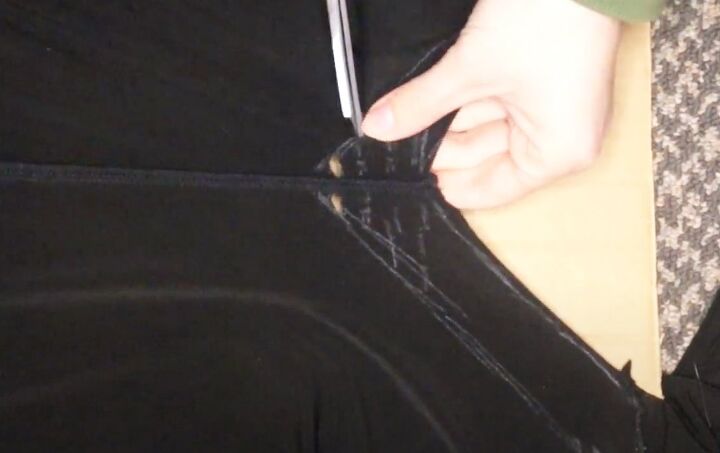
5. Prepare the top layer
Cut the neckline in the same way as for the base layer. Make any adjustments needed, for example to the sleeve length.
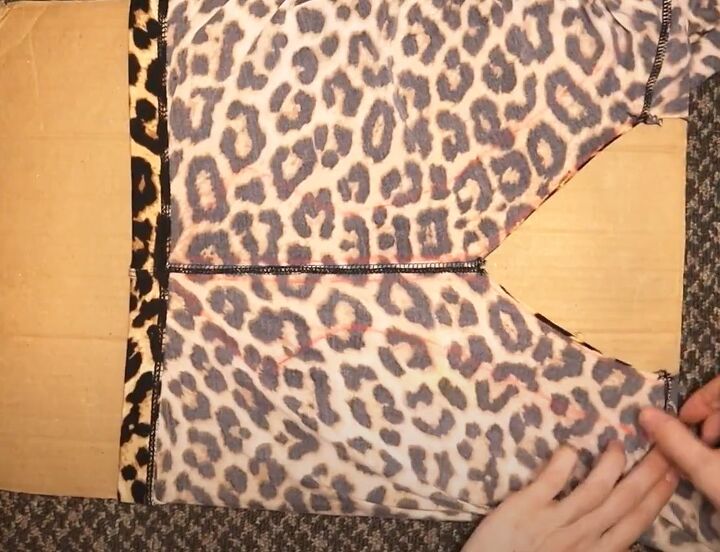
Put the top on inside out and draw the shape that you want to weave on to it. For this layer, I'm weaving a larger section around the neck and down the body of the shirt.
Lay the top down flat, insert the cardboard and draw a matching section on the other side of the front.
Draw guidelines close to the edges and seams that you don't want to cut.
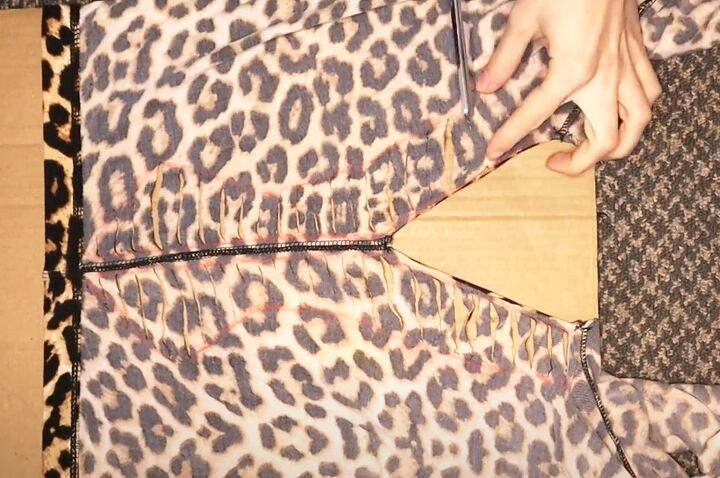
6. Make cuts
Cut horizontal lines across the marked sections on both sides, as before.

Carefully stretch the fabric and turn the shirt right side out. Insert the cardboard inside it again.
7. Weave the fabric
Starting at one shoulder, ladder weave the fabric as before and tie it off at the bottom.
Make the ladder weave on the other side, tie it off and then adjust the weave with your fingers.

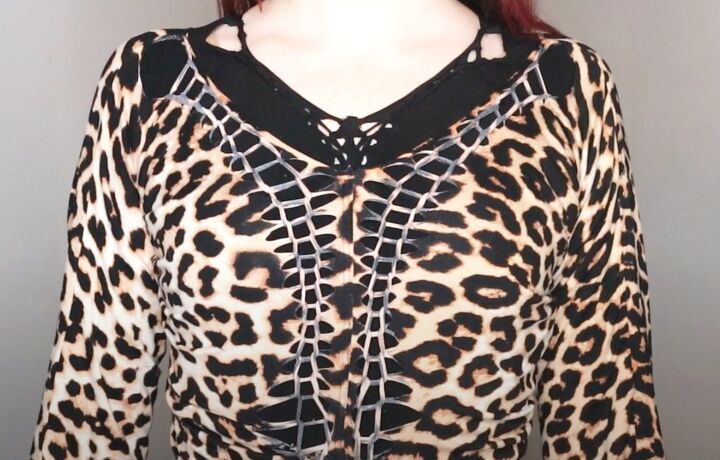

DIY woven crop top
The finished tops can be worn separately or together. Using leggings in contrasting or complementary colors gives a completely different look to this outfit.
I do hope you enjoyed seeing how to thrift flip leggings in this way. If you did or if you have any questions, please leave me a comment below.
For more DIY content, check out my post on 3 Super Easy DIY T-shirt Cutting Ideas.
The author may collect a small share of sales from the links on this page.


Comments
Join the conversation