3 Easy Upcycling Clothes Tutorials to Give Your Old Garments New Life

Today, I'm sharing three upcycling clothes tutorials. In my previous tutorial, you may remember I was going through my closet looking for things that I can upcycle, then I did three no-sew DIY projects with what I found.
Here, I’m going to take three different pieces and rework them into something new.
Tools and materials:
- Dress
- Jumpsuit
- Sewing machine
- Fabric marker
- Pins
- Fabric scissors
- Elastic
- Safety pin
- T-shirt
- Bleach
- Rubber bands
When I choose something to upcycle, I like breaking up dresses and jumpsuits into two pieces so that I can get more wear out of them.
I can wear them as a top with different bottoms or as bottoms with a different top or even as a set as a really fun new way to wear something that you really like. Breaking them up means that you now have two new pieces of clothing.
Upcycling a dress into a two-piece set
1. Adjust the straps
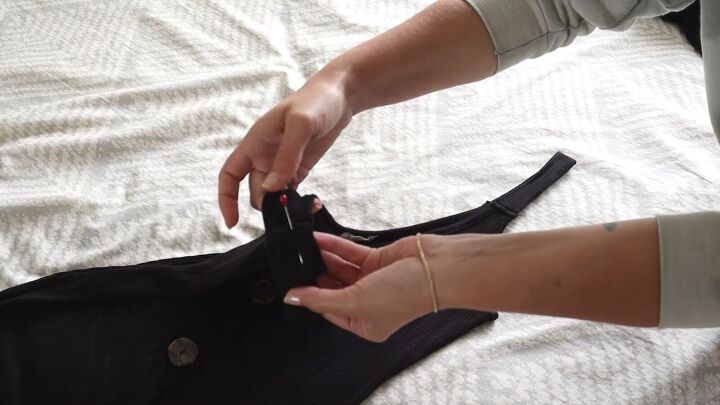
I needed to lower the straps a little, so I just marked off where I wanted to remove some excess fabric and pinned it while it was on me.
2. Cut the dress
Then, I decided that about three buttons down were where I wanted to crop it, so I cut it in half.
3. Sew the hem
Next, I flipped the top and the bottom inside-out so I could fold up where I wanted the hem to sit and then sew it on the inside.
I pinned these spots and then just sewed it for the top, and then when I sewed the bottom, I made sure to leave an opening so I could insert some elastic to be able to put on the skirt.
4. Insert the elastic
I’m going to insert my elastic by adding a safety pin to the end, and then you’re just going to inch it around and pull gently. Just make sure you don’t lose the other end of the elastic.
That way, you can sew them together and then sew your opening closed. Now we have a skirt!
5. Alter the straps
So I’m going to finish the hem of the top and then just trim that excess part of the strap off and save it so I can measure and make the other side the same.
Now I have a cute new mini-skirt
And a sleeveless top. These are both very versatile pieces that you can mix and match with lots of different things.
Upcycling a jumpsuit into a top
Here’s where DIYs can go wrong. I knew that the zipper was going to be a little bit of an issue, but this isn’t the issue that I thought it would be.
Basically, when I cut this item in half and cut through the zipper, I sewed a new waistline. It’s just sewn up, which is fine, but I didn’t take into consideration that the whole zipper on the back is how I was able to get this on, and now with no zipper, I can’t get these over my butt!
I thought putting in elastic would help, but this isn’t stretchy material, so I cannot put these pants on. Keep this in mind if you want to upcycle your own jumpsuit!
Fortunately, it wasn’t a complete fail. I was able to get a cute crop top out of it.
The back has the zipper still, so I was able just to sew up the bottom of the zipper. That way when you pull the zipper down, it just stops, it doesn’t completely come off.
Also, I decided to keep the bottom hem raw because I just like that it's denim, and it kind of gets a bit of a fray.
I sewed down the seams from the darts on the inside so that those weren’t awkwardly hanging.
Here we have the finished look. It’s super cute, and I’m happy that I now have a new top.
Upcycling a t-shirt with reverse tie dye
For this DIY, I basically just did the crumple method in a random pattern. Then I threw some bleach on it. It’s a really light-colored t-shirt, so I was excited to see the wash of white over it.
For a full tutorial on this, read my previous post on how to bleach tie-dye.
Upcycling clothes tutorial
Those are my three upcycling DIYs. I love taking old items and giving them new life by transforming them into something different.
Although sometimes you might make mistakes, just as I did, don’t let that stop you from having a go!
Enjoyed the project?
Suggested materials:
- Dress
- Jumpsuit
- Sewing machine
- Fabric marker
- Pins
- Fabric scissors
- Elastic
- Safety pin
- T-shirt
- Bleach
- Rubber bands
The author may collect a small share of sales from the links on this page.


Comments
Join the conversation
I've been doing this for over 20 years. I've made some really cool clothes for myself and my kids.
How do you keep your whites white? I look at white and it gets dirty! Lol