The Peppermint Peplum Top Sewing Pattern Review
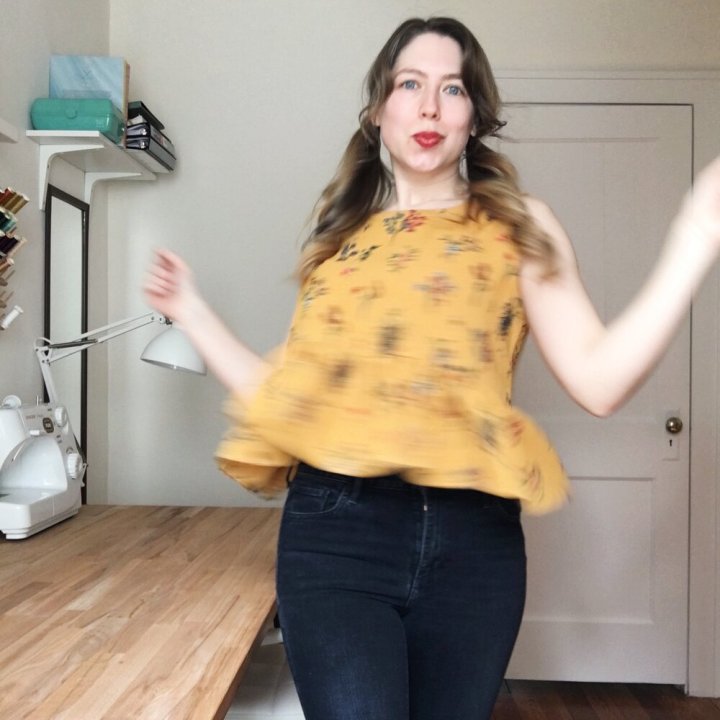
Today I’m sharing my full sewing pattern review for the Peplum Top from Peppermint Magazine. This free, beginner-friendly sewing pattern is perfect for your warm-weather wardrobe or worn layered in the cooler months. It also features a flouncy peplum detail at the bottom that, I can’t lie, is super fun to twirl around like a 6-year-old in! Keep reading for the complete Peplum Top from Peppermint Magazine sewing pattern review.

Not only is this adorable summer staple available as a free download, but Peppermint Magazine also has a whole slew of incredible sewing patterns free to try as well, like the jumpsuit, the button-up dress, and the ruffle sleeve top.
*Please note that while all of these patterns are technically free, right now the publication is accepting donations in any amount to help support them financially during the COVID-19 crisis. I wholeheartedly encourage you to give whatever amount of money you can, because I promise you, the patterns are more than worth it!
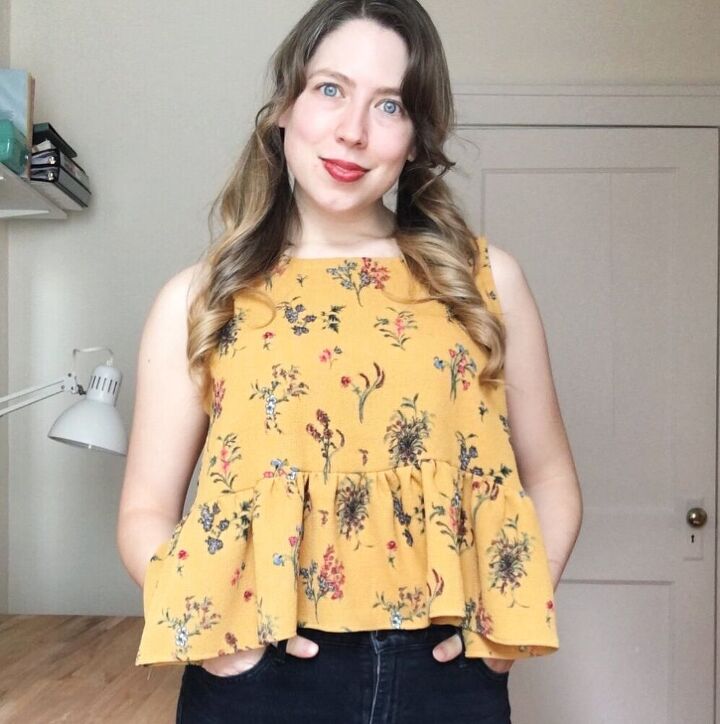
I was able to sew up this swoon-worthy top using some leftover fabric from a skirt I self-drafted a while back. As I learn more about the slow fashion movement, I’ve been loving scrap-busting projects like this one. Not only is using up your fabric remnants cost-effective, but it helps to clear space for more fabric storage while being more sustainable for the planet. What’s not to love about it? I was just barely able to eek this pattern out of the pieces of fabric I had left, though. However, the peplum part would be easy to piece together with a few different fabric remnants, so there’s always that option if you need it.


I am going to say upfront that I fucking hated every minute of making this top. Please know the pattern and instructions had absolutely nothing to do with my loathing. No, it was all fabric-based anger sewing from the first stitch to the last.
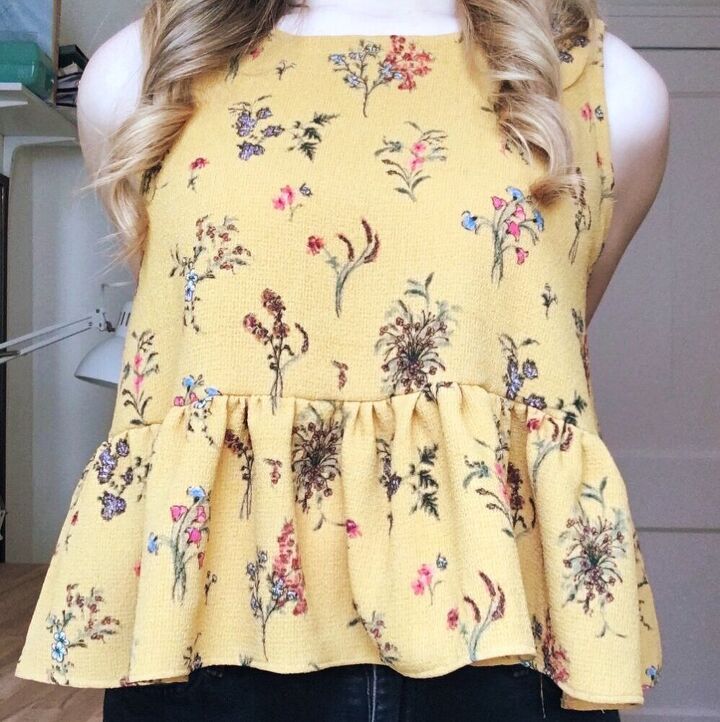
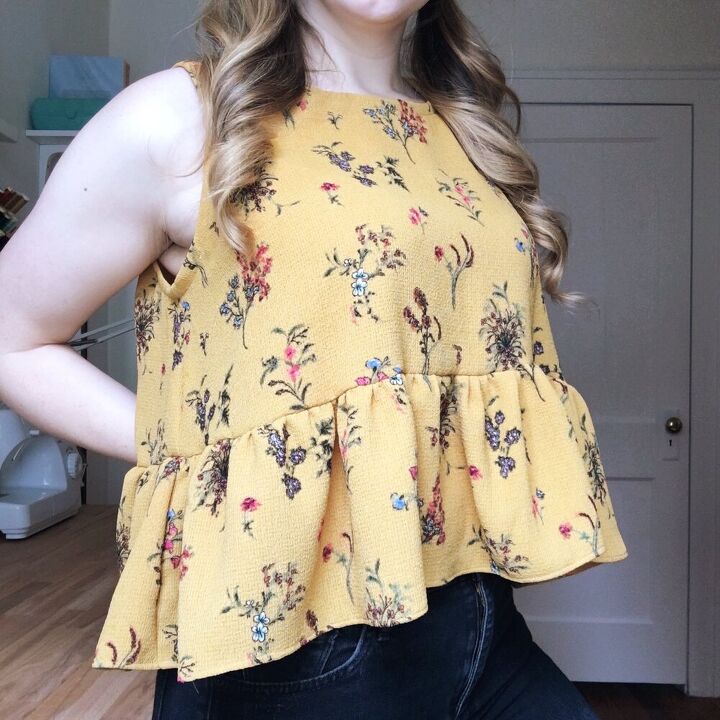
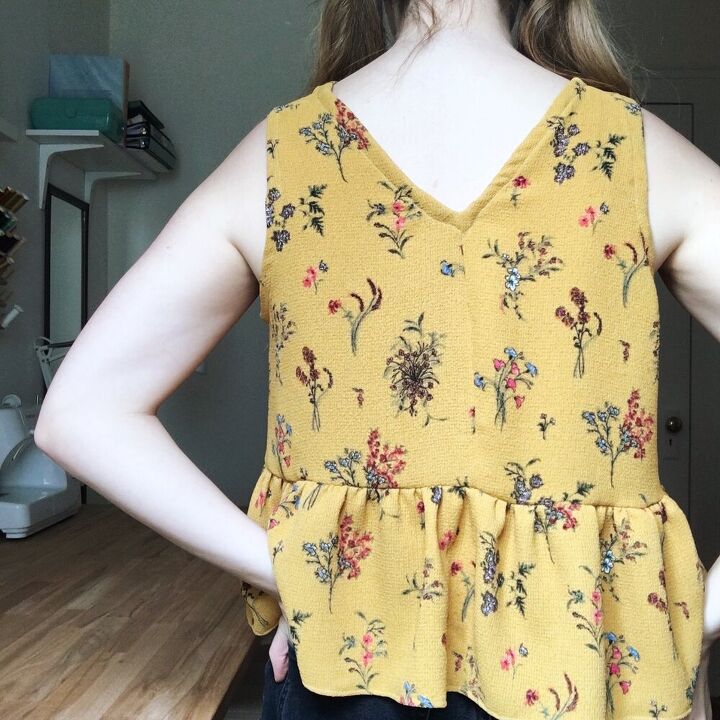
This hell fabric is a bubble crepe I bought from JoAnn’s when I first started sewing and didn’t know any better. While I still love the warm mustard coloring and dreamy floral print, I can’t stand bubble crepe. It frays if you look at it. It shows every single lump, bump, wrinkle, and imperfection. Not to mention it reacts to pressing in only one of two ways: melting or nothing at all. There is no in-between.
Maybe this bubble crepe sucks simply because it’s a cheaper fabric? I don’t know, but basically, I will never be washing this garment out of legitimate fear that it’ll completely shred and fall apart in the wash. Ah well, you can’t win them all. At least I learned that, in the future, when it comes to drapey fabrics it’s all rayon and viscose for me, thanks.
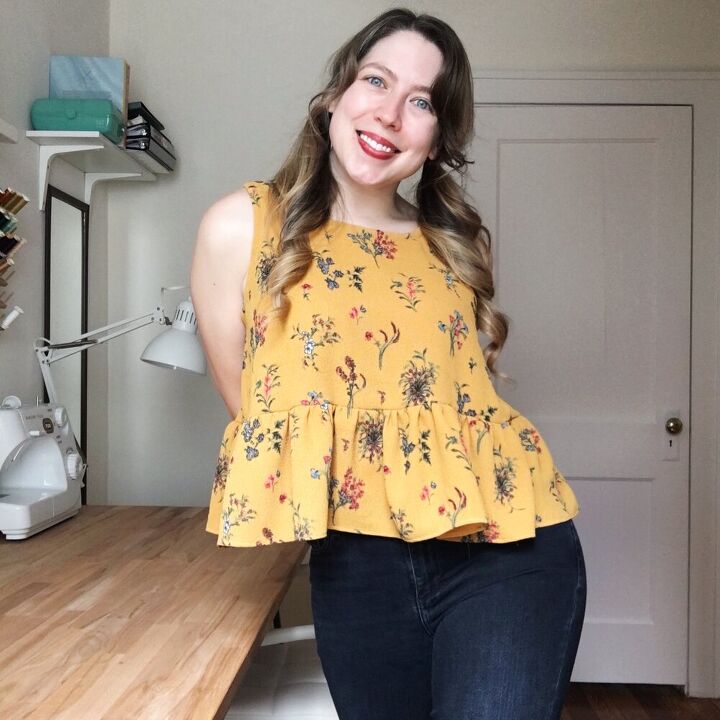
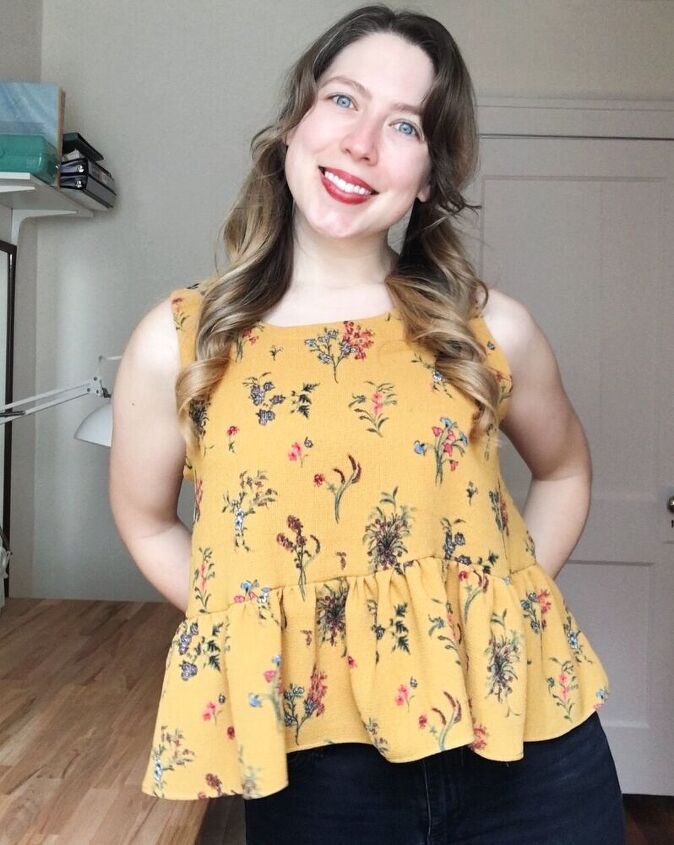
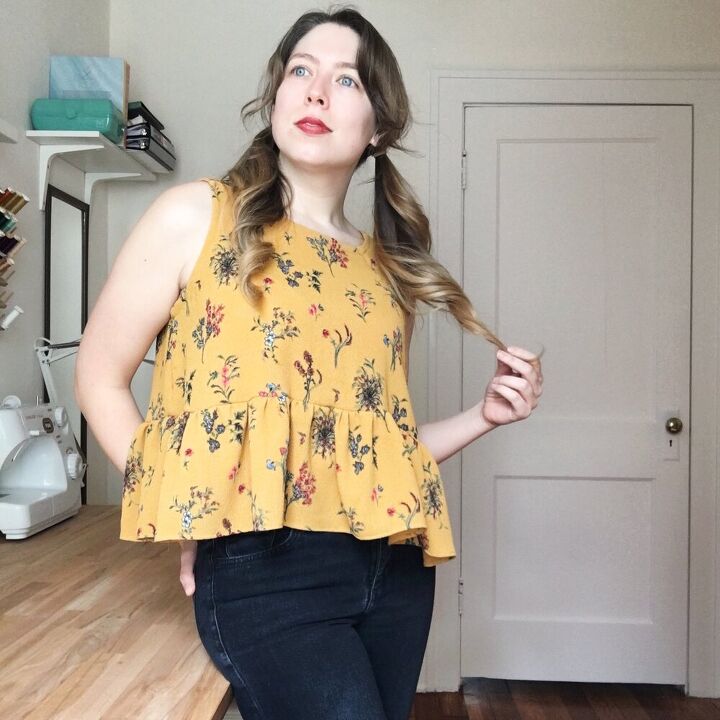
Apart from my struggles with the fabric, I will say that I really enjoyed this pattern and I am definitely going to be trying my hand at it again with a fabric I’m more comfortable with- likely linen or lightweight cotton.
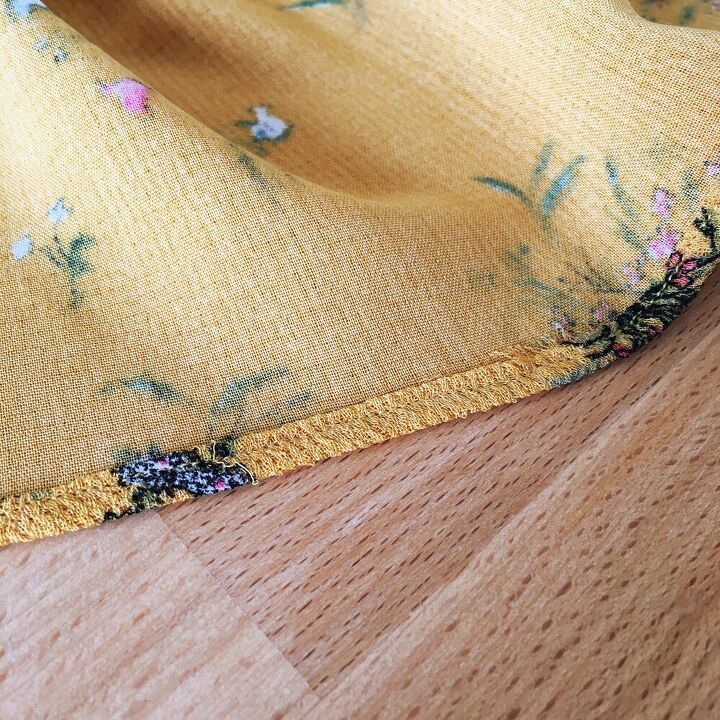
I’m super excited about one thing though, I completed my first successful baby hem! Since this fabric doesn’t press well and pins distorted the lay of the fabric too much, I found it really helpful to just roll the hem by hand and stitch little by little working s l o w l y. I ended up with a hem that didn’t pull away from the rest of the garment (an issue I had with my skirt) and I am very pleased with the result!
I did struggle in a couple of areas though. The first was in the shoulder panels. This actually wasn’t a terrible problem- they were just too long and therefore made the armholes sit down past my bra (about mid-rib length). I didn’t make a toile or anything, so I didn’t realize this until after I’d cut my fabric. I ended up just ripping out the seams and cutting about 2 inches from fabric, which made the shape a little funky but not unusable. Next time, I’ll alter the pattern piece accordingly for a better fit.
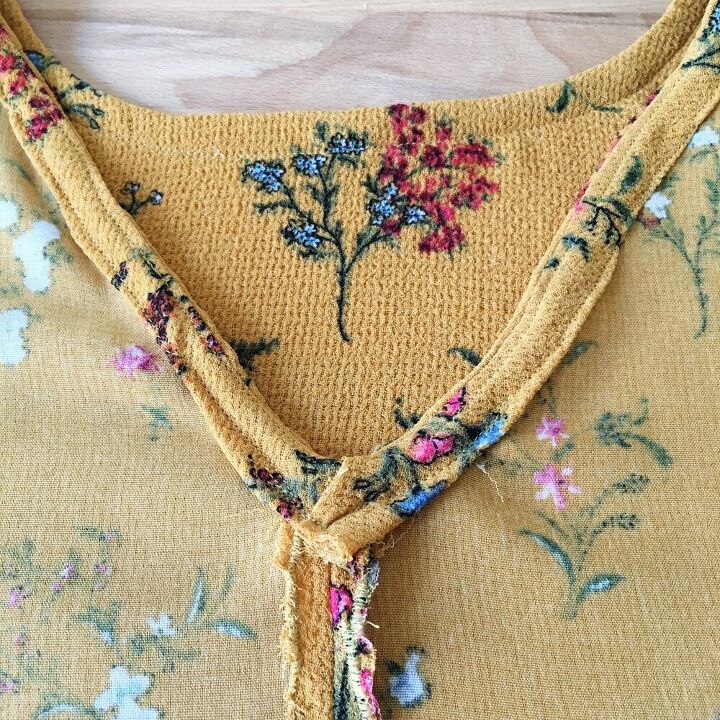
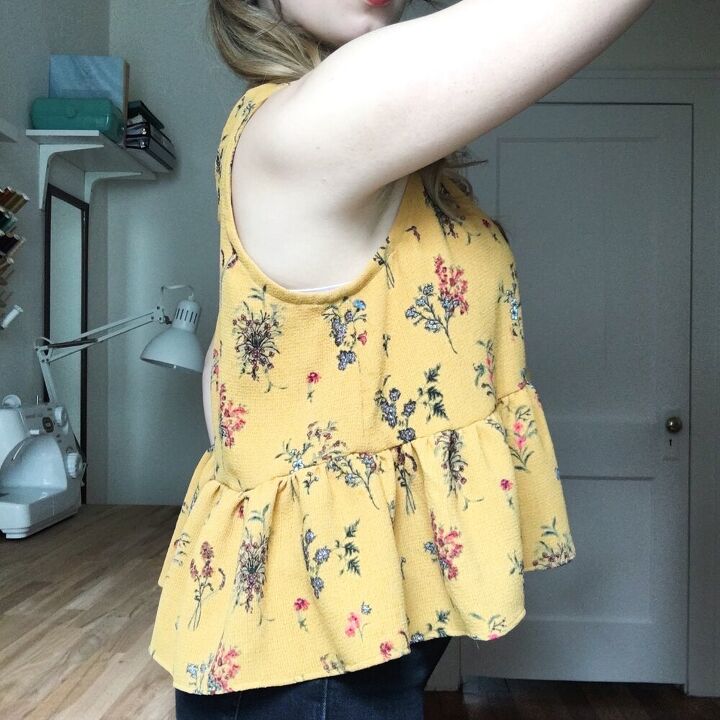
My biggest hurdle was with the neck binding. I don’t know if it’s simply because I’ve never inserted a v-neck binding the way they had described, but I just could not wrap my head around it. Granted, this was the last step I did (having skipped ahead to add the peplum and hemmed it before this step) so at this point I was pretty DONE. I was also beyond frustrated and over my fabric, so this may have skewed things a bit for me. What I ended up doing was ripping out the seam joining the ends of the facing and just folding the ends over to sew the “V”.
It’s not pretty, but it’s done so that’s all that really matters to me.

Maybe we can just switch to calling this a wearable toile? Because as lackluster as the construction of this top makes me feel, I did learn a lot, I do like the way it looks on, and I know I will love this pattern more when I choose a fabric that’s more enjoyable for me to sew with. At least I finished it instead of adding it to the UFO pile, so that’s something to celebrate…just in time, too. I need a drink!
Have you tried your hand at any Peppermint sewing patterns yet? I just put together a mood board for my next attempt, the pocket skirt, which you can view here. Until next time:
Happy Making!
-XO-
C
DETAILS:
PATTERN: Peplum Top by Peppermint Magazine
FABRIC: Similar (If you dare)
SIZE: I made a size E which was true to size (oversized fit)
Bust: 37.5″
Waist: 31″
Hips: 40″
ADJUSTMENTS: Shortened shoulder panels by 2″
KNOWLEDGE OBTAINED:
- Alter your pattern, not your fabric (if you can help it)
- The fabric should be practical as well as pretty.
- How to roll a baby hem

The author may collect a small share of sales from the links on this page.


Comments
Join the conversation