Make a Stylish Bow Headband in This Simple Tutorial

Headbands are a lovely little accessory to have, especially if you live in a freezing country like I do, and you need a fashionable option to cover your ears so they keep warm. In this easy DIY bow headband tutorial, I am going to show you how to make a knit, warm, and fleecy bow headband. I used the Rebecca Paige pattern; the link is listed under the material section of this article. You can use any fabric you wish, but make sure the fabric itself is stretchy so that it fits snug over your head. Are you ready to make a DIY bow headband? Let’s do this!
Tools and materials:
- Pattern - Get it here
- Fabric
- Pins
- Sewing Machine
- Needle
- Scissors
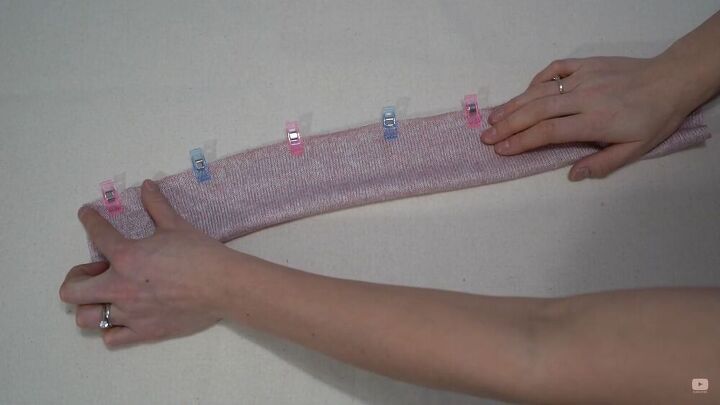
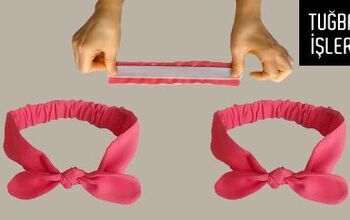
Cut your pattern and pin down
Cut out your Rebecca Paige pattern on your choice of fabric, fold over the fabric, and clip the right sides together.
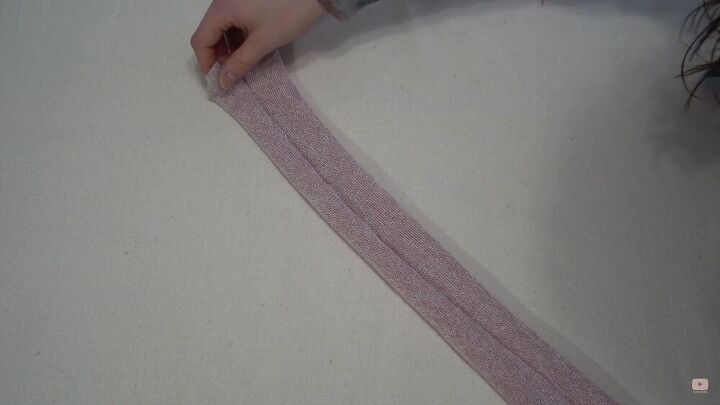
Stitch lengthways
Stitch your headband across, making sure to leave a gap on the side so that you can turn it inside out.
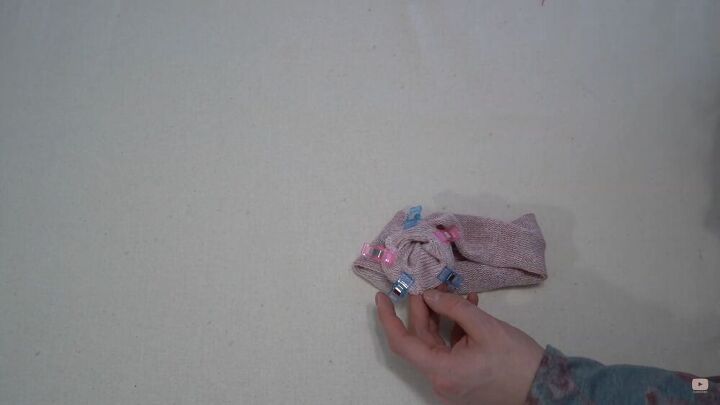
Stitch the short ends
Now, match up the short ends of each side of the headband and clip them all around the edges.
Stitch around the edges and surge the stitch so you have a finished edge. Don't forget to use a stretch stitch.
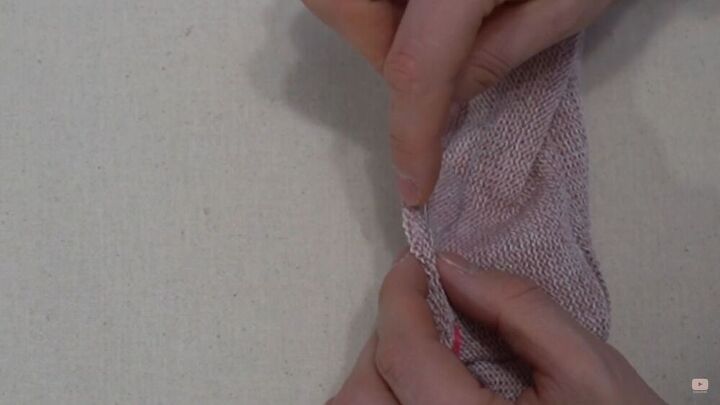
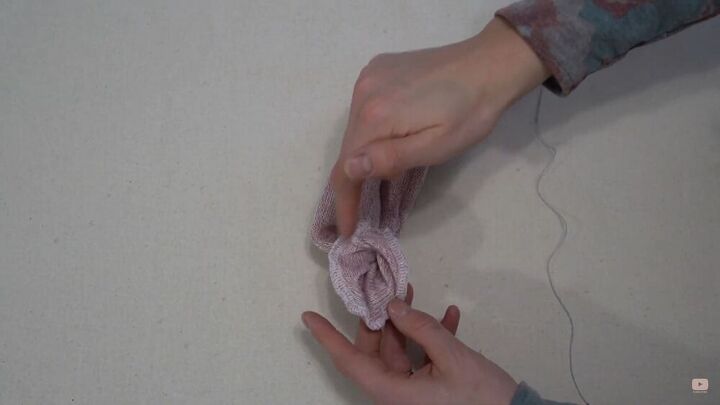
Stitch the gap
Remember the gap you left? Stitch that together. Clip the gap and use a blind/ladder stitch to stitch together. I did this by hand, just to ensure that the folds are nicely tucked in. When you first start stitching, bury the knot so it’s not visible, and then go ahead and do a ladder stitch all across the gap.
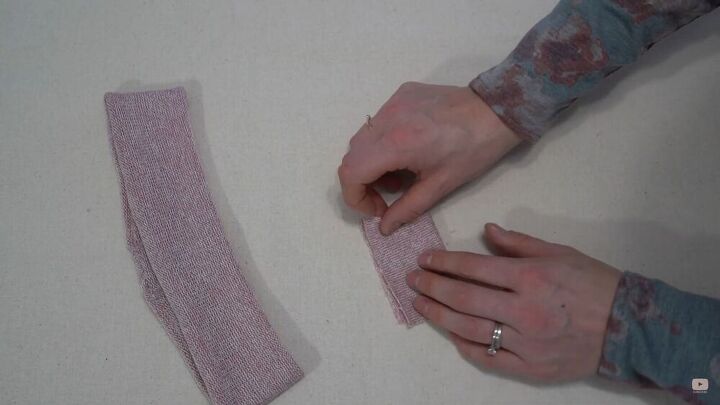
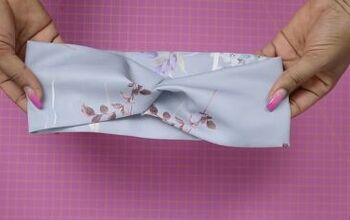
Add a bow
If you opt for a basic band, then skip this step. But because I want to add an interesting, cute touch to the headband, I went ahead and sewed on my bow. Take your small fabric piece, fold the right sides together and stitch it up.
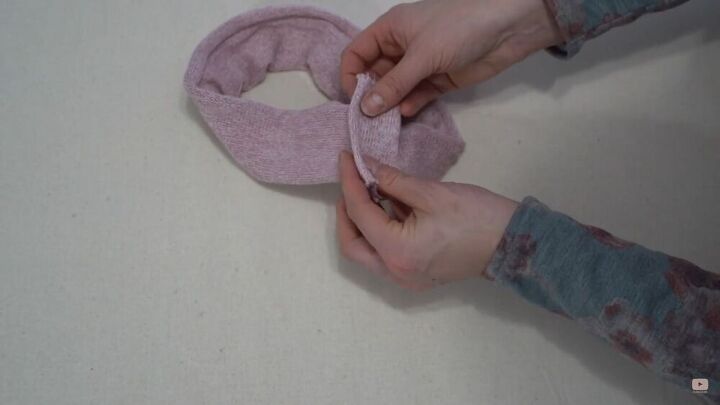
Next, turn it inside out, and wrap it around your headband, along the center seam of the headband so that it covers the seam.
Fold in either end of the stitches from the small fabric piece and clip together.
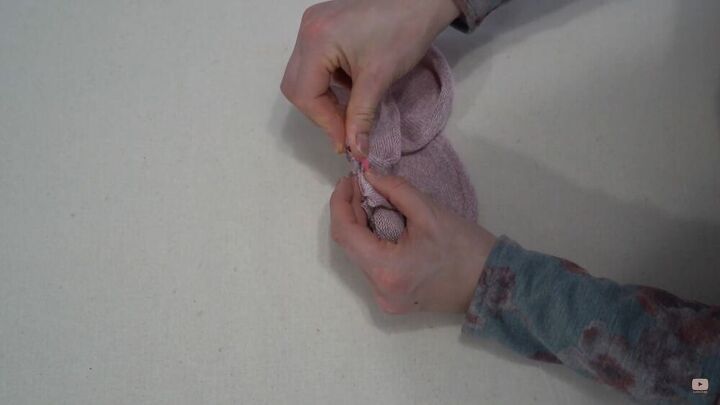
Do the same latter stitch to close it up; the same kind of stitch you did to close the gap in the previous step.
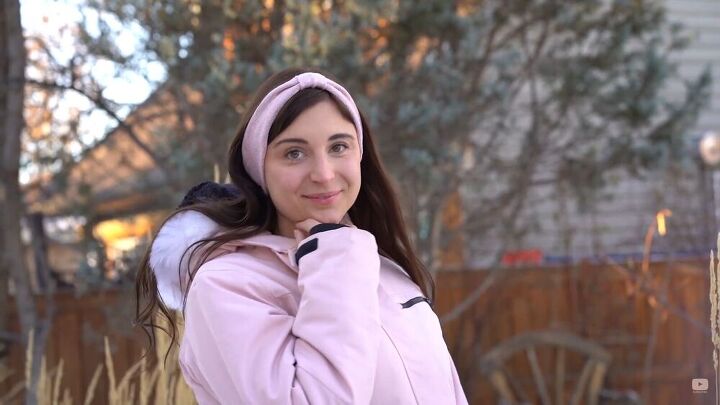
Ta-da! You have a lovely stretch knit bow headband. You can coordinate the fabric of the headband so that it complements some of your clothing items- leaving you looking super stylish and warm during the cold winter months. You can also opt for a non-knit headband and simply wear it as a fashion accessory. I hope you enjoyed my easy DIY bow headband tutorial.
The author may collect a small share of sales from the links on this page.


Comments
Join the conversation
So simple and cute!