Sew Your Own Bucket Hat in a Few Easy Steps

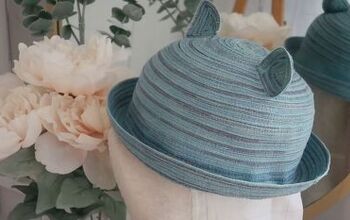
Are you going to the beach? Going for a hike? Or simply want to look cool and funky? It’s no secret that bucket hats are super cute! You can sew a bucket hat in just 2 hours and have a fun accessory to your everyday wear that is both stylish and functional, shielding you from the harmful sun rays. Also, this easy bucket hat is interchangeable, meaning you’ve two prints to show off! All you need is your sewing machine, two printed fabrics, and my bucket hat pattern that’s linked in the tools and materials section above. Ready to make your own DIY bucket hat?
Tools and materials:
- Two pieces of fabric
- Bucket hat pattern found here
- Pins
- Matching thread
- Sewing machine
- Scissors
Cut the fabric
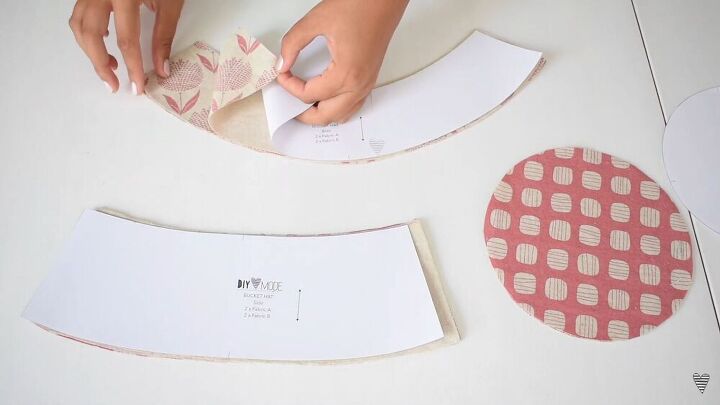
Start with your first fabric piece. Place your pattern on your fabric and cut. You should have two pieces of each section.
Make notches
Line up the notches accordingly. You can either use a pencil to mark them on the wrong side of the fabric or snip the markings. It doesn’t really matter how you do it, though.
If you choose to snip into the fabric, use a pair of sharp, small scissors for this step. Make sure to transfer all 8 notches to the previously cut-out fabric pieces.
Pin and press
Place the longer fabric pieces on top of each other, right sides facing. Sew the sides with a little seam allowance.
Then, press the seams after sewing the sides.
Sew and assemble
Sew the upper circular piece to the shorter curved section of the middle fabric piece. Pin the fabric all the way around, lining up the notches on the side seams.
Now, sew the upper part to the side panel, leaving around a centimeter ( ⅓ of an inch) seam allowance. This is the most challenging step, so take your time with this, sewing slowly from pin to pin, making sure you don’t sew any creases into the fabric.
TIP-
If your fabric is stiff, simply cut small incisions to the upper side panel, with a distance of about 2 centimeters (0.7 Inches), throughout.
Trim the seam allowance all around and try on the hat to see if it fits well.
Pin the brim all around the middle section. Remember to match the notches accordingly.
Sew all around, leave a centimeter ( ⅓ of an inch) seam allowance. Press the seam open and make sure the seam allowance is located on the inside of the head part.
Repeat the above steps for your second fabric piece.
Assemble and sew the fabric pieces
Turn one of the head parts left side out and put it over the other head part. Again, be sure to match the side seams accordingly. Pin the two sides together at the side seams and on the two notches.
Leave a 6 centimeter (2.5 inches) opening so that it’s easier to turn the hat inside out after. Sew the parts together all the way around, leaving a centimeter ( ⅓ of an inch) seam allowance.
Cut a little from the seam allowance all the way around. Don’t cut the seam allowance around the opening, as this will help you for the next step.
Turn the hat inside out and close the gap
Using the opening, gently turn the fabric inside out. Press the outer edge into shape by pressing all around the brim and seams.
Following the curve, fold the opening inwards and press so that you have a neat fold.
You can stitch the gap closed either by hand or with your sewing machine. If you choose the sewing machine route, stitch the brim of your hat all the way around to make it look cohesive. Use a small edge top stitch for this.
Adjust the pattern for a bigger or smaller size
This pattern is a unisex fit and should fit snug on adults and teenagers. If you need to adjust the pattern’s size, you can easily do this by taking in the middle piece. Always make sure that the top panel stays the same, though. You can make the hat tighter or larger at the bottom. For example, to make the head smaller by 2 centimeters (0.7 inches), mark the two sides of the bottom curved middle piece by 5 millimeters (0.1 inches) on each side.
Next, connect that point with a line all the way to the upper end. Repeat the same process with the brim.
On the flip side, if you want to make your bucket hat larger, do the same process but instead of taking away the length, add the length to those same spots as shown above.
You now have a functional, double-sided cute bucket hat to add to your bucket list of sewing projects. This is so easy to do and really requires time more than anything else. The results are so worth it, though! I hope you enjoyed this bucket hat tutorial.
How to fold hats
Enjoyed the project?
Suggested materials:
- Fabric
- Pattern (https://www.etsy.com/listing/977924066/)
- Pins
- Thread
- Sewing machine
- Scissors
The author may collect a small share of sales from the links on this page.


Comments
Join the conversation