How to Sew the Perfect Gift: 6 DIY Gift Ideas That Are Simple to Make

If you’re looking to sew the perfect gift for Christmas, look no further! I’ve got 6 incredible DIY sewing gift ideas that are perfect for Christmas or really any time of year!
Some of these are truly easy sewing gifts, and others are a bit more involved but all of them are beautiful, sustainable, and luxurious! You can find all the patterns you need here.
Let’s get started making your DIY gift ideas a reality!
Tools and materials:
- Free patterns for all items
Silk scarf
- Silk fabric
- Scissors
- Needle and thread
- Sewing machine
Silk sleep eyeshade
- Silk charmeuse fabric
- Black fusible interfacing
- Elastic
- Scissors
- Sewing machine
- Needle and thread
- Iron
- Batting
Produce bags
- Tricot mesh fabric or other sustainable fabric choices
- Scissors
- Cotton string
- Sewing machine
Waxed cotton
- Natural undyed cotton
- Pinking shears
- Natural beeswax
- Parchment paper
- Iron
- Rack (for drying)
Canvas bag
- Canvas
- Cotton lining
- Sewing machine
- Scissors
- Needle and thread
- Iron
Silk puffer scarf
- Silk fabric
- Batting
- Sewing machine
- Needle and thread
- Scissors
- Pins
- Iron
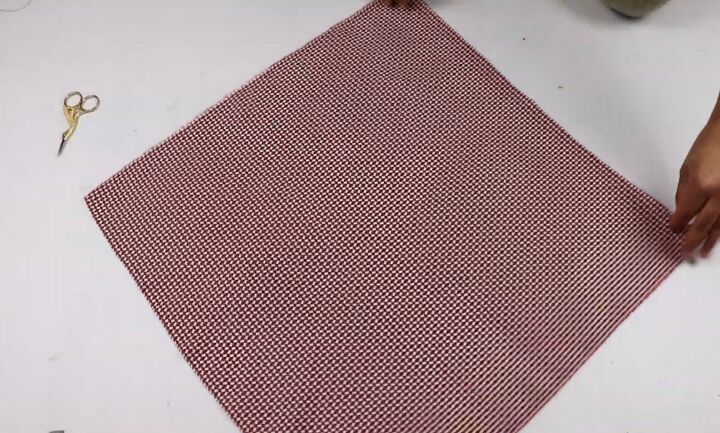
1. Silk scarf
This is one of the easiest sewing gifts! You’ll need an 18 X 18 inch square of silk fabric. Fold the edges in ⅛ of an inch and then again ⅛ of an inch (double fold).
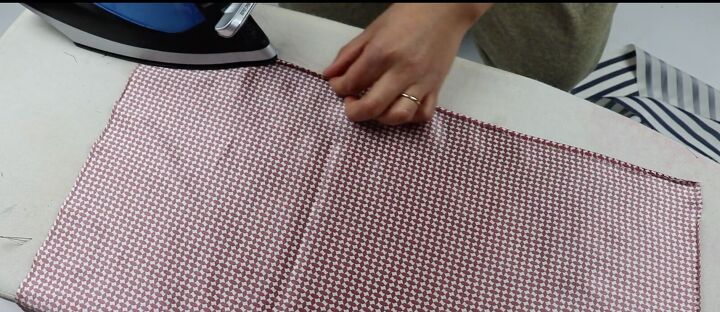
Iron in place. Sew either of 2 ways:
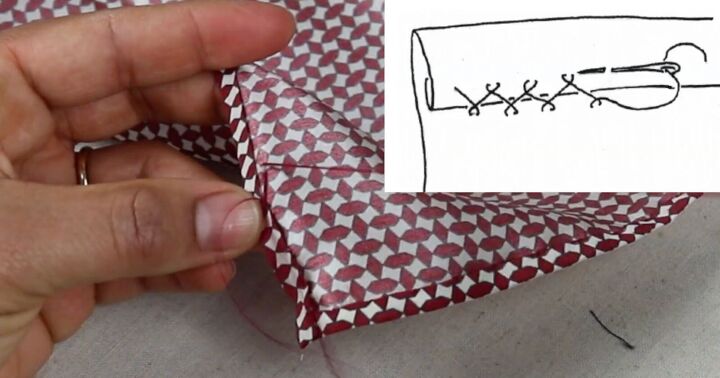
Hand sew with needle and thread for a more delicate hand finish.
Machine sew using a straight stitch all the way around.
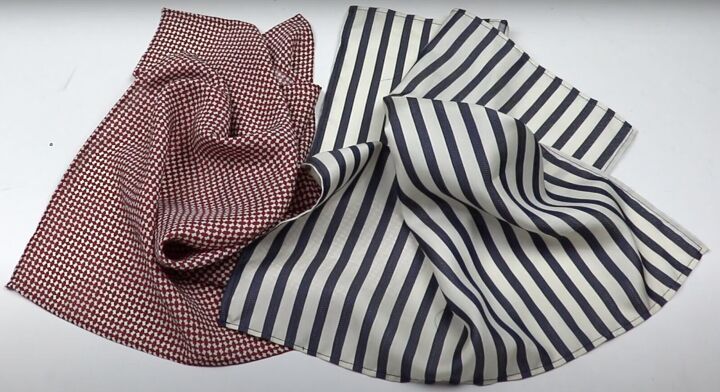
They are gorgeous and such an easy sewing gift!
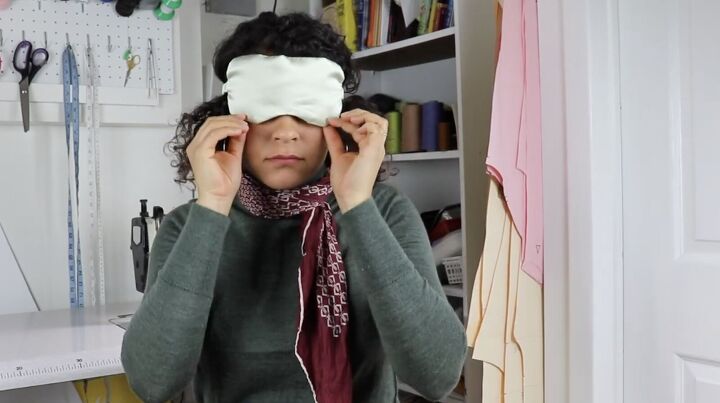
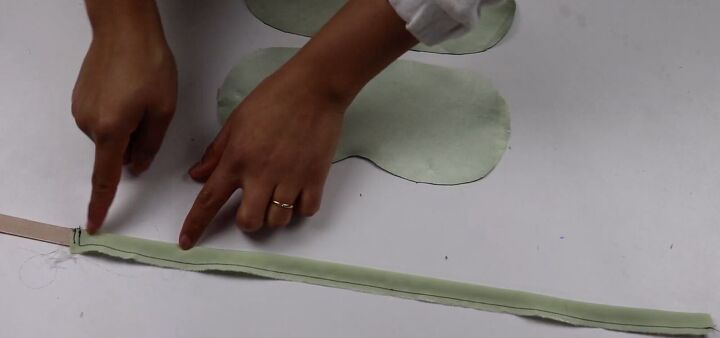
2. Silk eyeshade
Cut out all the pattern pieces for the eyeshade: 2 pieces of silk charmeuse fabric and black fusible interfacing. Cut the band out of the silk to fit the head. Make notches at the sides of the shade for the band.

Make the band by folding the long strip right sides together lengthwise. Sew with a straight stitch, leaving one short side open.
Insert the elastic and sew it to the seam allowance. Use a knitting needle or loop turner to pull it so it is right facing.
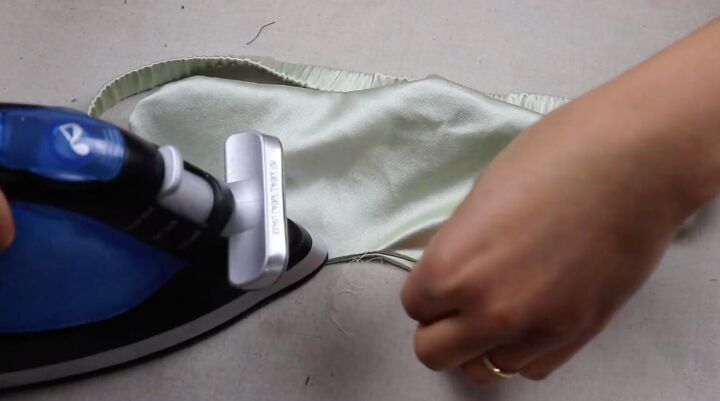
Lay the 2 silk pieces right sides together and the black piece on top. Attach the band at the notches by sewing. Then sew around the entire eyeshade, leaving an opening at the top.
Turn it right side out. Iron the shade.
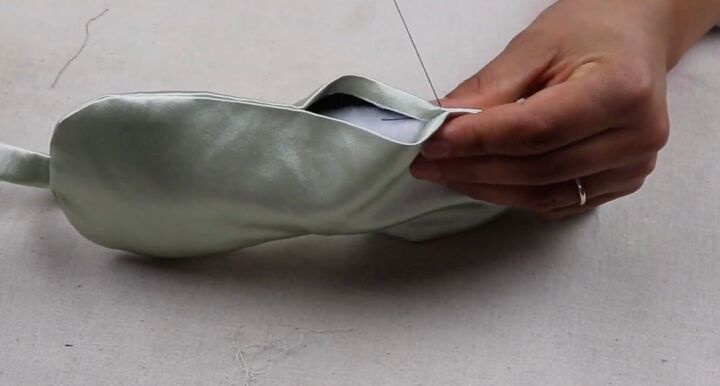
Add some padding to make it soft and plush. Slip stitch the opening to close.

You're done! This is such an easy-sew project.
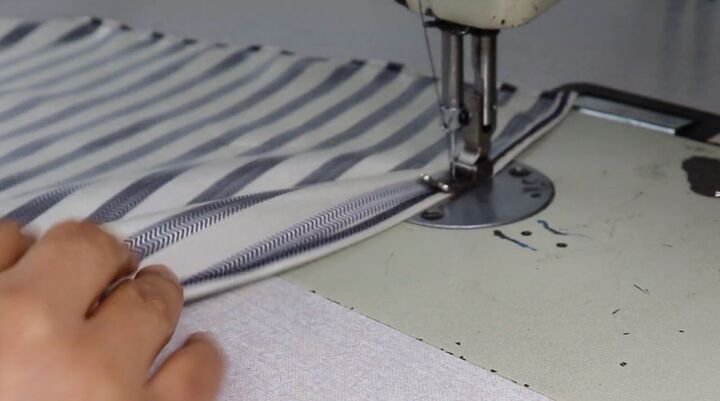
3. Reusable produce bags
You can use tricot mesh, curtain fabric, or even silk from the thrift store to make these for a fraction of the cost.
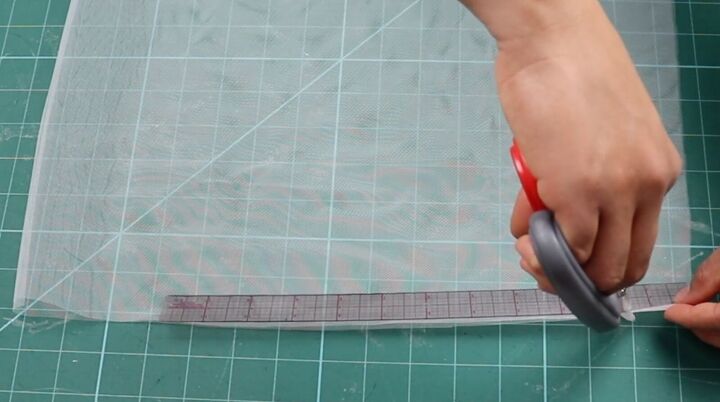
Measure and cut 13 X 30 inches for the large bag or 8 X 10 for the small bag. Fold the fabric in half. At the top away from the fold, go down 1½ inches. Snip a ¼ inch into the fabric. That’s the hole for the drawstring.
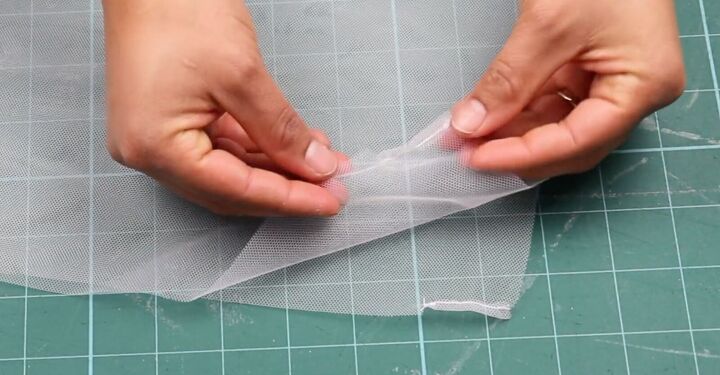
Fold this back and sew it down. Zigzag stitch (or serge) on both sides and reinforce with a backstitch at the top and bottom of the seams.

Fold over the top and stitch it down.
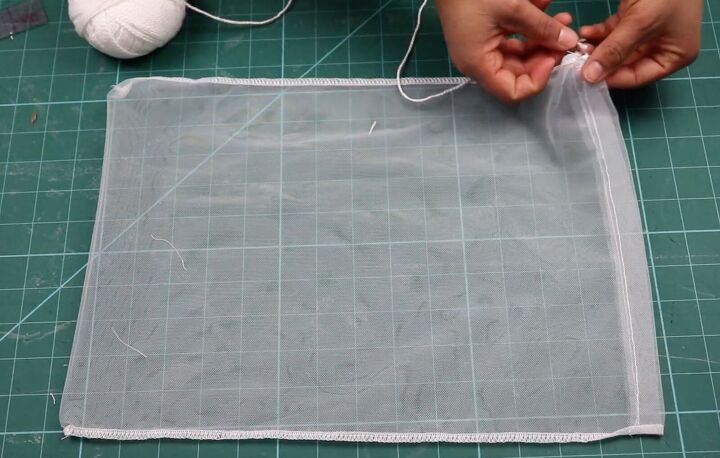
Feed the cotton string through the hole with a safety pin.
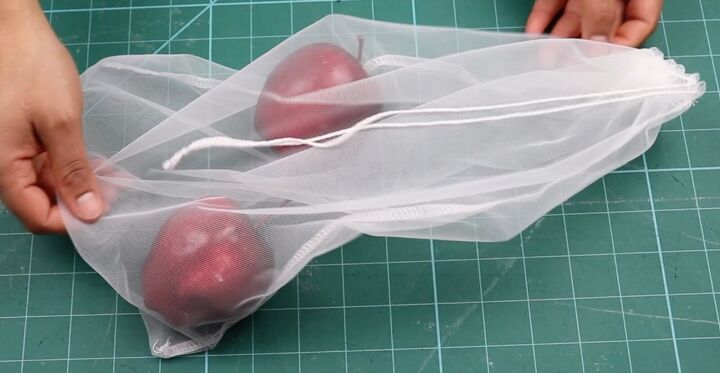
Tie off both ends. There you go!
4. Waxed food covers
Plastic is so bad for the environment. Waxed covers are a great gift to kickstart a loved one's environmentally conscious mindset! Please use a 100% absorbable fabric like cotton.
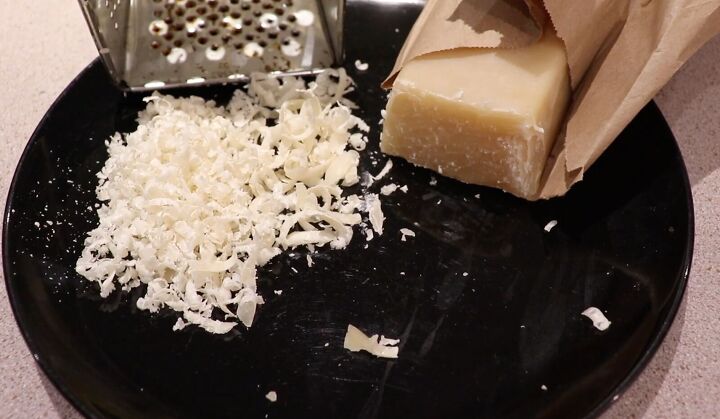
Use a box grater to hand grate the wax onto a plate or other surface.
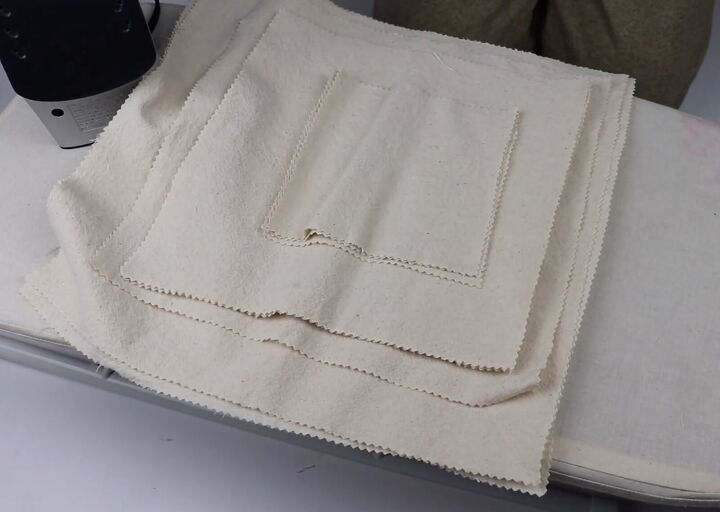
Cut the cotton fabric with pinking shears for a nice finish into 3 different sizes: 15 X 15, 10 X 10, and 6 X 6 inches.
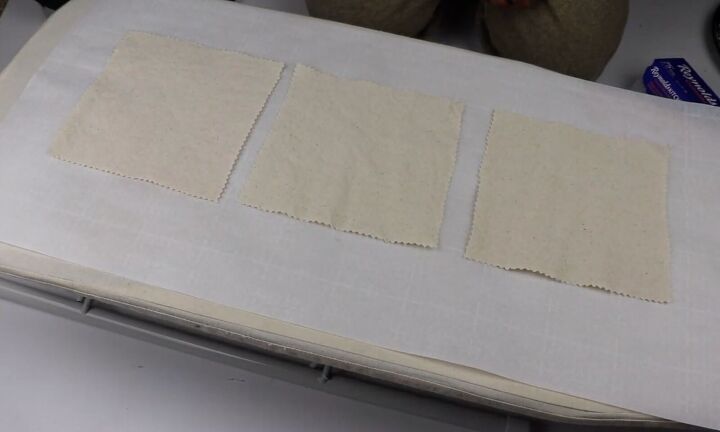
Lay parchment paper on a flat surface. Lay the cotton squares on the parchment paper. Sprinkle the grated wax on the cotton. Lay another layer of parchment paper on the squares.
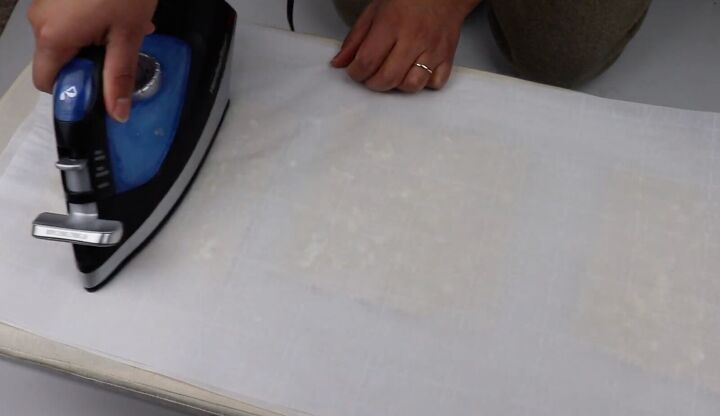
Iron the squares until the wax melts.
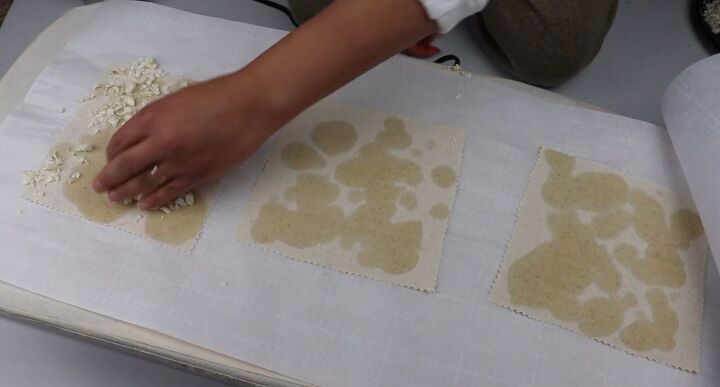
Keep adding more wax until the fabric is completely saturated.
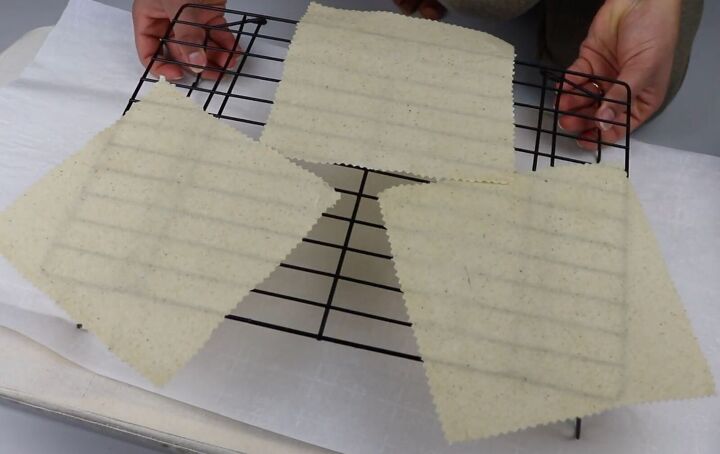
Let them air dry.
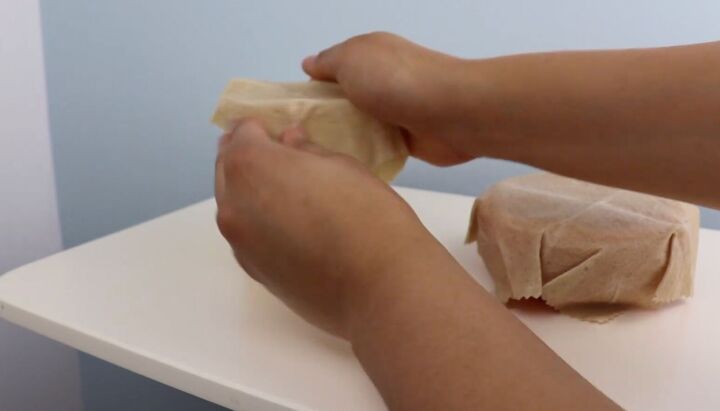
To use, place on your container and mold them closed with your hands. It won’t have as a tight finish as plastic but it's much more sustainable!
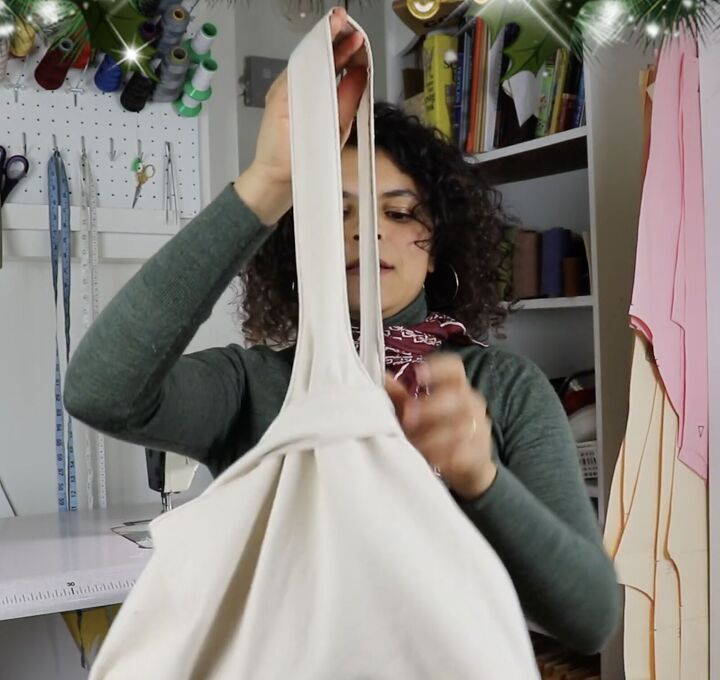
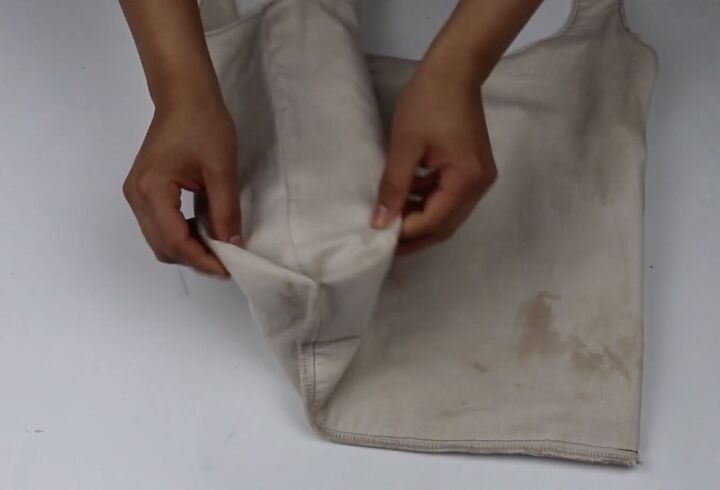
5. Canvas tote
This tote becomes an adorable and usable sack with its 2 differently sized handles. To switch it up, place the longer handle into the shorter one!
Make sure to preshrink the fabric by washing it and drying it in the dryer.
Optional: If you’re using natural canvas and your cotton lining is bright white, you can match the color by dyeing the cotton with boiling black tea.
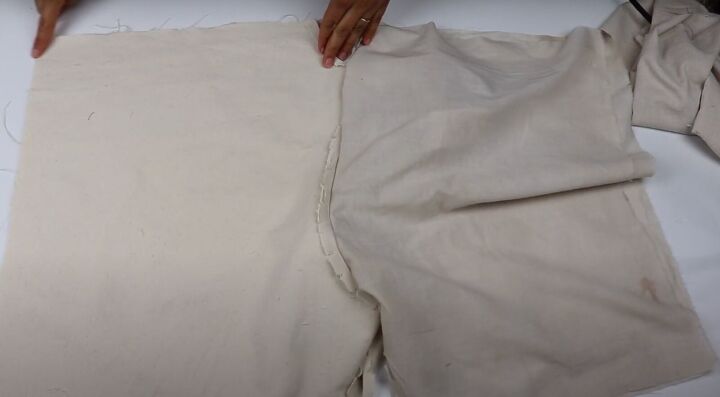
Cut 2 pieces of both the canvas and cotton lining.
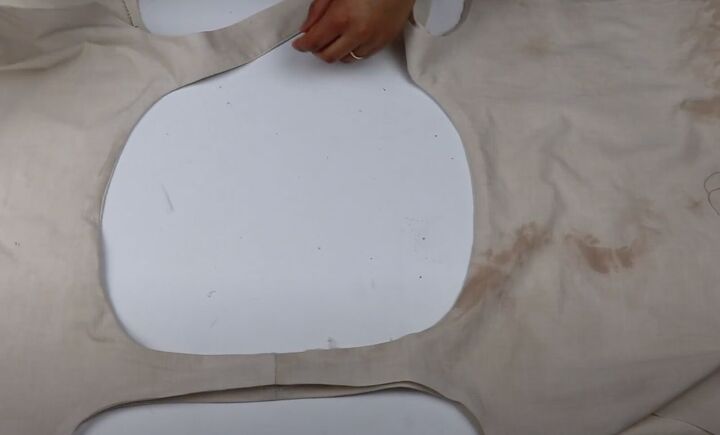
Sew the strap seams. Iron them open and flat. Place the pieces right sides together and sew the inner circle.
Snip along the curve, turn it out, and iron it down.
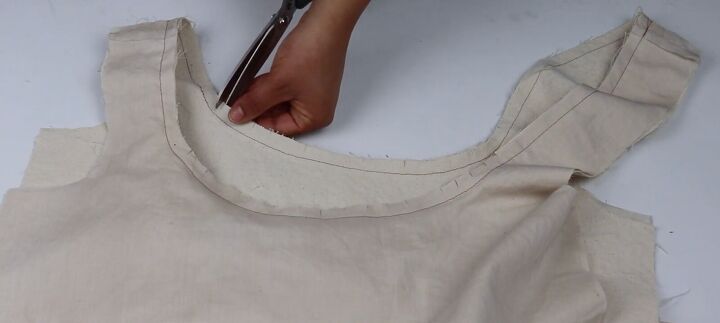
To sew the outer straps, fold in both sides of the shell and the lining. Iron them down. Snip at the curve to keep the rounded shape.
Before you sew the outer strap, flip the bag inside out.
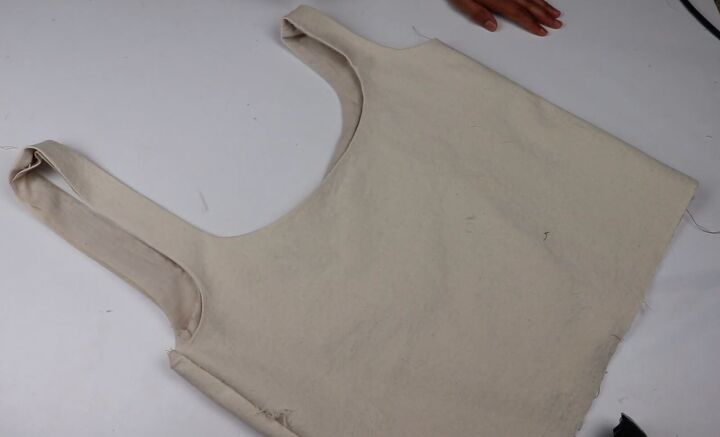
Sew the sides of the shell and the lining, right sides together.
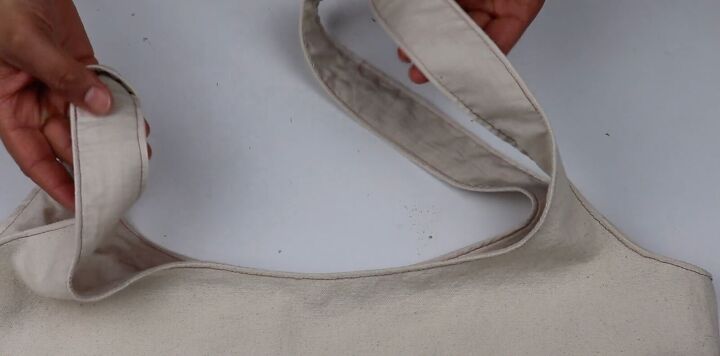
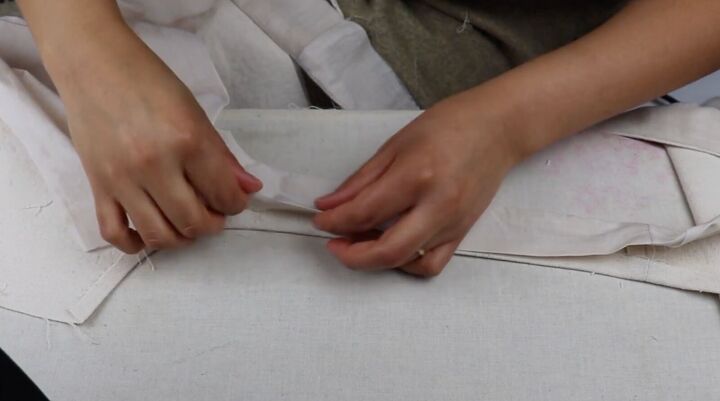
Then, topstitch around the outer and inner straps.
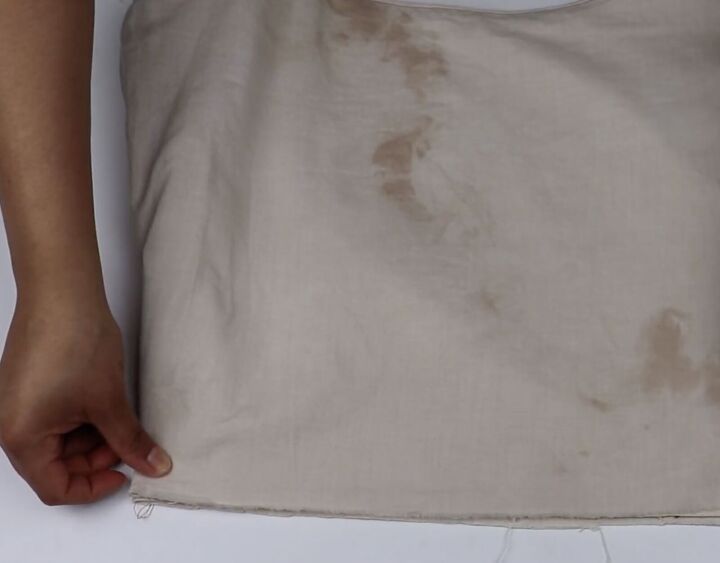
To close out the bottom, pleat at the notches and stitch them down.
Zigzag stitch or serge the bottom to finish.
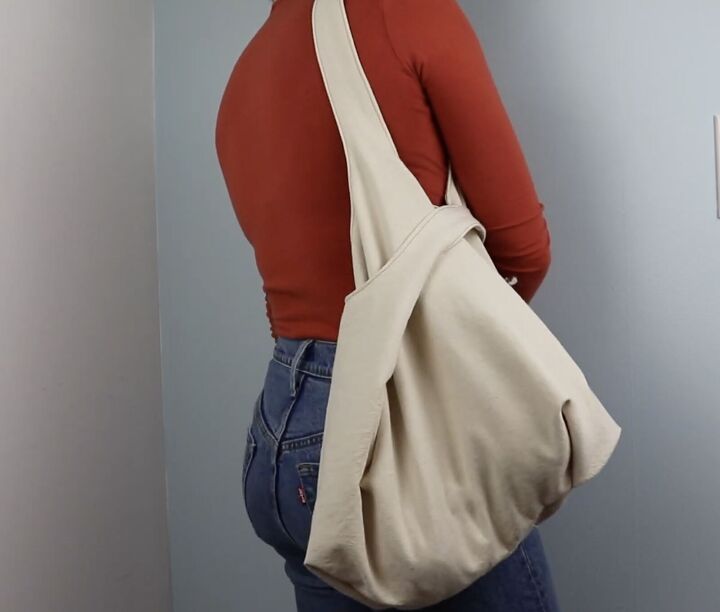
Turn it out and you’re done!
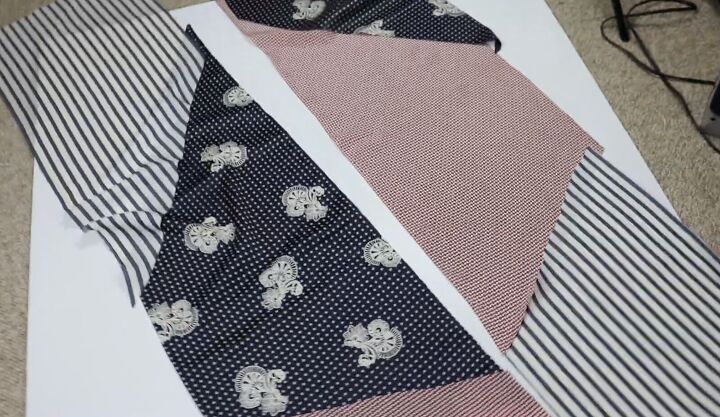
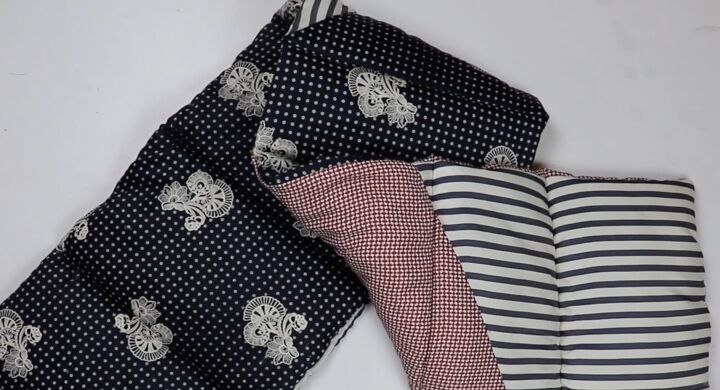
6. Puffer scarf
This luxurious patchwork quilted silk padded scarf is based on Roksanda’s gorgeous pieces!
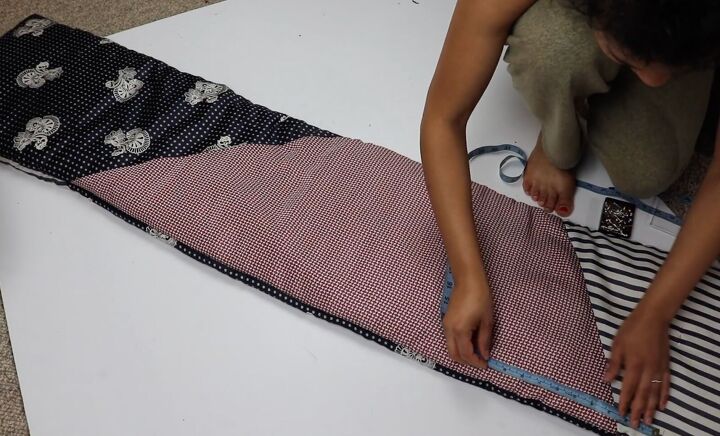
The dimensions are 65 X 15 though you may want to add an additional 20 inches in length.

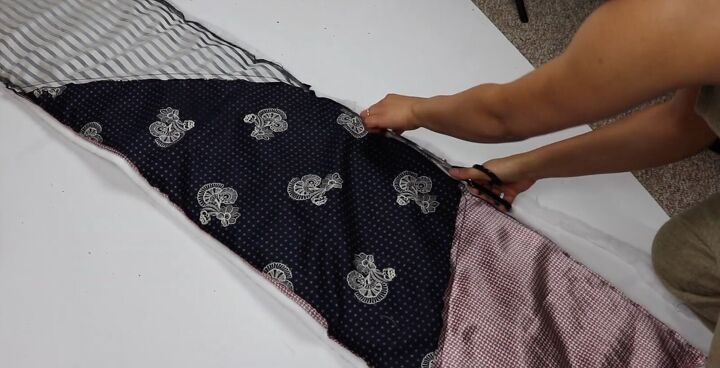
Use several different patterns of silk and sew them in diagonal panels right sides together. Iron the seams to one side.
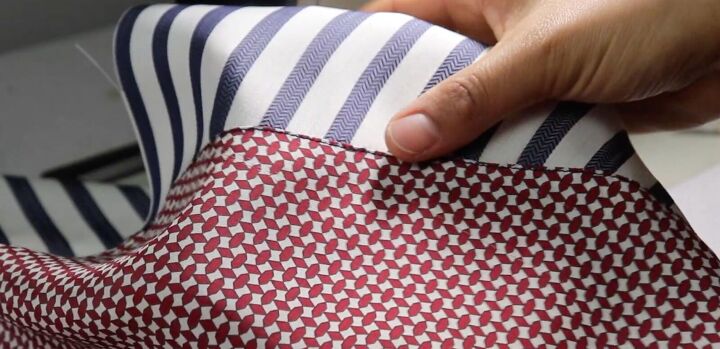
Topstitch each seam. Make your panels at least 15 inches wide.
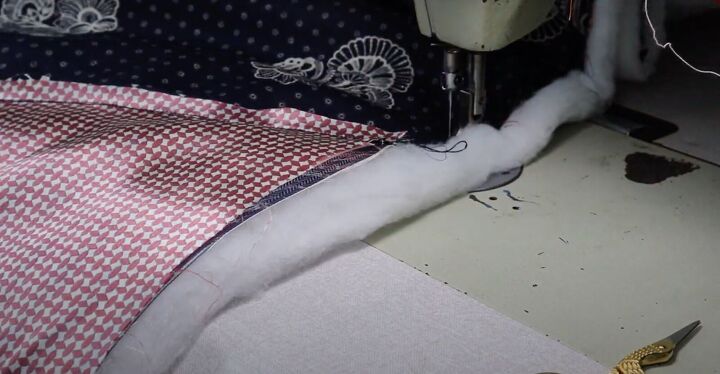
Place the finished panels right sides together with a double layer of poly batting. Stitch the fabric at the top of the batting, leaving a 5-inch opening at one end.
Trim the excess batting. Turn out the scarf, pushing out the corners.

Slip stitch the opening closed.
Measure even spaces for the quilting stitch. Mark with pins about 8 inches in between. Use the grid of your fabric if it has such a pattern to sew straight lines.
Backstitch at the beginning and end.
Sew the perfect gift
I hope these DIY sewing Christmas gift ideas helped you give your very best to your loved ones this holiday season! Let me know in the comments which ones you tried! Happy holidays!
The author may collect a small share of sales from the links on this page.


Comments
Join the conversation