How to DIY an Easy Designer-inspired Lace Shirt Dress

Today, I’m going to show you how to make your own lace shirt dress.
We’re going to elevate a couple of men's dress shirts into a beautiful dress. I was inspired to recreate this look from a Dries Van Noten black shirt dress with white lace trim. I reversed the colors and used white shirts and black lace.
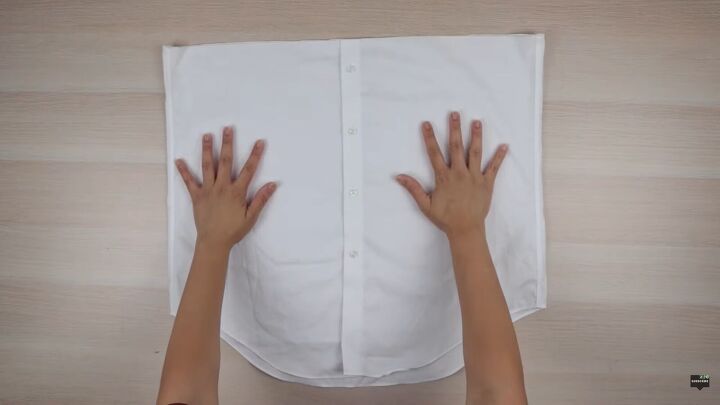
When choosing shirts for this project, look for two in the same color, without chest pockets and with the buttons on the same side. The sizes you need may vary.
For instance, one of my shirts was larger than the other, so I use the smaller one for the top half of my dress and the larger one for the bottom half. I found this to be helpful because I didn't have to do much adjusting later. In other words, use one shirt that's fitted on top and another that's roomy enough to accommodate your hips.
Now let's get started!
Tools and materials:
- Pins
- Ruler
- Scissors
- Seam ripper
- Hip curve ruler (optional)
- Marking tool
- Measuring tape
- 2 men's dress shirts
- 10 inch wide floral lace trim (1 yard)
- Matching thread for shirt and lace
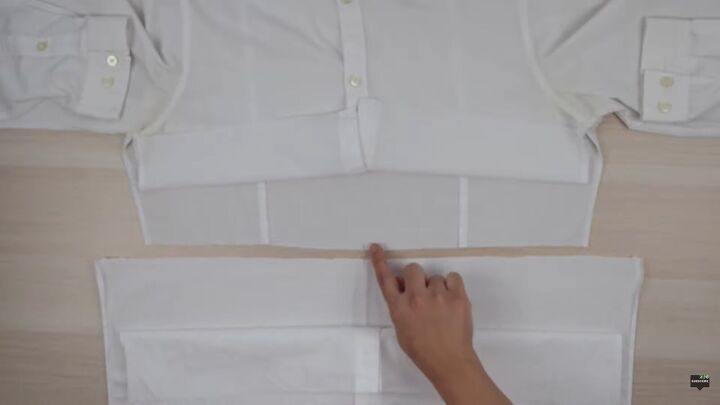
1. Mark and cut
Starting with the bottom half shirt, draw a line from one arm hole to the other and cut.

Next, try on the other shirts for the top half of your dress to locate and mark your waist.
You could go a couple of inches lower to utilize more of your shirt. From there, draw a line just above your mark and cut.
2. Join the two shirt halves
Now you're going to join the two halves.
To do that, you need to open up the side seams first. You'll see why later.
Once you've done that, locate and mark the center back on both halves.
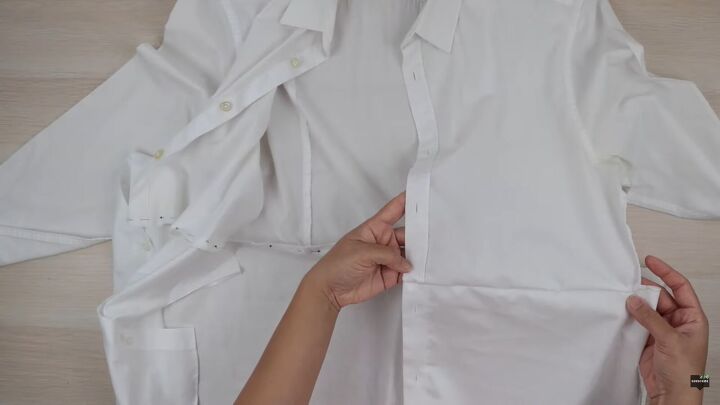
Then, with the right sides facing, match up the center points together and pin in place.
Do the same for the front pieces as well, starting from the button brackets. Now go ahead and finish the seams by sewing them in place.
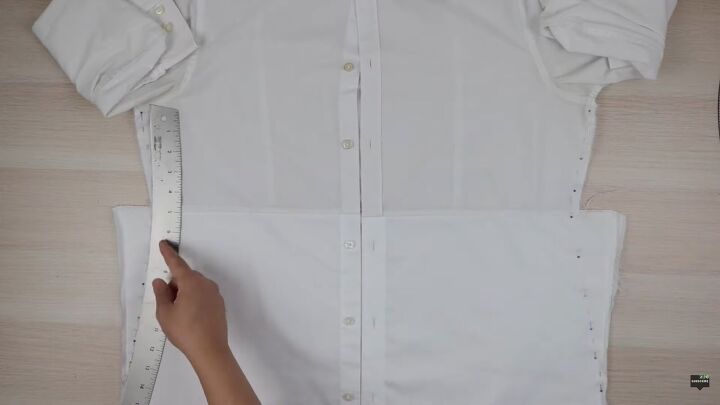
3. Clean up the side seams
Next, you're going to clean up the side seams.
I used my hip curve to assist with that, so both sides were somewhat symmetrical. Cut off the excess.
Try on the dress and make any necessary adjustments. While you have your dress on, locate and mark your under bust. You will need it for the next step.
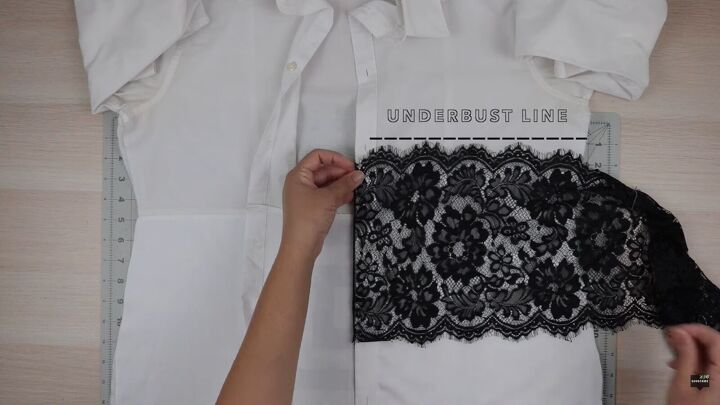
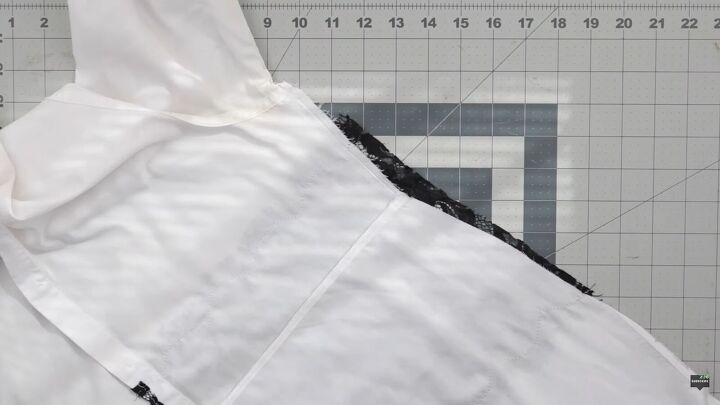
4. Add lace trim
Before you finish the side seams, you will need to add your lace trim.
To do that, lay the lace over your dress with one side folded under the button placket and the top edge aligned with your under bust line.
Pin the side along the bottom placket to hold the lace in place, then lay it out and cut, following the side seam.
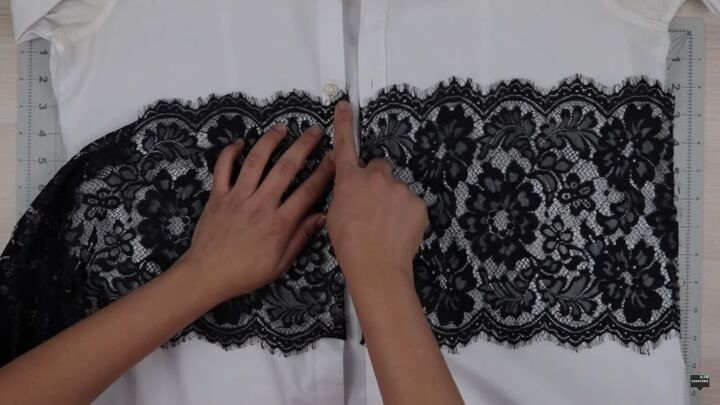
Do the same for the other side, but this time, position the side of the lace along the bottom placket lining it up so when the dress is buttoned, the trim will appear to be one continuous piece.
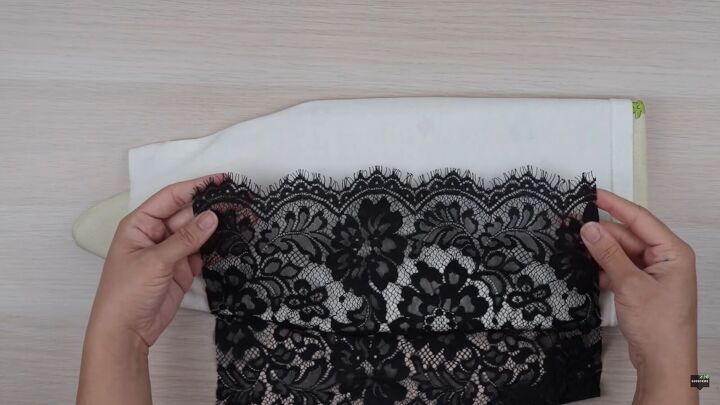
Before attaching the lace, give the pieces a quick press and apply a little spray starch.
This will add a little structure to the pieces so it’s easier to work with. Let the starch soak in for a few seconds. Then use a press cloth over the lace when ironing.
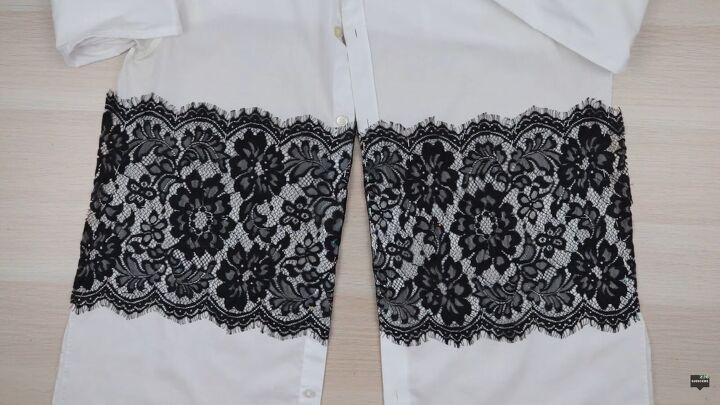
Afterwards, go ahead and secure your lace in place, adding a few extra pins along the edges and across the center.
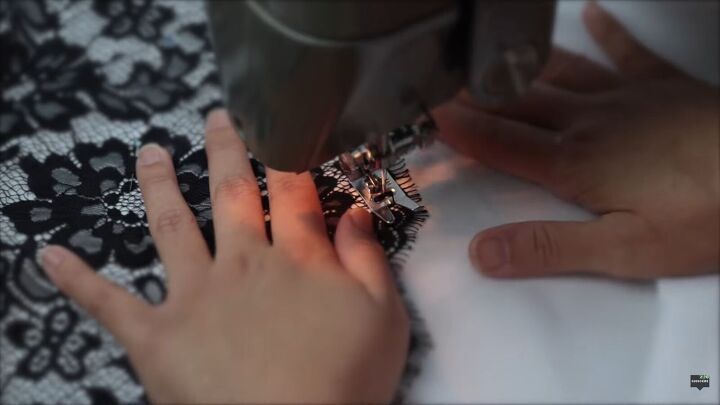
Now let's attach our lace. I decided to follow the scalloped edge using a straight stitch, but you can also use a zigzag if you prefer.
For a seamless look, I'm using black thread on the top spool to match my lace and white bobbin thread to match the color of my dress.
Once you get to the side with the button plackets, switch to a zigzag stitch to finish the edge of the lace folded under the dress.
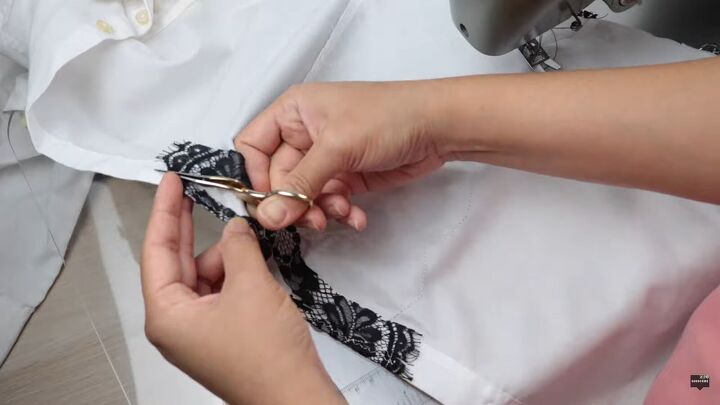
5. Trim off excess lace and reveal buttons
After attaching the lace, trim the raw edge roughly a quarter of an inch away from the zigzag stitch to remove any excess.
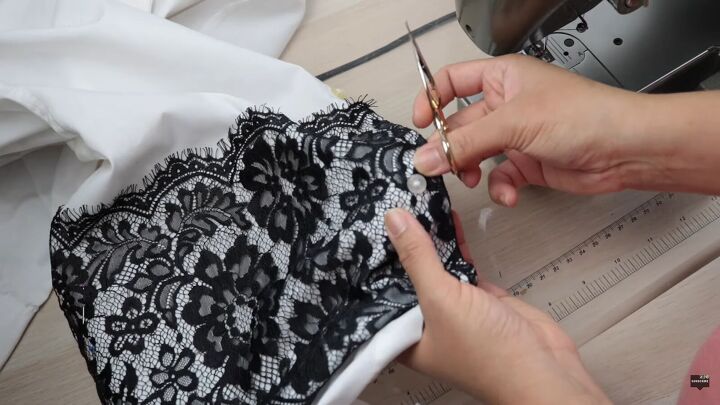
To get to the hidden buttons, snip a couple strands of the lace.
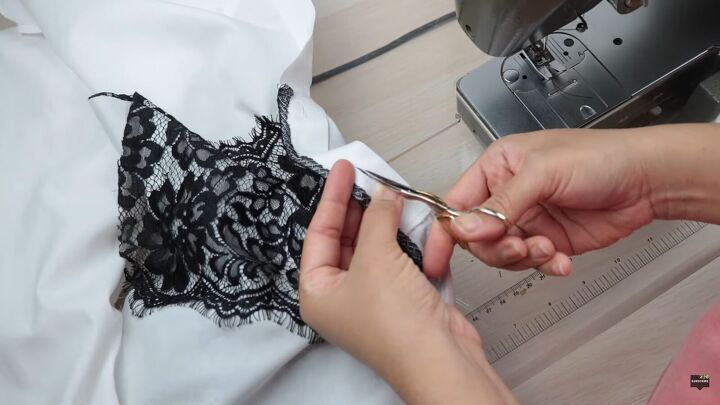
As for the buttonholes, from the wrong side of the dress, snip the lace to uncover them.
6. Finish the side seams
For the final step, finish the side seams.
First remove any excess lace hanging over the edge. You'll likely need to taper the seam at the beginning to blend it with the existing seam.
Hem the bottom of the dress and you’re done!


DIY lace shirt dress
Your dress is ready! This is such a great way to repurpose old clothes into something new and fabulous. The best thing about this dress is that it is both comfortable and stylish. The lace makes this DIY dress look very high end.
How did your dress come out? Tell me in the comments.
The author may collect a small share of sales from the links on this page.


Comments
Join the conversation