Thrift Flip Tutorial: How to DIY a Cute and Summery Blouse

Frilly, ruffled dresses and blouses are super trendy right now and I love the ones I’ve been seeing all over Pinterest.

I could have made one from scratch but I really wanted to thrift flip it if I could.
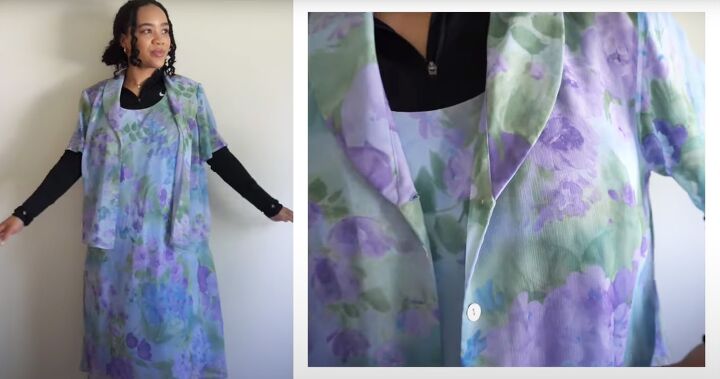
Luckily, I found a dress and top in the perfect summery colors in my local thrift store.
Chiffon-type fabrics and circular ruffles aren’t the easiest combination, so this isn’t really a beginner project unless you already have good basic dress-making skills.
Tools and materials:
- Lightweight thrifted dress and jacket
- Circular ruffle pattern for blouse edge
- Paper for ruffle patterns
- Fabric marker
- Pins
- Scissors
- Measuring tape
- Pencil
- Compasses (optional)
- Serger (optional)
- Sewing machine
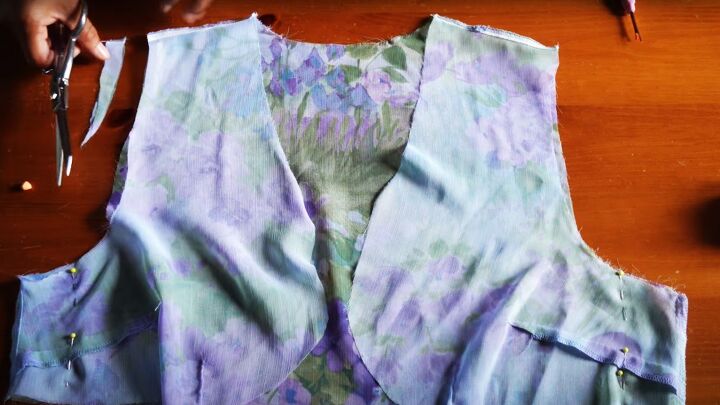
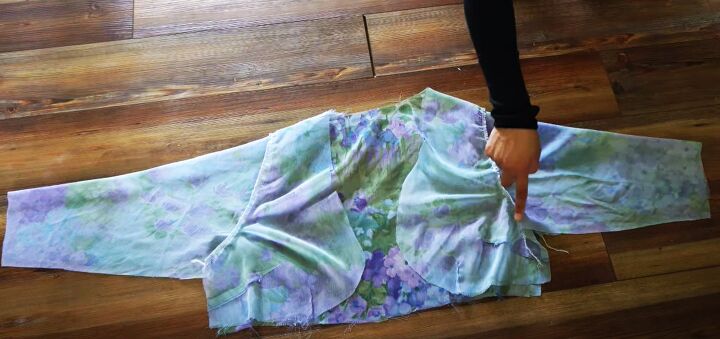
1. Cut out the basic shape
Cut off the jacket or blouse collar and the button and buttonhole plackets. Remove any shoulder pads.

Decide on the length you want the finished blouse to be. The ruffle will add about 2.5 inches at the bottom, so take this into account.
I also shaped the front edges of my blouse into a curve.
2. Make the sleeves
I decided I wanted longer sleeves and that the top needed to be taken in at the shoulders.
Remove the existing sleeves. Pin the side seams for a better fit and reduce the width at the outer shoulders.
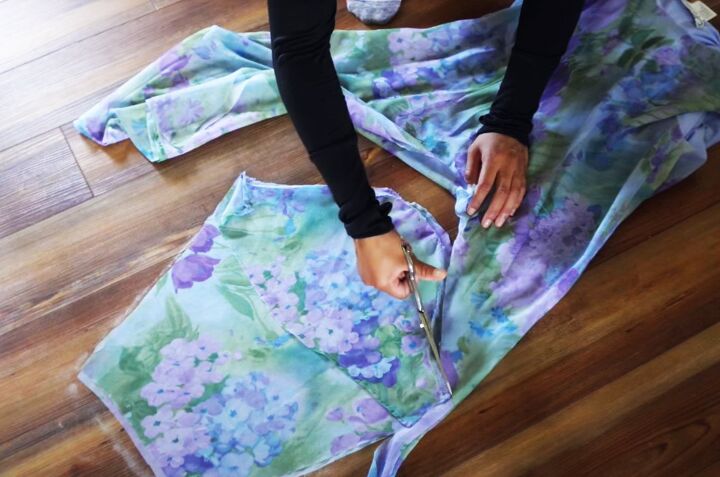
Use the original sleeves as a template to cut longer sleeves from the dress material.
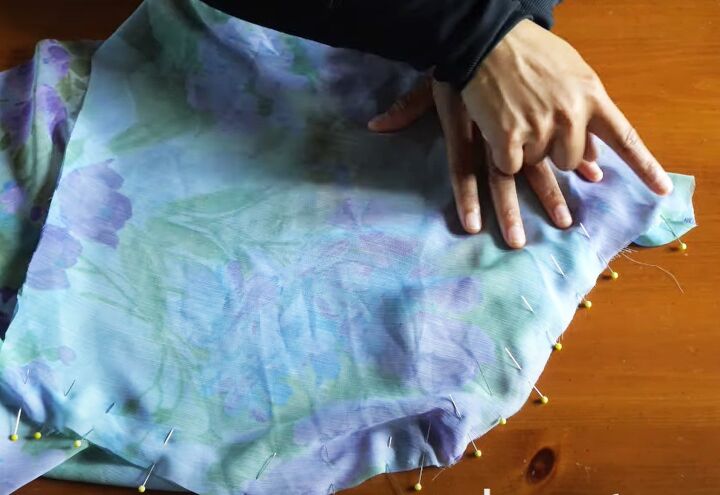
Pin the new sleeves into the adjusted armholes, easing them to fit as needed. Sew in place.
Sew the side and sleeve seams.

3. Circular sleeve ruffles
Measure the bottom edge of the new sleeve and double it to get the circumference.
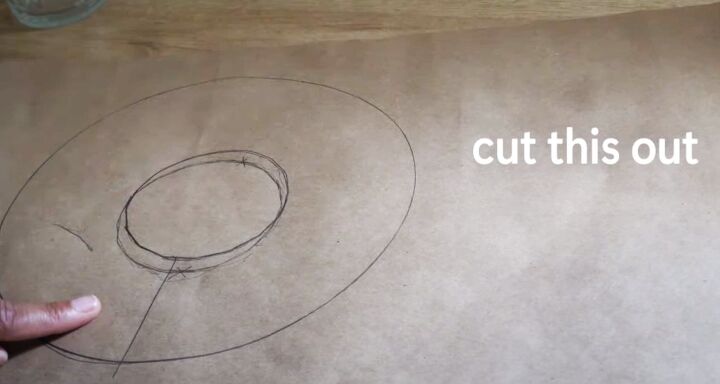
Find a circular object like a glass or coaster that matches the circumference or use a pair of compasses.
Decide on the depth of your ruffle. Mine are 2.5 inches larger all around than the smaller circle. I found a plate of the correct size for the larger circle.
I drew the small circle first and realized afterwards that it made it difficult to center the larger circle over it. I’d suggest drawing the large circle first if you do it the way I did.
If you use compasses, it doesn’t matter which circle you draw first as they will both have the same center point.

Cut out the inner and outer circle from the paper.
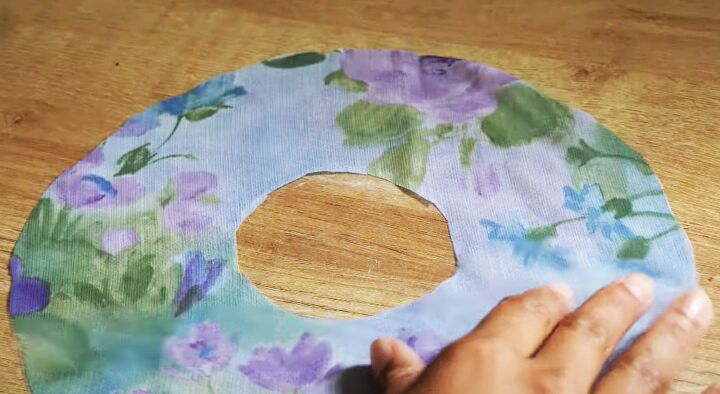
Trace the center circle onto the surplus fabric (I used the original sleeves) and cut two sleeve ruffles.
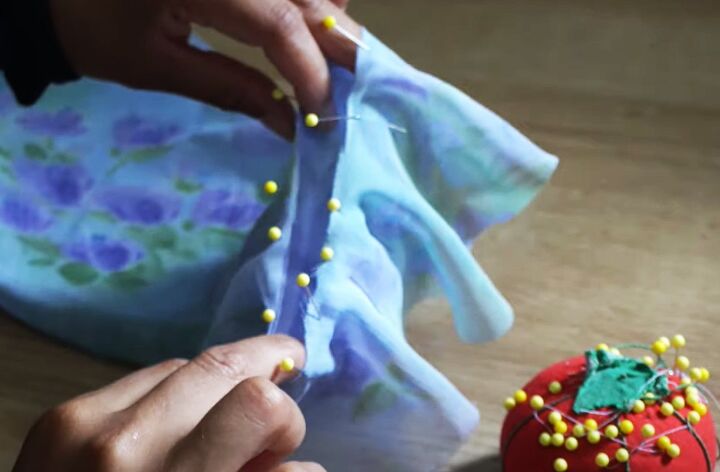
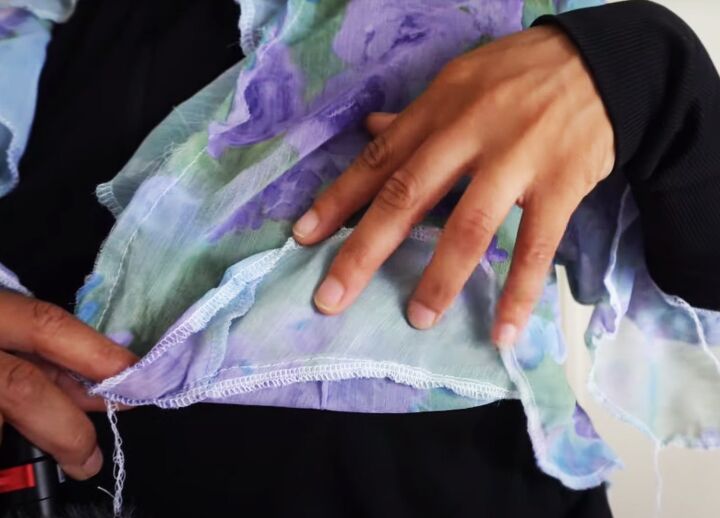
Pin and sew the inner circle of the ruffle to the sleeve edge with the right sides facing.
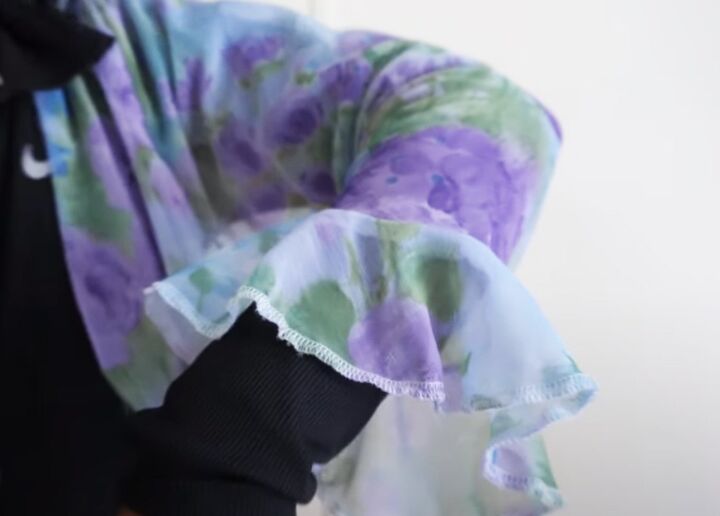
I serged the outer edge of the ruffle with contrast thread and decided to finish all the ruffles in the same way.
You may prefer to sew a double fold hem instead.

4. Blouse ruffle
Measure the length of the edge of the blouse from the center back of the neckline to the center back of the bottom.
I used a circle ruffle method that I found on Pinterest, and drew the ruffle to those instructions.
I wanted the ruffle slightly deeper at the center back and adjusted the pattern accordingly.
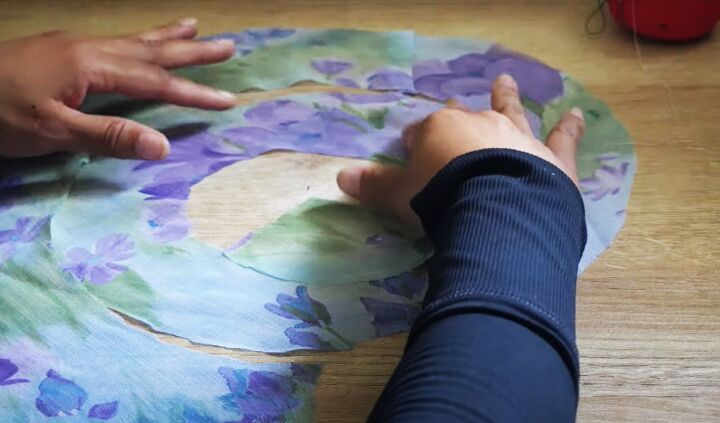
Cut two ruffles and pin one of them to the blouse starting at the center back neckline.
The ruffles on the center front need to flip in a different direction from the side and bottom ruffles, like a lapel.
Once I had one pinned into place I could see where I needed to cut the front ruffles, so I ended up with four ruffle pieces in total.
There’s probably an easier or better way to work out where to cut it, but this method turned out fine.
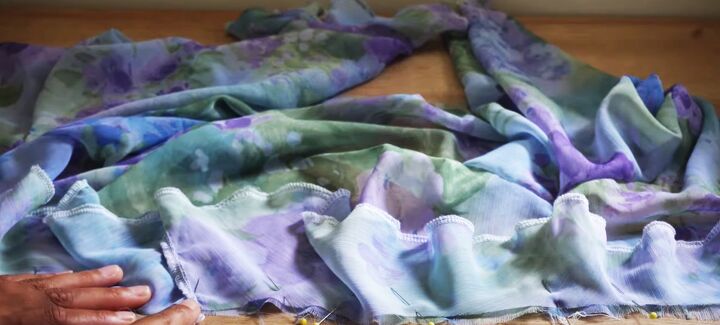
Join the two neckline ruffles with the right sides facing at the center back and the two bottom ruffles in the same way.
Serge or hem the outer edge of the ruffles, optionally curving in the ends.
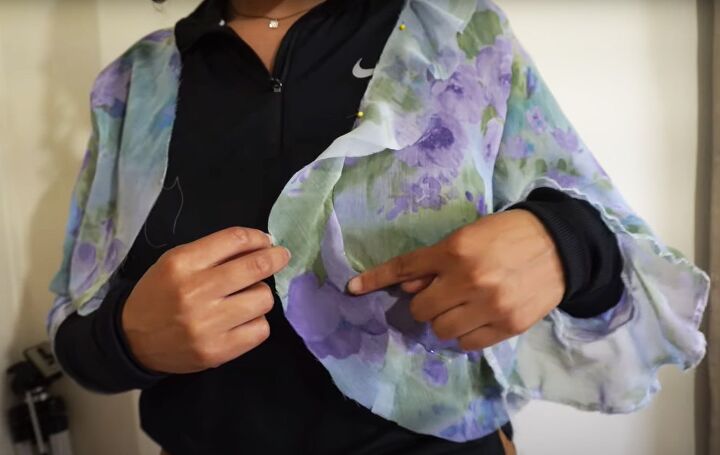
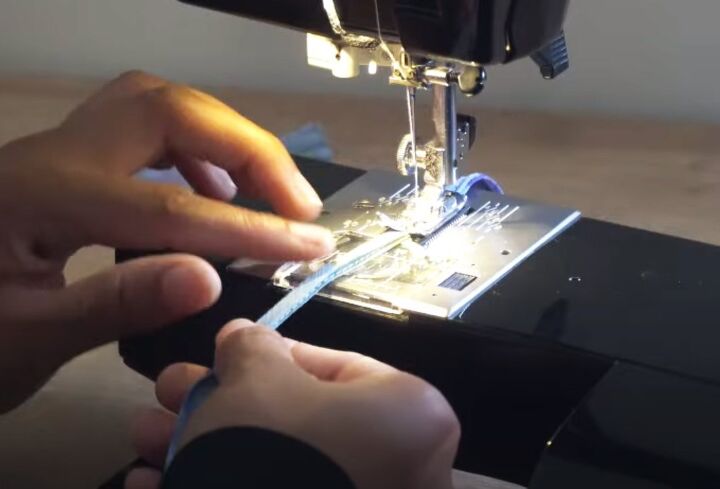
Pin and sew the raw edges of the ruffle and top together, with the right sides facing on the lower edges.
Pin and sew the right side of the ruffle to the wrong side of the top around the neck and front edges.
Serge or finish the outer raw edges on the front ruffles and understitch them into place.
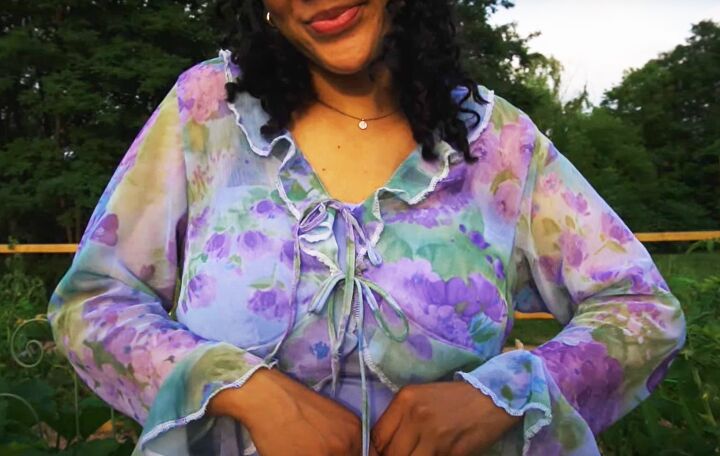
5. Front strings
Make four narrow strings or straps and attach them to the front edges, to tie the front of the blouse together.
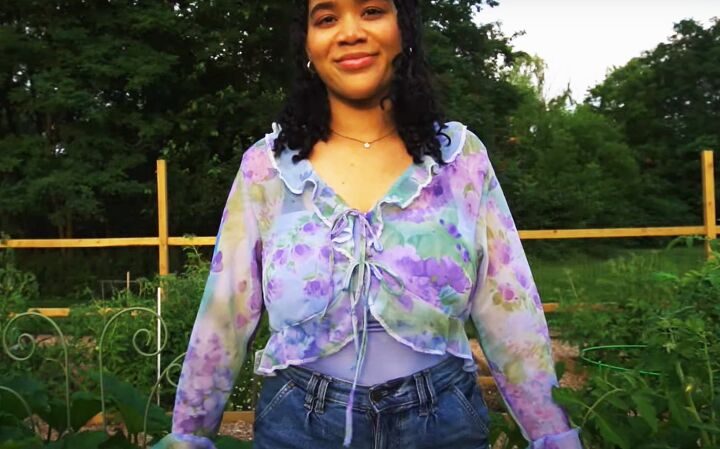
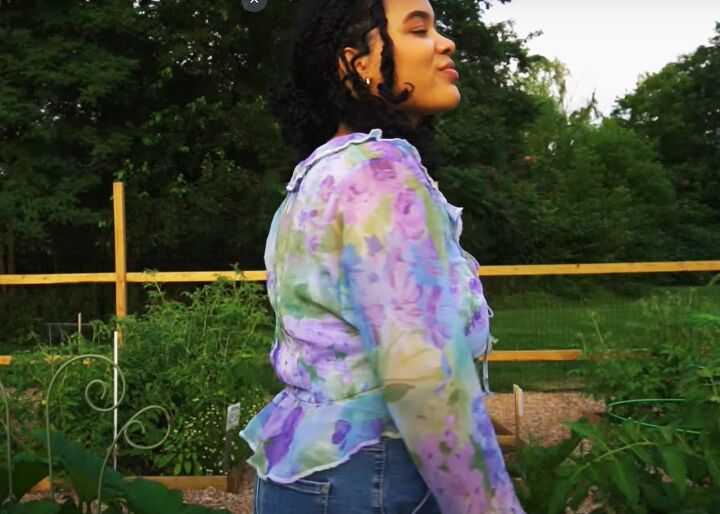
Thrift flipped blouse
I was delighted with the way this turned out. The fabric slipped when I was sewing it and the circular ruffle pattern I used was easy to follow but not that straightforward to draw.
I would definitely recommend taking this thrift flip slowly and carefully, but the end result is worth it!
I’d love to know what you think in the comments below.
Next, learn How to DIY a Cute Tiered Skirt and Top Set.
The author may collect a small share of sales from the links on this page.


Comments
Join the conversation
Beautiful transformation.
It’s beautiful but too hard for me to do.