Cute and Easy Brown Fall Nail Design Tutorial

In this tutorial, I’m going to show you some cute brown fall nail designs.
Whether you copy these brown fall nails exactly or mix and match, you’re sure to find a design you like to start the season off right. Let’s get started!
Tools and materials:
- Base coat
- Peachy-nude gel color
- Brown gel polishes
- Blooming gel
- Thin detail brush
- Gold platinum polish
- White polish
- Gold flakes
- Maple leaves
- Nail bling
- Top coat

1. Apply a base coat
Apply a thin layer of a gel base coat to all of the nails.

2. Apply a peachy nude base coat
Apply two layers of a peachy-nude color all over the nails, except for the ring fingernail.

3. Apply a gradient of French tips to each nail
For this look, we’ll be doing brown French tips with multiple shades of brown.
Use a long, thin brush to create a clean and sharp angle for the French tip.
If your polish looks streaky, you can apply a second layer over it.

The goal for this set is to do a gradient effect, so the darkest brown should be applied to the thumb and the color should get lighter as we go down to the pinky.
I ended up mixing multiple shades to get the best color.

4. Apply a blooming gel to the ring finger
The blooming gel is going to help spread out the white color we’re going to lay down on the nail.

5. Apply a white gel to the nail
Apply a white gel color in a swirling pattern to the ring fingernail.

6. Apply a gold platinum polish to the nail
Apply the gold platinum gel polish to the nail in between the white swirls.

Then, begin using it to mix the gold and white together.

7. Apply gold flakes
Press gold flakes into the nail with your finger.

8. Apply maple leaves to the nail
Before applying the leaves, bend them a little so they lay flat on the nail.
Otherwise, they will stick up a little because of the curve in the nail.

9. Apply a thick layer of gel
Go over the nail with a thick layer of a gel base coat. You want it to fully encapsulate the maple leaves.
If you have a builder gel, you can also use that, but any thick gel will work. You can do several layers of a base coat or even a thick top coat.

10. Apply bling
Apply gems, rhinestones, or charms to the nails.

Apply a top coat, cure, and you’re done!
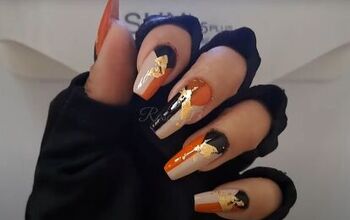
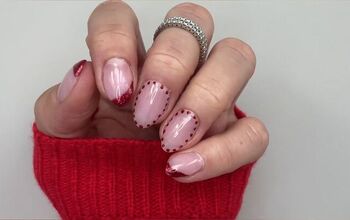
Brown fall nail design
Here are the finished brown fall nail designs! Let me know how you turned this set into your own in the comments below.
Next, learn How to DIY Cute and Fun Halloween Scream Nails.
The author may collect a small share of sales from the links on this page.


Comments
Join the conversation