Easy Builder Gel Tutorial for Healthy Natural Nails

If you’ve been wanting to grow long natural nails, you have to try a builder gel overlay! No nail tips or fake nails needed.
Come join me and learn how easily you can apply, file, shape builder gel overlays on your natural nails.
Upstyle Recommends!
Tools and materials:
- Protective manicure gloves
- Builder gel
- Cuticle pusher
- Cuticle oil
- Hand lotion
- Peel base
- E-file
- Isopropyl alcohol spray
- Nail brush
- Dehydrator
- Sticky primer
- Nail art brush
- Angled brush
- Nail lamp

1. Cuticle maintenance
I’m starting off with builder gel on my natural nails.
Every other day or two, I gently push back my cuticles and scrape off anything that gets stuck on the nails using a cuticle pusher.
2. Apply cuticle oil
Next, apply cuticle oil at least twice a day. I use it as many times as I can.
Any time you wash your hands, throw some cuticle oil on and seal it in with hand lotion.

3. Apply peel base
Apply a peel base on top of your builder gel. This way, you can change your manicures easily and as often as you’d like.

4. Debulk
This is what my nails looked like before I did that fill, when I’m getting ready for a new manicure.
I’ve done about 5 manicures per hand and I only fill them every 2-3 weeks.

When doing the fill for the builder gel, I use an E-file to get off the bulk.
Feel free to use a regular nail file if you’re uncomfortable with the electric tool.
See the video at 2:00-4:00 to hear about the bits I use and at what speeds.

5. Clean
Spray your nails with isopropyl alcohol and then scrub them with a nail brush.

6. Apply dehydrator and primer
Once the nails are all clean, apply a dehydrator to the nails on one hand.

Now apply 2 layers of a sticky adhesion primer to those nails.

7. Apply builder gel to one nail
Start with a thin layer of builder gel on the entire nail and don’t cure it.
This becomes the base on which to float the bead of builder gel down the nail.
Put the bead toward the back of your cuticle, but not all the way.
Gently push the bead back toward the cuticle and then push it side to side down your nail.

Then go in with a thin, nail art brush to get it close to your cuticle without flooding it.
You can also use it to move around gel from other places on the nail where it might have pooled.

If you get any gel polish on your skin, remove it with an angled brush dipped in acetone or isopropyl alcohol.

Flip your nail over to allow the polish to naturally build the apex and self-level.

8. Flash cure, finish your nails, then full cure
Flash cure the nail for 5-10 seconds before applying the gel to your other nails.
Then fully cure your nails.
I recommend curing your thumb nails separately from the others to be able to hold them at the correct angle under the lamp.

To see the technique I use to apply builder gel to my dominant hand, see the video at 9:30 and onward.
9. Buff and file
Once I finished painting and curing the nails on both hands, I sprayed all the nails with isopropyl alcohol.

Next, file and then buff your builder gel to make them super smooth.

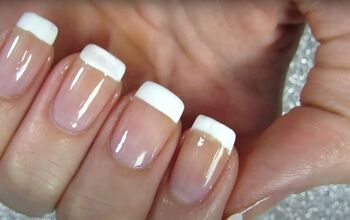
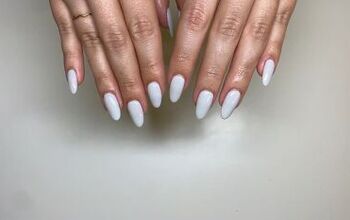
Here is the final result of these gel builder nails:

DIY gel builder nails
Now that you’ve learned how to use builder gel on natural nails, will you try this? Comment down below.
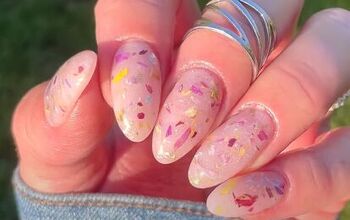
Next up, check out how to DIY viral fairycore nails at home.
The author may collect a small share of sales from the links on this page.


Comments
Join the conversation