How to Knot Your Shirt Perfectly Every Time

Oversized tees are the perfect mix of comfy and cute. Whether paired with denim, leggings, or shorts they are always super fun to wear. However, sometimes it's nice to add a little shape to a baggy shirt by adding a twist or knot in the front. In this tutorial I will show you my trick to adding a knot detail to the front of a shirt, even it there isn't enough fabric to tie one. All you need for this hack is a single hair elastic.
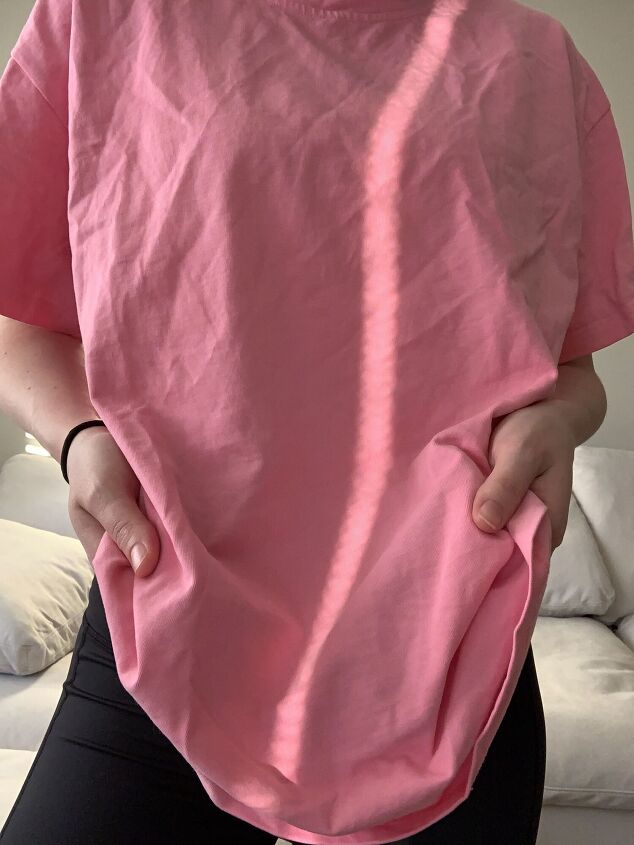
Begin by grabbing both sides of the shirt near the height at which you would like the knot to sit at. This is my favourite oversized tee.
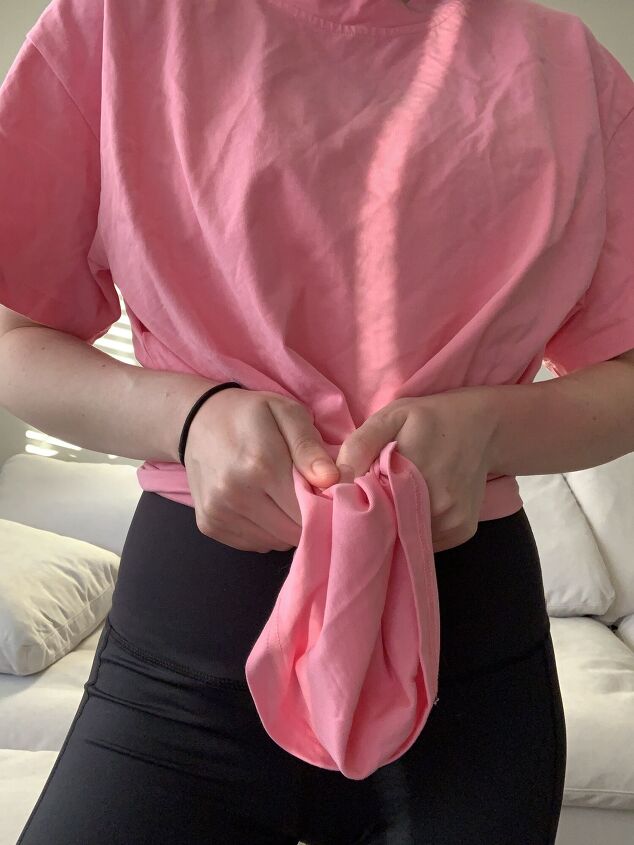
Then bring both sides that you just collected together in the middle. You could also collect them towards the side for an off-centered knot.
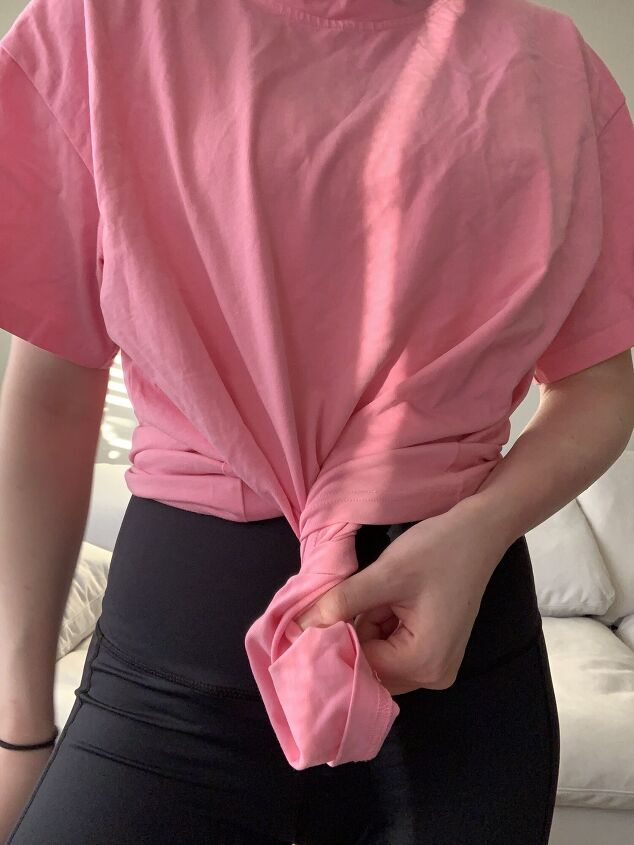
Twist the collected fabric. A tighter twist will make for a larger knot detail and will also make the shirt fit snug. A looser knot will show less of the knot details but will allow for your shirt to drape more.
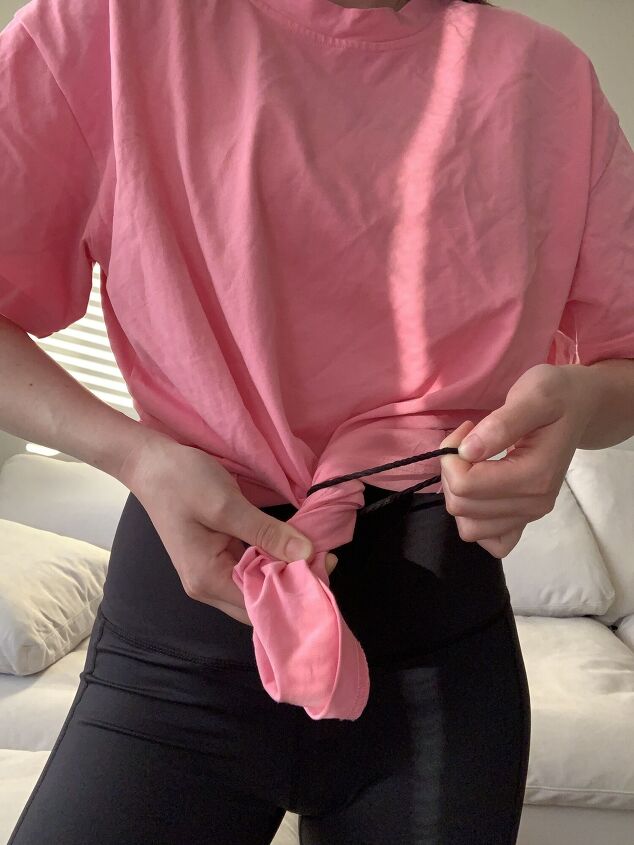
Take your hair elastic and begin looping it around the shirt twist to secure the twist. I recommend using a thicker elastic for this hack. You want the elastic to wrap tightly enough to avoid it slipping off.
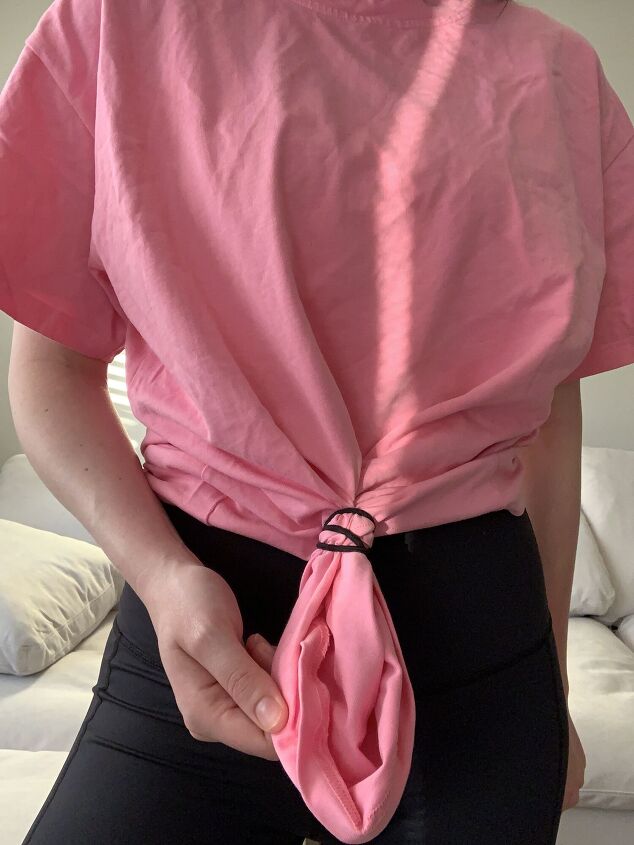
At this point your knot detail is fully secured. Play around with the position of the elastic for different effects.

Here is the finished knot detail. You can tuck the knot into the waistband of your bottoms for a more full coverage look, or into your bra or a top underneath for a more cropped effect.

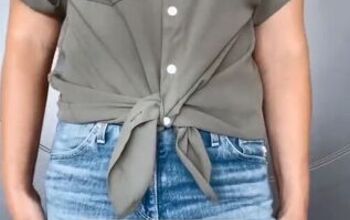
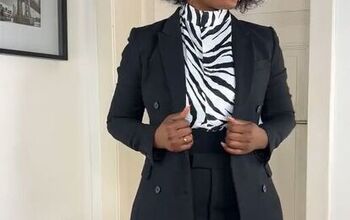
Here is another version of the knot in action! This silk shirt wasn't long enough to unbutton and tie at the bottom while still remaining the length that I wanted for this outfit, so my ponytail trick was the perfect fix. This is an example of tucking the twist into your waistband.
Let me know if you try this trick out!
These tips can be used to style pieces you already own or you can shop similar products to what I've used using the links in the text.
Make sure to follow me on instagram @melissaradford for more styling tips!
The author may collect a small share of sales from the links on this page.


Comments
Join the conversation
I like the shirt with jean tip thanks
My 10 year old grand-daughter taught me this a few years ago. She said her and her friends do this.