Cotton Candy Soap Tutorial
Who doesn’t love cotton candy? It’s nostalgic, sweet, and fun. Now you can bring this delicious treat to your shower with this easy tutorial on how to make cotton candy soap!
Cotton candy soap may not be as sweet as the real thing, but it’s still a treat for your senses.
This colorful DIY soap recipe is perfect for kids (and kids at heart) and is surprisingly easy to make. It is sure to please any Cotton Candy lover with it’s fabulous aroma!
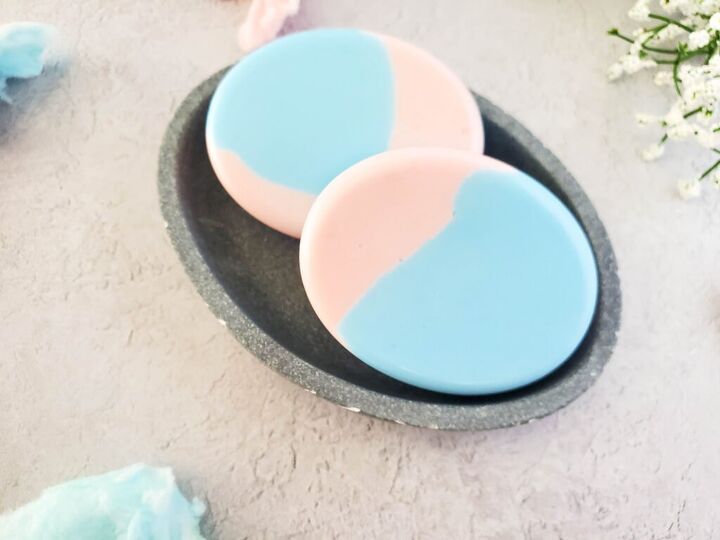
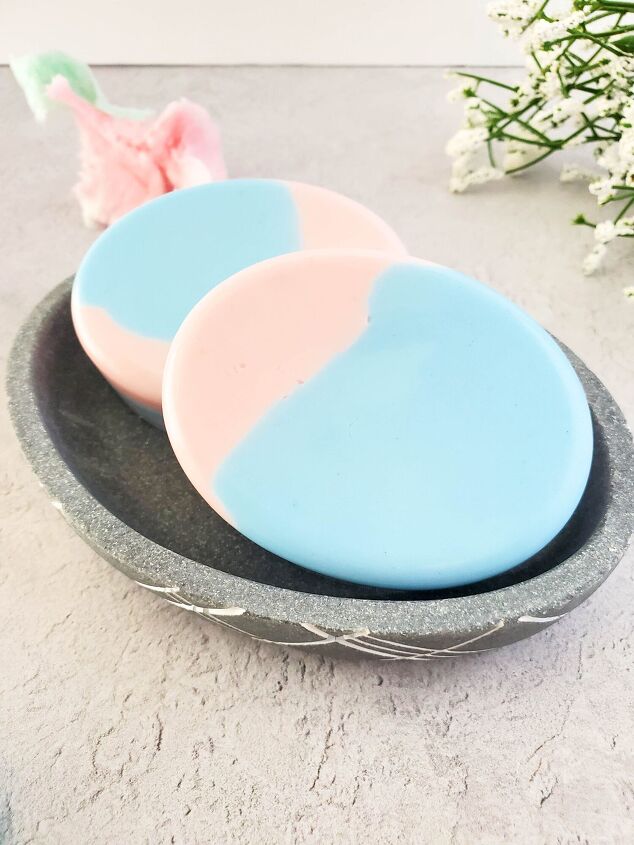
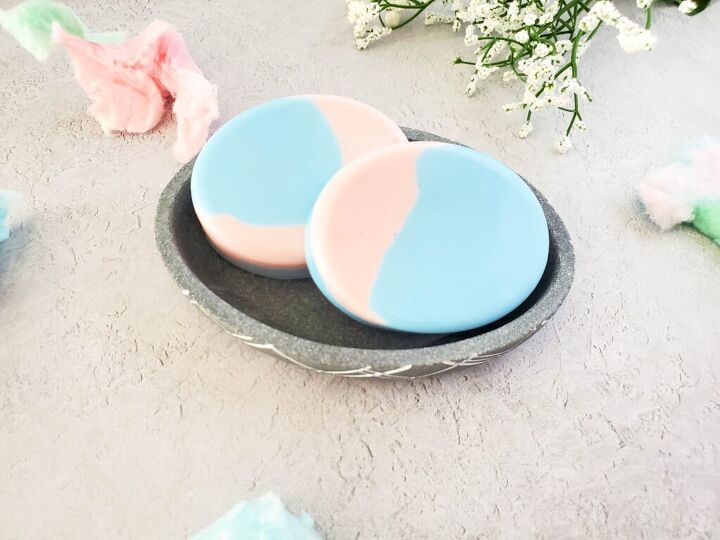
The best part? You can use any color combination you like – so have fun with it! We are using a vibrant blue and a vibrant pink to make our handmade soap using skin-safe colorants.
This soap is perfect for DIYers and crafters of all levels, and it makes a great gift or party favor for friends and family. Pair this soap alongside DIY Unicorn Sugar Scrub.
Get ready to have some sugary fun! The end result is a sweet-smelling bar of soap.
If you’re looking for a fun project to do with the kids, or just want to add a little bit of sweetness to your next shower, then read on for a step-by-step guide to making your own cotton candy soap.
Makes 6 soap bars
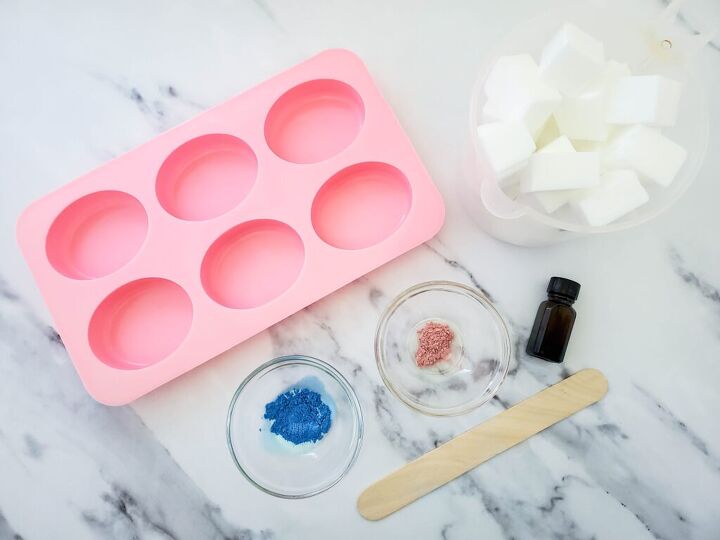
- 1 pound melt and pour soap base
- 15 drops grapefruit essential oil
- 15 drops ylang ylang essential oil
- 5 drops french vanilla essential oil
- ¼ tsp pink mica powder
- ¼ tsp bright blue mica powder
- Oval soap mold
- 2 – 4 cup microwave safe measuring cups
- 2 wooden craft sticks for stirring
- Spray bottle with rubbing alcohol (optional)
Directions:
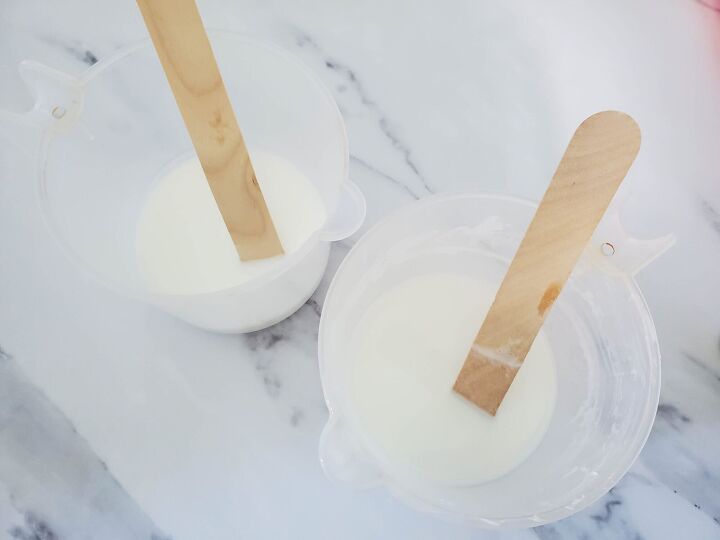
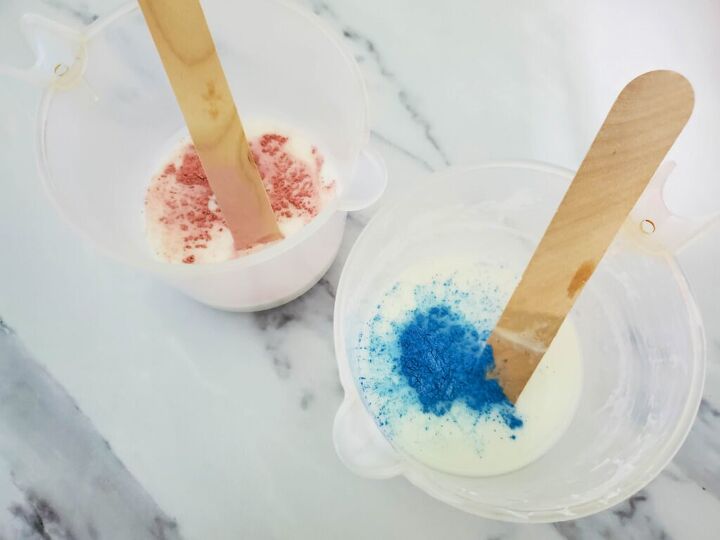
Cut the soap base into 1 inch squares and add to one of the measuring cups.
Heat on high for 30 seconds, then remove and stir well. Heat in additional 10 second intervals, stirring between each heating session, until the soap base is fully melted.
Allow the soap base to sit for a few minutes to cool down, then add the essential oils and stir well to fully combine the scent.
Pour half of the mixture into the second measuring cup.

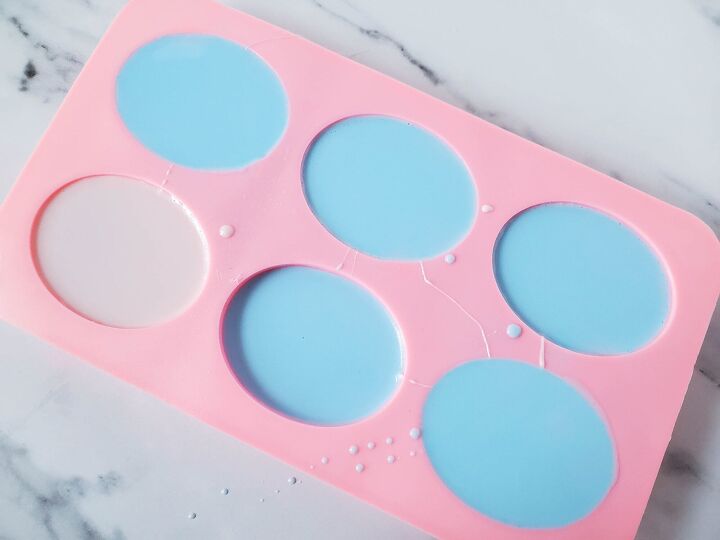
Add blue mica to one of the cups of melted soap base, the pink mica to the other. Stir very well to combine the color.
Pour a small amount of one color into the soap mold, only covering a portion of the bottom of the mold cavities.
Wait a minute or so to allow it to set, then pour some of the other color.
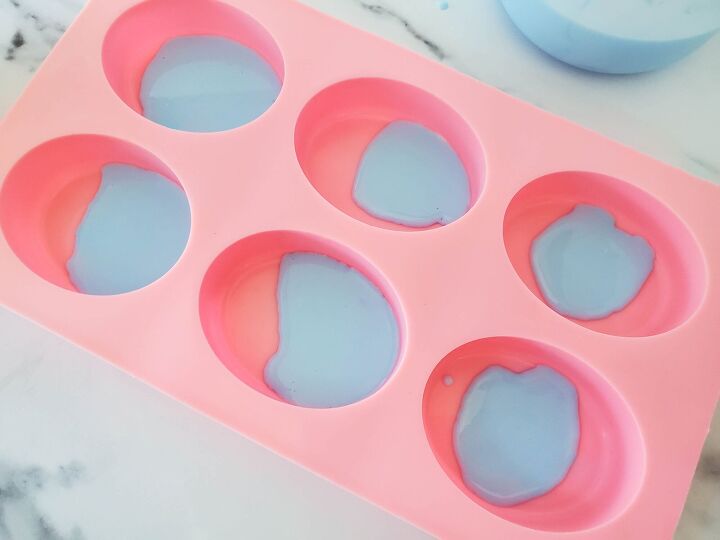
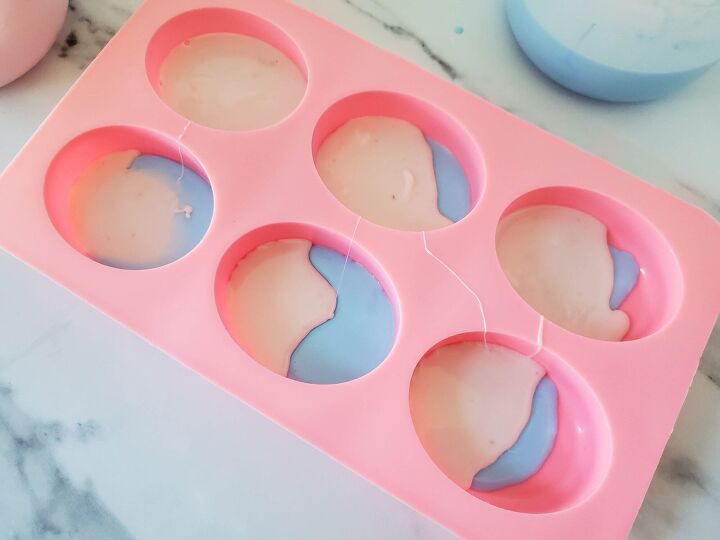
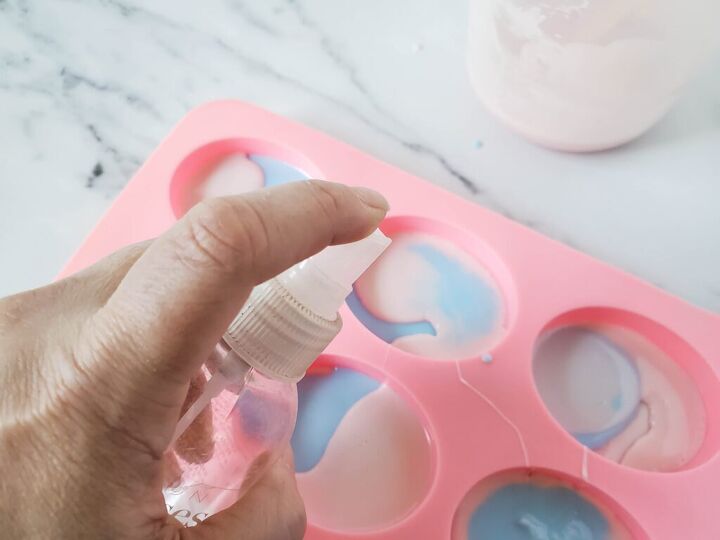
Alternate the colors until you have filled each of the mold cavities. You may spray with rubbing alcohol here and there to help reduce bubbles, and allow the layers to better stick together, then also after the final pour.
For an extra special touch, you can even top your Cotton Candy Soap with sprinkles or other decorations.
NOTE: You may need to reheat the soap base for 5-10 seconds a time or two between pouring.
Allow soap to set undisturbed for 2-3 hours, then unmold.

*This soap is for external use only.
The author may collect a small share of sales from the links on this page.


Comments
Join the conversation