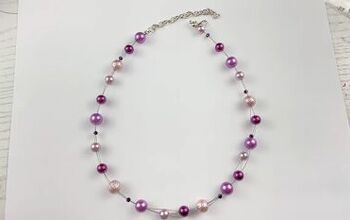
Teardrop and Pearl DIY Beaded Necklace

Today I’m going to be showing you how to make one of my favorite pieces of jewelry that I’ve ever designed. It may look complicated, but I promise, it is so simple to make, and I know you’re going to love it as much as I do. So without further ado, let’s get into this super-simple, and super-gorgeous DIY beaded necklace tutorial.
Tools and materials:
- Longnose pliers
- Round nose pliers
- Cutter tool
- 17 headpins
- 6 glass pearl beads
- 11 teardrop beads
- 5 metal hoops
- Chain
- 1 jump ring
- 1 lobster clasp
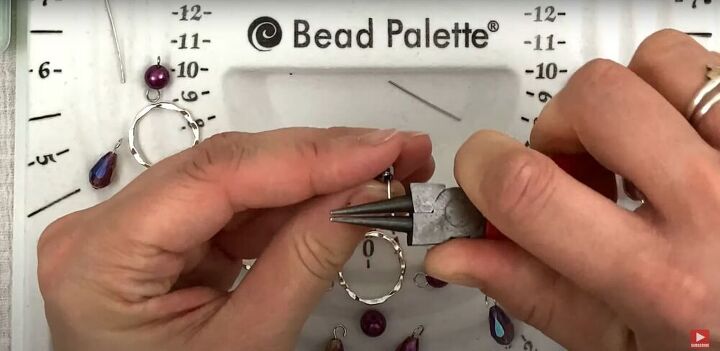
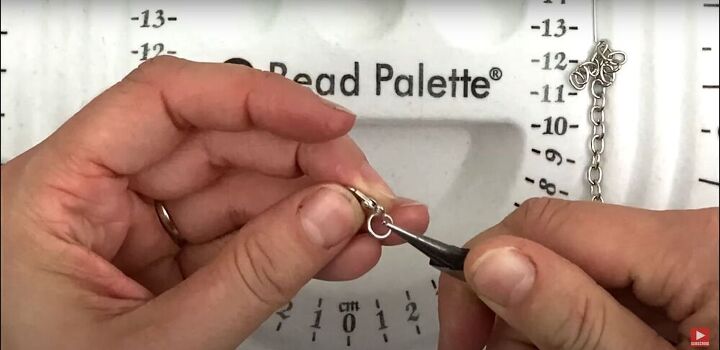
Make loops
Start by making loops on all your teardrop and pearl beads. The teardrops need only one loop, and the pearls need two loops. To make a loop on the teardrop beads, use the method shown in the video from 1:57-2:52.
To make the loops on the pearl beads, use the same method as above, and then use two pairs of pliers to twist the loops so they are facing the same direction.
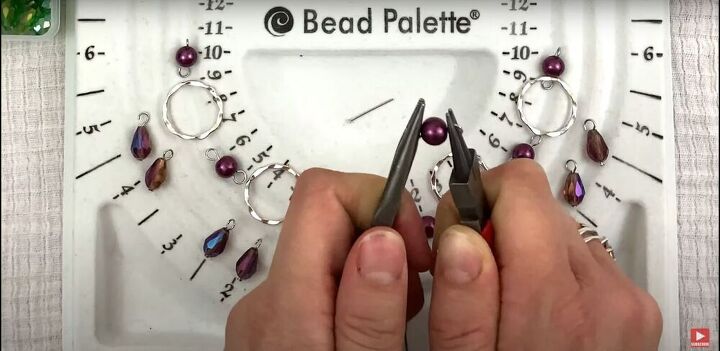
Add beads to metal rings
Once all the beads have had loops added to them, apply two teardrop beads to each metal ring, other than the center ring. The ring that will be used in the center of the necklace will get three beads. To attach the bead, open the loop at the top of the bead and hook it onto the metal ring. Then use pliers to close up the loop.
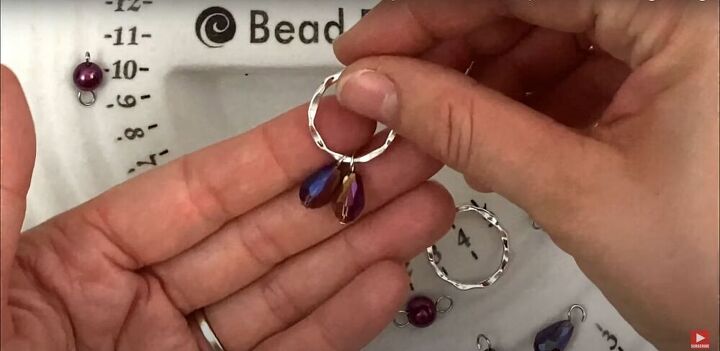
Add beads to center ring
To prepare the center ring, connect a teardrop bead to the loop on one side of a pearl bead. Then, connect the pearl bead with the teardrop attached to the center ring, and add two teardrop beads to the ring, as well, on either side of the pearl.
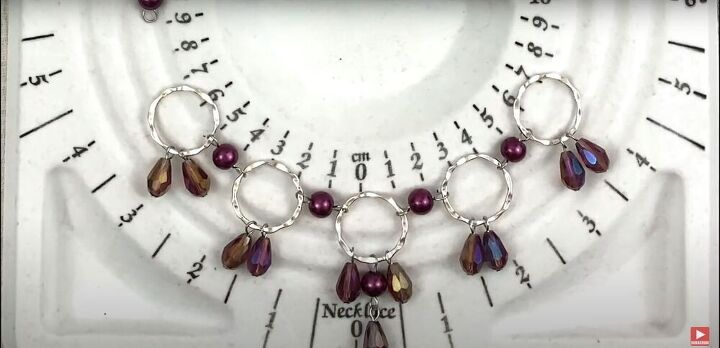
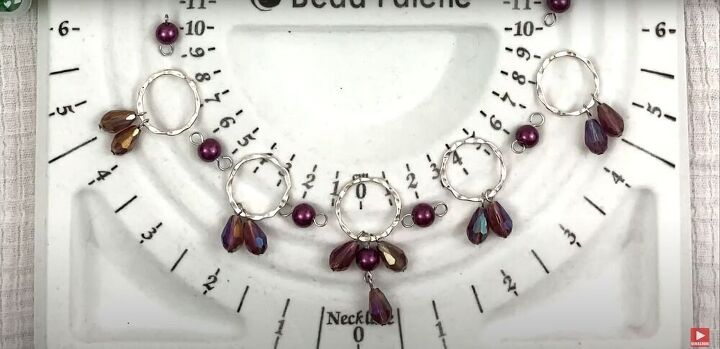
Connect the pearl beads
Now it’s time to connect all the metal rings by adding pearl beads between them. Open the loops on each end of the pearl bead and hook them onto the metal rings on either side. Make sure the placement of all the beads is correct before closing up the loops, so you don’t end up with the teardrop beads on the top of the metal ring, or with the pearl in between the teardrops.
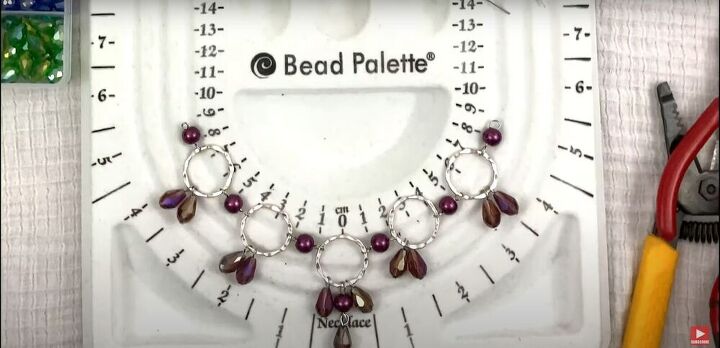
Connect the end beads
Once the rest of the beads are in place, you can connect the last two pearl beads to the metal rings on either end.
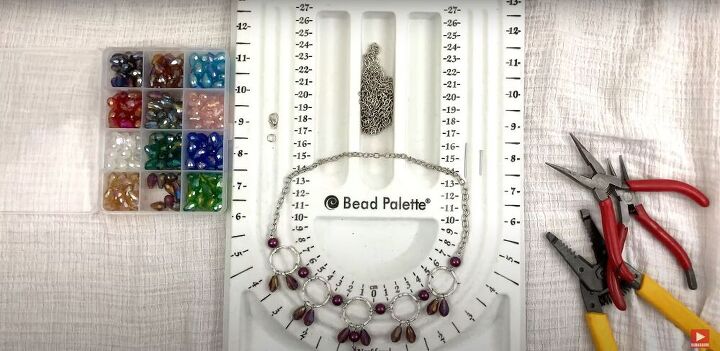
Add the chain
Open the loops on either end of the necklace, and insert the last link on either end of the chain into each loop. Then close up the loops with pliers.
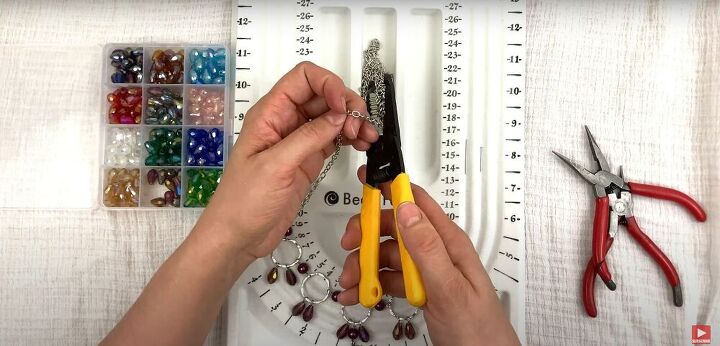
Cut
With your cutting tool, cut the chain. You can cut it in the middle, if you want the necklace to always be worn at the same length, cut the chain in the center. If you want the length of the necklace to be adjustable, cut the chain 2-3 inches to the side from the center.
Attach lobster clasp
Use pliers to open a jump ring, and slip a lobster clasp onto it. Then, slip the jump ring onto the last link of the chain on either side of the necklace. If you cut your chain unevenly to make the necklace adjustable, add the jump ring and lobster clasp to the last link of the shorter chain. Then use pliers to close up the jump ring.

And that’s it! See how easy that was? And it’s so pretty and so chic. I just adore this necklace so much! What do you think of this design? If you use my tutorial to make a DIY beaded necklace of your own, please post your results! I’d love to see how it turns out.
The author may collect a small share of sales from the links on this page.


Comments
Join the conversation